Paint it Black - Mild Restoration

Beakster

XS400 Member
Messages
28
Reaction score
4
Points
3
Location
Toronto, Ontario, Canada
Hi,

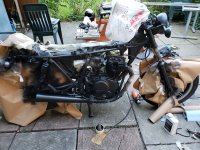
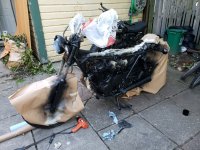
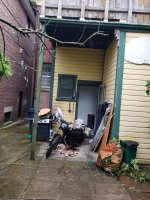
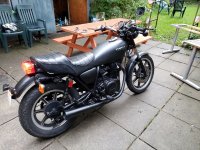
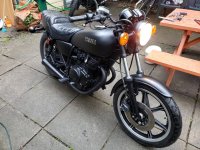
So my girlfriend is a new rider. Started out with a little KZ200 but wanted to move up. So last night she got a 1982 XS400 Heritage Special for $1200 CAD with 24,000 kms

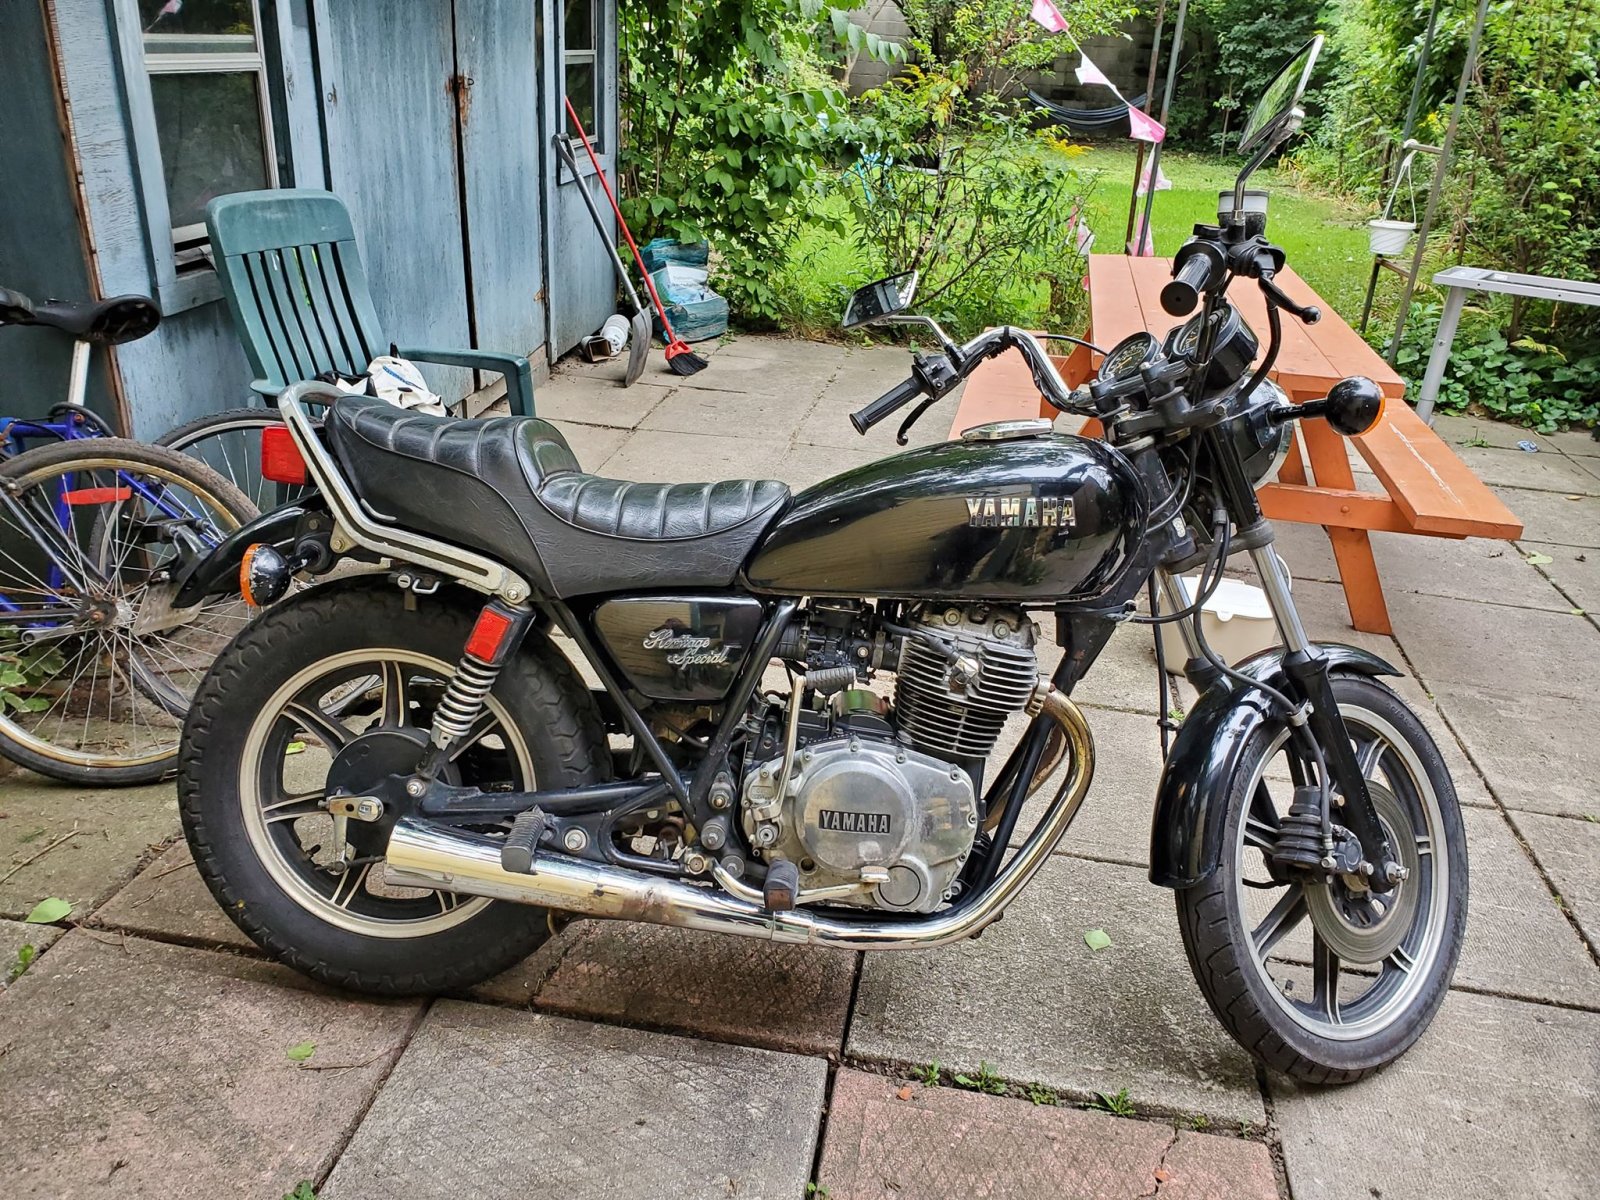
It is in running condition and we rode it home. Pressing the electric start does nothing, the idle is up at about 2,000rpm when warm, and it takes a few kicks to get it to start. Mechanically that's the issues I've discovered so far. Cosmetically it's a bit tired with surface rust bubbling through in a few places.

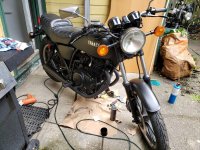
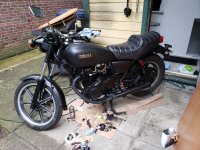
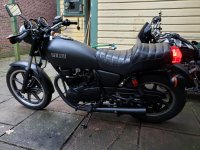
We looked at a few different bikes online to work out what she likes. So far we know that she likes things with lots of black. So tomorrow we're going to pick up lots of black paint from Canadian Tire and do a quick paint job.

There's not much summer/autumn left up here in Toronto and we want to make the most of it, so the aim here is to get the bike looking presentable and running well asap.

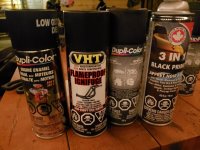
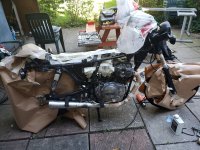
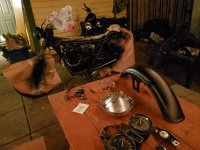
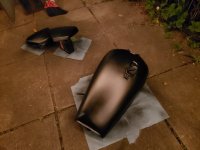
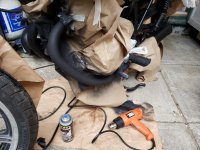
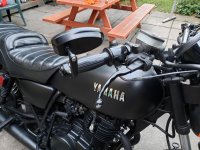
Tomorrow will be focused on pulling bits off and painting them. I'm planning to do paint the engine and frame together (no time to take it out) with black enamel and go over the frame with a heat gun to speed up curing time. I'll probably get some ceramic VHT header paint for the exhaust. Then we'll do the tank, side panels and mudguards in satin/semi-gloss black.

Other than cosmetically I plan to:
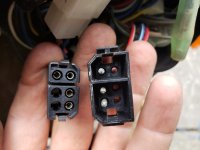
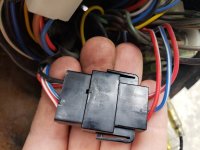
Trace the starter issue, hopefully just an electrical problem like a relay, wiring or switch
Clean carbs
Check timing
Check valve clearances
Change plugs
Balance carbs

I'm hoping that will be all we need to see us through until the snow comes and then we can start looking at getting a custom seat and any other more involved mods.

Questions:

I don't have a carb rebuilt kit, but I have ordered one. Can I get stuck in and clean them by reusing the existing gaskets then perhaps do a proper rebuild when the kit arrives?

Are there any other parts I should replace or things I should check on the bike? Common problems?

Whats the quickest and easiest way to have a flat seat on the bike? Don't like the raised pillion section.

Thanks
 
Took the side covers off and saw there are pod filters installed. What do I need to know about these with regards to checking carb setup?

Got the starter to turn by connecting + and - to solenoid. So I'm guessing safety relay or start button. How do I find the safety relay and identify it? What is the best way to by pass it until I get a new one delivered?
 
Ok I got the starter working by stripping down the button and cleaning it all out. However, I was confused by this black wire. I expected it to connect to earth in the headlamp bowl, but there's no black wire on the other side of the connector. What's the story there? It's working just by getting earth through the handle bars though.
 

Attachments

  • 20190914_104128-1008x756.jpg
    20190914_104128-1008x756.jpg
    125.7 KB · Views: 397
  • 20190914_103958-1008x756.jpg
    20190914_103958-1008x756.jpg
    164.8 KB · Views: 435
Welcome, I will dump my opinions here. Nice starting point.

Rushing paint, not prepping anything and running a rattle can over things will look like crap...especially the engine. It will look like crap and your lady wont want to ride it, forcing you to buy a newer bike!

Its in running condition= tune it up and leave it alone, dont make it a project lol.

Your maintenance list is right on, Id throw in a new battery as well.

DO NOT use aftermarket jets. Use only genuine Mikuni jets.

I also worry about brake lines for obvious reasons. The ones on your bike are probably original and you should really flush the system and replace the line with a new one from Goodridge or Russel or something. I have Goodridge Shadow lines/fitting on my XS.

The main thing with these carbs is getting them clean inside. The needle and seats should be changed and thats probably all youll need for the carbs. You will want to get new carb boots if yours have any cracks in them.

You can probably search for an older XS400 seat and use that. The seat off my 78 parts bike is somewhat flat, looks decent too. Theres no-name cafe/scrambler seats on EBay that run around US $200 and it seems they will simply bolt right on. Theye decent as well but I havent tried them. I made my own seat.

People have painted those mag wheels all black too and they can look decent. Its best to powder coat them.
 
Hi Mike,

Thanks for the reply. All good points. I'll definitely look out for some new braided hoses for the brakes and bleed the system with new fluid. Just switching to braided should make a nice difference to the feel of the brake

Regarding the paint job, I agree no prep would be a bad idea. Part of the requirement in this project is to have it in the road by Monday with fresh paint. A tight order given that I also have to fit in quality time with the girlfriend or she'll get annoyed too.

I did 4 hours of prep today before painting. Most of the painting is now done. Tomorrow I'm putting some VHT paint on the downpipes and painting the rear mud guard.

You'll see a lot of things that I painted on the bike when they would have been easier to paint removed. This was a combination of the time limit and risk of damage. The exhaust in particular worried me incase I sheared off a stud in the head plus I didn't have a new set of gaskets and I'm guessing they're one use only.

I think for the seat I'm going to take a breadknife to it and then recover it with some new vinyl. I might use a heat gun to remould the rear plastic of the seat pan.

Does anyone have recommendations for cheap and easy to fit turn signals?

Also the petcock on these bikes is nonsense. Is there a replacement which fits and doesn't have a vacuum tube?

Attached some pics of the current state. More updates tomorrow.
Thanks
 

Attachments

  • 20190914_210033-1008x756.jpg
    20190914_210033-1008x756.jpg
    208 KB · Views: 460
  • 20190914_174909-1008x756.jpg
    20190914_174909-1008x756.jpg
    292.4 KB · Views: 459
  • 20190914_174902-1008x756.jpg
    20190914_174902-1008x756.jpg
    302.6 KB · Views: 494
  • 20190914_161946-1008x756.jpg
    20190914_161946-1008x756.jpg
    309.8 KB · Views: 487
  • 20190914_210046-1008x756.jpg
    20190914_210046-1008x756.jpg
    192.5 KB · Views: 485
  • 20190914_210040-1008x756.jpg
    20190914_210040-1008x756.jpg
    164.8 KB · Views: 480
You can check the classifieds here for a seat, just seems easier and will save a ton of time. Stock seats look good, I have one of these seats on my parts bike: http://www.xs400.com/threads/1978-xs400-for-sale-southern-ontario.5810/


Turn signals can be found all over. I used the mini round turn signals that Dime City has. The front and back signals are solid mounted on my bike, the front signals have been fine over the last 3-4 years, havent even changed a bulb yet. The back signals got flaky after a while and kept popping bulbs or the wires inside would fray off or the bulbs would pop out of the socket. It was always something with the back signals..

This year, I purchased Motogadget M Blaze pin LED signals for the rear. They are SUPER bright and they are very very small. I was having issues with my wiring harness and a wire got loose and burned on the tire, damaging the wires. I ended up ripping the signals off and throwing them back in the box and Ive been running without rear signals, because I just wanted to ride and not always be working on something for a while. I know, its not proper. I will get another harness this winter and do it right.

Theres a manual petcock you can buy. I have one on mine, cant remember where or what its from.
 
That's the painting finished. The tank filter fell out of the tank though. I went to get a universal inline filter but it's far too big to have hanging off the side of the bike. I think I'll need a new manual petcock with built in filter.

Also the rev counter cable is coming out, held in with a cable tie for now so need to figure that out. Otherwise seems good. New handle bars that came with the bike are on now too and look much better but now all the cables are a bit too long.

Almost gave up because of the rain, but managed to fit it under the canopy by the back door. Dried any wet bits with a heat gun before painting so seemed to work ok.

Now to get on with the sorting the mechanics and thinking about upgrades
 

Attachments

  • 20190915_112731-756x1008.jpg
    20190915_112731-756x1008.jpg
    309.8 KB · Views: 483
  • 20190915_122856-1008x756.jpg
    20190915_122856-1008x756.jpg
    238.7 KB · Views: 464
  • 20190915_160621-1008x756.jpg
    20190915_160621-1008x756.jpg
    311.5 KB · Views: 465
  • 20190915_160612-1008x756.jpg
    20190915_160612-1008x756.jpg
    298.7 KB · Views: 497
  • 20190915_183311-1008x756.jpg
    20190915_183311-1008x756.jpg
    284.8 KB · Views: 529
  • 20190915_183317-1008x756.jpg
    20190915_183317-1008x756.jpg
    313.4 KB · Views: 451
  • 20190915_183404-1008x756.jpg
    20190915_183404-1008x756.jpg
    232.6 KB · Views: 492
I do not believe that paint will resist gas spills. I would put a few drops of gas on a painted test piece and wipe off and see what happens.
A rattle can solution I have found is to clear coat with indoor/outdoor ployurethane spray.
You could probably get away with just doing the tank.
 
I used Rustoleum truck bed coating in aerosol cans to paint my frame and various bits. Leaves a nice textured finish that looks good and has held up extremely well over the years to everything.

You bike looks good the way it is. Honestly, Id call it finished lol. I know my XS360 is all cafe and its all worked on etc... It was my first real motorcycle and thats just where I was in life at the time. I also had no money at all and it took me a year I think for me to rebuild the engine that was seized when I got it. I love the bike, its my favorite one. I love how light and nimble it is, its honestly had me looking at a brand new Suzuki TU250. The small bikes are just a blast to ride around locally. Over the years, Ive just become more simple and less "OCD" when it comes to making things perfect and fixing things that no one cares about or only you will ever notice.


The 400 can handle a passenger no problem on the streets. Havent been on the highway 2 up yet.
 
Craig, fair point on petrol damaging the paint. I haven't done a test but we'll see. It's supposed to be resistant to chemicals. If it keeps getting in a mess I can always redo it with the engine enamel I have left over as that says its petrol resistant.

Mike, thanks for the compliments. Agree it's looking good but I'm the sort of guy where the bike is never done . Also totally agree about small bikes. I rode across Vietnam on a 98cc Honda Win and had the best month of my life. This XS400 is replacing a Kawasaki KZ200 which I had a lot of fun with and was sat to see go.

Added new grips and mirrors today and there are some more bits on the way.
 

Attachments

  • 20190918_191249-1008x756.jpg
    20190918_191249-1008x756.jpg
    205.9 KB · Views: 417
  • 20190918_191205-1008x756.jpg
    20190918_191205-1008x756.jpg
    182.7 KB · Views: 470
I've used Eastwood 2K clearcoat on various builds, it comes in gloss or matte. I haven't used the matte yet but it's easy to apply. Just be careful to not inhale the fumes. Fuel resistant and hard wearing finish.

Hey we got the same grips and mirrors! My mirrors have a different face in it though...
 
Can you provide a link to the grips/mirrors? My mirrors need replacing! My grips go all the way to outside edge so think I'd need to replace to have a mirror on the end
 
Mirrors
https://www.amazon.ca/gp/aw/d/B06XVQ66J3?psc=1&ref=ppx_pop_mob_b_asin_image

Grips
https://www.amazon.ca/gp/aw/d/B06Y61423L?psc=1&ref=ppx_pop_mob_b_asin_image

You will need to cut a hole in the end of the grips with a Stanley knife and you will also need to saw off the end of the plastic throttle grip that sits under the rubber grip.the mirrors come with mounts to plug into the end of the bars, but as I have very wide bars I mounted the mirrors directly on the bars and then plugged the holes with these:

https://www.amazon.ca/gp/aw/d/B016MFA51U?psc=1&ref=ppx_pop_mob_b_asin_image

Just make sure that your throttle has enough space and a bit of grease on it so that it always returns to closed easily when you let go.
 
Underslung looks great but I don't think I could get used to it.

ordered new fork seals but they didn't come with the external dust covers. The forks don't seem to be leaking but the dust covers are falling apart and held together with tape. I thought they came together. What do I order to get new dust covers?

The choke doesn't stay out, I have to hold it until the bike warms up. What do I need to fix that? Not sure how the mechanism works.

Thanks
 
On my 90s Honda my choke did the same simply from a loose screw, bolt, or fastener. Just had to tighten it up and it updated as normal. Perhaps similar to yours. On my 80 XS it's totally different, just clicks into place so doubt much to tighten
 
Sorry to hijack, but how did you go about installing the end cap mirrors. My bars are enclosed on the end. Angle grinder or drill I assume?

Enclosed how? I have after market bars but bars are hollow. It's probably just a cap on the end if anything. The only thing I had to cut was the hand grips and the plastic throttle handle for which I cut the end off with a hack saw.

Post a photo and it might help. But is someone has welded up the ends of your bars (unlikely) I'd use an angle grinder to chop a few mm off.
 
ordered new fork seals but they didn't come with the external dust covers. The forks don't seem to be leaking but the dust covers are falling apart and held together with tape. I thought they came together. What do I order to get new dust covers?
Thanks
Allballs racing has the fork seal parts you need.
Can look up part # on Partzilla. They have dust seals for my 1980 G model around $14/each. Part# 1L9-23144-00-00. Presume may be different for your model, lookup then google the part# and buy from your desired provider.:
https://www.partzilla.com/catalog/yamaha/motorcycle/1982
 
Back
Top