peebuck
XS400 Enthusiast
After breaking down the entire transmission in order to replace the crank case due to a broken kick start locator.
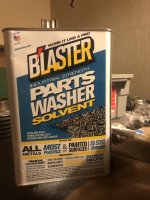
Break down and inspect each piece of the transmission & CELAN CLEAN CLEAN every bit of every piece. (Blaster, parts washer) is dope and available at most part stores.
When your ready to reassemble use liberal amours of motor oil on every part.
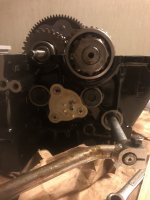
Slide the shift drum in from the right side of the case and install the stopper plate in the proper location see manual.
Hold the detent plunger down if still in place Locate neutral w/ the shift drum by rotating counterclockwise fully and then back one it should line up with the position of the neutral indicator on shift drum cover plate.
OIL !!!!!
Install the shift drum cover plate on left side of motor (this will keep the shift drum in alignment while you install the gear change mechanism on the right side.
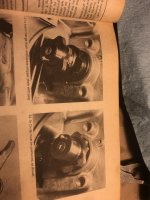
The gear change mechanism is fairly straightforward.
OIL!!!!
Install shift fork shafts/ cam from left side positioning each fork in the appropriate channel on shift drum.
1st main shaft fork gets the first channel
1st lay shaft gets the 2nd channel and the other 2 share the 3rd channel
OIL!!!!
Once you have the gears assembled on the shafts with NEW clips and washers
OIL!!!!
Install the main shaft first and make sure all gears spin freely and forks are aligned in the proper gears.
OIL!!!!
Install lay shaft and make sure all gears spin and that forks line up.
Be sure that the bearings are aligned in the crank case w/ their key ways.
OIL!!!
Temporarily install the shift lever
Rotate the main shaft forwards at a good rate (watch your fingers)
Knowing that you should be in Neutral
Shift down into 1st while spinning the main shaft pay attention to the fork movement and the alignment of the gear dogs. OIL!!! And keep shifting from 1st - 6th until you can smoothly make the full range.
I ran into issues I believe due to the fact that I changed everything out into a different crank case. I needed to grind down the lowers shift mechanism guide and drill out the upper one because the holes in the crank case that the screws go in we’re not drilled as exactly on the original case that I was discarding due to the broken kick start locator. Took a perfectly good bike and made it in operable FML.
But when you get lemons one can make lemonade. So I have powder coated the new case and am now painting & polishing the head and other motor components.
I look forward to all y’all guys feed back and hope this helps feel free to add you experiences