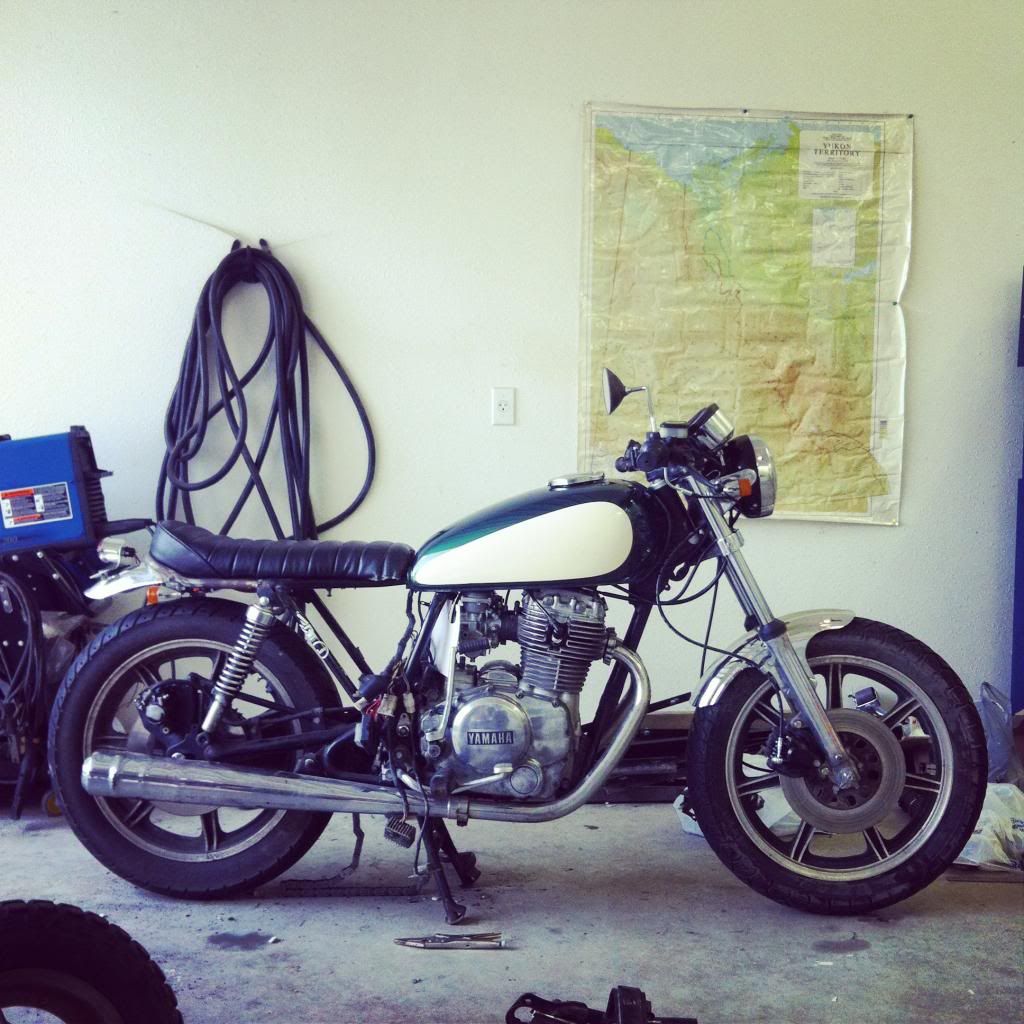
'79 xs400 rough>reliable>cafe 'Scarlett'

My bike had copper crush washers when I got it. Original flex line, so I'm guessing the factory used copper. Aluminium crush washers are available, but I don't know if they'd be up to the pressure.

FYI (I'm NOT recommending this for use in braking systems), copper crush washers can be re-used if they are in good condition and annealed prior to re-use.
 
I would leave it alone unless you have a new one to replace it with:wink2: They should come out with a bit of effort but if it is in good shape why remove it?
 
So I got my scratched up master cylinder back from a friend who did his best to buff out the damage, grabbed my new SS line from Apex Brakes and got to work. First of all I should have ordered a shorter line... I ordered a 37" line to reduce the slack brought on my by drag bars, but looking at it now I could have gotten away with a 34" line. Well, better too long than too short. Better than the stock was anyways.

The notch I cut out of the master cylinder to allow my banjo fitting rotate which in turn allowed my master cylinder to level out on my handles worked great. However again, looking back I could have simply ordered an angled banjo fitting from Apex Brakes to possible obtain the same resulted.

Hindsight 20/20...

Next I topped up my MC and started pumping. And pumping. And pumping...you get the picture. I had music playing so I could hear the banjo fitting gasping air when I released the brake. I was worried the repairs on the MC surface didn't take, but I grabbed a wrench and torque the fitting a bit more and voila, sealed!

So now I have wasted an hour and half a bottle of brake fluid, but I finally have no bubbles in my line and pressure on the pads! Not sure how clean the fluid should be coming out though. My brake fluid is clear in the bottle but is coming out of the calliper somewhat cloudy. By the end of the night I had to call it quits, still a bit cloudy but definitely cleaner than when I got the bike!
 
The cloudy is most likely tiny air bubbles from all the pumping with the banjo bolt sucking.
 
Let the bike sit for a day without touching the brakes. This will allow the tiny bubbles to gather. Then, starting at the caliper, gently tap from the caliper up to the master. This will get the bubbles to float free. Repeat every day. After a few days of tapping and resting, bleed the brakes once or twice until the fluid is clear and then let it sit again. Repeat until the fluid bleeds clear. Be sure to keep the master topped up so you don't get any more air in the system when bleeding. Once you have a good and solid brake lever, you should be safe to ride. Bleed again after a couple rides. All the air will eventually get out of the system.
 
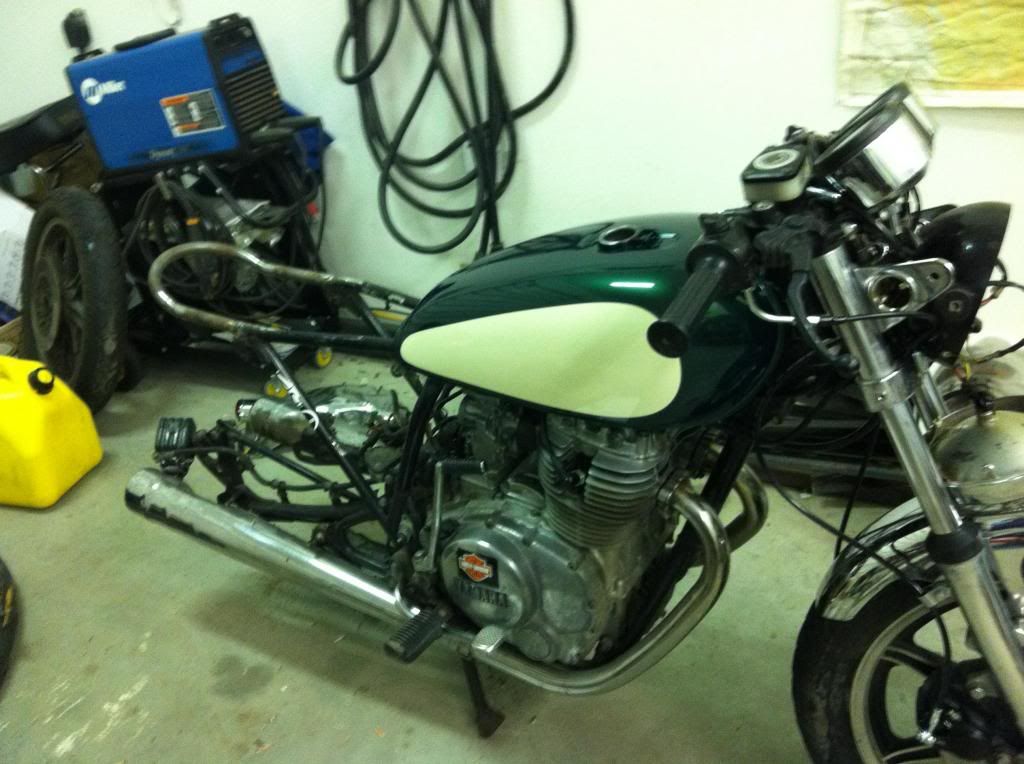
Got the tank back from paint! Very happy with it. Jaguar Racing Green with cream cheeks that were colour matched to my helmet.

photo3_zps7944177f.jpg

...not very happy about the Harley sticker prank...that thing is stuck. I haven't had the fortitude to tackle it quite yet.

photo4_zps8a310e88.jpg

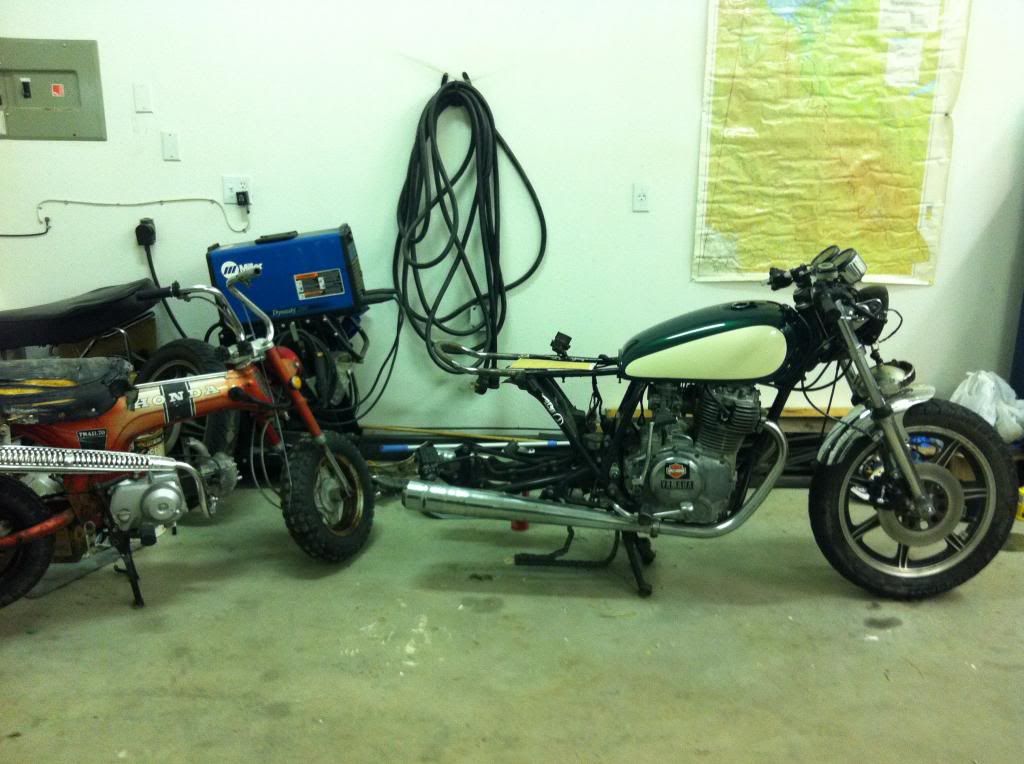
Here it is with my wife's CT70. That thing is a head scratcher.

Still working on the electrical tray. I feel like the battery I have is too big, I wanted to keep it as small and compact as possible but I don't have enough room for all the other electrical components which is annoying. Any suggestions for how to cram them all in there?

Thinking the tank needs some kind of decal on the cheeks, possibly black Yamaha tuning forks. I will probably stick to a more vintage vibe. Any suggestions for exhaust or mirrors? Or any pointers over all?
 
Very nice! I've always been a big fan of "british" racing green!


For a decal, I would probably simply use the Yamaha emblem!
Something like this (they sell those on Ebay) they are slightly "raised" to give a 3d effect
$_57.JPG

$_57.JPG


And I think it would need some kind of a pinstripe around the cream portion to finish it off nicely and tie in evrything together!
 
Last edited:
And I think it would need some kind of a pinstripe around the cream portion to finish it off nicely and tie in evrything together!

Thanks for the suggestion and interesting you say that, the auto body fella said he started to do a pinstripe but didn't like it so took it off. Once I have my back wheel on I will do some photoshopping and try a few different things out. I'm not sure if less is best or if the pinstripe would help it pop!
 
A gold pinstripe might work well with the green and cream. Use a heat gun on the HD sticker, the heat will soften the adhesive and allow you to peal it off. Any remaining adhesive can be removed with a light solvent, lighter fluid, camp stove fuel, or even a little gasoline if one is careful.
 
A gold pinstripe might work well with the green and cream. Use a heat gun on the HD sticker, the heat will soften the adhesive and allow you to peal it off. Any remaining adhesive can be removed with a light solvent, lighter fluid, camp stove fuel, or even a little gasoline if one is careful.

Ditto to both ideas, pinstripe and remove the sticker.
 
Love the ct-70. Working on one myself.
Are you on a CT forum? Could definitely use a comrade on this project. My mind is so engulf with my XS that the little buddy isn't getting much attention.

Got the sticker off!

Also got a seat made up…but I must've made my measurements too tight. With the tiny bit of fabric wrapped around my pan the extra diameter is interfering with lining up the mount points. I may have to go back to the upholster (who was quite difficult to deal with…probably won't use him on any future projects) and have him peel back the upholstery on the front of my seat so I can cut a 1/4 off the front of my pan.
I'm pretty disappointed but the show must go on!

Planning on welding up my rear (stock) fender to my seat hoop, rear signal mounts and finding a place for my front signals this weekend.

Then it is on to the electrical. I have been putting this off to the very end because I have no idea where I will stash all the components. I would love to see what others have done. Hoping to have everything as tight under my seat as possible.

Thanks for all the help and support!:thumbsup:
 
If your upholstery is just glued onto your pan it is easy to do it yourself. Just get a heat gun or hair dryer and heat up the area and slowly pull the upholstery material back. On the foam part that is another problem. It doesn't like the peel back very good, but with a sharp knife and heat it can be done. Then just get some 3M spray adhesive and glue back down. And careful if grinding around foam, it will ignite in a hurry!
 
no not on any CT forum, i should be.
just doing a lot of reading on this site until i pick a style to go with. thinking of going with a tracker style. saw one on a post called black and tan.
 
Even easier if you have a forked staple puller and a staple gun. Doing it the way he did is a lot better for long term then just the simple glue method.
 
Made some progress over the weekend.

photo3_zps00238c65.jpg


Added my rear fender and signal lights!

Tweaked my seat for fitment.
Even easier if you have a forked staple puller and a staple gun. Doing it the way he did is a lot better for long term then just the simple glue method.
Thanks for the advice, it worked perfectly and save me a ton of time and money!


Still looming over head is the electrical…
Then hopefully a good clean and :bike: !

Got some new plans for the future too…
 
One thing I noticed was that the reflective material inside my headlight seems to have peeled off a bit. That can't be too good for visibility.

What are good replacements? Ideally I would like to switch to an H4 style bulb. What modifications are required for that?
 
Back
Top