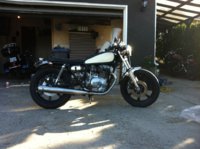
'79 xs400 rough>reliable>cafe 'Scarlett'

Planning on having my rims powder coated. In preparation I have pulled the wheels off the bike but now I am having trouble taking out the bearings, oil seals or that piece with those toe teeth. Got the speedo drive off and axle out, but not having any luck with the rest. Any tips?
 
Seals can be pried out. Bearings can be punched out with a rod if you know what you are doing. I have never needed to remove mine but if you plan on re-using the ones you have I would let a shop do it just to be safe.
 
Cannot punch out old bearings and expect to reliably reuse them. Well I guess you could if you could find some way to pop them out pressing against the outer race but usually only the inner race is accessible. They shouldn't be to spendy to get new ones and better peace of mind regardless.

My method of removing bearings is to get a (big) screwdriver, put the tip about halfway in to the center axle spacer and pry it laterally so it moves to one side allowing you to then use a long punch or the screwdriver to pound against the far side inner bearing race, moving around it to keep it from binding. Takes a bit of violence at times to get 'em to pop out.

Make sure they don't get any powder coat in where the bearings go but they probably know that already. When you put new bearings in, always press against the outer race to seat them and you won't gall your new balls.
 
I have a line on some new sealed bearings. (that is all I will need to replace, unless something goes wrong, correct?) So now I just gotta get the old ones out.

I am able to pry the spacer to the side to reveal a small lip but as of yet have been somewhat holding back on the whacking. Now that I know the odds of me reusing the bearings are slim, I will whack harder.

Do I need to pull that toothed washer (presumably for the speedo) out before I whack out the bearings?
 
So I did a bit more digging about powder coating and don't want to risk screwing up the Cush Drive rubber. So I am going to have them sand blasted and spray it with some primer and epoxy black. I've been excited about working on the bike again, it's been a busy few months but now I am getting back into the swing.

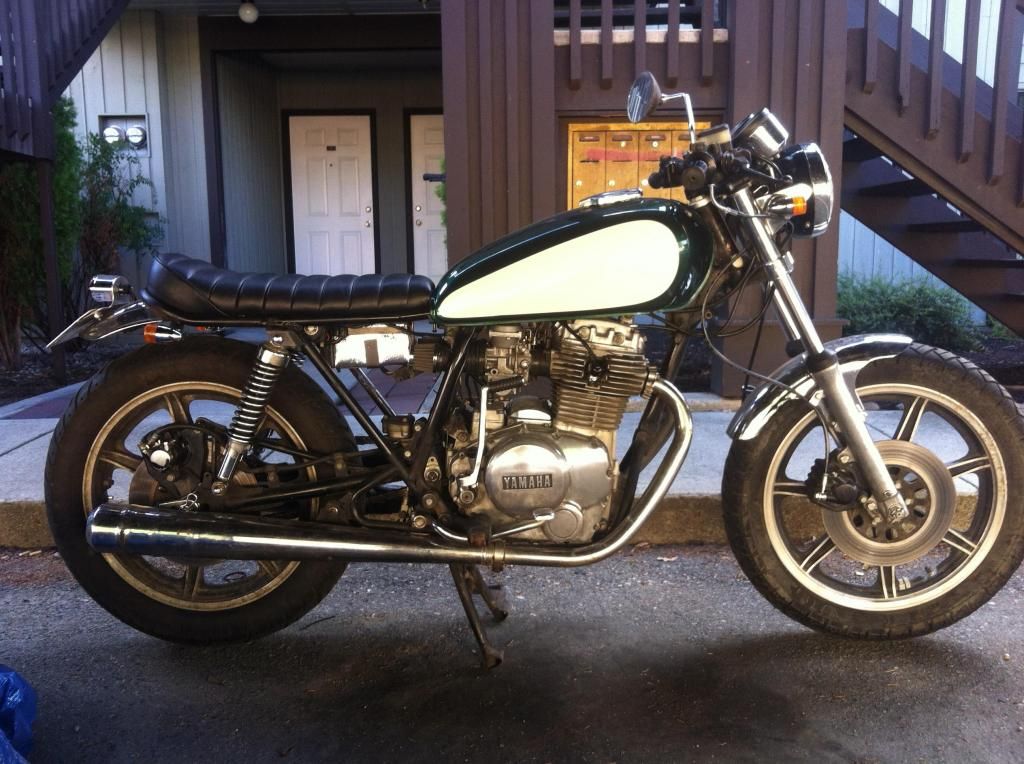
Did a little photoshop...
Currently:
ScarlettFull2_zpsc1d081b2.jpg


Future:
Scarlett2_zpscc05b443.jpg


- Put a logo on - the cheeks seem a bit plain.
- H4 head light, as my reflector is falling apart. Might try the candle power upgrade if the part numbers line up.
- Headlight arms and visor.
- Move signals down to forks (any tips on mounting there?)
- Paint rims and rotor (epoxy and heat resistant paints)
- Need new rear shocks, thinking of raising the rear up 1"
- New left hand mirror
- Either wrap headers or get a 2-1 exhaust (if the 2-1 is actually a performance upgrade, I might do that to get the most out of the bike)

I welcome any comments or criticisms! I am no expert at this stuff, so any sage-like wisdom is VERY encouraged!
 
Sweet bike, dude! I think the tank would look killer with the yamaha logo decals, personally. It'll give it enough of a pop while keeping it minimalist, if that's your thing.

About the 2-to-1 exhaust, I recently slapped a set on my xs360. Although I haven't been able to get it steadily running (still tinkering with the jetting), in the few minutes I was able to ride it, I immediately noticed more low-end torque. I can't say much else, especially about the top end, but it might be something you want to look in to.
 
Are you wanting to wrap the headers for aesthetic reasons? They are double walled so not sure how much more performance (exhaust scavenging) is to be gained from wrapping them. I found epoxy painting the wheels to be very easy, just a super pain doing the prep work. So many nooks and surfaces needed cleaning and roughing…

I like your plan though, looks good!
 
ImageUploadedByTapatalk1425529513.969344.jpg
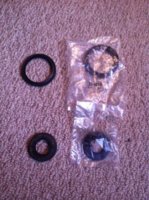
I am reassembling my wheels, but can't seem to find the location of this piece off the rear wheel (new unit on the bottom, old on the top). There is also a smaller, wider one. Both with a spring inside of them.
 
Last edited:
I am reassembling my wheels, but can't seem to find the location of this piece off the rear wheel (new unit on the bottom, old on the top). There is also a smaller, wider one. Both with a spring inside of them.

Oil seals. Well, in this day and age with sealed bearings I suppose you could call them dust seals. After you put the bearing in, they go in front on both sides. The wider one goes on the side with the wider bearing.
 
image.jpg


Exact same one I use on all my bikes. Makes pulling bearing a breeze, literally no pounding involved at all. Plus it's good for other bearings that need to be pulled on the engine. I've used this kit for many jobs. From wheel bearings-crank. Only cost me $20 from pit posse
 
ImageUploadedByTapatalk1425566254.234802.jpg
Is this a seal not already covering the bearing? Both sides already have the seal. The fella who pressed the bearings said there was one more thing I needed to add before I out them on my bike. He said it was in the bag he have me. The mystery piece isn't the size of the dust seals, but I did take them off (I have the damaged ones), I just don't remember from where.

Left is the old removed ones, right is the new in the bag ones.
ImageUploadedByTapatalk1425566515.733793.jpg

They are Mag wheels, if I don't need these pieces then great. Bit like I said, I had some on previous...
 
the large one looks like the seal for the front wheel where the speedo gear goes.
 

Attachments

  • DSC02886.jpg
    DSC02886.jpg
    227.1 KB · Views: 315
ScottLuke, can you tell us where you got that kit for $20? I've been looking around, and just one collet is $20. Did you get it a long time ago? Even a Harbor Freight kit is $70.
 
Put my freshly painted wheels on and went for a ride!
ImageUploadedByTapatalk1426376792.496601.jpg

Some lingering idle issues, I need to figure out my carb and jetting situation... But boy was it fun to start the old girl up - first crank too!
 
I need to replace my headlight and upgrade to an H4, but I want to maintain room in the bucket for tucking in extra wire. I've been reading about the good quality of CandlePower, but there seems to be some compatibility issues...

This "LOW WATTAGE" says it works for XS400s.
"Yamaha (Part.#1A0-64320-61-00) RD400, XS 400 - ALL (Some models may require bending of the spring or retaining clip(s)) NOTE: does not fit Yamaha Part #1L9-84320-61-00"
http://store.candlepower.com/lowwaca61quh.html

Where is the part number on the bulb? I pulled my headlight out, but couldn't see a clear number.
photo%201_zpskwpzyqum.jpg

photo%202_zpslizbbunq.jpg
 
Thanks! A quick look at that site was worth the time for a chuckle. And a trip down memory lane. Y2K was such a blast... I guess not much has changed since 2011. Certainly not that site, the info presented, or their products.

You'll have to excuse my dry scarcasm, I'm one of those bad boys who runs an H4 HID conversion and LED everything else. Funny how my headlight doesn't annoy motorists, the mechanic who did the safety inspection, or multiple police officers who've stopped me in roadside checks. It even lights up the road well, and has been reliable. While only using 35 Watts. All impossible according to the CandlePower folks...

A 45W incandescent headlight is not worth the money compared to the stock 35W, in my opinion. Can't comment on the lens, as they don't show it. The funky mounting brackets certainly wouldn't work in a Maxim headlight bucket. It may fit your headlight bucket though. Hard to tell just looking at pictures.

Hey Dave! Thanks for the reply, but I might be missing the message. You say don't bother with the H4 upgrade? The reflector inside my sealed beam is falling off, so I need to replace it with something, and I like the idea of being able to swing by a local parts story and replace the bulb with little muss and fuss.
 
Back
Top