All over the place...Maxim/Seca build

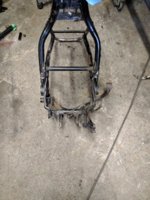
You say the bike was "Layed Down?" I'd say that the motor took most of the torsional stresses, and that caused the bent frame? I'd be very careful, with lining up the the donor parts of the other frame, though! Putting the empty crankcase in there wouldn't really help in aligning the donor parts, unless you have the top end attached too? You may still have handling problems, even if things go right for you, when welding everything up? You really need an alignment jig, to get all of the frame geometry spot on! I tried something similar on a late 60's CB77 it never really handled properly, after the donor parts were welded up! I ended up selling it, after six months of riding on the road! The 77 frame, wasn't as badly bent as your's is! I just thought that I'd pass on these few words of wisdom, before you do things too drastic?

I hope this has been of help to you?

Merlin
 
Well...Sorry Merlin but I did it...The only other option was to buy another bike with title but...That's m'y last ditch option if it comes down to that later.
The bike handled fine...That's what I find weird but I simply could NOT rebuild it like that. So my thinking was(maybe wrong) that it couldn't really be worst than before. Now I'm on call today so didn't really have Time to do all the transplant but...Mocked Up it looks already Much better to me.
IMG_20170326_114116.jpg
IMG_20170326_120205.jpg
 
Last edited:
Plus I took the whole bottom out in one piece...So I figure the angles/width,gussets etc will maintain that part's integrity...I did notice the pipes springed when I cut the part out ...but provided the measurements are good and the the bracing is right during the welding process...I'm pretty confident it Will be good....
IMG_20170326_102130.jpg
Plus, with tightly fitted plugs it lined right Up....After the mock-up measured everywhich way and everything measuresd up within 0,5mm wich was NOT the case before.
What remains is to not mess it up while welding...
That is why I Will do this tomorrow with Time to spare.
.
 
Plus I took the whole bottom out in one piece...So I figure the angles/width,gussets etc will maintain that part's integrity...I did notice the pipes springed when I cut the part out ...but provided the measurements are good and the the bracing is right during the welding process...I'm pretty confident it Will be good....View attachment 28784Plus, with tightly fitted plugs it lined right Up....After the mock-up measured everywhich way and everything measuresd up within 0,5mm wich was NOT the case before.
What remains is to not mess it up while welding...
That is why I Will do this tomorrow with Time to spare.
.
You have been very lucky, from your photos, you may just get away with it, as things are looking very good. I really do hope that things work in your favour!

Merlin
 
Yep now all that remains is the welding...Will try to ensure I do not warp the whole thing....You see the Crossmember at the bottom of the frame...And then the bar that reinforces the bottom where the centerstand attaches...I took measurements Along the whole lenght and got 208mm consistantly...And then measured the motor mounts ...I forget the numbers but it came out the same on both sides...So if all goes well I should do fine
IMG_20170326_082053.jpg
And if I compare the before/after ...It can't really be worse.
IMG_20170326_120205.jpg
 

Attachments

  • IMG_20170326_120205.jpg
    IMG_20170326_120205.jpg
    264.1 KB · Views: 255
Last edited:
Yep now all that remains is the welding...Will try to ensure I do not warp the whole thing....You see the Crossman et at the bottom of the frame...And then the bar that reinforces the bottom where the centerstand attaches...I took measurements Along the whole lenght and got 208mm consistantly...And then measured the motor mounts ...I forget the numbers but it came out the same on both sides...So if all goes well I shouldView attachment 28785 do fine. And if I compare the before/after ...It can't really be worse.View attachment 28786

It can't be worse than the bent and twisted engine mounts, now can it? I am keeping everything crossed for you! (It's hard typing with crossed eyes, I can tell you!) You will have to let us all know how it handles, when your finished on the rebuild?
Best of luck

Merlin
 
Looks good man, I like your plan. I'm sure it will come out just fine, so long as you keep her square it'll track down the road just fine.
 
Thanks for the encouragements folks. I need it as messing with the frame was not in the plans but then again neither is buying another bike or frame...
Started the welding today...First did all the plug welds alternating from one tube to the other as not to apply heat on the same tube/side for too long, then made 12 o'clock to 3 o'clock welds on the tubes again whilst alternating tubes/sides.
After that I test fitted the engine...And boom! It went in like pappy into mammy...So happy Days!:lmao:
Took the engine out then proceeded with the rest of the welding....Still with quarter clock and alternating...
All there is to do now is to grind the welds as I know how to make good penetrating welds but the esthetics is still a little off...But hey patience will get me there I guess.
 
With patience, I finally finished the repair on the frame and painted it with VHT rollbar paint.
IMG_20170328_195404.jpg

Doesn't even look like it was repaired...
IMG_20170328_195445.jpg
 
With the frame repaired/painted, it is now time to start putting it back together...So the engine found its way in the frame,the modified swing arm also.
Put the front end on... Headlight....Controls...This is how she sits right now.
IMG_20170401_145351.jpg
IMG_20170401_145338.jpg
IMG_20170401_145400.jpg
 
Made a little progress today on the front-end.
IMG_20170402_082418.jpg
Then looking at the controls....
IMG_20170402_081409.jpg
IMG_20170402_081400.jpg

I decided that it just would NOT do on my shinny bike..So took them appart...Cleaned everything and went on to give a fresh coat of paint to 'em.
IMG_20170402_115347.jpg
IMG_20170402_115355.jpg
 
Between paint coats...I decided on putting the stock swing arm on...It gives me more clearance to my hoop...And the modified one's mounting point for the shock was off-center maybe 1mm...Was a little worried about it affecting handling...So I changed it out...greased everything generously and torqued to spec.
Since I had the torque wrench out I torqued the engine mounts and front axle and pinch bolts as these are not coming off anymore...Or I hope so.
 
Last edited:
Took on the electrical...This is the donor loom
IMG_20170403_165952.jpg
It is quite the mess,it was chopped up pretty bad...But it IS just a donor.
I want to put all the relays under my seat/cowl area and then There is the obligatory cafe racer rear ignition switch...So chopped some wire, fired-up the soldering iron and...This is where i'm at...
IMG_20170403_200634.jpg
I think the front to middle section looks clean, the only thing that will remain inside the frame will be the coils...Then relocated the relays and ignition switch to the back of the loom...Not finished, ran out of electrical tape:doh:
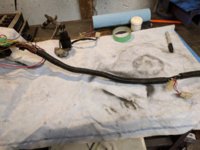
...But hey that's progress.
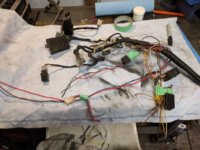
 

Attachments

  • IMG_20170403_200646.jpg
    IMG_20170403_200646.jpg
    230.4 KB · Views: 281
  • IMG_20170403_200709.jpg
    IMG_20170403_200709.jpg
    251.1 KB · Views: 248
The wiring harness found its way back into the frame. Made an aluminium plate/electrical pan to accomodate the rear part of the loom. Screwed with M4 screws tapped to brackets and frame.
IMG_20170405_200317.jpg
 
Then messed around with foam to make a mold for the cowl. The keyword is MESSED...cause damn that foam flies everywhere.
IMG_20170405_201200.jpg
 
Took the fiberglass off of the mold and test fitted before adding fiberglass coats.
IMG_20170408_063602.jpg
Trimmed the excess.
IMG_20170408_070324.jpg
IMG_20170408_070336.jpg
Starting to look like something...
 
Back
Top