Blu's XS400 Brat Style

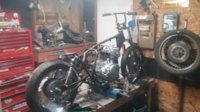
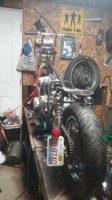
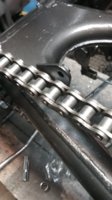
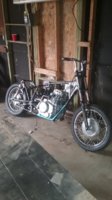
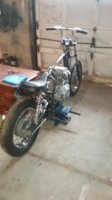
Got the motor in, made the new kicker deal, welded up the headlight bracket and mounted the coils. After I got the chain on I realized my electrical box is too big, stupid mistake. My old man is on the hunt for a new box today so hopefully he finds something 1/2" narrower, I'd prefer not to have to make it at this point. Nothing real exciting but I did cross a few more things of the list I guess. Going to try to paint the headlight bucket, front fender and a few other small things tonight, possibly work on the carbs.
 

Attachments

  • 20170308_195837.jpg
    20170308_195837.jpg
    156.9 KB · Views: 242
  • 20170308_195914.jpg
    20170308_195914.jpg
    133.7 KB · Views: 243
  • 20170308_210429.jpg
    20170308_210429.jpg
    111 KB · Views: 254
  • 20170308_210449.jpg
    20170308_210449.jpg
    145.6 KB · Views: 233
Almost forgot to ask....what's this tab for? I was thinking I might put a small roller there for the chain....
 

Attachments

  • 20170308_210429.jpg
    20170308_210429.jpg
    111 KB · Views: 232
Ok, I'll flip 'em over. PO had one up and one down so I had a 50-50 chance lol. I'm also missing one of the hoses.
 
If you are using the oem vacuum petcock, only one will have a hose going to it. The right side is what most use. Also it's the factory side. These are also used to sync the carbs.
 
I knew they were used for syncing. What if I'm running a sportster tank with an aftermarket 1/4 npt petcock? Do I need two hoses then or can I get away with just the one on the right?
 
If your using a manual petcock, all you need to do is cap both barbs. No hoses needed.
 
Great, thanks Chris.

Didn't get anything done on the bike this weekend, moved instead. Gotta pick up the seat tonight and hunt for a new electrical box. Hoping to be back at it very soon.
 

Attachments

  • 20170311_133623.jpg
    20170311_133623.jpg
    132.6 KB · Views: 211
Thanks man!
Painted some small stuff last night but didn't take any pics. I'll see if I can update this thread tomorrow. Waiting on the electrical box to show up so I think I'm gonna focus on carbs this weekend. Got 15 days to get her done so it's crunch time :)
 
Oh, I did pick up the seat, not a great shot of it but the pleats came out pretty nice.
 

Attachments

  • 20170313_171919.jpg
    20170313_171919.jpg
    97.4 KB · Views: 197
No top motor mount? With how the 81-82 sohc xs400 motors mount (only front and rear lower) I would want one. These motors tend to shake from side to side. Also three of the mounts are thin steel. They where designed to have a bit less vibes for the rider with the rear lower rubber bushings. The earlier bikes use thick steel front and back with a upper rear mount which I think would be much safer.
 
I'm not worried about it, this little 400 can't shake worse than my springer soft-tail. Besides, the forward controls are being cut out of 1/4" plate as we speak and will have spacers welded to the back before being attached to the front mounts. Should provide some rigidity in terms of energy transfer and be plenty solid enough without a top mount. I can always add one later if I feel I need to. Probably gonna ditch those little rubber pads and cut some spacers for the rear mount eventually too, I hate rubber mounted motors.
 
Keep in mind these are 180* parallel twin motors, I have seen broken rear motor mounts with them. Just has to weld one on my 80 over the winter and that one had all the stock mounts.
 
Rear motor mounts DO break..This is how my Maxims mounts looked like when I got it out.
IMG_20170312_113637.jpg
Left side(on the picture) broken-off...She was probably layed at one point in her life....And the other mounts kept the motor in the frame...So maybe I would rethink...For safety.It's bad enough if you crash...Imagine a motor comin' out and flyin' around while you do...
 
Back
Top