CRUNCH TIME: Motor re-assembly has begun!!!!

Greasey Fingers

XS400 Guru
Top Contributor
Messages
1,069
Reaction score
15
Points
38
Location
Australia
So here we go with the reassembly, again wish me luck guys!

For anyone who is interested the tear down thread can be seen here: http://www.xs400.com/forum/showthread.php?t=6775


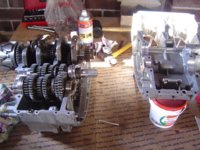
Me and my brother started the reassembly today and got a good session in.

STAGE 1
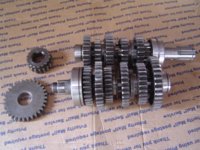
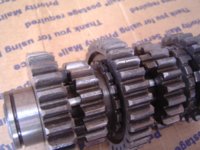
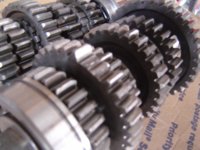
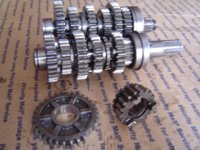
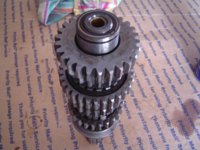
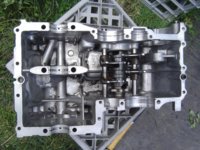
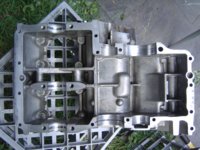
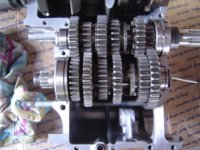
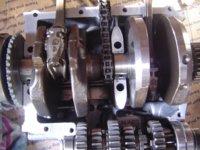
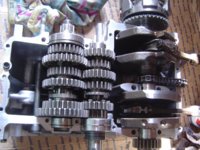
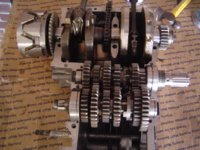
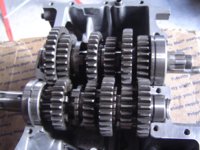
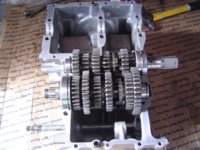
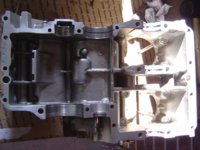
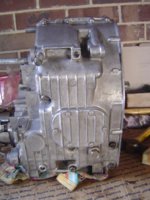
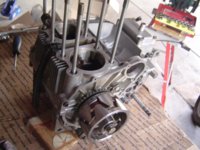
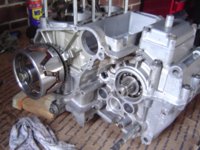
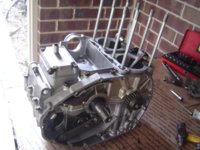
2nd gear replaced on both main shaft and lay shaft. Gearbox internals installed, gearbox sealed with threebond and bolts torqed up as per manual instructions. Gearbox is together and everything is shifting and moving smoothly, fingers crossed its all GOOD:laugh: Here come the photos.

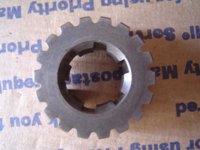
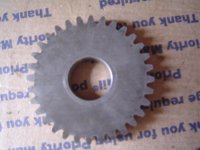
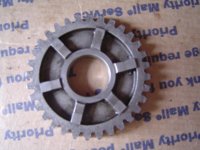
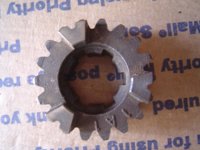
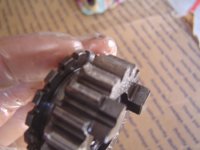
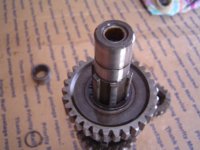
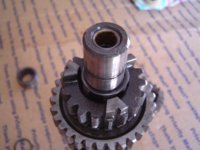
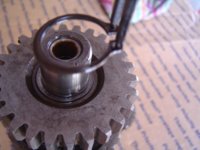
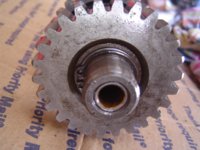
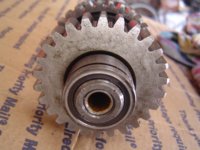
The old broken gears and the replacements...
 

Attachments

  • DSC02865.jpg
    DSC02865.jpg
    218 KB · Views: 322
  • DSC02873.jpg
    DSC02873.jpg
    184 KB · Views: 307
  • DSC02872.jpg
    DSC02872.jpg
    166.9 KB · Views: 347
  • DSC02869.jpg
    DSC02869.jpg
    134.2 KB · Views: 318
  • DSC02868.jpg
    DSC02868.jpg
    163.3 KB · Views: 327
  • DSC02867.jpg
    DSC02867.jpg
    177.6 KB · Views: 333
  • DSC02874.jpg
    DSC02874.jpg
    188.3 KB · Views: 354
Last edited:
Replacing a gear, making sure to put everthing back EXACTLY the way it came off...
 

Attachments

  • DSC02881.jpg
    DSC02881.jpg
    120.8 KB · Views: 336
  • DSC02879.jpg
    DSC02879.jpg
    140.6 KB · Views: 306
  • DSC02878.jpg
    DSC02878.jpg
    137.4 KB · Views: 315
  • DSC02877.jpg
    DSC02877.jpg
    146.8 KB · Views: 302
  • DSC02876.jpg
    DSC02876.jpg
    178.7 KB · Views: 309
  • DSC02875.jpg
    DSC02875.jpg
    176.1 KB · Views: 301
  • DSC02885.jpg
    DSC02885.jpg
    209.2 KB · Views: 307
  • DSC02884.jpg
    DSC02884.jpg
    188.4 KB · Views: 291
Last edited:
Cases cleaned and ready to reassemble. Drewpy i would have put them in the dishwasher but my girlfriend would have been really really angry so i decided not do that:laugh:
 

Attachments

  • DSC02882.jpg
    DSC02882.jpg
    279.8 KB · Views: 369
  • DSC02883.jpg
    DSC02883.jpg
    249.3 KB · Views: 378
Back in the box! Just took our time here and were really methodical and double checked everything.
 

Attachments

  • DSC02893.jpg
    DSC02893.jpg
    222.4 KB · Views: 313
  • DSC02892.jpg
    DSC02892.jpg
    201.8 KB · Views: 350
  • DSC02890.jpg
    DSC02890.jpg
    236.9 KB · Views: 341
  • DSC02888.jpg
    DSC02888.jpg
    232.9 KB · Views: 305
  • DSC02887.jpg
    DSC02887.jpg
    189.4 KB · Views: 311
  • DSC02886.jpg
    DSC02886.jpg
    229.2 KB · Views: 334
ready for some mating action...:heart:
 

Attachments

  • DSC02890.jpg
    DSC02890.jpg
    236.9 KB · Views: 362
  • DSC02891.jpg
    DSC02891.jpg
    195.1 KB · Views: 354
  • DSC02889.jpg
    DSC02889.jpg
    247.3 KB · Views: 330
True love...:bed:
 

Attachments

  • DSC02894.jpg
    DSC02894.jpg
    195.8 KB · Views: 361
  • DSC02899.jpg
    DSC02899.jpg
    200.1 KB · Views: 384
  • DSC02898.jpg
    DSC02898.jpg
    202.3 KB · Views: 374
  • DSC02895.jpg
    DSC02895.jpg
    195.5 KB · Views: 375
Now with the top end, i am thinking to take it to a proper rebore place to get them to dip it in acid wash to clean and decarbon it all. They do this stuff all the time and can also give me theyre opinion of the pistons and bores. Although im pretty sure the bores are fine because the cross hatching is visible and they look good. The pistons also look pretty good.

So do what do you guys think about the acid dipping to clean it all up? And if i do that should i be taking out the valves first? And anything else i may need to be thinking of in regards to cleaning the top end and general things too, any help here is appreciated!!

Im a little more nervous about the top end than i am about the gearbox.

In fact i would actually say the gearbox was pretty straight forward, i am suprised how easy it was and im reasonably confident we got it all right. I was at first thinking the gearbox will be REALLY complicated and technical but it really wasnt that hard at all. We'll see anyway when i go to fire it up how well we put it together, lol.
 
not sure about acid dipping the head as it carries the cam and has no bearing surface.
I would get them all vapour blasted

lightly grind out the lumps in the inlet and exhaust tracts before that, makes the engine run smoother. Dremel attachment is the best for that
 
not sure about acid dipping the head as it carries the cam and has no bearing surface.
I would get them all vapour blasted

Cool thanks again for your help drewpy! Just rang around then and found one near me. Gonna take the stuff to him tomorow. He also gave me an easy way on how to test the valves, to see if they need lapping:

'Put the spark plugs in then tip upside down. Now fill up with kero then come back in 1 hour. If the level has gone down the valves are leaking'

Sounds good to me, is that what you guys would do to test the valves?
 
I'd lap them anyway.

you have to strip the head down and the lapping kit is cheap.

spin the valves in a drill to clean them up with carborundum paper then wire wool.
 
I'd lap them anyway.

you have to strip the head down and the lapping kit is cheap.

spin the valves in a drill to clean them up with carborundum paper then wire wool.

sent the bits of to the vapour guy today, gonna lap the valves when i get the bits back, getting closer to finishing this...
 
Yeah,lapping the valves makes sure there are no inconsistencies in the valves and their seats.Make sure that your valve guides are good and tight. The sealing test for the valves is an old trick,and works well,and works with water as well.Good luck. lha
 

Attachments

  • DSC02662.jpg
    DSC02662.jpg
    162.4 KB · Views: 292
  • DSC02661.jpg
    DSC02661.jpg
    173.7 KB · Views: 292
  • DSC02660.jpg
    DSC02660.jpg
    194.7 KB · Views: 329
  • DSC02659.jpg
    DSC02659.jpg
    214.4 KB · Views: 320
  • DSC02658.jpg
    DSC02658.jpg
    234.5 KB · Views: 314
  • DSC02657.jpg
    DSC02657.jpg
    195.5 KB · Views: 331
  • DSC02665.jpg
    DSC02665.jpg
    161.7 KB · Views: 302
  • DSC02667.jpg
    DSC02667.jpg
    171.5 KB · Views: 314
  • DSC02683.jpg
    DSC02683.jpg
    142 KB · Views: 282
and now...
 

Attachments

  • DSC03091.jpg
    DSC03091.jpg
    195.2 KB · Views: 302
  • DSC03090.jpg
    DSC03090.jpg
    190.4 KB · Views: 277
  • DSC03089.jpg
    DSC03089.jpg
    226.8 KB · Views: 313
  • DSC03088.jpg
    DSC03088.jpg
    177.5 KB · Views: 268
  • DSC03087.jpg
    DSC03087.jpg
    149.1 KB · Views: 291
  • DSC03086.jpg
    DSC03086.jpg
    186 KB · Views: 290
  • DSC03097.jpg
    DSC03097.jpg
    185.6 KB · Views: 286
  • DSC03096.jpg
    DSC03096.jpg
    199.5 KB · Views: 274
  • DSC03095.jpg
    DSC03095.jpg
    173 KB · Views: 301
  • DSC03094.jpg
    DSC03094.jpg
    298.5 KB · Views: 258
  • DSC03093.jpg
    DSC03093.jpg
    205.9 KB · Views: 305
  • DSC03092.jpg
    DSC03092.jpg
    204.9 KB · Views: 277
a couple more pics:laugh:...inever knew those bits between the fins were rubber?
 

Attachments

  • DSC03098.jpg
    DSC03098.jpg
    163 KB · Views: 236
  • DSC03099.jpg
    DSC03099.jpg
    166.4 KB · Views: 253
Last edited:
Fantastic looking! Wish i'd- a - done that. . Gleaming :thumbsup:

I would get them all vapour blasted

lightly grind out the lumps in the inlet and exhaust tracts before that, makes the engine run smoother. Dremel attachment is the best for that

Wish i woulda done that too.
Next time :shrug:
 
Fantastic looking! Wish i'd- a - done that. . Gleaming :thumbsup:


Wish i woulda done that too.
Next time :shrug:

Yeah i was pretty happy with the results, bit on the pricy side but i guess you may as well do it good while its apart. If i knew it was that good i probably would have done the gearbox casings there too instead of cleaning them up myself. Thanks again drewpy for the great vapour guy tip:thumbsup:

They look like new again, these 2 photos really illustrate the dramatic difference:
 

Attachments

  • DSC02661.jpg
    DSC02661.jpg
    173.7 KB · Views: 279
  • DSC03090.jpg
    DSC03090.jpg
    190.4 KB · Views: 292
Last edited:
Back
Top