Dystopian Cafe Racer Project

ChrisValentine

XS400 Enthusiast
Messages
41
Reaction score
0
Points
6
Location
Phoenix, AZ
I restored most of an old Camaro once. I can change my own oil and my own brakes. I've replaced various other engine components following the how to guide books they sell. I have a high IQ. Other than this, I have essentially no skill in mechanics or motorcycle restoration. In fact, I'm mostly a computer geek, that runs a software company. Probably the exact person who should not try to undergo bike customization.

All that being said, I want to do bike customization to the bike I bought. 1981 Yamaha XS400. I have an entire garage full of tools (sans welding equipment) and I have the space to do it and I'm sure I could budget money towards it every month.

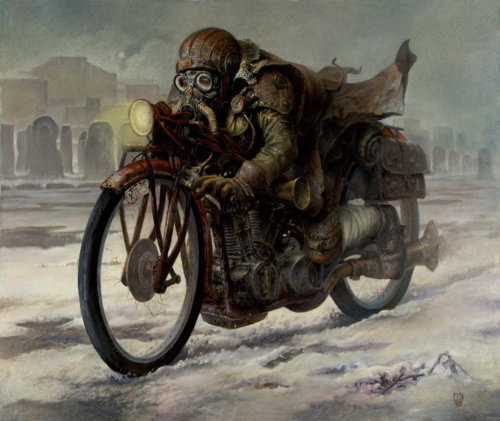
I would like to turn this bike into a dystopian version of a Cafe Racer. I like the brushed metal look with perhaps some brown leather bags and seat. Probably not saddlebags but fork bag or something to that effect. To give this the look of a bike that is used to run around a post atomic war earth. A bit of rugged steampunk/dieselpunk-esque feel. That probably only makes sense to me but I thought I'd outline that anyway :)

I would like the bike to have this overall look (like this 1971 Honda CB450 or maybe a bit Norton-eque):

This is a quick mockup
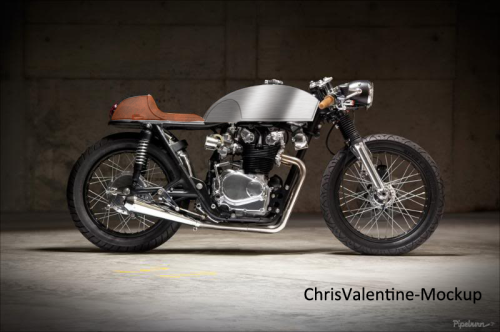
tumblr_m457jtFIh51rvlqeco1_500.png


Derived from these

tumblr_m3ulv5Y98h1rvlqeco1_1280.jpg


http://www.bikeexif.com/benjie%E2%80%99s-cafe-honda-cb550f

1963_norton_atlas_cafe_racer_michael.jpg


tumblr_m3uqegGbVb1rvlqeco1_500.jpg


With a little bit of distressed, dusty sci fi western look, similar to this but not as steampunky:

http://www.pipeburn.com/home/2012/4/23/73-honda-cb250-isabel.html

So my reason for posting really boils down to what direction should I take? In what order should I rebuild this "correctly". Do I strip this down to the frame and clean/restore everything necessary as I piece it back together?

What tank would really give me the look I am trying to go for? I have searched but perhaps someone else with a better eye can immediately tell me what it is I really would like to achieve the look. I saw a GS450, I believe it was, that sorta had the right bulky straight feel.

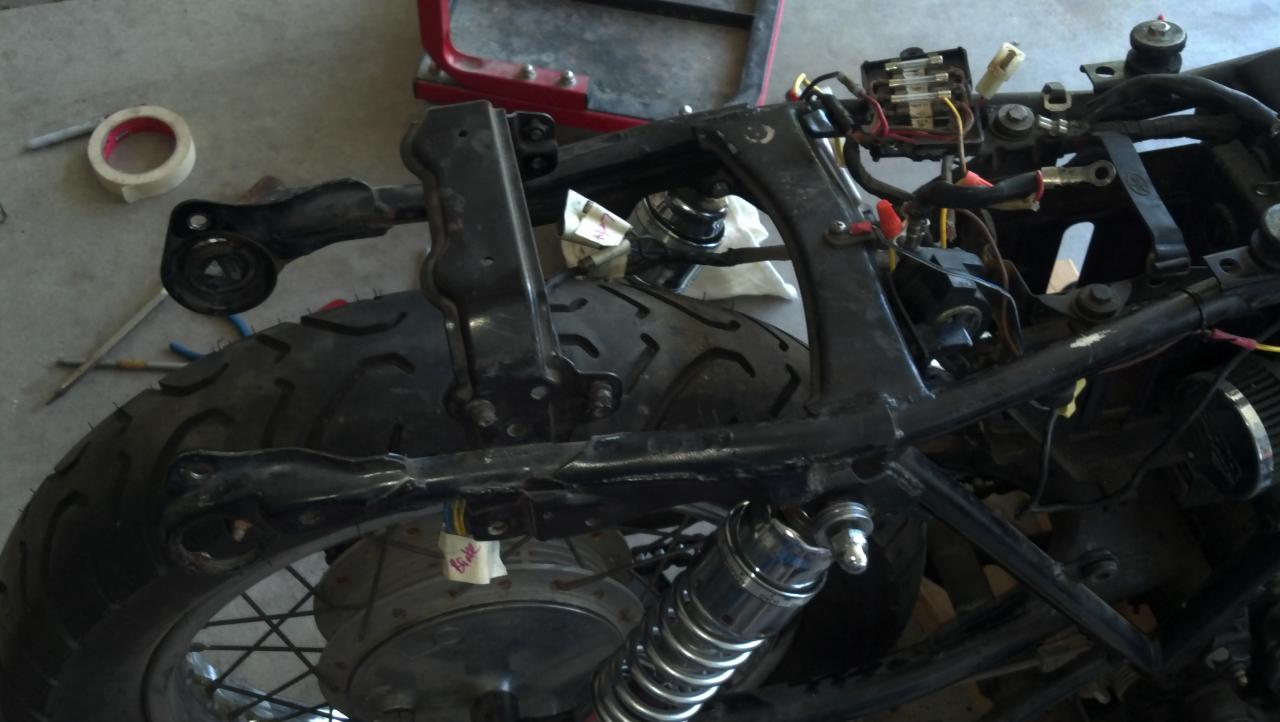
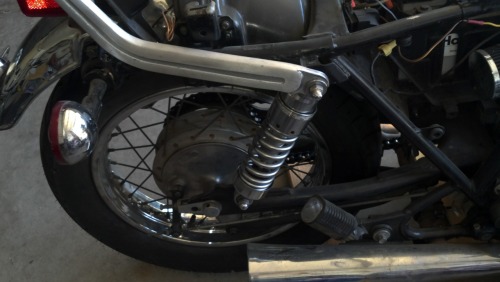
I do have extra rear shocks from a Honda Rebel that lower the rear end a bit as well. And I remove the ape hangers and replaced with a straight slightly bent type.

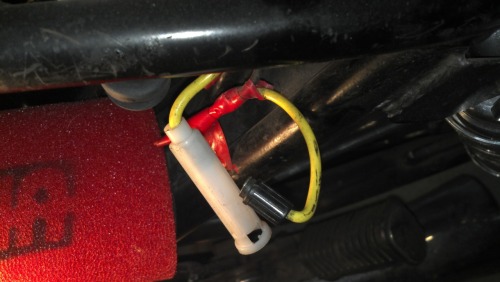
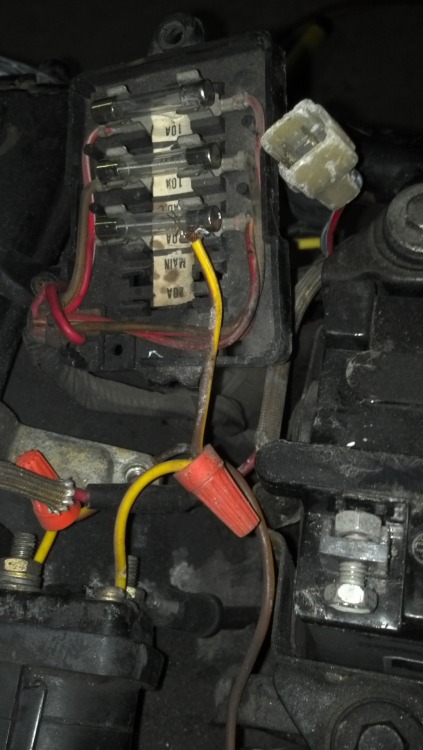
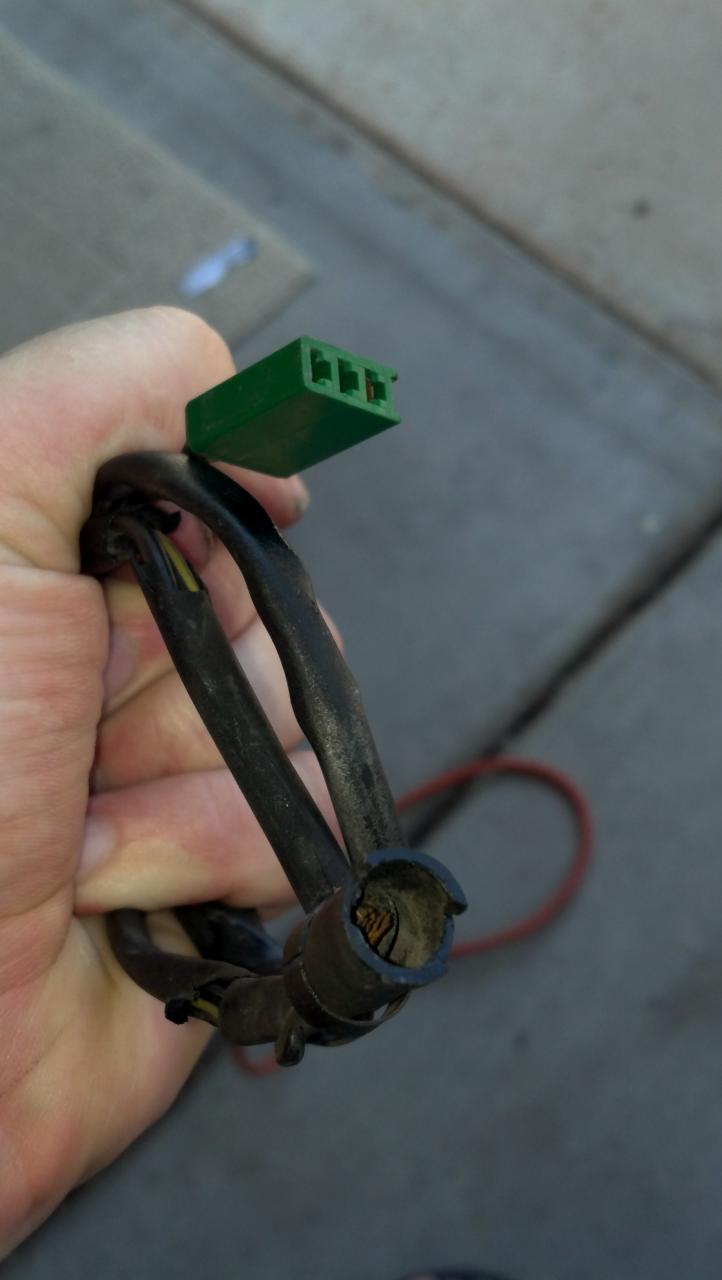
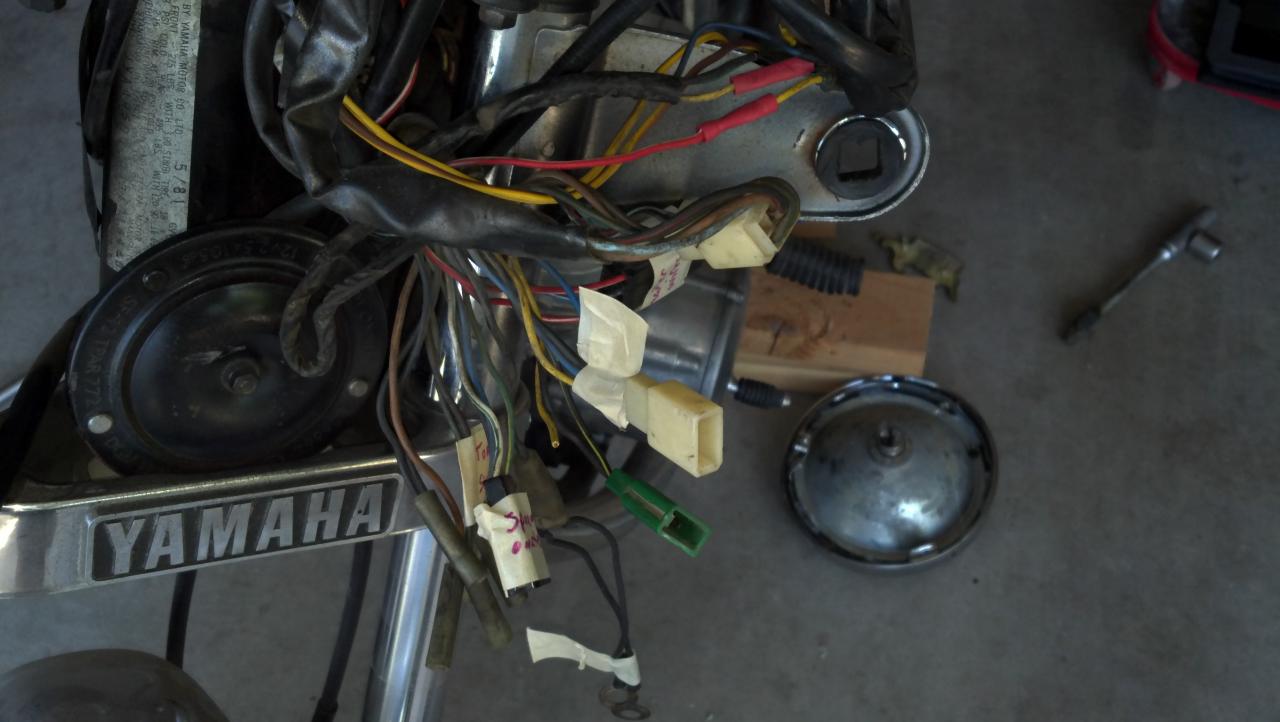
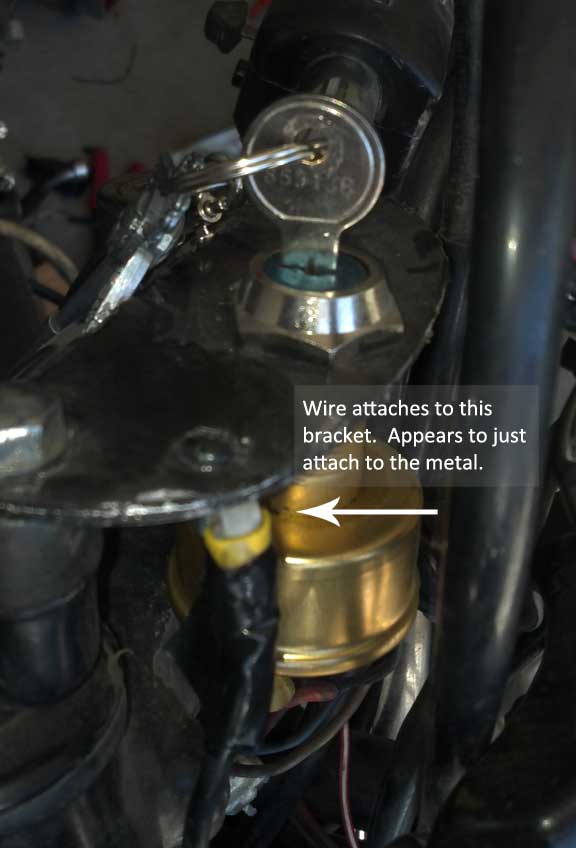
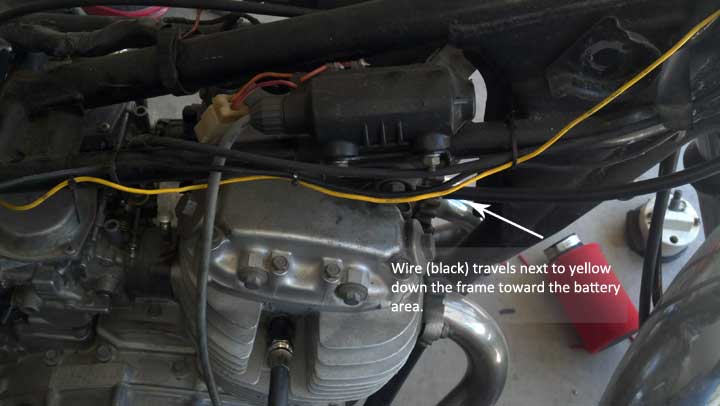
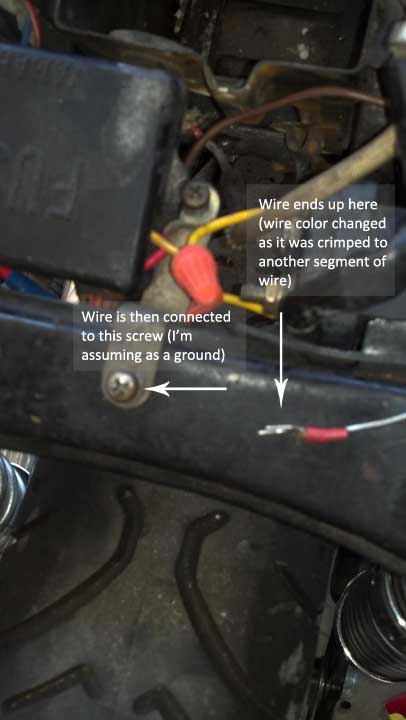
Currently the bike does not run (though it did for a bit) due to a leak in the fuel cock, and some kind of short that makes the main fuse (I think) blow every time its started.

So is this project just a fancy dream or is it relatively achievable for a beginner? Any help or direction would be much appreciated.

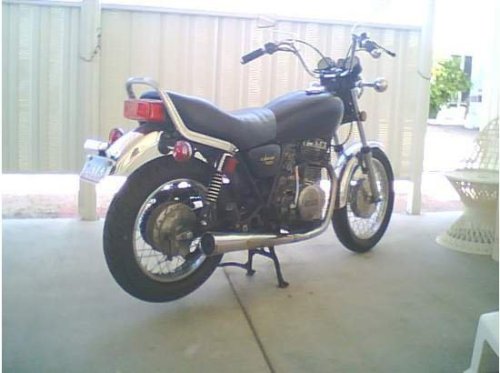
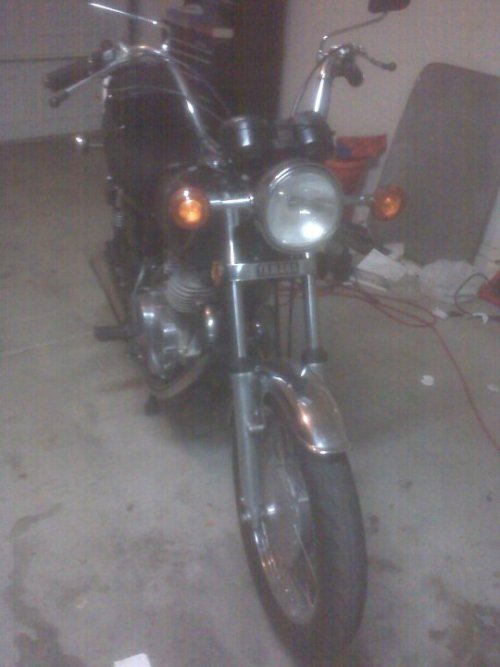
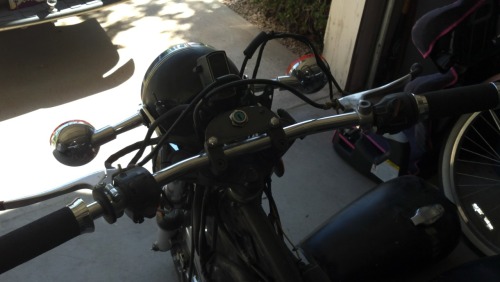
Bike as it is presently:

tumblr_m452rq6fWi1rvlqeco1_500.jpg


tumblr_m452ukbbMG1rvlqeco1_500.jpg


tumblr_m452t9XMwZ1rvlqeco1_500.jpg


tumblr_m452spnBOp1rvlqeco1_500.jpg
 
Last edited:
Welcome Chris..Sweet aspirations as well! Ok, in my opinion...You must make sure the engine/drivetrain and electrics are somewhat sound before commiting a budget to a pile of nion functional aluminum/steel. I would do a compression test first..charge the battery, then tmeporarily figure out way to run the leaky petcock so you can warm her up and take a 10minute run on her.. Upon returning from the ride I would then confirm battery is 12+ volts and look for any oil leaks afterwards. If your battery is 12+ volts than most likely elctrics are functioning as they should, If there are oil leaks take pics and make plans to address during the build to reduce effort loss down the road upon build completetion..FYI reco. cyl PSI is 140 ;)..Just my two cents my friend, best of luck, the bike you chose is well worth the investment and worthy of the conversion to a post apocalyptic beast! I can see it now..knobby tires, brushed steel, brass/copper,mesh and brown leather...damn!...I hope you make it happen!
 
Thanks for that enthusiasm :)

I should say, this bike did run before I started messing with it. I've driven it around the neighborhood 6 to 10 times. It only started to not work when I attemped to put a new petcock on it (the old one was RTV'd over) and i put a fuel liner rubber coat thing cuz the tank had some rust. Somewhere between doing that I must have created the short in the main circuit.

So I'm fairly confident this bike does run pretty well, and has no real leaks that I have seen. I will however check that compression.

I'm just unsure if i should invest in a new fuel cock on this old tank, when I will probably be getting a new tank for the look I'm going for.

Thanks.

Gotta love RTV..... RTV is to wrenchers as GreatStuff Foam is toback-yard rattle can body-men...LOL I'd nail that eletrical issue down as well, gotta be something simple and close to the backbone if you only messed with the tank/cock..
 
I have a high IQ.

Me too. Nothing teaches humility like trying to customize a 30+ year old bike.

Sounds like you're looking at a similar direction to me, only my platform is newer (with an arguably uglier engine and wheels, which suit me just fine, thank you very much.)

Check out the work at http://www.classifiedmoto.com/ for other ideas of where you could take the bike. Also, follow some of the custom bike blogs (Bike Exif, Pipeburn, Return of the Cafe Racers, etc.) for other ideas an inspiration.

For what you're looking for, you may want to do a full teardown and cleaning. These bikes are deceptively simple, so a teardown, cleaning, polishing / painting and rebuild can be done relatively quickly. Just keep your carbs and electrics clean, and everything else is cake.
 
Me too. Nothing teaches humility like trying to customize a 30+ year old bike.

Yes, I"m fearful of how hard it will slap me. Trying to see if what works will in the tech world will at all translate into practical mechanics. Probably only marginally :)

I will check out those blogs. I have Bike Exif on my flipboard but I have not seen the other ones. Thanks.

[...]so a teardown, cleaning, polishing / painting and rebuild can be done relatively quickly.

Out of curiosity, what is a ball park of how long "relatively quickly" might me?
 
Out of curiosity, what is a ball park of how long "relatively quickly" might me?

Well it's exactly that. Relative. I mean in theory, you could tear it down, clean it up, paint and polish in about 40-50 hours. But it's really up to your familiarity with the bike itself, and banking that minimal parts need replacing.. My advice, take too many pictures, because it's never too many. Try and write down a sort of "to do" list and methodically work form it. That will certainly quicken the rebuild part of the process.
 
welcome,
the hardest part is over, you know where to go with the bike. Now how long it takes to do is entirely up to you and the standard you want, who you know in the bike world or how good are you at making new friends/contacts who can help.

do a dry build,that way your not scratching new paint etc where you need a bracket for the new thingumabob you just bought on eBay.

good luck :)
 
Yes, I"m fearful of how hard it will slap me. Trying to see if what works will in the tech world will at all translate into practical mechanics. Probably only marginally :)

My favourite saying (especially being an corporate training consultant) is:

In theory, theory is just as good as practice.
But in practice, it isn't.

But that's the great thing about playing with a cheap, old commuter motorcycle. You can keep trying and retrying until you make a thing of beauty.

(Note: beauty is very much in the eye of the owner.)

Out of curiosity, what is a ball park of how long "relatively quickly" might me?

Shamus is right. You're looking at 40-50 hours, but speaking from (very current, as in tonight) experience, there's something really satisfying about pulling a bike apart, marvelling at the craftsmanship and design that went into it, cleaning, and then putting it back together so it's designed for you, not the average global motorcycle consumer.

I bought this bike to flip, and fell in love with it. Your results may vary, but enjoy the journey in the meantime.
 
I think I may have located the short. The large braided ground cable to the negative terminal was not properly secured to the frame. Not sure if this would cause the fuse to blow and smoke to appear from the battery area (near fuse box) but it was for sure not connecting probably so was definitely an issue. I can try tomorrow once I buy more 20A fuses.

Also, the main fuse seems to have been relocated from the fuse box and moved to an inline type fuse. Is this common? A cheap work around or a more intelligent design than existed when they were first made?

tumblr_m47ak5XYXY1rvlqeco1_500.jpg


tumblr_m47amrAwSX1rvlqeco1_500.jpg


Also, as you can see in the image the starter on the lower left of the second image appears to be wire-nutted into the headlight circuit. I'm confused as to why that was. And there is an empty harness clip thing on the right of the second image, I have no idea what that goes to. Probably not important?


Also, I found this image just thought I'd add it to the tread as it is in the spirit of what I'd like.

tumblr_m47araGlnT1rvlqeco1_500.jpg
 
I am sure I could re-use the existing block,and I'm sure the main would work as an inline fuse. I've just been reading that the old fuse boxes and connectors are likely not making a great electrical connection. So if redoing all that would give me 1. Confidence knowing that my fuses area was solid. 2. Easier access to more modern fuses. and 3. Fixing all the previous owners wire nut and splice jobs.

We shall see i suppose :)
 
Thanks, now I want to see that :)

I removed the rear fender pieces, seat and all the stuff that was limiting my visibility.

full


I removed the head light (I think i broke it, apparently it was not held on be tension but was tack welded to some collar pieces on the forks? I hope thats fixable) and found that there were a ton of wires shoved into the headlight casing. I was able to follow the wiring diagram and label most of them. I still have about 4 or 5 wires with snipped connectors that seem to have gone no where and then a green plug with wires that goes somewhere but I cant figure out where it went. I'm thinking maybe the brake switch?

full


full


Can anyone Identify the green cilp and maybe give me a clue where the other wires might go, other than brake switch I believe all other wires have been accounted for, unless I'm over looking something.
 
Well I have not redone the fuse block yet, but I have one on order. What I did do is replace the inline 20Amp main fuse with an inline blade type fuse so I have better acess to new fuses as I get this working. Old glass style seem hard to find.

Another question:

I can ground a wire to the frame anywhere on the frame? Its all the same? (as long as its not painted over or anything obstructing)

I have this peculiar wire. It goes from the bracket the ignition key is mounted on, down the frame and then terminates on the screw that holds the fuse bracket. I am assuming this is just a ground wire. But why would it need to travel all the way down the frame and connect to the frame at that point rather than somewhere much closer to where it originates (Assuming this is meant to ground the ignition key bracket)

full


full


full

Does anyone have any idea why it would have been set up like that?

(Sorry for all the questions, I'm trying to learn about this as much as I can)
 
Back
Top