how to remove engine

davey1207

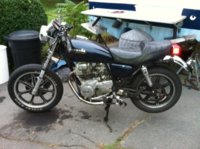
1981 Yamaha xs400 Special
Messages
76
Reaction score
0
Points
6
Location
New Bedford, MA
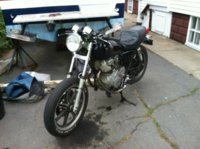
Hey guys. It's been a while since my last post but I may need some help. I live in new england and we are supposedly getting snow this weekend. i need to disassemble my bike to bring into my basement. i was wondering what some good steps to follow would be. i.e.; what to disconnect first, what is easiest to disconnect before taking the entire engine out of the frame. i want to clean every inch of the bike to I'm basically doing a complete disassemble. any help would be appreciated thanks guys!
 

Attachments

  • IMG_1964.jpg
    IMG_1964.jpg
    303.3 KB · Views: 508
  • IMG_1965.jpg
    IMG_1965.jpg
    300.1 KB · Views: 478
Seat, side covers and tank are all pretty easy start. The electrical is pretty straight forward. Most of the connectors only fit the thing they are supposed to be hooked to. The exhaust was my hardest part. I had to get a bottle jack and spread the pipes apart at the crossover pipe because it had rusted together. Looks like yours are cut above that though so it should just be 4 nuts on that. Carb is just a couple clamps an the accelerator cable. Pegs and shifter. Clutch cover and clutch cable. Then like 5 bolts holding the engine block in. Get a buddy and pull it out on its right side, or lay the bike on its side I hear works well. Might want to drain the oil first. If you want to take the front fork off. Go breaks, axle, Wheel, both downtubes, top bolt in triple tree, run around like a crazy person catching ball bearings. I unhooked all my electrical and pulled it with my fork but you can get into the headlight and unhook everything in there if your feeling adventurous. Im sure others will pick up on things Ive left out.
 
There aren't actually that much connector and bolts on this bike, just remove the seat and tank and you'll figure where to go next. But if you feel like it's over your head, then take pics as you tear it down, makes the assemble much easier. (winter is long):)
 
There's a free repair manual on this site as well; it walks you through a tear-down. Get some large zip-lock storage bags and label everything as it comes off. I was able to fit 75% of the disassembled bike in one decent size cardboard box. Masking tape both ends of wires or harnesses if you like; I use symbols instead of descriptions because they are smaller; i.e. star, happy faces, etc. It doesn't matter as long as both labels match. I found that lifting the engine out of the frame was easy, but I don't think this opinion is shared by many :shrug: If you have any problems or need to identify a part simply post a photo; I've been rebuilding mine from a complete tear-down since September.
 
awesome advice thank you guys. beware i will be posting pictures of the tear down so you can see the process. just trying to decided whether or not it will stay cold in massachusetts from here on out!
 
I'd start with everything thats been said, take out the tach cable, and unhook all the electrical connections. Take off the side cover and remove the chain. and looks like you dont have those pesky cross over pipes to worry about. Should take about twenty minutes tops after you remove fairings and tank.
 
Thanks guys. Happy to say I successfully pulled the engine (along with plenty other parts). I will upload some pics later when I get home. I am planning on having a buddy weld the rear end with a "U" beam so that I can make a custom seat for 2up riding..
 
Back
Top