1. Having trouble logging in? Try closing your browser and re-opening it. If that doesn't work, try a different browser or device. The site will be updated soon to resolve these browser issues.
    Dismiss Notice
  2. Dismiss Notice
  3. Want an XS400.com t-shirt? Go to the store to order. Limited sizes and quantities available.
    Dismiss Notice

I couldn't stay away... XS400 Heritage special resurrection

Discussion in 'The Lounge' started by JPaganel, Aug 22, 2020.

  1. JPaganel

    JPaganel XS400 Addict Top Contributor

    I was last active around here, oh, in about 2013.

    Then, I sold my XS and moved on to boards relevant to other bikes I owned.

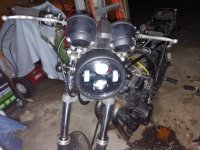
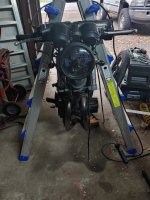
    This week, though, I was gifted an XS400 Heritage Special. There is a story there, but suffice it to say, I got a non-runner, but with proper paperwork, and it was free.

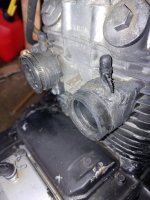
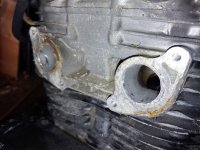
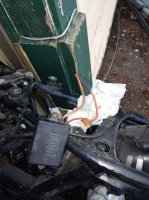
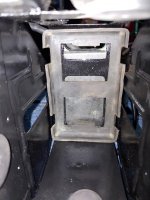
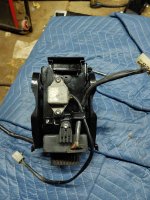
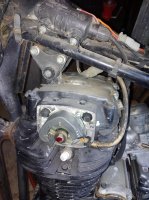
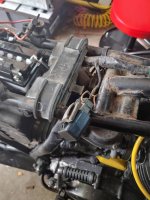
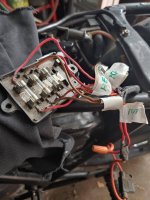
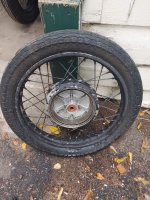
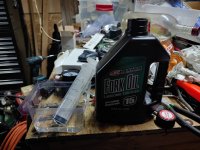
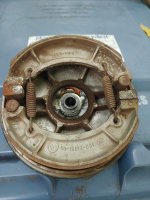
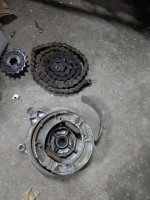
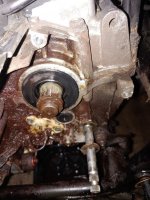
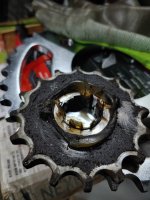
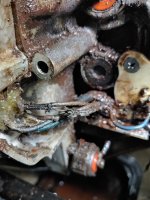
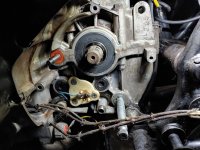
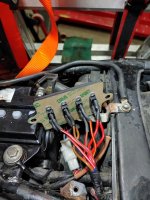
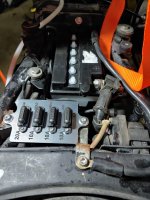
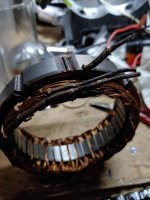
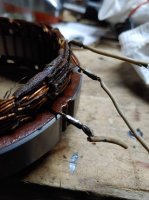
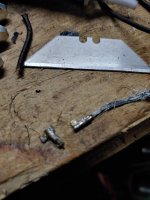
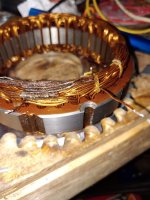
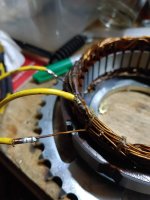
    Bike is pretty heavily molested. Rattlecanned black with paint runs and peel, manifolds covered in silicone, missing front fender, not dust caps on the forks, brake cable burned on the exhaust. Wire nuts in the the wiring harness. Oil leaks out of the usual seals.

    Fortunately, no cuts to the frame, so it's probably safe structurally.

    20200821_104504.jpg

    Should be a fun little slog making it a decent runner.
     
    LennyB, stillwater and xschris like this.
  2. JPaganel

    JPaganel XS400 Addict Top Contributor

    Well, here is what is wrong with the bike.

    • Rattlebombed black
    • Clutch and brake cables stuck to liners and corroded.
    • Brake cable sheath melted on the exhaust
    • Battery box rusty
    • No spark
    • Handlebars are a piece of pipe
    • Seat latch is wonky
    • Rear turn signals missing
    • Relays dangling
    • Chain is rusty trash
    • Missing tach cable
    • Wire nut in the wiring
    • Plug wires cracked
    • Clutch tension spring rusted and broken
    • Crankcase vent tube is hardened into a rock
    • Clamps lost and replaced with shitty worm drive clamps
    • Missing fork dust caps
    • Cracked carb boots
    • Missing petcock vacuum line
    • Missing front fender
    • Broken plate holder
    • Bent rear fender
    The paintjob is so bad that some of it came off with just a wash. The sprocket cover lost all paint after degreasing and soap and water.

    I have so far:

    • Derusted and painted the battery box
    • Replaced clutch cable
    • Replaced a bunch of miscellaneous rubber bits (Thanks, xschris)
    • Replaced plug wires
    • Replaced headlight with an LED one. There is one that fits in place of a stock one perfect
    • Installed new turn signals. They don't work properly, but I'm waiting on a relay for that.
    • Derusted and painted the starter cover.
    • Degreased the sprocket cover and made a new clutch tension spring (this is discontinued, but easily replaced with a generic one)
    • Replaced bars with proper low bars
    • Set valves
    • Replaced rear fender (thanks again, xschris)
    • Installed new tach cable
    • Replaced carb boots
    • Got proper clamps on the intake (xschris again)
    • Put in new relay holders (also xschris)
    I think I really should have just had Chris ship me a whole parts bike...

    I figured out the no spark issue - it's the stupid fusebox. The clamps are corroded and have no tension. I ordered a new one from eBay, but for being just a a four-way fusebox it turned out to be ginormous and won't fit under the seat unless I make some fancy bracketry.

    Also, waiting on a new chain, brake shoes, fuse holders.
     

    Attached Files:

    xschris likes this.
  3. JPaganel

    JPaganel XS400 Addict Top Contributor

    This is the derusting of the battery box

    I used electrolysis, and then painted it with engine paint. Not the greatest paintjob, but oughta keep the rust out.
     

    Attached Files:

    Robsteeler66 and xschris like this.
  4. JPaganel

    JPaganel XS400 Addict Top Contributor

    A special mention needs to be made of the pickup coil cover.

    I needed to remove it so I could pull the coil. I had to pull the coil to get the valve cover off. I had to get valve cover off to replace the tach drive seal.

    The pickup coil cover has a brass plug over the rear screw. The plug is a lot bigger and thicker than I thought. You have to drill it and pull it.
     

    Attached Files:

    xschris likes this.
  5. JPaganel

    JPaganel XS400 Addict Top Contributor

    Another special mention is the front drum brake cable.

    They don't exist. Yamaha has them discontinued, MotionPro doesn't list them.

    I found one on eBay,shipped from Norway. It was listed as being for a 1979 XS400.

    It had the wrong end on it on the wheel side, and the adjuster barrel is too small.

    Yamaha lists different part numbers for these cables different years. However, the cable connector they snap into is the same for all years, so the difference has to be in length for different style bars. It wasn't a mistake in the year.

    I sent the seller a pissy message and took the cable down to my favorite moto shop. The guy there is very oldschool, and has the setup to make his own cable ends.

    Part numbers are as follows:
    1978 XS400-2E 1T6-26341-00-00
    1979 XS400-2F 2V6-26341-00-00
    1980 XS400G 3F8-26341-00-00
    1982 XS400SJ 3F8-26341-00-00
     
    xschris likes this.
  6. JPaganel

    JPaganel XS400 Addict Top Contributor

    This is what the new headlight with turn signals looks like.

    All the wiring fits into the bucket like it should.
     

    Attached Files:

    CxTxRxL and xschris like this.
  7. xschris

    xschris XS400 Guru Top Contributor

    Lots of work with that bike. Good your getting it back in working order! If you need anything, I have any part that you could need and it will fit the bike as it should. It's nice to save the time then trying to find something to work. I wish I was able to do that 20 years ago when I was trying to put one of these back together and parts where discontinued or cost crazy money. Carb boots where over $100 a set from yamaha and the gaskets where another $20
     
  8. JPaganel

    JPaganel XS400 Addict Top Contributor

    Big day yesterday.

    New fork seals and oil, new brake shoes in the front, shiny new brake cable.
    Also new shocks in the rear. They are Chinesium, but still better than the 40 year old OE ones.
    New blinker relay, blinkers blink now.
    Installed front fender and fork gaiters.

    Started on the fusebox, and that didn't go well. Half the fuse clips broke when I touched them. Tried using the plastic base for new fuse holders, and broke the base.

    Still, good progress. Once I get the fuses sorted, it'll be time to fire it up.


    Fork oil hack - my syringe doesn't fit into the bottle. However, the packaging the seal come in makes a perfect little tub to put oil into so you can easily suck it up.
     

    Attached Files:

    motoTrooper and xschris like this.
  9. JPaganel

    JPaganel XS400 Addict Top Contributor

    Today I got the new chain and sprocket, pulled of the rear wheel and sprocket cover and went degunking.

    Rear brakes were delaminated and the brake shaft was sticking on old grease. Cleaned, wirebrushed the rust off, greased, installed new shoes.

    Chain and sprockets are trash. Under the gunk, shift shaft washer was siliconed to the seal. And the sprocket was for some reason siliconed to the shaft.

    I think someone was trying to fix oil leaks, but the leak is actually from the clutch pushrod. Which had no silicone, but was massively covered in gunk.

    I replaced the shift shaft seal and the output shaft seal. I forgot to order the pushrod seal, so that's next.

    Also, I think I have another candidate for mysterious electrical gremlin. One of the wires (three that are all the same, so I think it's stator) is only one third there. There are like five strands remaining connected.

    Now I need to clean off the inside of the brake drum, replace seal, fix the wire, and start reassembling.
     

    Attached Files:

    xschris likes this.
  10. JPaganel

    JPaganel XS400 Addict Top Contributor

    Cleaner... So much cleaner...

    Cleaned off oil and silicone. Replaced output shaft seal and shift shaft seal.

    The original source of the leak was the clutch pushrod seal. I can see it seep when I move the rod.

    Also, the super-sad stator wires...
     

    Attached Files:

    xschris likes this.
  11. JPaganel

    JPaganel XS400 Addict Top Contributor

    The clutch rod seal is done, rear wheel and brakes assembled and back on.

    Also, I have a super cool and functional fusebox.
     

    Attached Files:

    Robsteeler66, CaptChrome and xschris like this.
  12. xschris

    xschris XS400 Guru Top Contributor

    Your main ground strap should go directly on the motor. This helps for grounding the e-start motor.
    DSC03871.JPG
     
  13. JPaganel

    JPaganel XS400 Addict Top Contributor

    Maybe I'll run an extra one.

    While we are on the subject of grounds - do you have a suggestion for a good place to ground the right switch block? I don't really want to scrape the paint off the bars.
     
    xschris likes this.
  14. xschris

    xschris XS400 Guru Top Contributor

    The right and left sides use the bars to ground to each other. If you are careful where you remove the paint you won't even notice it.
     
  15. I'm enjoying the build/repair. Keep it going, I want to see more. And that fuse block is nice! I had the same issue, I touched mine and one of the tabs just fell...
     
    JPaganel likes this.
  16. JPaganel

    JPaganel XS400 Addict Top Contributor

    The thing I have been working on lately has been the stator. The main stator wires were trash, as per above. So, out it came.

    I had to cut away the thread tying it to the coil and cut the lacquer-filled fabric off the wires. There was no separating them otherwise.

    The Yamaha sarariman earned their sake on this one - the connection between stranded wire and solid windings wasn't just a solder joint. It was W-crimped to the stranded, O-crimped to the solid, and filled with solder. Royal pain to take apart, but I succeeded.

    I got some silicone-insulated 16 gauge wires, they fit the grommet perfectly and tightly.

    To honor the unknown to me engineers of Yamaha, I replicated the solder-crimp by crimping on some spade terminals to the stranded and cutting off the spade part, then crimping them to the solid. Then, solder-filled. Putting this together is way easier than disassembly. I am putting heatshrink over them, and then I will try to re-tie them with nylon thread.

    This is where I am sitting now.
     

    Attached Files:

  17. Gra900

    Gra900 XS400 Addict

    Interesting story, nicely told. Actually the bike looks to have been dry stored and suffering fro dust and age. At least most of the parts are there.
    I really liked the electrolysis on the battery cage. 12V in bicarbonate, or was it koh? We’re you getting the battery crust off?
    I’m wondering how the engine is, looks fairly low mileage, and compression?
     
  18. JPaganel

    JPaganel XS400 Addict Top Contributor

    There is minor surface rust here and there. I'll attend to it eventually.

    Worst damage was "repairs" and "mods".

    Sodium Carbonate - washing soda.

    There wasn't so much acid crust, as an old acid spill ate the paint, and it rusted.

    I haven't measured compression, but not too worried about it.
     
  19. JPaganel

    JPaganel XS400 Addict Top Contributor

    I've been away a bit, had been moving and doing home repairs.

    The project is still on. I replaced wire looms and generator wires, need to finish putting the plug back on. After that I think I'm ready to put some oil in it and try starting.
     
  20. JPaganel

    JPaganel XS400 Addict Top Contributor

    Aaaaand... It runs.

    I have rewired the stator, re-sleeved the field coil harness, put on a new chain, cleaned everything along the way.

    Stator wires are now silicone-insulated ultra-flexible ones, harnesses are housed in fireproof fiberglass and silicone looms.

    I put it on a bottle, charged the battery, cranked it a few times, and it caught and fired, and idled right away.

    Still need to reinstall the peg and shifter, fix the blinker I broke along the way, and figure out a couple of small things I found. The carb is missing the choke detent and the tachometer wobbles inside it's housing.

    But it's alive.
     

Share This Page