My 360 has a brace and the fender is mounted on it. You can try to find one of those..
I actually just picked up a color matching front fender with the brace for my bike. I have an idea about using it as a rear fender.
https://www.ebay.com/itm/1976-Yamah...757441?hash=item362fd58941:g:cKIAAOSwstNaxRck
I actually just picked up a color matching front fender with the brace for my bike. I have an idea about using it as a rear fender.
https://www.ebay.com/itm/1976-Yamah...757441?hash=item362fd58941:g:cKIAAOSwstNaxRck


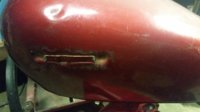


") I also learned to add a little more bondo that is needed and use the DA with 80 grit to knock it down then use the pad and hand sand up through the numbers......I hate body work and sanding but its been sort of fun.....
I also learned to add a little more bondo that is needed and use the DA with 80 grit to knock it down then use the pad and hand sand up through the numbers......I hate body work and sanding but its been sort of fun.....