My build progress so far......

dodger0129

amatuer/enthusiast builde
Messages
167
Reaction score
0
Points
16
Location
Aylesbury,Bucks. England
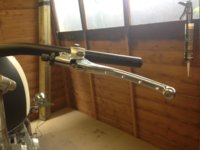
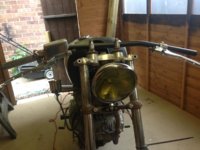
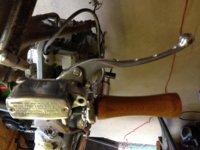
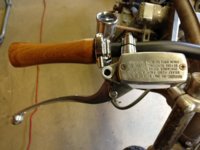
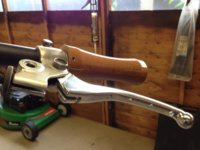
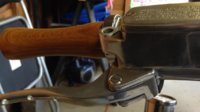
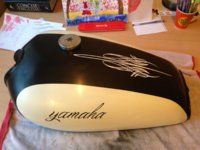
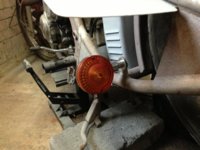
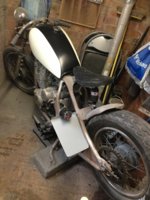
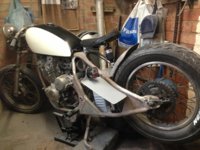
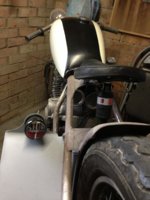
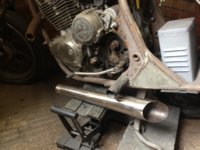
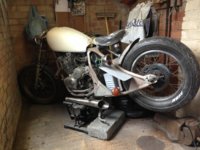
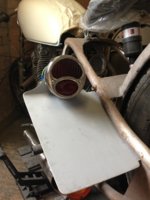
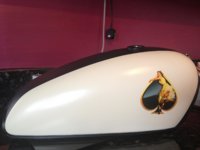
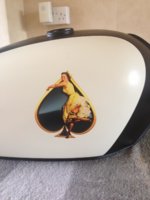
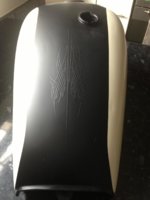
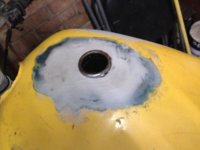
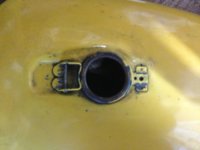
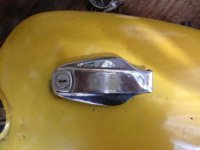
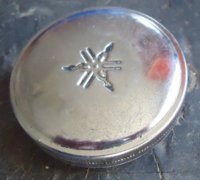
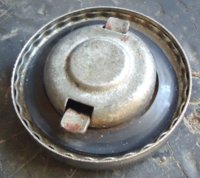
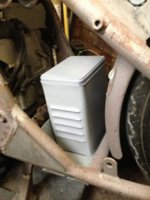
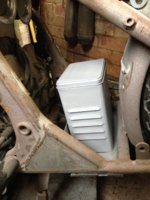
Hey all....thought i'd share a few pics of my progress so far!!...It,s been quite a long journey so far,with loads to work out,but hey,that's the fun part!!??.It's an XS400 DOHC in a hardtailed Honda Nighthawk frame,so new engine mounts etc had to be done.It's a bloody tight fit as well,but I love the "packed in" look of it all.It's got the front end from an original XS400 donor I started out with,before aquiring the DOHC motor.The tank is XS400,with modified fuel cap by myself,and the back wheel is from an SR250.I had the original XS wheel,but it was a disc brake item,and I wanted to go with a drum brake at the rear.I made the side mount number plate,and the battery box.The bars are original 1978 XS,flipped over,to give a dropped look....I started out to build a bobber,and now i don't really know how to describe it,except to say it's a custom,it's original,and it's all my own work..Check my album for more photo's:thumbsup:.....29/03/13....just added some pics of new tail light,swapped the Miller for a Model A duolamp replica,got the indicators mounted,and started mock up on the exhausts,which I slash cut from the original xs400 silencers.They are now straight through,although I will probably fit removeable baffles for the MOT test!!!:wink2:
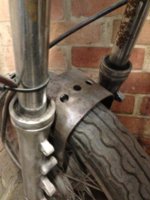
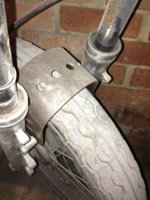
The last two pics are a fork brace,from an old enduro bike,drilled for a bit of style,which i'm using instead of a front mudguard!
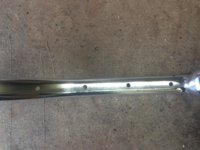
 

Attachments

  • IMG_2437.jpg
    IMG_2437.jpg
    214.4 KB · Views: 477
  • IMG_2432.jpg
    IMG_2432.jpg
    192.1 KB · Views: 407
  • IMG_2423.jpg
    IMG_2423.jpg
    237 KB · Views: 432
  • IMG_2422.jpg
    IMG_2422.jpg
    243.8 KB · Views: 486
  • IMG_2382.jpg
    IMG_2382.jpg
    198.6 KB · Views: 402
  • IMG_2425.jpg
    IMG_2425.jpg
    192.4 KB · Views: 421
  • IMG_2619.jpg
    IMG_2619.jpg
    228.8 KB · Views: 386
  • IMG_2620.jpg
    IMG_2620.jpg
    240.4 KB · Views: 350
  • IMG_2617.jpg
    IMG_2617.jpg
    212.2 KB · Views: 363
  • IMG_2615.jpg
    IMG_2615.jpg
    227.8 KB · Views: 394
  • IMG_2616.jpg
    IMG_2616.jpg
    201.9 KB · Views: 370
  • IMG_2618.jpg
    IMG_2618.jpg
    179.5 KB · Views: 347
Last edited:
No,just heavily modified it!!!!...the front loop is a Honda Nighthawk and the rear section is fabricated from scratch and welded up.The front still has the removeable frame rail that was on the standard frame,which made it a bit easier to squeeze in the DOHC motor!!:wink2::thumbsup:
 
A) that looks awesome.

B) What can you tell me about how you built your gas cap? I'm thinking of switching to an RFID ignition instead of a key, but I'd still need a key for my gas cap. I love the tank, but until now hadn't seen a custom cap solution. Can you give me any details?

C) Nice battery box. What was it originally?
 
The scheme for your gas tank is awesome,how did you get that design on the top?

Hey,thanks for the compliment!....

The pinstripe is a self adhesive decal I got on Ebay (UK) for I think about £3!!!

They've got quite a few on there,it was a doddle applying it!

You could actually use it as a stencil also,if you lay down your base colour,apply the decal,lay on your top colour,and then peel the decal..

Here are the sellers details I got it from : kustomkulturedesignuk

If you search them on Ebay UK you should find them OK,and they ship international!

I've since changed the tank design!!...I left the pinstripe on,painted over all the satin black with matt black,and painted out the Yamaha lettering(i was'nt diggin' it!),and applied two classic hot rod pin up waterslide decals,which are great as they so low profile they look painted on!!...couple of matt clear coats to seal it,and all done :thumbsup:
 

Attachments

  • IMG_2627.jpg
    IMG_2627.jpg
    103.9 KB · Views: 281
  • IMG_2625.jpg
    IMG_2625.jpg
    169.4 KB · Views: 314
  • IMG_2629.jpg
    IMG_2629.jpg
    161.1 KB · Views: 290
  • IMG_2626.jpg
    IMG_2626.jpg
    124.4 KB · Views: 268
A) that looks awesome.

B) What can you tell me about how you built your gas cap? I'm thinking of switching to an RFID ignition instead of a key, but I'd still need a key for my gas cap. I love the tank, but until now hadn't seen a custom cap solution. Can you give me any details?

C) Nice battery box. What was it originally?
Hey,thanks for the comments!

I originally had an XS400 tabk,with the lozenge type locking fuel cap.
I really wanted to change it for a round cap,as I thought it fit the style of the bike better,SO.......

I found a 1970's Yamaha RD fuel cap on Ebay,which had the same size internals for my filler hole,then set about removing the old cap(easy).

Not so easy,was removing the mounting lugs for the cap,which are spot welded to the tank.Some carefull cutting and grinding later,and they were gone.You have to be VERY CAREFULL with this,as the top of the tank is quite thin,and east to cut/grind through!!

Then,I had to notch two slots into the filler neck,to take the lugs on the new fuel cap.
Then it's a simple process of fill/sand,fill/sand,fill/sand until you flush up all the surrounding recessed area around the old cap.

The RD cap I bought is'nt a locking cap,so i'm just gonna have to trust that no-one tampers with,or syphons my juice!!!!!!

I've added a couple of pics of the process,there's more in my album.

HTH and let me know how you get on?:thumbsup::wink2:

The battery box started out life as a biscuit tin!!!!
I bought a couple of louvres from a marine store,cut out the sides of the tin,grafted on the louvres,then filled,sanded and primed before mounting to my battery tray.I've lined the bottom with foam,and have yet to drill some holes for wiring etc..gonna try and run as much as possible in the frame.What will be seen I will probably run in SS braided hose.....
 

Attachments

  • IMG_2105.jpg
    IMG_2105.jpg
    187.2 KB · Views: 304
  • IMG_2099.jpg
    IMG_2099.jpg
    186.7 KB · Views: 276
  • IMG_2098.jpg
    IMG_2098.jpg
    203.3 KB · Views: 263
  • fuel cap.JPG
    fuel cap.JPG
    55.7 KB · Views: 269
  • fuel cap 2.JPG
    fuel cap 2.JPG
    69 KB · Views: 272
  • IMG_2382.jpg
    IMG_2382.jpg
    198.6 KB · Views: 269
  • IMG_2381.jpg
    IMG_2381.jpg
    227.4 KB · Views: 278
  • IMG_2347.jpg
    IMG_2347.jpg
    180.7 KB · Views: 287
  • IMG_2346.jpg
    IMG_2346.jpg
    172.3 KB · Views: 272
  • IMG_2345.jpg
    IMG_2345.jpg
    141.8 KB · Views: 308
I have a sweet ti mtn bike shock that would look great on your seat. Ill sell it for cheap!!!

Romic.jpg
 
The locking gas gap doesnt realy do anything to prevent thieves from stealing your petrol.If they want it all they have to do is undo the fuel line and turn on the petcock.Already had it happen dam neighbors.
 
Just picked up these grips on "fleabay".......I think they're super cool and a bit different!!!
Made from alluminium in wood grain effect.Should look sweet with my new matt black drag bars,new throttle tube/housing,and new front master cylinder.Jobs for the weekend are drilling out my levers hot rod style,and mounting up the new master,amongst other things.........:thumbsup:
 

Attachments

  • grips.jpg
    grips.jpg
    263.1 KB · Views: 264
  • griips.jpg
    griips.jpg
    248.9 KB · Views: 255
  • 980df717b78847e3a004868b26e3eaf1.jpg
    980df717b78847e3a004868b26e3eaf1.jpg
    254.2 KB · Views: 261
  • $(KGrHqV,!p8E9lb5Q31LBPrgULzB8!~~60_12.JPG
    $(KGrHqV,!p8E9lb5Q31LBPrgULzB8!~~60_12.JPG
    20.3 KB · Views: 244
Last edited:
New levers drilled..........been fabbing up a bracket for the side stand also....pics to follow.Jobs for today are (1)Trying to remove the four front mudguard bolts that are snapped off flush in the forks so I can mount my fork brace :banghead:
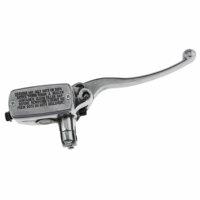
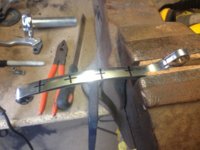
. (2)Measuring up for a new set of steering head bearings...I know the headstock is from a honda knighthawk,don't know which size(cc) though,and apparently there are huge differences in bearing sizes between the models!!!:confused: Running the stock XS400 forks in front so have been asked by supplier for lots of pics/measurements and they'll sort me out :)
 

Attachments

  • IMG_3127.jpg
    IMG_3127.jpg
    178.6 KB · Views: 300
  • IMG_3134.jpg
    IMG_3134.jpg
    129 KB · Views: 262
  • IMG_3132.jpg
    IMG_3132.jpg
    189.9 KB · Views: 279
  • IMG_3130.jpg
    IMG_3130.jpg
    277.7 KB · Views: 253
  • IMG_3129.jpg
    IMG_3129.jpg
    288.9 KB · Views: 266
  • IMG_3128.jpg
    IMG_3128.jpg
    264.2 KB · Views: 259
Some pics of the grips fitted....they were for 1" bars,and mine are 7/8 so a bit of plastic pipe and some contact glue later....hey presto!!!!:wink2:
 

Attachments

  • IMG_3149.jpg
    IMG_3149.jpg
    172.9 KB · Views: 254
  • IMG_3150.jpg
    IMG_3150.jpg
    165.8 KB · Views: 286
  • IMG_3151.jpg
    IMG_3151.jpg
    138.6 KB · Views: 259
  • IMG_3162.jpg
    IMG_3162.jpg
    61.9 KB · Views: 250
Back
Top