Restarted Project

Drewpy is the man for part numbers!

No harsh chemicals on the diaphragms; soap and water sounds good to me. Just be gentle, but don't be scared; they aren't made of tissue paper :) As long as you have no holes in the rubber they are probably fine. I have heard of people successfully using different kinds of glues to patch a diaphragm. Something like Shoe Goo might work, but I can't see the split you mentioned.

The tang in the center is for float height. If you have a float needle pivot tang (whatever you call it) it would usually be off to the side. I actually don't see it in your photo unless it is on the other side. The float needle pivot tang thing would also have something like a 90 degree bend on it, while the float height tang is 15 degrees or less.

Don't worry about angles, those are just ballparks to help you identify what they generally look like.
 
Hi BCware, I think I have the same floats as you.


I have been struggling to find float bowl gaskets for the BS32 - mikesxs has one that looks right but hard to confirm and csmnl does not have a list for the xs250. I might just have to wing it with mikesxs but delivery time to Australia might make that a long process. Can anyone help?

float bowl gasket part # is 1J7-14984-00 :D

email this guy
http://www.tamortrading.com.au/
 
Thanks Drewpy - you ARE the man. Just letting you know that D&K got back to me with a price on a complete XS400 engine - 200squid which is like $300 Aussie. A bit out of my price range so I might have to get creative about increasing capacity.

No progress on the bike today but I did pick up a little arc welder that I am itching to use as I haven't welded anything in 20 years. I know people bag-out arc welders but my options are severely limited on my budget, plus I loath paying other people to do things that I can do.
 
Quick update. I drained the oil & it had a lot of fuel in it - looks like the fuel had been running both out the air filter and down the cylinders. When I disconnected the fuel line from the carb fuel was pissing out of the hose still connected to the petcock. Does that sound like a petcock problem (it is the vacuum type).?
I took the engine out tonight with the help of a buddy. I had to remove the oil filter so that I could remove the lower front engine mounts bolts - is that normal or did the PO put then on bum-backwards?
Thanks for the carb info BC - I am sure i will have more noob questions as I go along.
Can wait to get out the angle grinder & start trimming tabs etc. Hopefully get to welding & painting the frame on the weekend. My wife & I just had our first kid so finding time & money for the XS is pretty hard but I am determined to get it back on the road by christmas.

Cheers.

Pork Chop
 
Hi Drewpy, I guess the oil filter kind of locks the bolts in place so if the nuts every fall off (ouch!) the bolts will still hold the engine in place.

I want to replace the vacuum petcock with a simple on/off/res fuel tap. Is there a type I should specifically get (a certain flow rate or something) as ebay has ones for about $20 and $40 and they look the same to me.

Thanks,

Pork Chop
 
A buddy of mine came over a couple of nights ago we removed the engine from the frame. Unfortunately the beer made me lazy and I just chucked all the nuts and bolts in a bucket so I spent a bit of time today working out what was what and bagging and labelling.
The frame is now completely stripped and I started degreasing and cleaning - took bloody ages and is still a bit grimy but it will do for now. It feels good to have the bare frame but looking at all the parts in tubs is a bit daunting.

I will start grinding tomorrow and maybe do some practice welding.
 
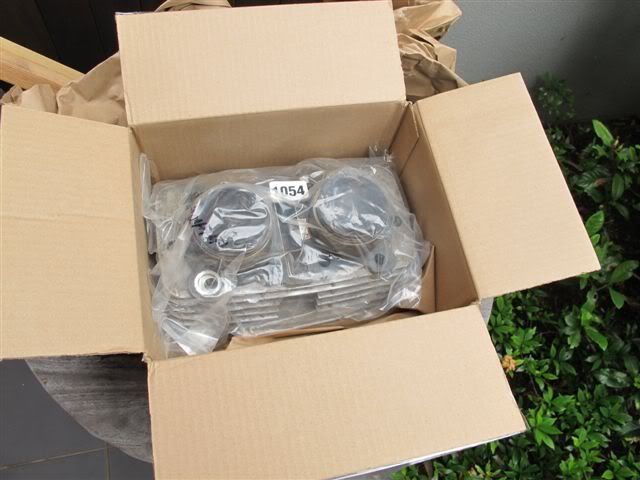
I got a parcel today all the way from sunny Florida.

IMG_3500.jpg


IMG_3501.jpg


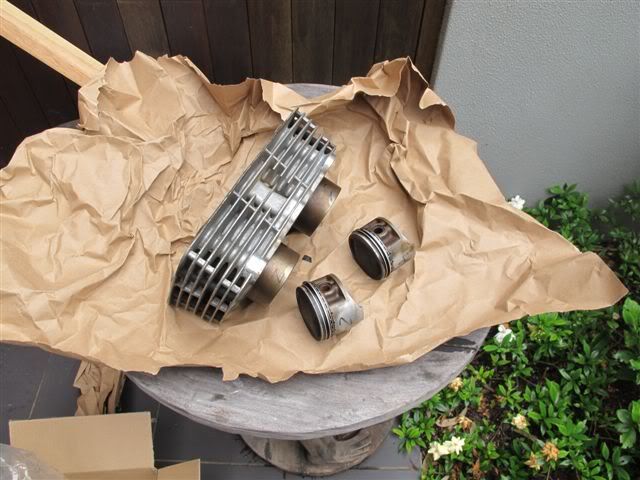
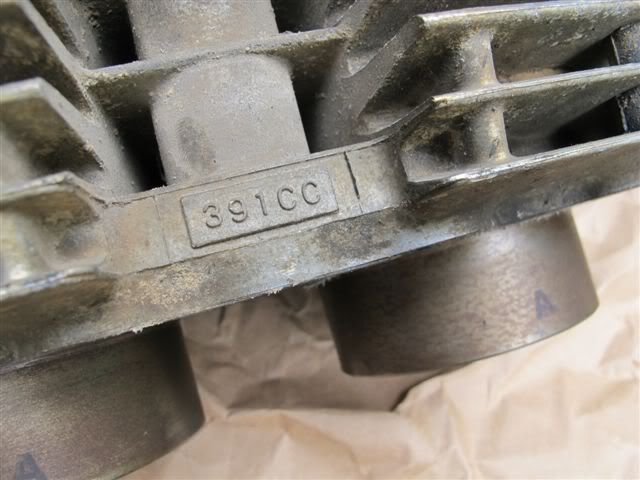
This should help give the old bike a few more ponies. :D

IMG_3503.jpg
 
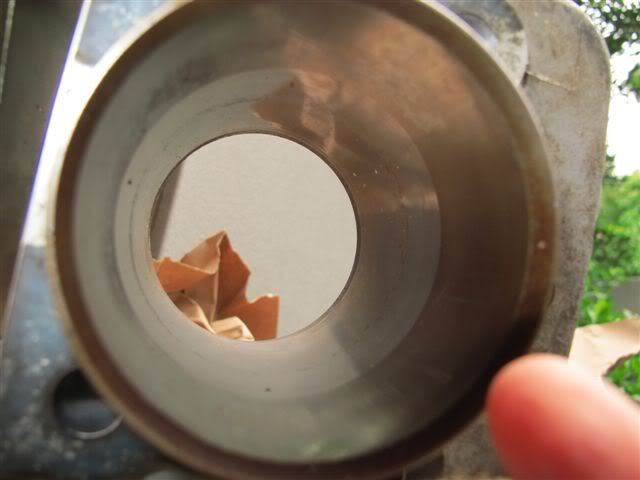
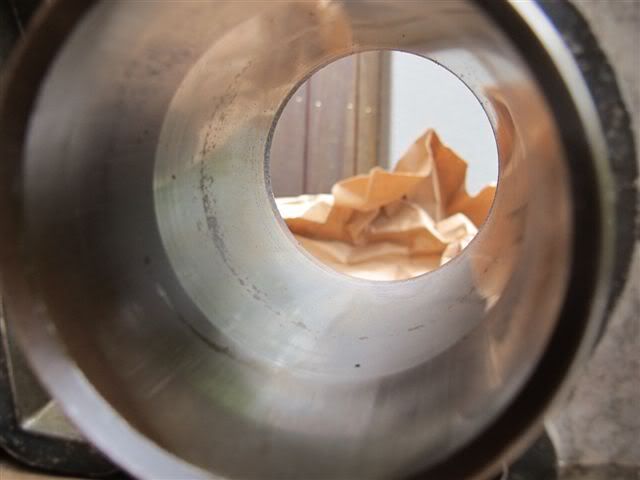
These bores look ok to me but then again I have never look inside motorcycle jugs before. What do you guys think?

IMG_3511.jpg


IMG_3507.jpg


The pistons seem to fit nice and snug too.
 
I would just polish them a bit since they are in your hands. Wet sand 2000 grit, polish compound, rinse and dry. Don't leave any residue.
 
I would just polish them a bit since they are in your hands. Wet sand 2000 grit, polish compound, rinse and dry. Don't leave any residue.

I think daddio meant the outside not the bores....:wtf:

those bores need honing easy to do just hire the noning tool and use an ordinary drill.

check rings and clearances properly now, before you put together.


Don't forget you need to open up the head squish area and get bigger valves machined in there.
 
Is that all that's different between 250 and 400?

Maybe just get a block of wood and cut the correct diameter circle out, wrap it in emry paper and put a bolt through, put it in your drill...
 
You can buy a cheap hone for not too much money,or an auto parts store will usually rent you one by the day for cheap.I've got one that I've had for 35 years,and it's still like new.I got it for about $10.00 and used it a lot in those days re-ringing Volkswagen and Fiat motors,as not many shops wanted to mess with them at the time.You just need to lube the bore with motor oil[30 wt],and at about 550 rpms and move it up and down fairly so that the marks of the hone form a 60 degree angle upon intersecting.Don't use excessive force on the stones,just enough to contact and have a little bite,but not to remove any material. lha
 
Hi Ryan, I believe there is more difference between the 250 and the 400 besides just the jugs. I suspect that the head design, valves, cam, carbs and crank are all different.

Drewpy, cash is really tight at the moment and I think that doing the cylinder head properly will postpone the build for a quite a while and I want my bike to be back on the road by new years eve. I thought that installing the xs400 jugs would be a simple and straight forward way of increasing the engine capacity.I am pretty sure that the 32mm carbs wont perform as well as the 34mm carbs and that the stock xs250 head wont get the most performance out of the 400cc jugs but I am hoping to get away with just rejetting the carbs and installing free flowing air filters and exhaust. And hopefully producing more power than the existing 250cc. It is a bit of an experiment but do you guys think I am about to make a big mistake trying this?

Cheers.
 
I think its a mistake, there is more meat on the head and a danger the pistons will hit the protruding edge. The compression will be a lot higher too.

can't see it costing that much to index it to the barrels. If someone has their head off, maybe they could get the cc's the head holds so you know how much to get milled out!
 
The bottle brush type is good,and the regular stone type as well. The bottle brush type is easier to use for the uninitiated,but care must be used to only mark the surface with "crosshatch" marks,which is really grooving the cylinder to provide "storage"for oil in the cylinder for the rings to ride on.If left smooth,there will be rapid wear as there will be wiping action from the rings riding against the cylinder. Make sure to wash the cylinder with soapy water,rinse with water,then dry with lightly oiled cloth until clean with no grit from honing. lha
 
Drewpy - what you say makes sense. As much as I want to just bung 'em on and hope for the best, I don't want to go to all this effort just to watch the motor drop it's guts.

So if anyone has the heads off their engine, I would really appreciate if you could measure the cc's of the head/valve area and let me know.

Thanks for the instructions Ihaolpa, I will try and pick up a hone this week.
 
Back
Top