Drewcifer
1976 XS 360 Maniac
So I wrote about this last week and since 3 of us have had the same issues, I figured it's time for pictures.
I lost my voltage regulator. It shorted out and then the bike lost tons of volts with the key on. I could trickle charge it over night but it bothered me how much I was losing power just keying the bike on. To me that spelled a problem.
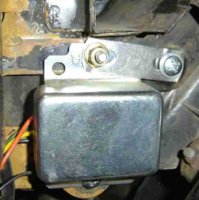
The first stop. Regulator:
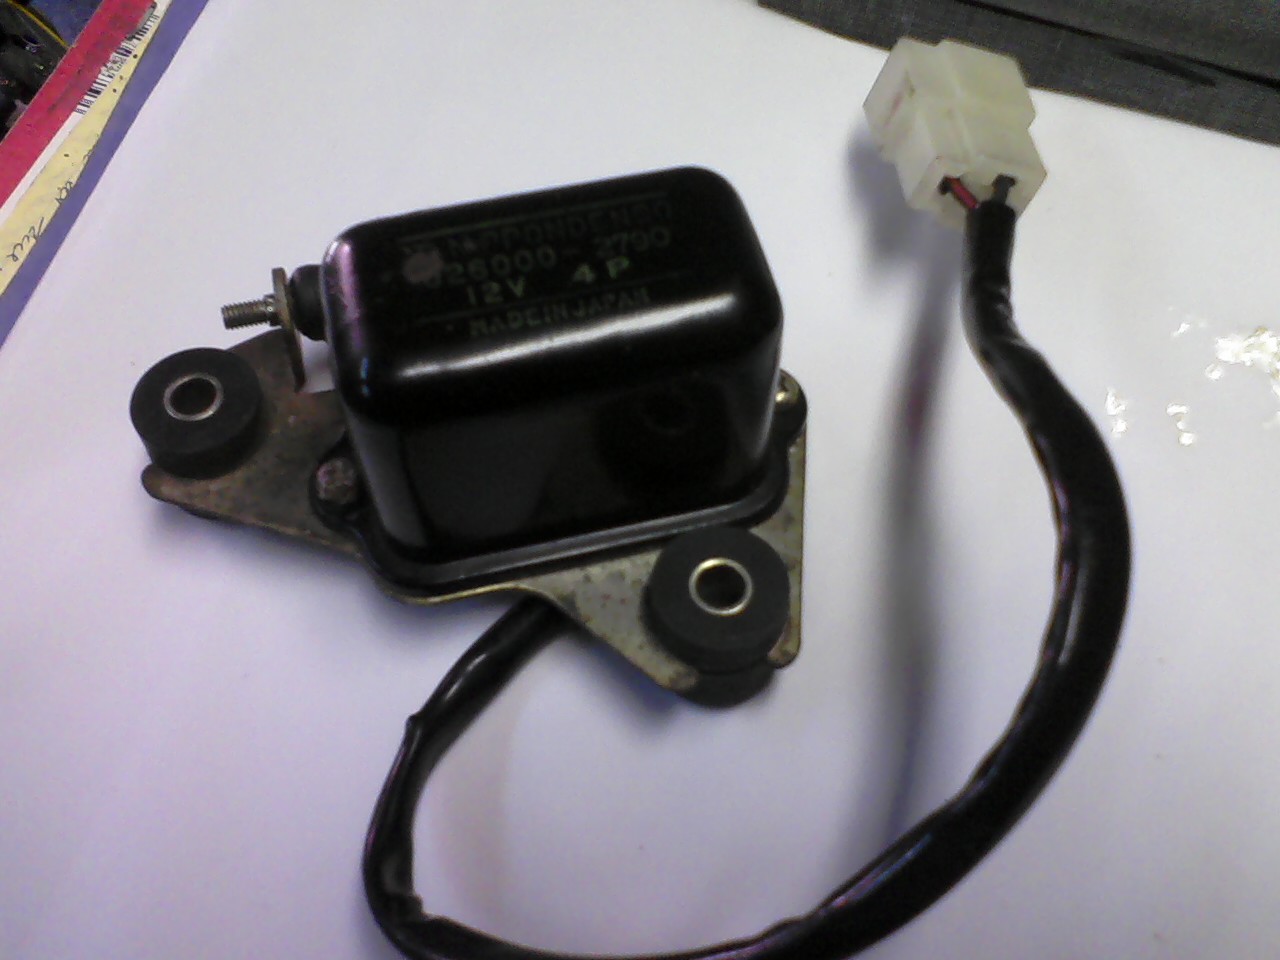
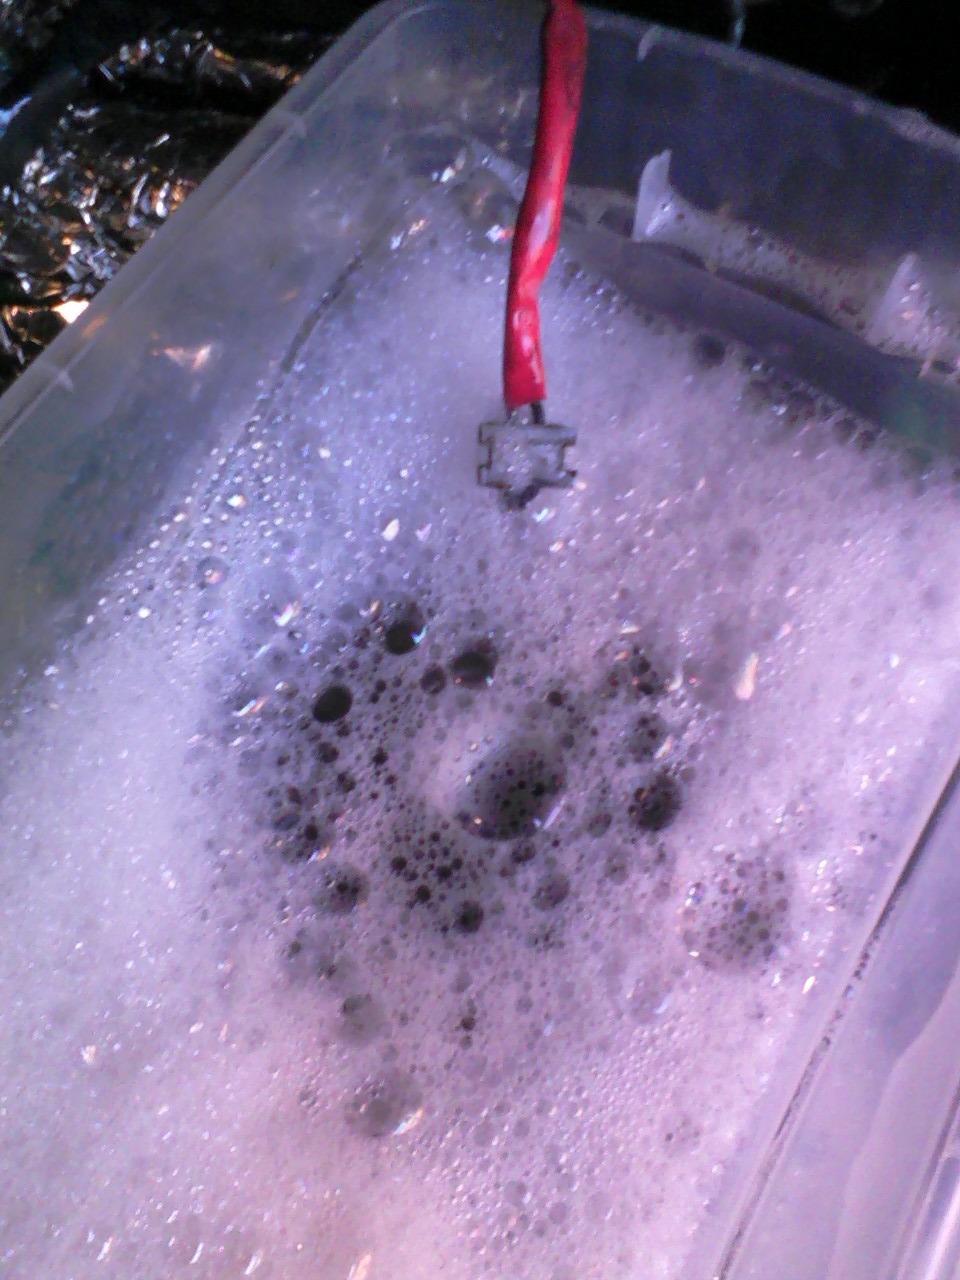
After I tested it over and over I realized it was just dead. it tested 112 ohms when it should have tested at 10.5.
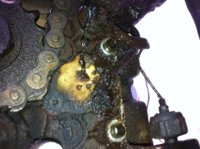
Mailed away for a new one. ebay. Got it. Didn't solve the problem. Next stop, stator. Used the pizza box trick to keep track of the bolts as they came out of the bike. They're all different sizes, so keep them organized.
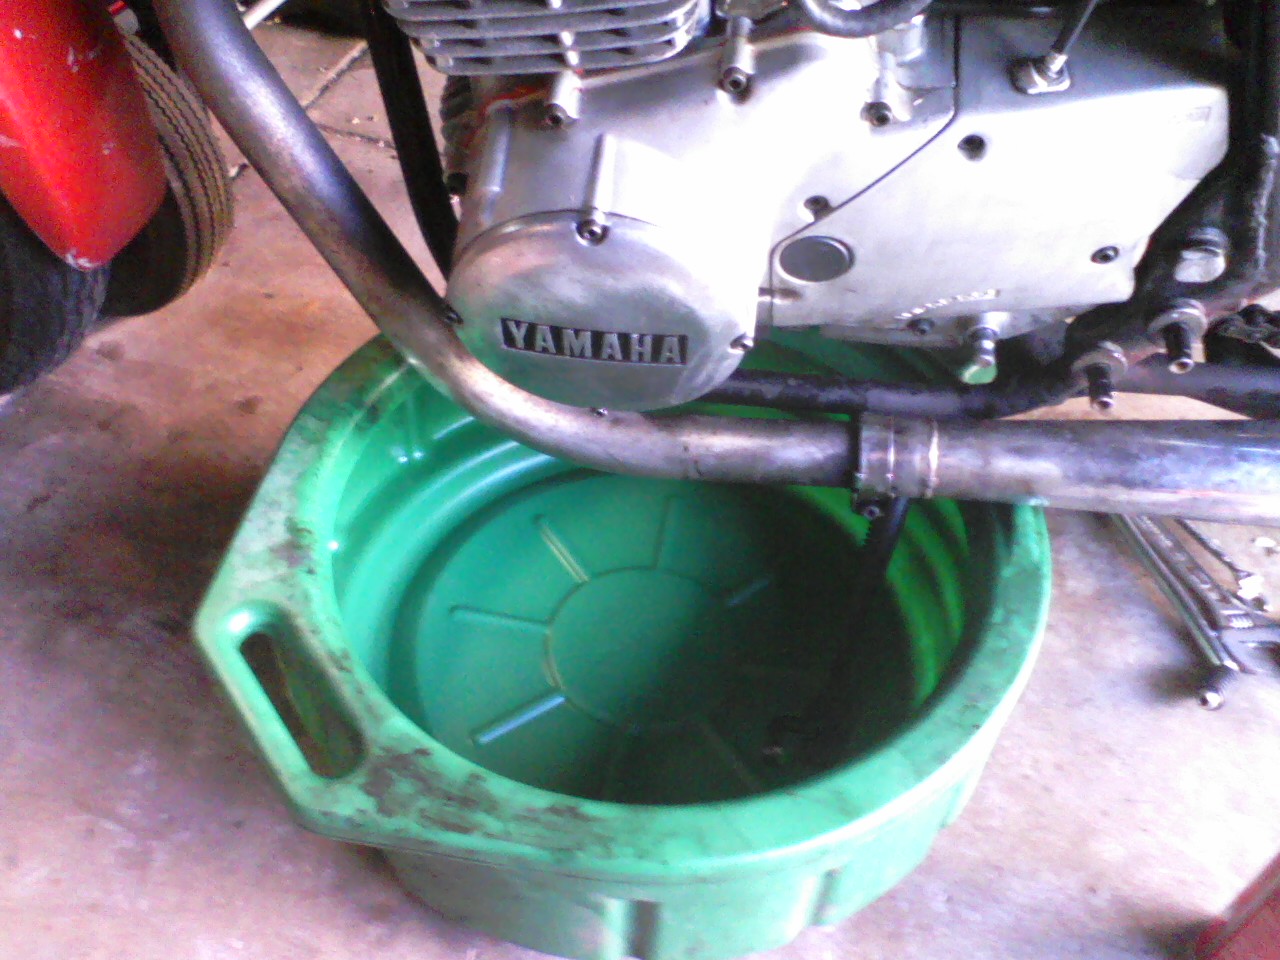
Park bike over an oilpan. I put my Kickstand inside.
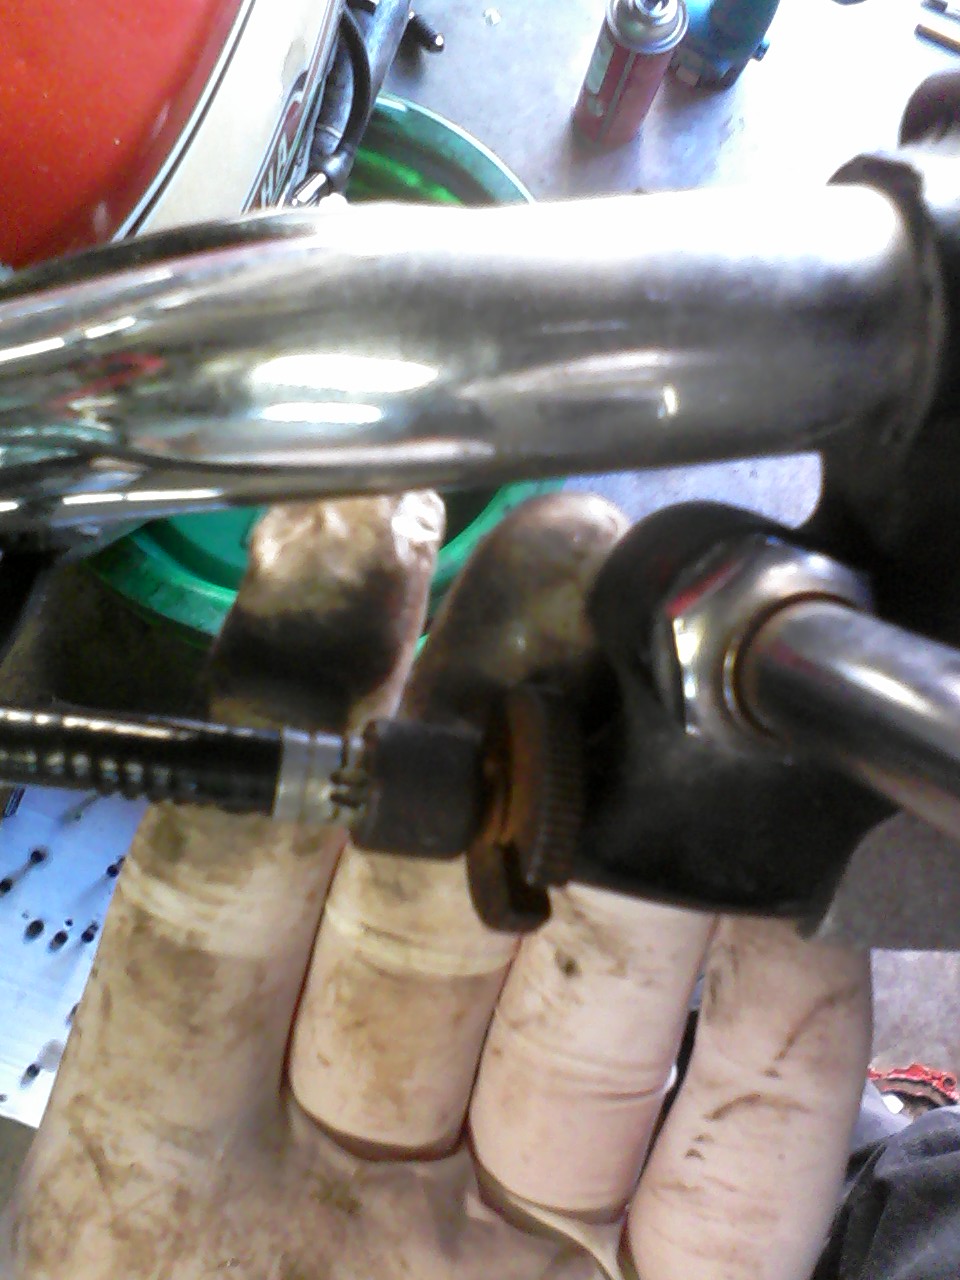
Loosen the clutch cable adjustor nut at the handle bar.
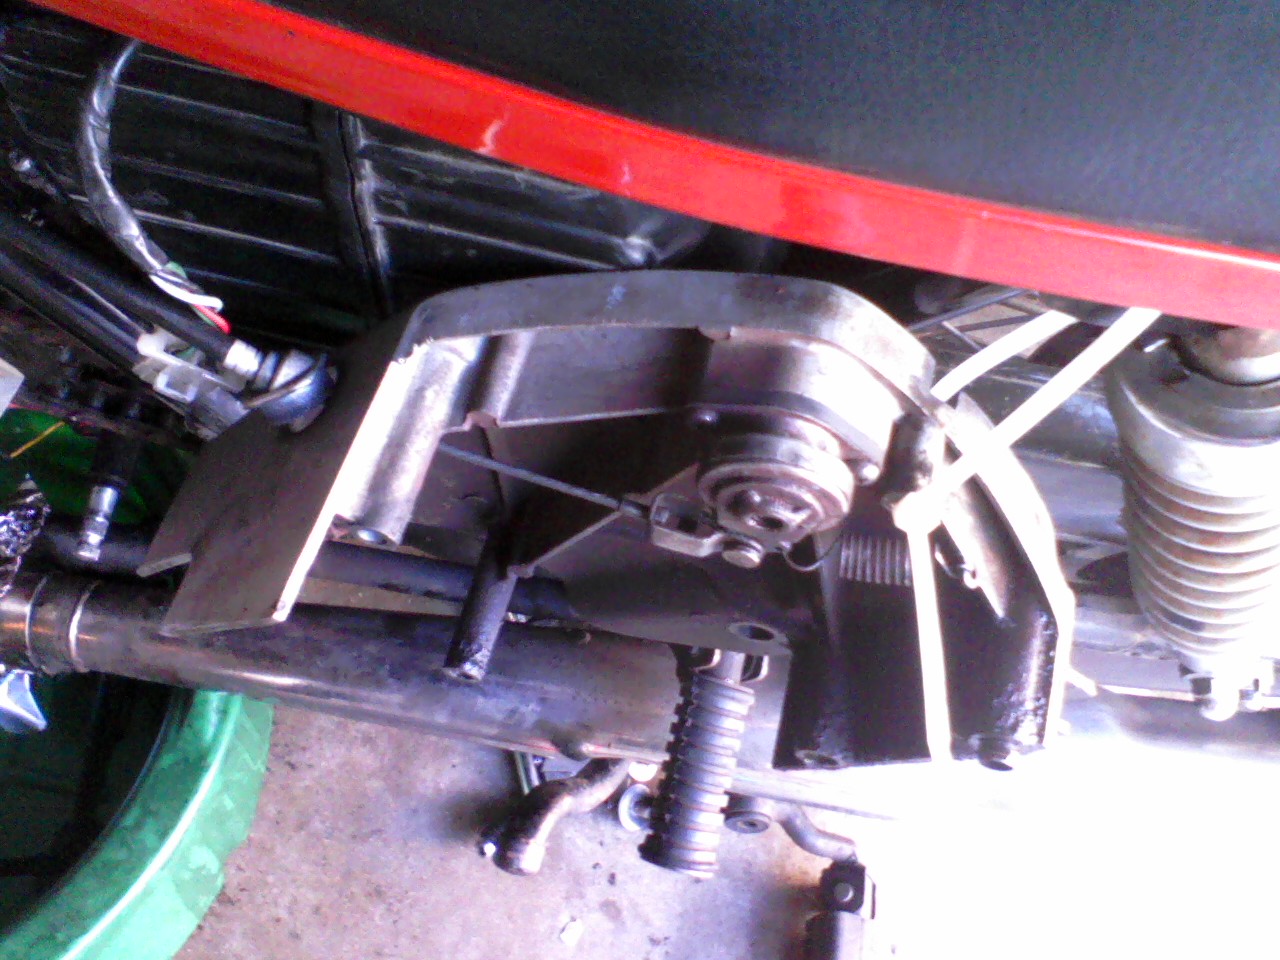
Ziptie the clutch cover out of the way
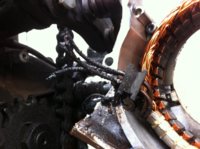
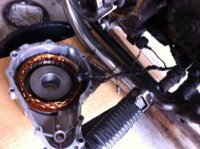
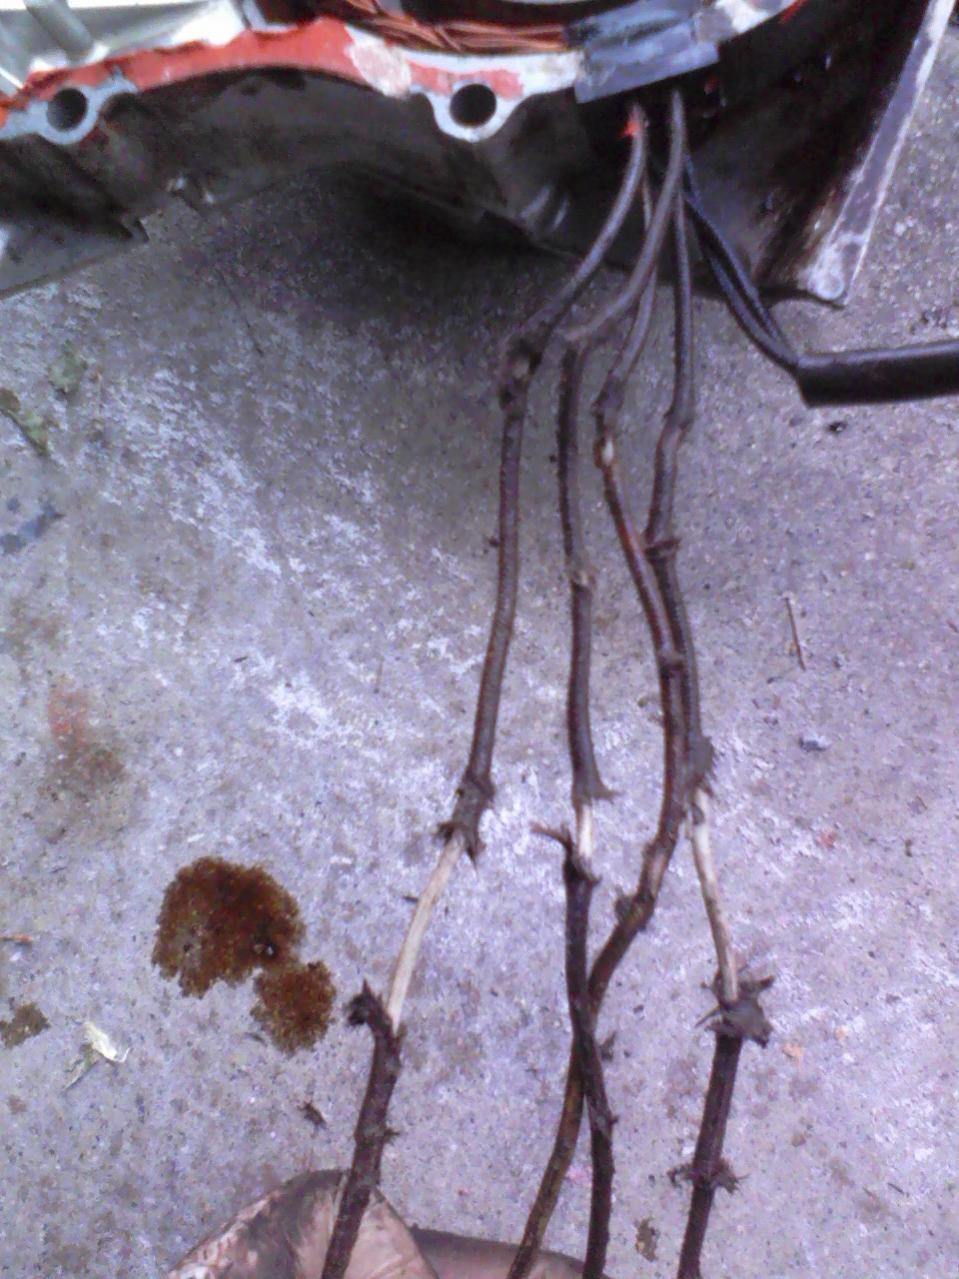
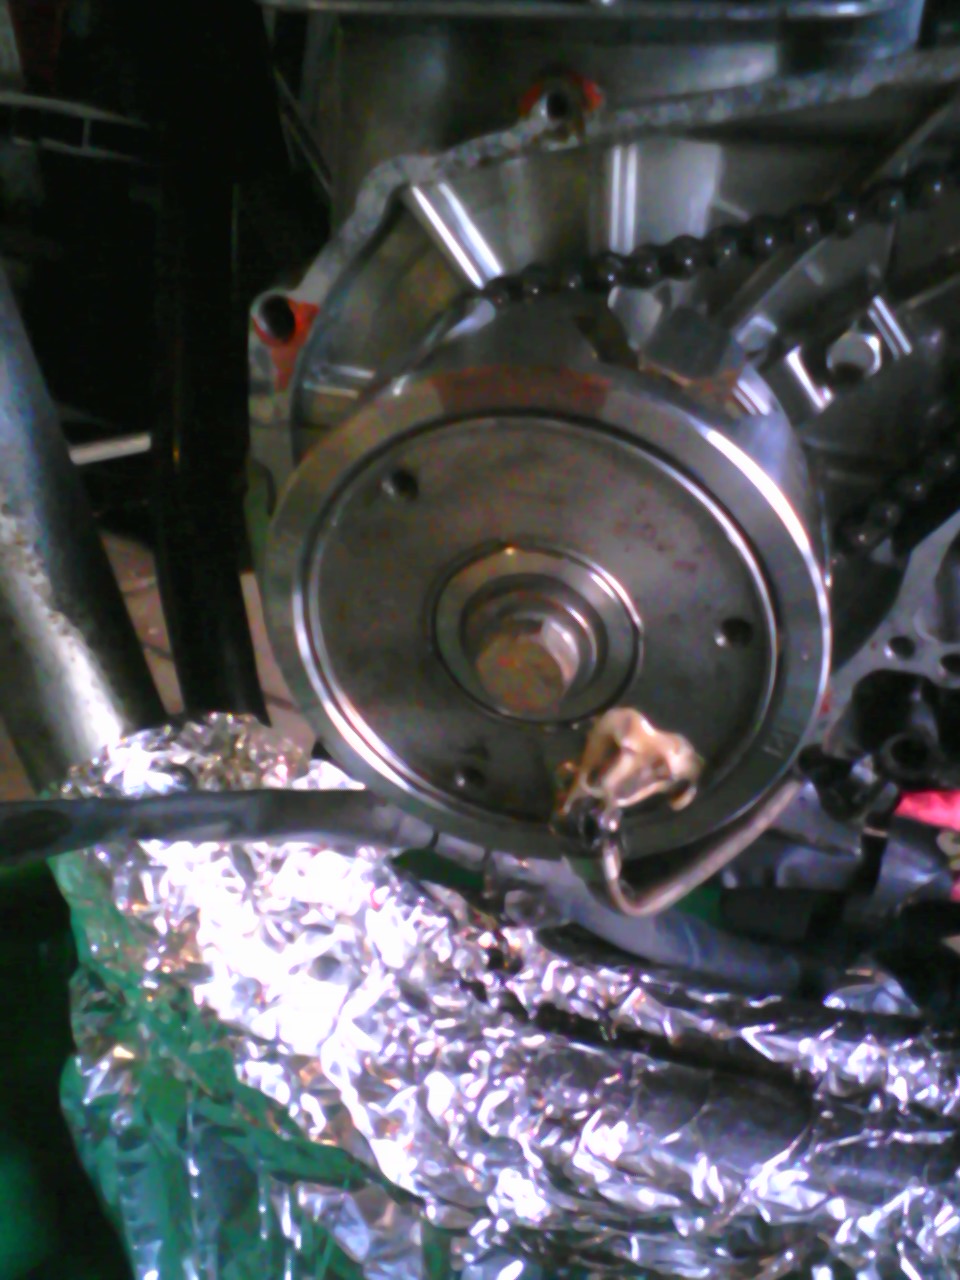
I removed all the bolts and finally got inside the stator. You can see my wiring is worn through.
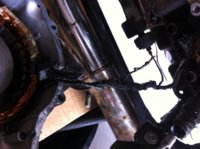
Once I slide the fiber shell back, I saw a break in one of the wires. With all the white wires separated and not touching, they tested correctly for ohms. So I figured "i've gone this far. might as well replace them."
I got 8 feet of wire from the boat store and started cleaning up the wires and soldering the new wires to the old wires.
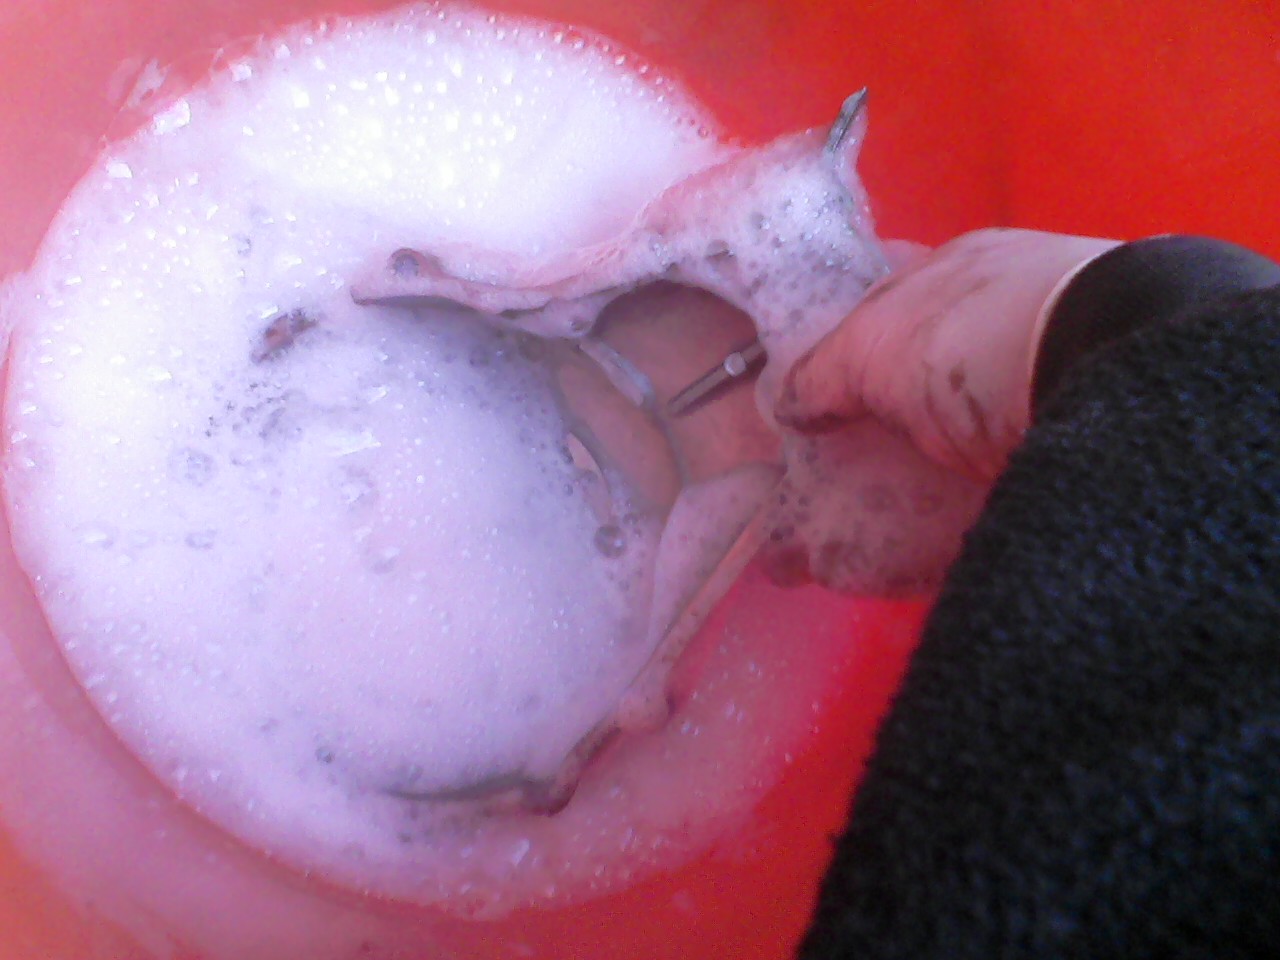
I degreased the coil and stator in hotwater and dawn dishsoap. This is extreme but I needed to be sure there were no metal shavings or contaminants causing shorts. I knew the windings were insulated in epoxy so I used electrical contact cleaner to get the water off and a compressed air supply on a hose. It's safe enough for DC motors, safe enough for me.
It took a while to make sure no soapy film remained, but it was very clean after. So was the clean stator cover. I was sure then there would be no dirty oil causing shorts.
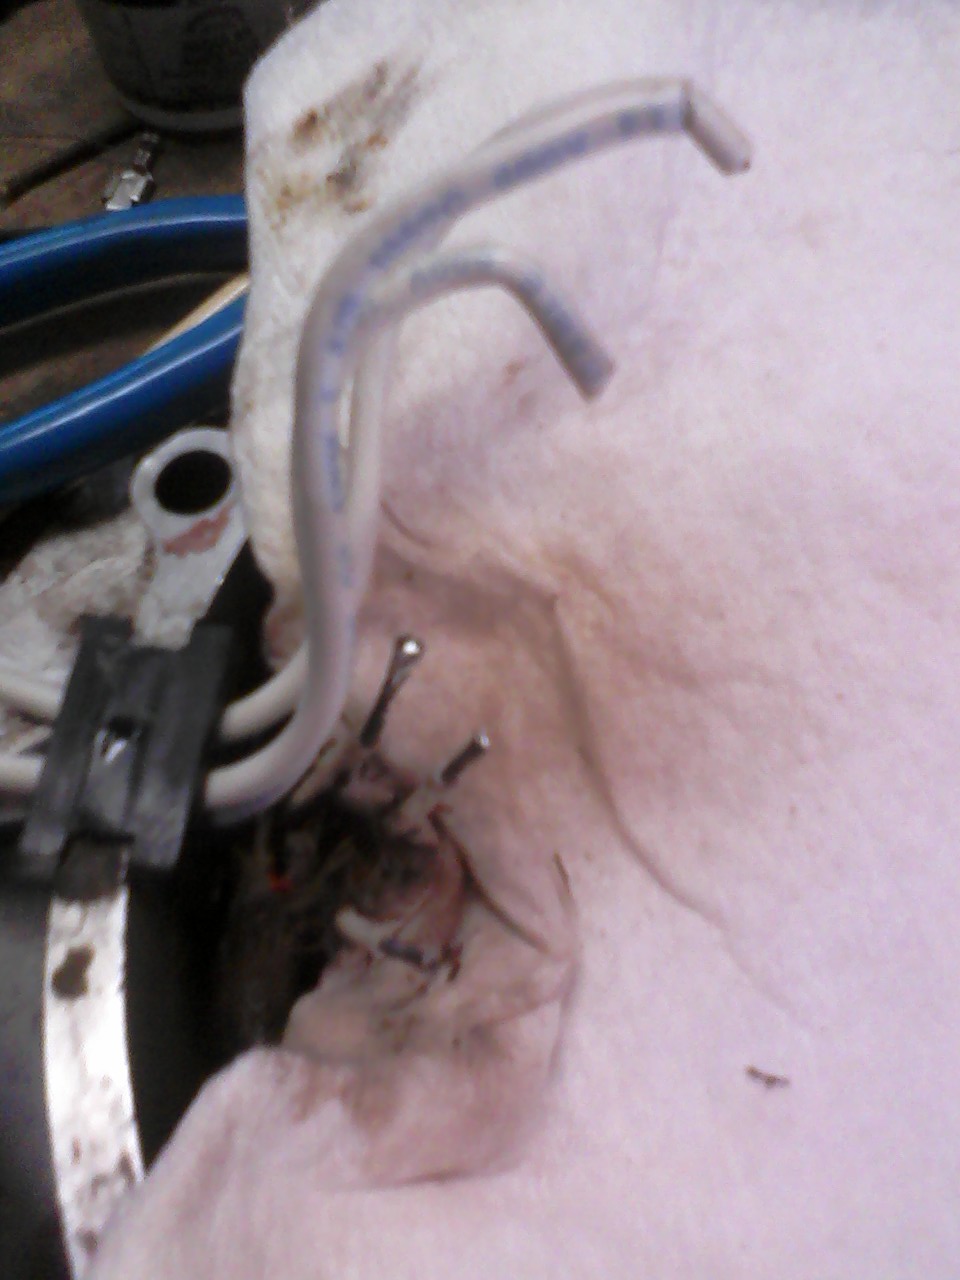
Pushed them through the rubber grommet,
Slid heat shrink over them, tinned them, soldered them. I tinned too much for too long, and they became stiff and linear instead of flexible. So I had to do them twice. My tip is to solder them at a 45 degree angle and nip off the overlap. They have to bend to get up and through the grommet. 18 gauge is fine. I used 16 and it was too thick in my opinion.
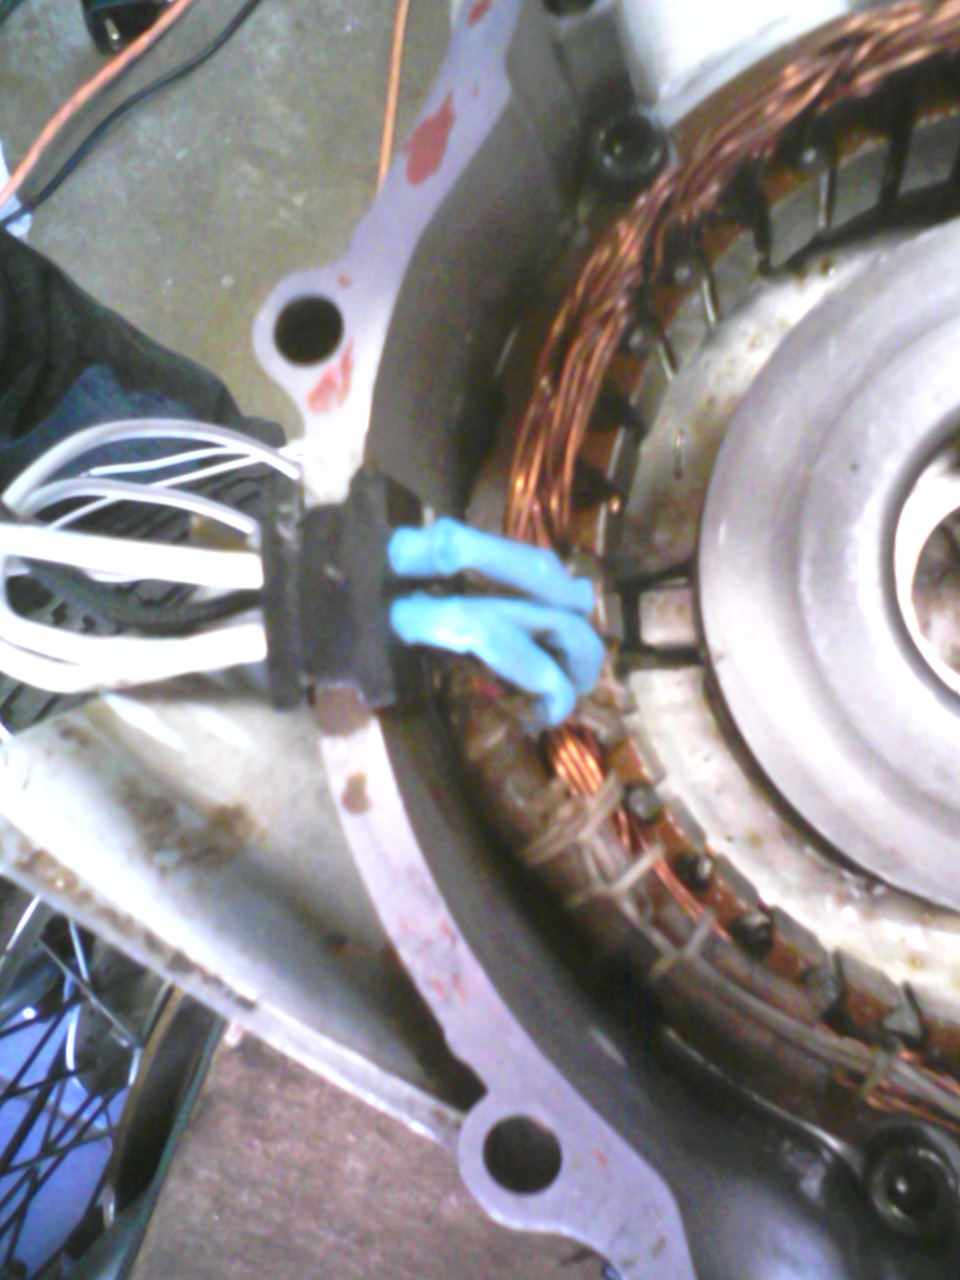
Checking coil and rotor fitment to be sure there are no rubbing parts/shorts. I just slid it over the rotor. It had space all around.
When I was done I made sure they were all testing correctly on the ohmeter and put the replacement gasket on that I made. Sealed it up with red gasket seal.
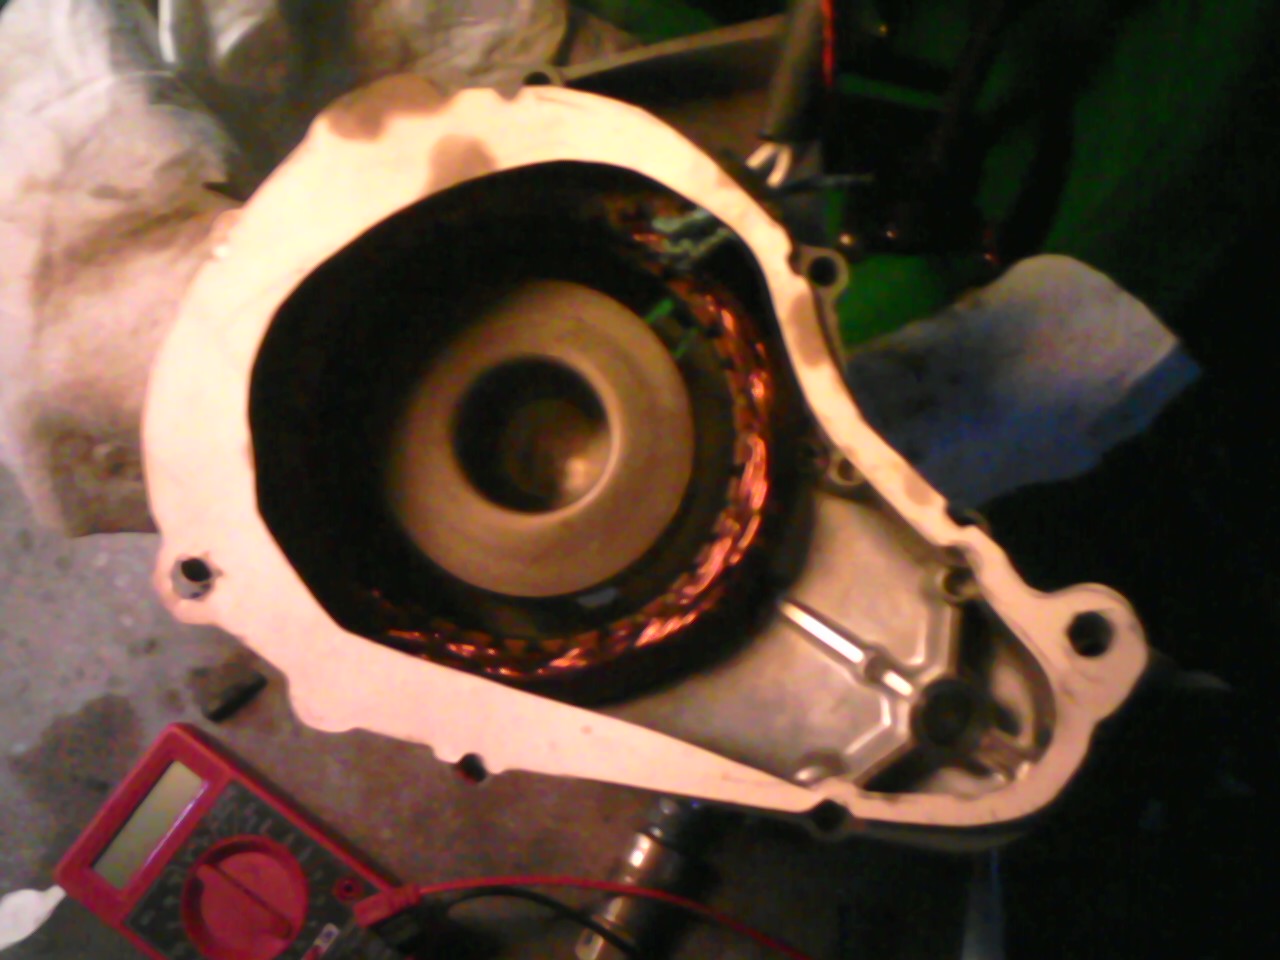
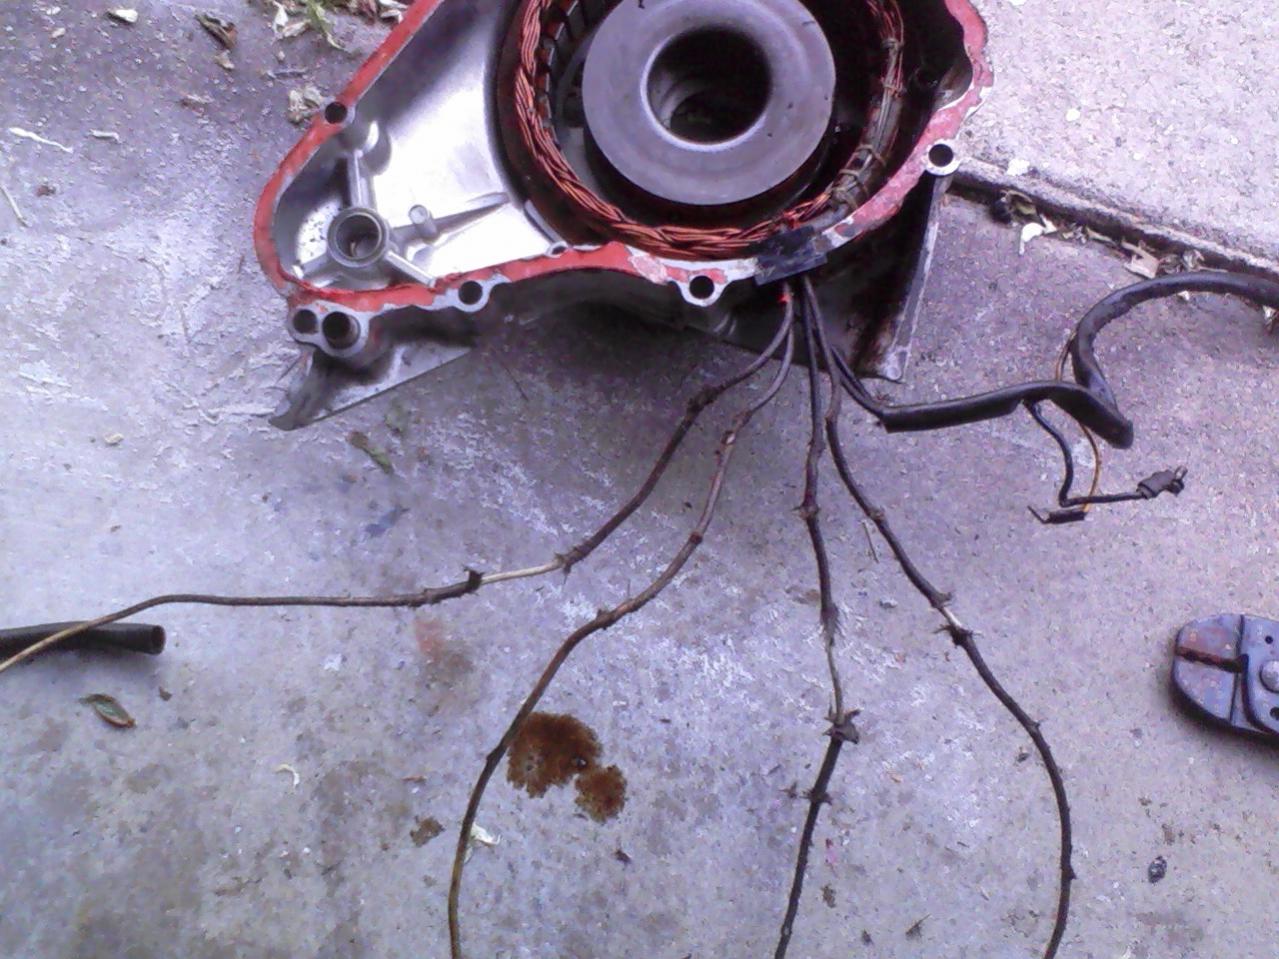
Stator with clean wires and clean wire covering.
I put the stator back on after I verified that it all lined up correctly, and tested right with the ohm meter.
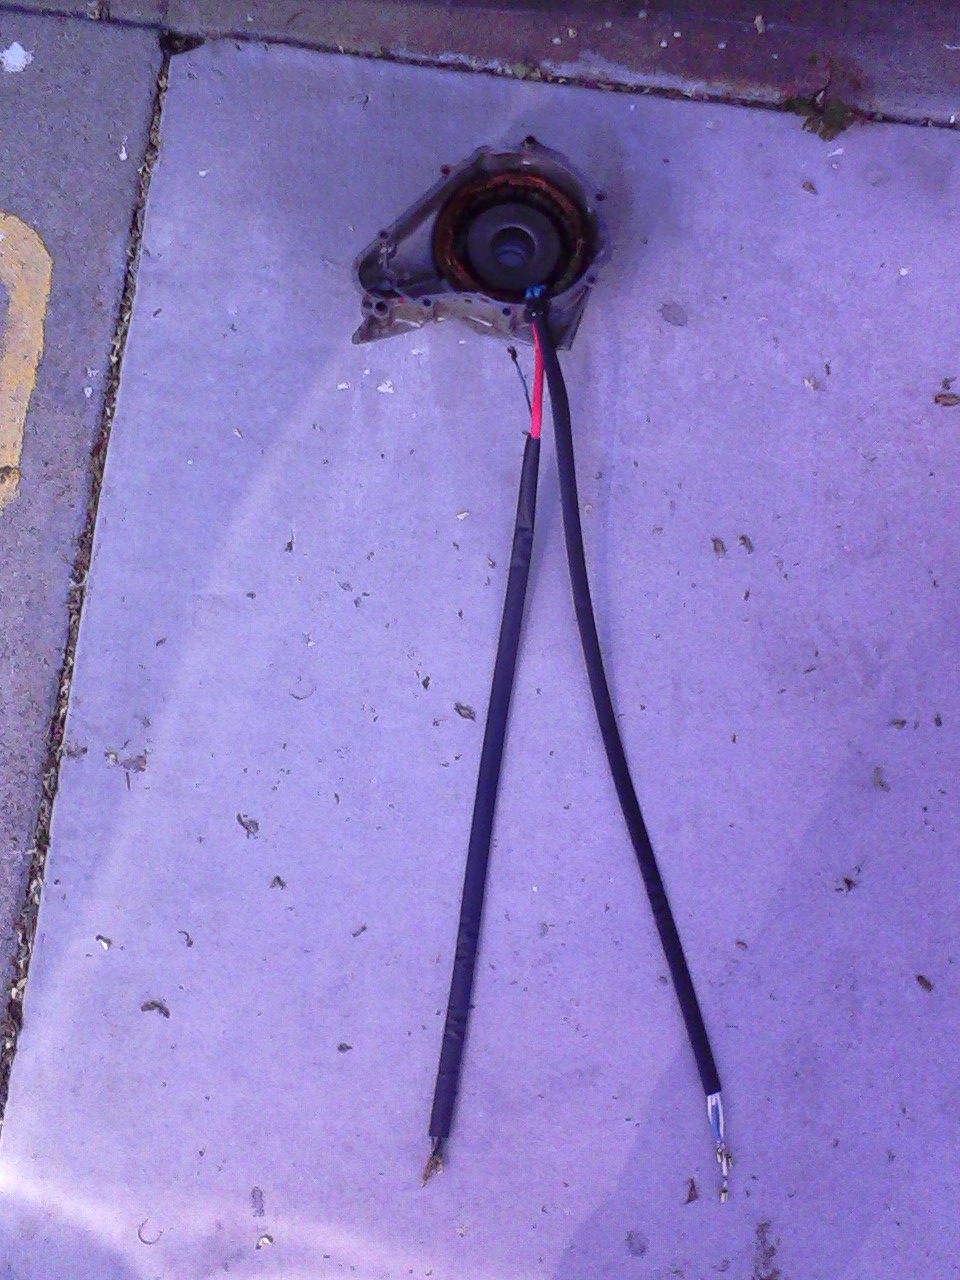
You can see the new neat heatshrink tubes I used to route the bundles together back to the connectors. I had to find it at an obscure old electronics place that is probably barely surviving, but they had heatshrink in 4 foot lengths, unlike radio shack.
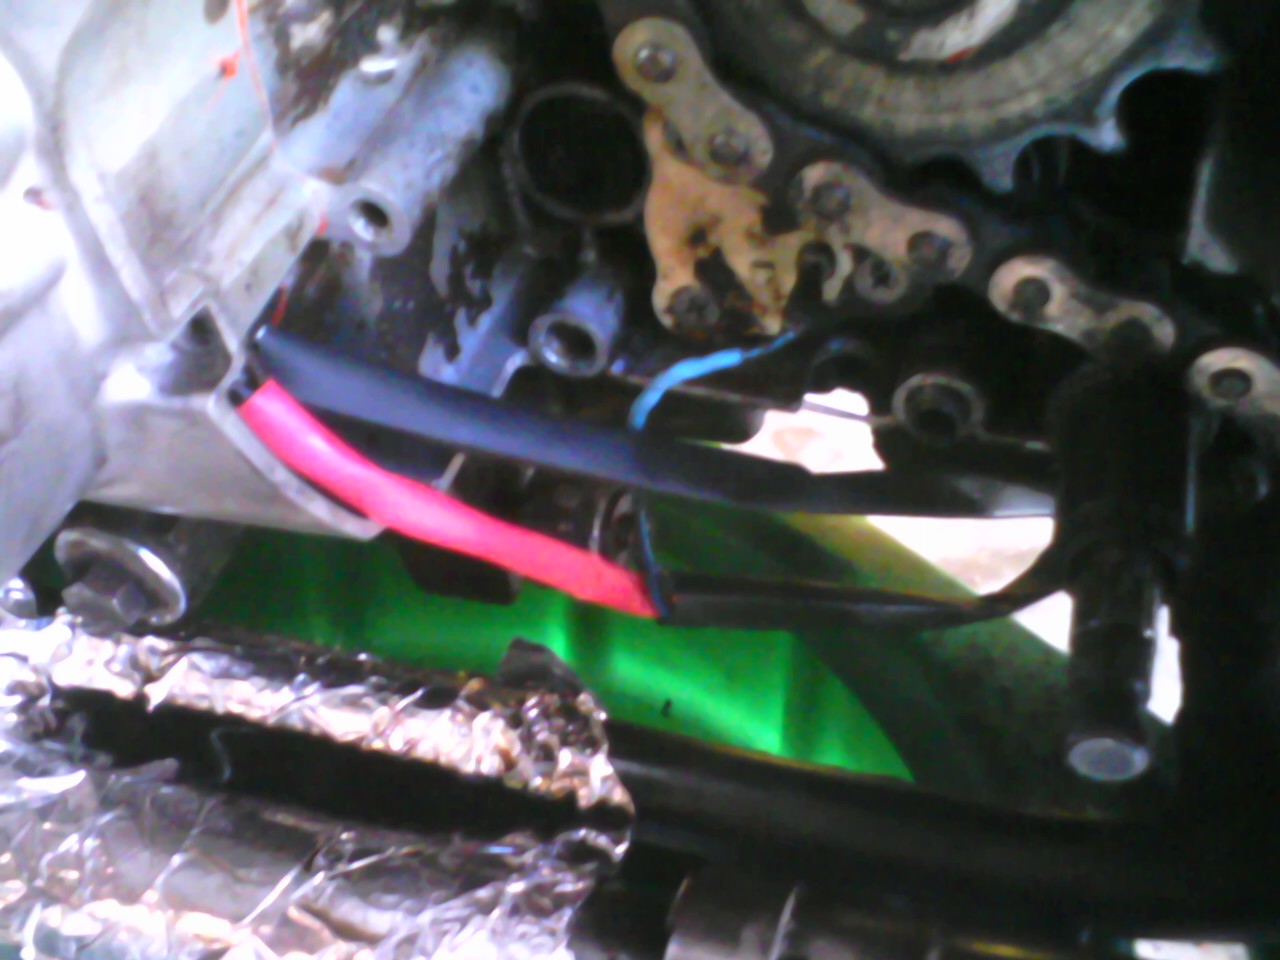
The foil keeps the oil off the pipes and prevents smoking when you re-assemble/restart the bike.
Lastly I had to wire in my replacement voltage regulator when I found that the alternator was rewired and still not producing voltage. So I powered up a wire with + voltage and touched it to the end of the green wire I'd just re routed. The voltage rose, meaning I had a dead regulator.
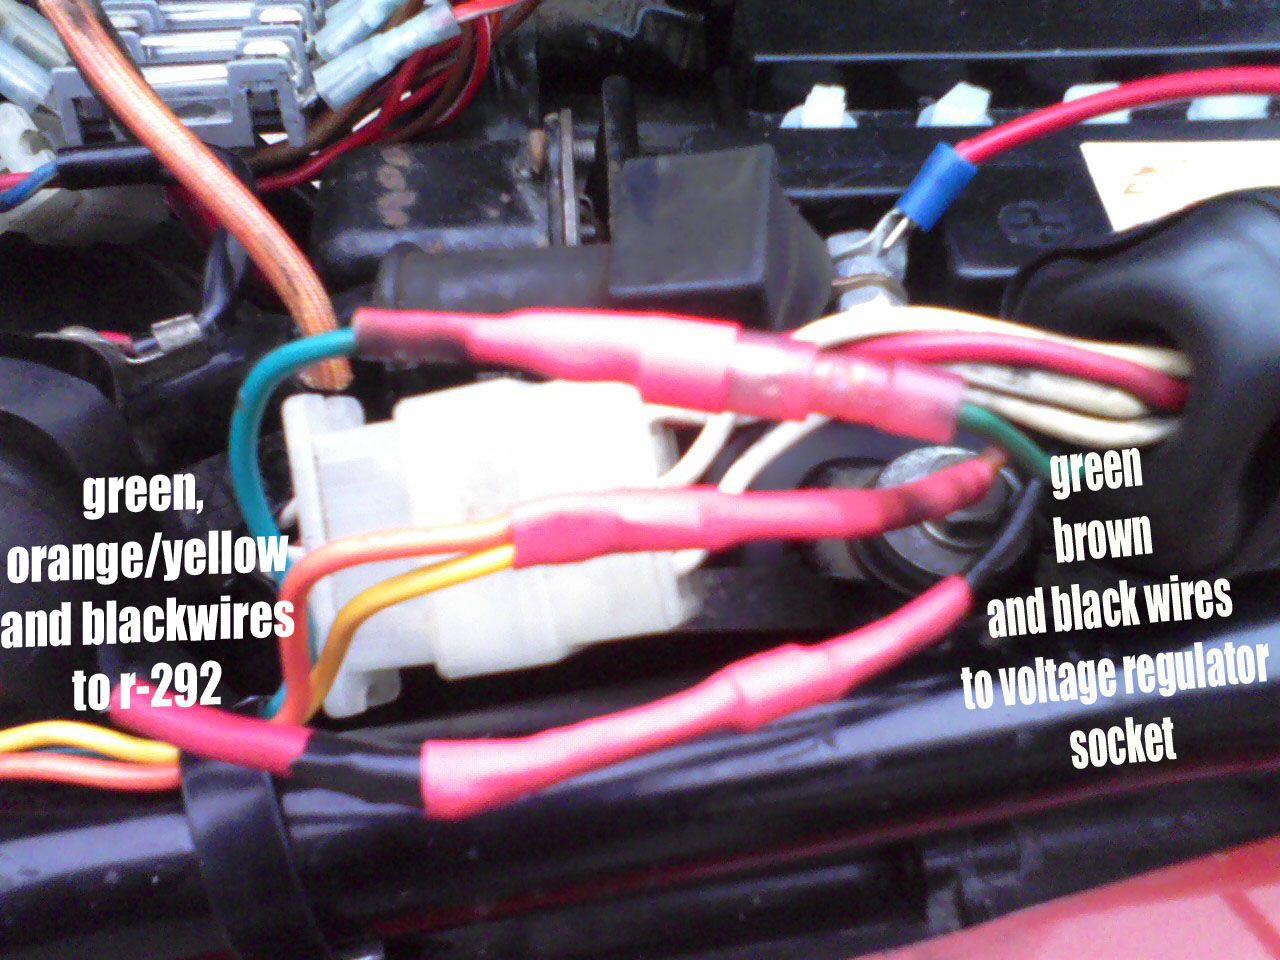
I bought an r-292 at Oreilly and wired it into the bike's loom, using solder.
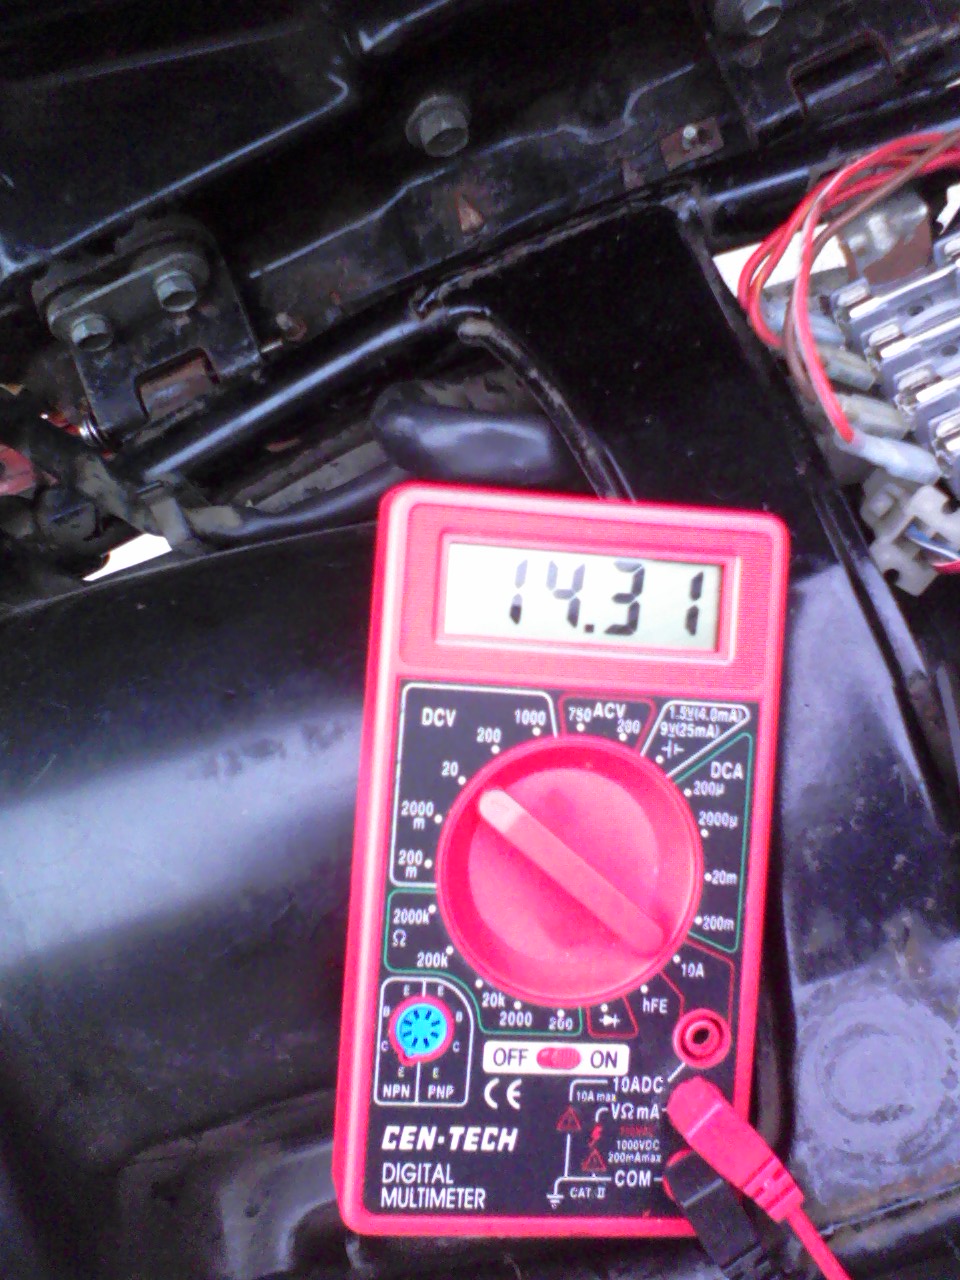
Happily with it all soldered together, I got the right volts at idle, and at rev.
It took a while to gather the knowledge, but the work itself didn't take long. I actually pulled the stator about 4 times before I rewired it looking for issues, So by the last time I could get into the stator and back out in less than an hour. The messiest part was the oil that would come out of the timing cover/stator case. It does need a layer of gasketing there, or heavy paper. I used file folder sealed in place with red gasket sealant on both sides, and it's been fine.
Best of luck to those others with voltage issues. You'll be sorted soon enough. It just takes patience. When you see the magic volts you'll feel pretty proud.
Safe riding

Drewcifer
I lost my voltage regulator. It shorted out and then the bike lost tons of volts with the key on. I could trickle charge it over night but it bothered me how much I was losing power just keying the bike on. To me that spelled a problem.
The first stop. Regulator:
After I tested it over and over I realized it was just dead. it tested 112 ohms when it should have tested at 10.5.
Mailed away for a new one. ebay. Got it. Didn't solve the problem. Next stop, stator. Used the pizza box trick to keep track of the bolts as they came out of the bike. They're all different sizes, so keep them organized.
Park bike over an oilpan. I put my Kickstand inside.
Loosen the clutch cable adjustor nut at the handle bar.
Ziptie the clutch cover out of the way
I removed all the bolts and finally got inside the stator. You can see my wiring is worn through.
Once I slide the fiber shell back, I saw a break in one of the wires. With all the white wires separated and not touching, they tested correctly for ohms. So I figured "i've gone this far. might as well replace them."
I got 8 feet of wire from the boat store and started cleaning up the wires and soldering the new wires to the old wires.
I degreased the coil and stator in hotwater and dawn dishsoap. This is extreme but I needed to be sure there were no metal shavings or contaminants causing shorts. I knew the windings were insulated in epoxy so I used electrical contact cleaner to get the water off and a compressed air supply on a hose. It's safe enough for DC motors, safe enough for me.
It took a while to make sure no soapy film remained, but it was very clean after. So was the clean stator cover. I was sure then there would be no dirty oil causing shorts.
Pushed them through the rubber grommet,
Slid heat shrink over them, tinned them, soldered them. I tinned too much for too long, and they became stiff and linear instead of flexible. So I had to do them twice. My tip is to solder them at a 45 degree angle and nip off the overlap. They have to bend to get up and through the grommet. 18 gauge is fine. I used 16 and it was too thick in my opinion.
Checking coil and rotor fitment to be sure there are no rubbing parts/shorts. I just slid it over the rotor. It had space all around.
When I was done I made sure they were all testing correctly on the ohmeter and put the replacement gasket on that I made. Sealed it up with red gasket seal.
Stator with clean wires and clean wire covering.
I put the stator back on after I verified that it all lined up correctly, and tested right with the ohm meter.
You can see the new neat heatshrink tubes I used to route the bundles together back to the connectors. I had to find it at an obscure old electronics place that is probably barely surviving, but they had heatshrink in 4 foot lengths, unlike radio shack.
The foil keeps the oil off the pipes and prevents smoking when you re-assemble/restart the bike.
Lastly I had to wire in my replacement voltage regulator when I found that the alternator was rewired and still not producing voltage. So I powered up a wire with + voltage and touched it to the end of the green wire I'd just re routed. The voltage rose, meaning I had a dead regulator.
I bought an r-292 at Oreilly and wired it into the bike's loom, using solder.
Happily with it all soldered together, I got the right volts at idle, and at rev.
It took a while to gather the knowledge, but the work itself didn't take long. I actually pulled the stator about 4 times before I rewired it looking for issues, So by the last time I could get into the stator and back out in less than an hour. The messiest part was the oil that would come out of the timing cover/stator case. It does need a layer of gasketing there, or heavy paper. I used file folder sealed in place with red gasket sealant on both sides, and it's been fine.
Best of luck to those others with voltage issues. You'll be sorted soon enough. It just takes patience. When you see the magic volts you'll feel pretty proud.
Safe riding
Drewcifer


 Because at mid to high RPM the bike pulls really hard up to about 70-80, but then I let off, because she needs new tires, and I'm not that brave/stupid...