Riven Motors cafe build

So here is the product of a few hours masking and spraying. Looking really forward to throwing on some clearcoat and seeing everything pop.


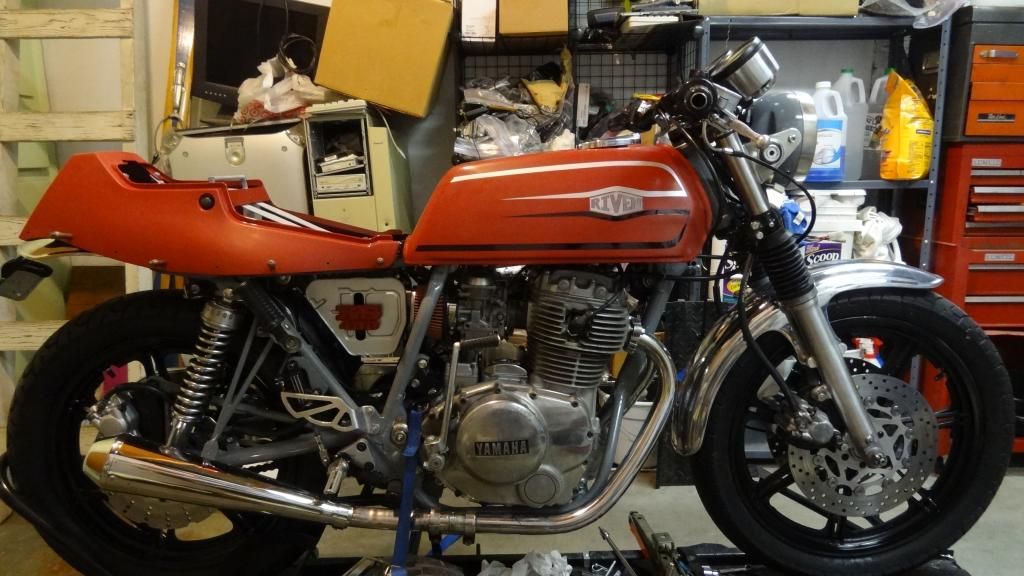
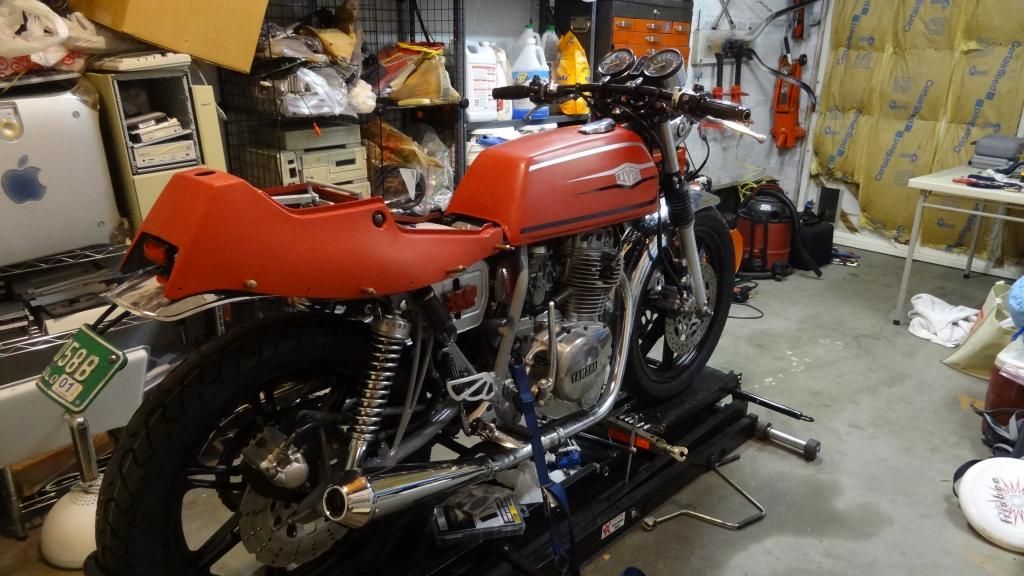
The bike, the color scheme, everything about it is screaming an identity at me. Early on it seemed like its identity was 'Jailbait' as it's so small and delicate and it seemed to be suggesting we go out and break some laws together. Now I'm not so sure. Very old school Japanese manga possibly. Like the old 'Shogun Warriors' toys I had as a kid. Gotta let it percolate some more…

And more photo whoring

 
Thanks Chris! Well I finally jumped on covering the seats after doing another job I dislike -shaping seat foam with a flap wheel on an angle grinder. I had to recast the main seat foam as I dropped the stock seat in an oil catch pan full of used oil. Which quickly propagated throughout the entire seat. So I bought some two-part flexible urethane molding foam from a sculpting supply shop and created a massive misshapen foam lump that had to be made in a seat shape. So out with hack saw blades and hand grinders it was. Electrostatically charged foam dust was everywhere...:cussing: Then I glued on some higher density foam on both seats. It makes a huge difference in comfort as I've done it before. I left the foam quite a bit thicker than the stock seat by an inch to an inch-and-a-half in areas as I didn't want to slide into the tank and give my legs a bit more room. Even though I am only 5'9", this is a small bike! I have no idea how anyone taller can sit comfortably on some of those plank bobber seats. So now the rider is perched more 'on' the bike than 'in' it. I had some cool black vinyl from my brother's LandRover Defender console cover. It has this denim texture to it and it's definitely weatherproof but I had to carefully cut the stitching on it and then sew the panels together by hand. I used a shoelace pattern for the stitching and am pretty happy with the result.


I also found some mini led turn signals that fit perfectly into the rubber grommets of the headlight ears. Cheap and bright! Now to get a flasher unit that works with leds! Also spent a day sorting out the wiring harness and moving and soldering connectors. Motorcycle wiring is so much more enjoyable than car wiring.

 
Last edited:
great job on the seat...Are these turn signals visible from the front view?
And what is bolted under the headlamp on the lower yoke?
 
Thanks Lucky, here are the answers to your queries and more!

Yeah pretty visible depending on lens orientation!


This is the front brake splitter, stock FZR600/400


I needed to fill a gaping hole on top of the seat unit where the seat release key used to be. I also wanted a marker light for night riding so, being a Star Wars fan, I installed an R2 unit! Actually it's a license plate light for pickups but it reminded me of R2D2 when I put it in. The finish complements the gas tank cap and satisfies the geek in me.
 
It was a nice fall day. Good for picture takin'. Still no clear coat. I really like looking at this motorcycle. And like a numb nuts I neglected to put the right foot peg down for the photo series...


Love how the lines and shapes play here


Work to make the rear frame transition into the fender line.


I was pretty dubious about the front signals until I realized that the LED ring is also part of the front flasher setup.
Looks great though.

Are you going with a glossy clear coat or matte?
 
Right you are about the headlight ring. I'm going gloss on the clear but now I think I need to add some stripes on the tail section. Hmmmmm.

dan s, I got 'em off of ebay, just look up mini round led marker light and you should find it. I thought I'd need to mount them on the metal plug that mates with the grommet but they turned out to be a good fit straight in. I had to trim some of the rubber sleeve from the led stalk (you'll see what I mean if you get them) to push it into position.

An led signal flasher unit is a must have as I trial fitted some resistors to each side to get the flasher to trip but no go with that old unit. Will share what unit I'm going with if it works out!

Thanks for the comments all.:bike:
 
Still figuring out the led turn signals… Got an led flasher but I've some wire sleuthing to do. Mounted the horn below the tank and spliced it back into the harness.

The bike fires right up and runs strong after adjusting the valves, installing a PAMCO electric ignition, and changing the filter and oil with some Rotella Triple T (thanks to the forum for the oil reference)! Also during the oil change I popped open the little oil strainer panel under the engine and cleaned that sucker. Beware doing this as it makes an oily mess and I luckily have a lift to work on it. Had to make another paper gasket for it as the other one tore during removal. Probably won't do this in the future but I wanted to start with a clean sheet. Also put in a threaded sight port in the generator cover so I can check timing without creating more oily messes.


I cut the fork springs down and made some (long) spacers to firm up the front end. Maybe too firm now but I can cut an inch off the spacers and reduce preload there.

I have to say these bikes are really fun to ride! Nice torque down low and lots of enthusiasm to the redline. Transmission is a little stiff and balky because I've gotten too used to modern bikes. Brakes work excellent and the pads haven't even bedded in yet!

Kept eyeing the tail section and it seemed to need some stripes like the tank. So I sat down with a movie on the computer and some striping tape last night and painted it today.


I wanted the stripes to continue and resolve the scheme and break up the red real-estate a bit. I'm happy with it but need to add some clear coat soon because I'll probably fuck it up riding it like I 'm going to.

:thumbsup:
 
I like the continuation of the stripes. Looks great.

I have to ask as I'm still new to motorcycles and maintenance.
Wouldn't you still need to take the generator cover off in order to rotate the crank?
 
At this point the only reason to turn the crank by hand is to adjust the valves. When it had points you needed to carefully turn the crank to measure when they opened but now with the PAMCO I can just hook up a timing light to the left spark plug wire and shoot the light at the rotor through the sight port while the engine idles. I briefly thought about putting a big access hole in the center to turn the crank. And for it to be big enough to fit a 17mm socket it would basically take out the 'MA' part of the YAMAHA logo. Then I realized it was unnecessary as I would probably only want to adjust the valves when I do an oil change.

:smoke:
 
Well I did it. I fucking did it. I got the led fricken turn signals to work properly. When I initially installed them and hit the signal-switch -nothing.

Fine. That makes sense. These are new tech, bike is old tech. Led's don't pull enough electrons to get it working. So got some resistors (4) to load the flasher relay, but still wasn't enough and it seemed stupid to try and save the energy putting leds in and have a big ceramic resistor (4) burn hot energy that you just tried saving!

Fine. Onto superbrightleds.com and purchase an led turn signal relay. A few days later I am trying it out and find that my wiring is incompatible. So I stare at the wiring schematics for some time and then using some clips to hook up the proper wiring, see that when I switch on the turn switch ALL the turn signals come on.

Okay. So more schematic staring. It appears on the '79 the turn signal indicator light on the 'dash' is wired with both positives (chocolate and green wires) completing a circuit at the bulb with no black ground wire…?! So… the stock turn signals back feed each other when they are on… Does that have something to do with the canceling unit??

Fuck it. I'm making this work. So I go to RadioShack (again) and get some diodes. I disassemble the indicator pod and look at the one for the turn signals. Sure enough, chocolate wire and green wire. So I thread up a black ground, cut the chocolate wire and solder it as my new ground. Then I take the chocolate end and solder it to the green wire. Then upstream of that I soldered diodes to both wires. So now each signal can trip the indicator light, ground, and can't back feed to the other side.

Sweet, they work. Snipped out the canceling unit and made room for the new led flasher unit.

Then I fitted an old crankcase breather filter I'd held onto and plumbed it between the XS air filter pods. Pretty productive day(s)...
 
I know the 79s have dual turn signal indicators; do they light up individually left and right, or do they just both flash when one of the indicators is on? My 81 only has a single lamp for either and I'm going to be diving into that wiring before long.
 
Thanks for that reminder lev. You're right, I did buy a set of clocks from the forum here and they were probably an 80's set judging by the connectors. There was only one central indicator for the signals. Weirdly enough the schematic I referenced was for the '79 which was right for my model and wiring.
 
Back
Top