Starting, starting

seanneyb

XS400 Member
Messages
6
Reaction score
1
Points
3
Location
Vancouver, BC
Hi everyone,

My XS400 is from 1979; I bought it a few months ago as my first motorcycle (I've been riding a scooter for about 8 years and decided it was finally time to upgrade). Appearance-wise, it looks to be in pretty nice shape, and has ~5100km on the odometer. Brought my motorcycle buddy to test drive it, started up fine, ran fine but had a bit of a tendency to backfire ~6000 RPM. Figured it just needed a tune-up and fluids so I took it to the shop I've had the scooter serviced.

Evidently a lot of the electrical needed to be replaced, and wasn't charging properly, so the shop ended up rebuilding the stator and field coil assembly, installed a regulator/rectifier, and replaced the fusebox with inline blade fuses. They also installed new fuel lines and added a fuel filter (as well as new tires, and a few other maintenance things)

I got it back and have ridden it a few times. It was still backfiring around 6k, and hesitating quite a bit, especially if I'm on the throttle. And it would occasionally die instead of idling. I got in touch with the shop, and their response was basically "old bikes are finicky; the next step is check compression, timing, and valves, and estimated 4-5 hours of labour. I've already paid them a lot of money to get it to where it is now, and figured it's time to learn how to fix my bike myself (I've never worked on motorcycles before, but I follow instructions well and have worked on my own cars since I've been driving)

Around this time I found this forum and started searching. There's a lot of information here! I bought a compression tester, and it seems to check out - 155 on the left, 162 on the right.

I added a quarter can of Sea-Foam to the gas tank, hoping for a quick fix, and the next day I rode it and it was backfiring and hesitating even more. I read how the timing might be off, and borrowed my housemate's timing light. I have no idea what's going on but the timing seems WAY off (lights up well before RF, doesn't light up at all for LF; here's the most confusing thing: it lights up on both sides for RF??). I put things back to where they were, because I couldn't get the timing adjusted close enough on RF, and who knows what's going on with the other side). I did notice that the left spark plug was kinda sooty, so I cleaned it up with some sand paper.

Then I started her up...and took her for a ride...and she was great. Best she's been yet, at least. The backfiring was *almost* gone, and she didn't stall once.

Next day, go to start her. Has trouble catching over, and when it is, really idling low and gurgly. And dies. So I start her again, and close, but nothing. Try one more time and I notice gas POURING OUT OF THE LEFT AIR BOX. Thought I may have flooded the carb trying to start it, and got busy the next day. Tried it two days later and same thing, won't start, gas is now pouring out of the exhaust (I was pointed slightly downhill this time) and I also noticed the left exhaust pipe is cold. Pulled that spark plug off and saw that it was soaked in gasoline. That's where we stand now.

From what I've read and experienced, it seems like:
a. something is seriously wrong with the timing and/or
b. something is wrong with the carbs - specifically the left, and possibly related to the float valve. or maybe
c. something is wrong with the petcock, although the shop checked it and said it was fine.

Does this seem about right? What would everyone recommend checking and fixing first? Anyone have any idea why the timing seems so strange?

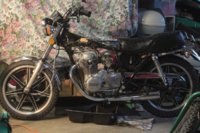
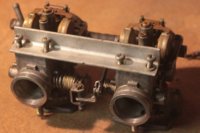
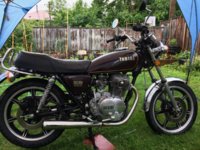
Here's a picture, because I hear you like pictures (I've got more but I'll have to resize them in order to upload):

IMG_3395.JPG


And thanks for any advice you might have. I've only had a couple good rides on my bike but it's been so fun, and I'm hoping I can learn how to sort out these issues and learn about motorcycle repair in general!
 
Ok so first things first.......have you been in to he carbs? If not I say go through them then sync them and adjust the idle screws.....after that go to the timing. Not a whole lot can be wrong with these things they are pretty bullet proof for a bike.

Let us know what you find out.....good luck!
 
seanneyb.......I had a similar problem when it came to gas leaking out the air intake. After a month of working on my project bike (1980 XS400) and replacing the CDI, rectifier, voltage regulator, rebuilding the carburetor and the petcock along with replacing a handful of parts, I final got the bike started and running. Early one morning my wife woke me up to the overwhelming smell of gasoline in the entire house. The motorcycle dumped all the gas back through the air intake. The next day I removed the air filters, carburetor, spark plugs, gas tank, and removed the oil from the engine at three location; crankcase bolt, oil filter and the oil strainer. I then let the bike sit for a couple of days. Then I removed the float chamber body on the carburetor and exercised both floats to verify they are working. I replaced the foam fabric on each of the intake air filter and lubricated each of them opposed to buying new ones. After that, I removed the petcock and noticed the interior filter net that has the long straw built into it was attached to the reserve output port. It should be attached and in-line with the port that is in-line with the petcock lever facing straight down. I also noticed the vacuum line from the carburetor joint to the petcock wasn't attached to the backside of the petcock. After all the discoveries, I reassembled everything and added fresh oil, the bike is running great. No more gas issues.

I would first verify the vacuum is attached to the petcock. If it is, when the lever is in the on position no gas should be running out. I would also remove the petcock and verify the straw inside the filter net is seated in the correct port. Lastly remove the float body and check the floats to verify they move up and down.

Watch the following video on youtube regarding the petcock

Watch the following video on youtube regarding the timing (if you don't have a timing gun)

Hope this information help and sorry for the lengthy story.
 
@Bikebone - thanks for the advice, I really appreciate reading your example. So in the end, it was all a fault of the way the vacuum lines being connected incorrectly onto the petcock? I'll definitely check that and hope that your experience saves me a bunch of time. As for timing, that video that you linked is the video I watched to teach me how to check the timing, but the test light didn't turn on when the engine was at LF; the test light only turned on for RF, and at least 1/8 of a turn before the firing line...:shrug: Also, when I connected the test light to the points...metal spring thing...there were little electric shocks that would occur. Is that cool or naw?
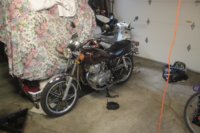
@spectra - I haven't gotten into the carbs yet. I don't have any experience working on carbs at all, but I do have the Haynes and Yamaha manuals. Any recommendations on how best to clean them? I've read a few things (boiling in vinegar and lemon juice, specific carb cleaners) but I guess before I even decide on what to clean them with, I just have to learn how to get them off. I probably don't have time to start actually pulling things apart until the weekend, but I'll steal minutes here and there to really clean and organize my garage in prep.

One more thing I thought of: the shop had said that the tank had previously been lined with Kreem, which was starting to come off. So maybe while I have the tank off I go the extra step and clean it out. I've also read a few different ideas on how to clean out tanks; any personal preferences anyone can share? From what I've read, it seems like Red-Kote is pretty well regarded, but I'm just going off of what I've gleaned from old forum conversations. Is Red-Kote a better choice than Kreem? Also...how difficult is something like this to do? As easy as swishing it around in the tank for a while until it dries?

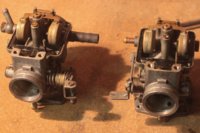
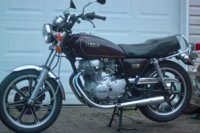
Here are a couple better photos:
IMG_3177.jpg IMG_7768.jpg
 
You have to remember that when these bikes were hitting the market. The owners of these did all the maintenance themselves. Its a responsibility that came with everything that had an engine back then, still true today sort of. If youre going to have one of these bikes, you have to try your best and learn the bike inside and out. Read the manuals a couple times over and pay attention to what its telling you. Bringing these types of bikes to a shop for "minor" work will kill the joy of owning it. Youre better off buying a new bike for 6 grand.

Id start by checking the valve clearances first. Buy Keyster carb rebuild kits and check the float height and clean the carbs. Then take the points ignition of and put it in your pile of extra stuff and buy the Pamco electronic ignition.

I have the pamco with the E-advancer and its and amazing upgrade that cured all the problems that come along with points ignitions. The basic Pamco is a very simple install.
 
Dude, I have the exact same bike, and I must say yours looks like itś in awesome condition.
I am restoring my 79 and agree with switching to the Pamco electronic ignition and ditching the points.
I used to have an awful time starting mine. Now with the Pamco ignition, it starts right up. It would only run on choke, and had idleing problems so Iḿ rebuilding the carbs. The basic carb rebuild kit didn´t fix the problem, I took them off again and cleaned out the jets which were clogged.
There are good you tube videos on how to clean and rebuild the carbs. Mine were real bad inside, and it is the most common problem when the issue is hard starting and poor ideling. Whether you do the carbs yourself or have the shop do them, chances are they are the problem.
Once the carbs are done, and if you make the switch to electronic ignition, anything else is gravy.
Good Luck
 
@Bikebone - thanks for the advice, I really appreciate reading your example. So in the end, it was all a fault of the way the vacuum lines being connected incorrectly onto the petcock? I'll definitely check that and hope that your experience saves me a bunch of time. As for timing, that video that you linked is the video I watched to teach me how to check the timing, but the test light didn't turn on when the engine was at LF; the test light only turned on for RF, and at least 1/8 of a turn before the firing line...:shrug: Also, when I connected the test light to the points...metal spring thing...there were little electric shocks that would occur. Is that cool or naw?
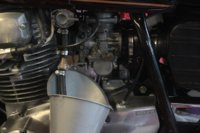
@spectra - I haven't gotten into the carbs yet. I don't have any experience working on carbs at all, but I do have the Haynes and Yamaha manuals. Any recommendations on how best to clean them? I've read a few things (boiling in vinegar and lemon juice, specific carb cleaners) but I guess before I even decide on what to clean them with, I just have to learn how to get them off. I probably don't have time to start actually pulling things apart until the weekend, but I'll steal minutes here and there to really clean and organize my garage in prep.

One more thing I thought of: the shop had said that the tank had previously been lined with Kreem, which was starting to come off. So maybe while I have the tank off I go the extra step and clean it out. I've also read a few different ideas on how to clean out tanks; any personal preferences anyone can share? From what I've read, it seems like Red-Kote is pretty well regarded, but I'm just going off of what I've gleaned from old forum conversations. Is Red-Kote a better choice than Kreem? Also...how difficult is something like this to do? As easy as swishing it around in the tank for a while until it dries?

Here are a couple better photos:
@Bikebone - thanks for the advice, I really appreciate reading your example. So in the end, it was all a fault of the way the vacuum lines being connected incorrectly onto the petcock? I'll definitely check that and hope that your experience saves me a bunch of time. As for timing, that video that you linked is the video I watched to teach me how to check the timing, but the test light didn't turn on when the engine was at LF; the test light only turned on for RF, and at least 1/8 of a turn before the firing line...:shrug: Also, when I connected the test light to the points...metal spring thing...there were little electric shocks that would occur. Is that cool or naw?
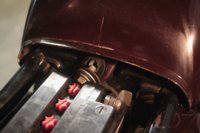
@spectra - I haven't gotten into the carbs yet. I don't have any experience working on carbs at all, but I do have the Haynes and Yamaha manuals. Any recommendations on how best to clean them? I've read a few things (boiling in vinegar and lemon juice, specific carb cleaners) but I guess before I even decide on what to clean them with, I just have to learn how to get them off. I probably don't have time to start actually pulling things apart until the weekend, but I'll steal minutes here and there to really clean and organize my garage in prep.

One more thing I thought of: the shop had said that the tank had previously been lined with Kreem, which was starting to come off. So maybe while I have the tank off I go the extra step and clean it out. I've also read a few different ideas on how to clean out tanks; any personal preferences anyone can share? From what I've read, it seems like Red-Kote is pretty well regarded, but I'm just going off of what I've gleaned from old forum conversations. Is Red-Kote a better choice than Kreem? Also...how difficult is something like this to do? As easy as swishing it around in the tank for a while until it dries?

Here are a couple better photos:
View attachment 30444 View attachment 30445

View attachment 30444 View attachment 30445

Seanneyb,
--As for the vacumm, yes just make sure it is connected from the backside of the petcock to the carburetor joint (black rubber transition piece between engine and carburetor).
--As for the timing I would take the recommendations from NewHavenMike and Stormtracker, they seem to be very confident in the electronic ignition.
--You need to purchase a carburetor repair kit, I purchase the K&L repair kit for my 1980, it cost $35.00. I actually paid my neighbor who's a certified motorcycle mechanic to clean and repair my carburetor. It cost me a 24 pack of beer. You did say that your not sure how to remove the carbs. You need to take the advice from NewHavenMike, and dig in and get dirty, that's how I learned. So, if you want to know your bike the carbs would be a good place to start. I would begin by removing the air-intake canister and inspect the air filters, then remove the rubber transition piece leading up to the carbs. Now you will loosen the ring fastener at the carb joints (both of them). At this point you can remove the carb, but you will still have the throttle cable still attached. Slide the cable through the open slot to free the carb completely. If you haven't drained the float bowl prior to removal then be carful, gas will run out. while you have the carb off inspect the carb joints, if they have not been replace they might be very worn and possibly cracked in many locations. They will run you approx. $40.00 to purchase new ones.
--I'm not familiar with any fuel tank liners, they all sound like a bad idea.
 
Be careful of the K&L kits........I purchased one for my 1100 not knowing any better and went through the carbs. Came time to fire it up and couldn't get it running for nothing.......read a few people on another forum having issues with them so pulled the jets and replaced with the old ones once I cleaned them. Bike fired right up and was able to sync the carbs.

I just ordered genuine Mikuni ones from jetsrus. I will only run them from now on. You can try the K&L but who knows what will happen.

As far as working on the carbs they are easy if you have any mechanical skills. Just keep what you take out in separate piles and make sure to clean everything really well. Blow out all the holes with cleaner and then air. Look at the diaphragms and make sure there are no holes in them. Also if you still have screws on the diaphragm hold downs replace them with allen heads it makes taking them apart much easier next time.
 
spectra.......good information to know about the K&L kit. I've no not issues with the K&L at all. I'm am going to re-condition another bike over the winter, so I'll look into the Mikuni Carb Kit.

Happy wrenching @seanneyb. Please keep us updated on your progress.
 
Finally had a chance to work on her this afternoon. I drained the tank, took off the petcock, and removed the airboxes and tubes. Removing the carbs will happen next, maybe Saturday. I'll do my best to document the process; this forum's helped me a lot, and just reading other people's experiences is really informative.

IMG_7808.jpg
I've got a little chunk of the garage dedicated to the bike. Currently sharing space with a large rack of costumes (my wife is a designer), her scooter (Aprilia Scarabeo), 6 people's worth of bicycles (we live in a shared house) and one of my housemates is currently rebuilding his VW van's suspension. Staying organized and clean will be big priorities, and should make things a bit easier in general.

IMG_7826.jpg
Started by draining the fuel tank. The petcock seems to be working properly; I set it to "Prime" and fuel flowed out; switched it back to "On" and it stopped. Also, the petcock vacuum lines were hooked up properly, so I guess I can rule that out as a possibility.

IMG_7813.jpg
Next I removed the tank. There's a single 12mm bolt under the seat, with two rubber washers and two metal washers. Undo this and the tank comes off easy. Take a look at this, though:

IMG_7821.jpg
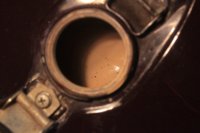
The inside of the gas tank. Apparently it's been lined with Kreem, and it doesn't look so good. What might the best way of UN-lining the tank be? What should I do after that? I'm hoping to not have to repaint the tank, because I can get cheap collector insurance if I keep it stock.

.IMG_7836.jpg
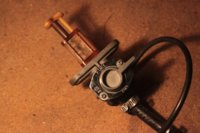
I removed the petcock from the tank (uhh, careful, gas will spill out if you're not. Guess who smells like gas now), which was really easy (two Philips/JIS screws). I haven't taken it apart yet but the rubber gasket looked okay to me. I'll give it a good cleaning before it goes back on.

IMG_7842.jpg
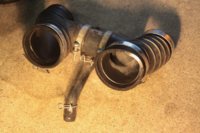
Took the air filters off, and then removed the rubber H-pipe. There's another rubber hose that connects to the bottom part of the engine, but the spring clip was easy enough to take off. I used a flathead screwdriver to gently unseat the rubber hose.

IMG_7843.jpg
Looks kinda like a face, with dirty insides. Also smells like gas a lot, most likely from when it spewed gas out the air filters. I did notice some wetness on the inside of the other side, too, which is interesting...

IMG_7848.jpg
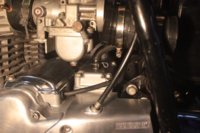
Here's where I'm at now! Feels good to have gotten even just this bit done.
 
Last edited:
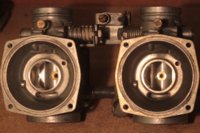
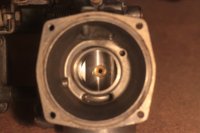
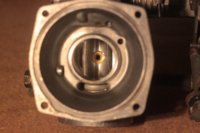
I took more things apart last night. So far so good, but I do have a couple questions...

IMG_7854.jpg
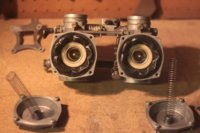
First things first though! Carbs off. Good news is that every screw (so far) has come off without problem. I bought some JIS screw bits; don't know if those have been helping, but it's been smooth so far.

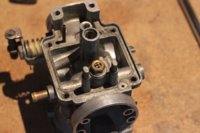
The left carb:
IMG_7855.jpg

The right carb:
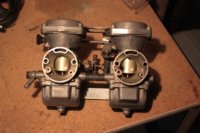
IMG_7856.jpg
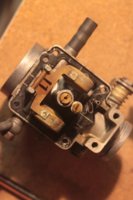
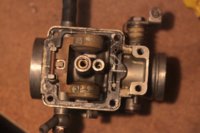
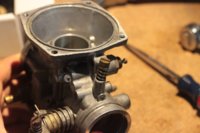
Now, being the first set of carbs I've taken apart, I don't know how clean or dirty these are in comparison to good (or bad) examples. Especially on the right carb, the brass jet(?) looks kinda gummed up. Is it okay? How clean is "clean"?

IMG_7863.jpg
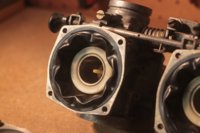
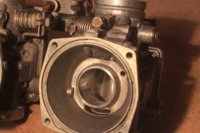
Also thought this was interesting with the diaphragms. Are they supposed to look distorted and wavy like this? The video I was watching looked like they sat more flush inside. You can really see it in this next photo:

IMG_7866.jpg
Is this normal? You can see how much "slack" the diaphragm seems to have below:

IMG_7869.jpg

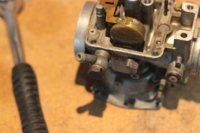
Took the choke rod off:
IMG_7871.jpg
Be careful! When I pulled the choke rod off, one tiny ball bearing fell out and ran across my floor. Then, when I turned the carb upside-down, the other ball bearing fell out, along with (I didn't notice at the time) one of the tiny springs. The second tiny spring fell out a short time later, at which point I realized that the thing I *thought* had fallen on the floor but then couldn't find was probably the other spring. Fortunately, I found it on the edge of my mat. Phewf.

IMG_7872.jpg
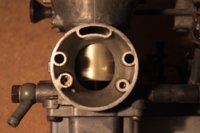
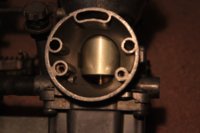
With the diaphragms removed. I noticed some scratching on the inside of the carbs here:

IMG_7873.jpg IMG_7874.jpg

Not looking *the* cleanest, hey?
IMG_7879.jpg

IMG_7882.jpg
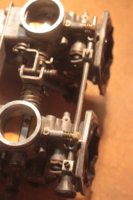
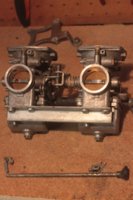
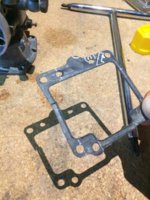
The Haynes manual suggests separating the carbs, so I removed the connecting bracket, along with the float bowls.

IMG_7884.jpg
*When one becomes two...*

IMG_7885.jpg
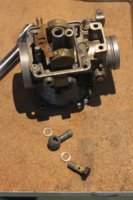
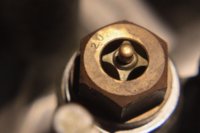
Removed the brass plugs. I read about the brass being soft, and it looks like maybe the PO had marred up the screwhead a little. They were easy enough for me to get off without much effort, but I'm wondering if this is just cosmetic or if anything needs to be replaced.

IMG_7894.jpg
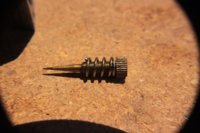
Without the caps. The Haynes manual says to DO NOT remove the jets, because it can damage the threads on the way out, but in the video I watched the guy sticks a screwdriver in there are just pulls them out.

I need to get a pair of snap-ring pliers that are long enough to allow me to remove the circlip inside the diaphragms...I bought a pair today but they're too thick to get in. My main questions right now, though:

1. What methods of cleaning carbs do you like? Soaking in vinegar? Boiling in vinegar? Carb cleaner spray?
2. Should I be taking apart absolutely everything? Seems like there's some conflicting advice; some say you don't have to take apart everything, some say take everything apart because chemical carb cleaner will eat gaskets/rubber. If I go the carb cleaner spray method, do I need to replace all the gaskets it comes into contact with?
3. Are my diaphragms totally effed, or is that "wavy"ness the way they're supposed to look?
4. Is it safe to remove the pilot jet? Again, the Haynes manual advises against it, but in this video the dude removes the pilot jet.
I gather it's easier to clean with things removed, but I'm a little wary of damaging anything.

Thanks in advance!
 
Ok well you already took them apart so..............to late. I like to leave all the carbs together but you are ok. As long as the diaphragms have no holes I think they are fine.

The video you posted I think was done by a member here in the past and is a great one to follow.

As for the jets yes pull them out you need them out to clean and blow cleaner and air through the carbs to make sure nothing is in there. If the bike has sat for any length of time who knows what you will find......

Pull the floats to and clean every hole you see in the carbs......then clean them again ;) when putting back together measure the float level and adjust if needed.

My 1100 had 2 carbs with squished floats and green shit everywhere.........not sure if fuel had water in it and froze or what.
 
Ahhh, yeah...I was undecided on whether or not to pull them apart. It seemed fairly straight-forward, so I hope it'll be as easy re-attaching everything.

I figured I was going to have to pull the jets out. I didn't have a screwdriver the correct size but I just got back from the store with one that I think will work. If the jets are stuck, is it safe to use penetrating oil? Also exchanged the snap-ring pliers for another set...I'm not sure if it'll fit, but it was the longest/narrowest I could find locally. Fingers crossed!

Thanks for the advice, @spectra! One final question; do you soak the carbs or just use carb cleaner to spray them off?

@NewHavenMike , could you confirm that this is the right carb rebuild kit?
https://www.siriusconinc.com/pro-detail.php?pid=&product_id=712

Thanks for holding my hand through this :thumbsup:

I don't soak the carbs I just clean all the holes really good with cleaner and air. If the carbs are covered in crap maybe but I am sure you are fine as the bike was a runner.

Kit looks good to me but tear yours apart first you may not need everything in that kit. Clean everything up really good and you can re use parts if there ok.
 
I soda blast all of my carbs and use compressed air (125-150 psi) to clean it all out. I have made very crappy old carbs look like new. The only thing that you can't clean is rubber or worn parts.
 
Ahhh, yeah...I was undecided on whether or not to pull them apart. It seemed fairly straight-forward, so I hope it'll be as easy re-attaching everything.

I figured I was going to have to pull the jets out. I didn't have a screwdriver the correct size but I just got back from the store with one that I think will work. If the jets are stuck, is it safe to use penetrating oil? Also exchanged the snap-ring pliers for another set...I'm not sure if it'll fit, but it was the longest/narrowest I could find locally. Fingers crossed!

Thanks for the advice, @spectra! One final question; do you soak the carbs or just use carb cleaner to spray them off?

@NewHavenMike , could you confirm that this is the right carb rebuild kit?
https://www.siriusconinc.com/pro-detail.php?pid=&product_id=712

Thanks for holding my hand through this :thumbsup:
It appears to have all the right stuff, but I think you will need 2 kits, one for each carb.
 
For some reason the link wont work for me.. but ive used both a specific carb cleaner and brake cleaner before. The carb cleaner can be expensive and ill use it in between tear downs or jetting changes as a final clean. The brake cleaner i like because its cheaper and it puts out a ton of spray volume. Just watch your eyes. Brake cleaner will not do well on a fine cleaning. I will sometimes use something like seafoam or WD40 and a rag or scotch brite to get rid of deposits in a fuel bowl and then spray it all oit with brake clean. Not the best way but it works for me. Brake clean is good for a light external cleaning too with dirt/oil.
 
Also, i had to drill my jets out and tap an awl in the hole to get it out. They were frozen beyond belief. I obviously ruined the jets.
 
Different motorcycle - exact same problem(s).

Fuel leaking past godawful original petcock to carbs. Floats not holding the needle closed. Fuel works its way down hill into intake, cylinders, etc. Best case stumbles coughs then eventually runs. Worst case won't even start you could smell the gas in the oil.

Replaced the original vacuum petcock with a manual one. Hyper diligent about opening and closing. Problem gone.
 
More success! I've got the carbs completely apart now, currently soaking in Pine-Sol. I did a vinegar bath yesterday and started cleaning. More cleaning and scrubbing today. Along the way, I'm pretty sure I found the reason for gas pouring out of the air filter!

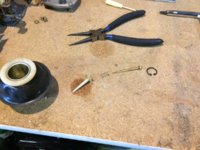
After going to four different stores, I finally found snap-ring pliers long enough to get at the circlip. Very, very satisfying.
IMG_3514 (1).jpg

Close up:
IMG_3515.jpg

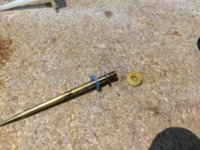
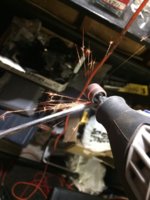
I was also completely unable to find a screwdriver that would be tight enough/narrow enough to get down into the carbs, but I did have a screwdriver that almost fit, and a dremel...now it fits perfectly. And fortunately, nothing was stuck.
IMG_3523 (1).jpg

IMG_3527 (1).jpg
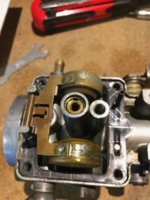
This was also pretty easy to get out: a few gentle taps with the bottom of a screwdriver and it popped out. It goes into the carb body, btw. I didn't realize that at first and couldn't figure out how I was supposed to extract it.

Found another dead part. The float bowl gasket from the right side.
IMG_3528 (1).jpg


Took off this bit:
IMG_8051.jpg
IMG_8055.jpg

Taking out the float pin. I used a small socket as a brace against the float "arm" and used a small punch to gently tap the pin out.
IMG_8056.jpg

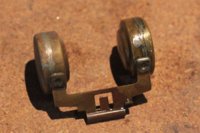
The float is free! I was wondering why it still smelled like gas...can you see the problem?
IMG_8057.jpg

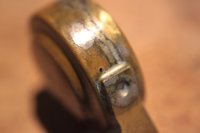
How about now? I got the macro lens out and as you can see, there's a tiny hole in the float that had filled up with gasoline.
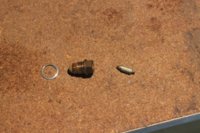
IMG_8059.jpg

Going to order two new floats. The pins can be re-used, right? I found two options, one without the pin for $17.50 (https://www.siriusconinc.com/pro-detail.php?pid=&product_id=4131) and one with the pin for $38 (https://www.siriusconinc.com/pro-detail.php?pid=&product_id=122407). I'm going to go with the float-only version unless someone yells at me not to.
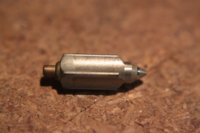
More disassembling. With the float removed:
IMG_8065.jpg

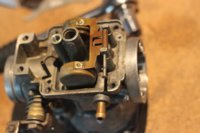
Close-up of the float valve:
IMG_8064.jpg

Exploded view:
IMG_8068.jpg

More close-up:
IMG_8069.jpg

One more thing to remove:
IMG_8073.jpg
IMG_8071.jpg

I'm happy that I've discovered broken things here and there; it's making me hope that putting everything back together, with newer bits, will help solve the issues I was having.

Next I'm going to buy the carb repair kit(s), and then add the Pamco ignition system. I'll have some questions about that...soon, haha.
 
Last edited:
Back
Top