XS360 Bratstyle Replica- Codenamed: Sheeple II

Dean

XS400 Enthusiast
Messages
51
Reaction score
1
Points
6
Location
Highland Park, IL USA
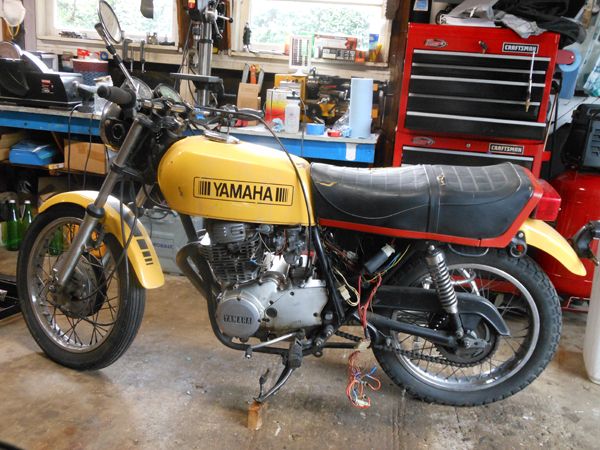
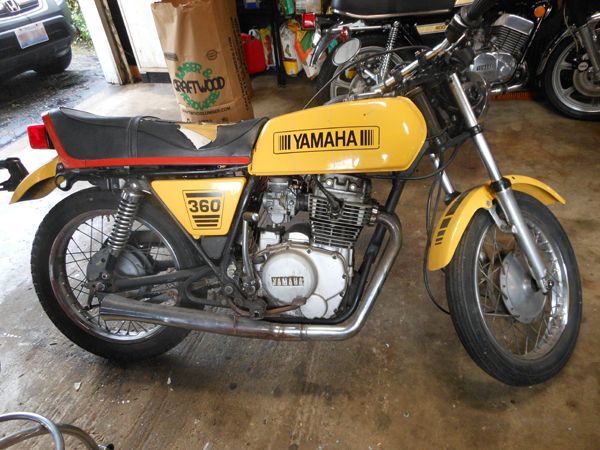
I drug home this hot little mess a couple of years ago. It's a '77 XS360, the basic entry level model with kick start only and drum brakes front and rear. The PO was up front about the fact that what's not missing doesn't work anyway and the exact volume of oil you pour in would be puddled on the ground within 15 minutes . It had a title so I traded him an old DVD player for it.

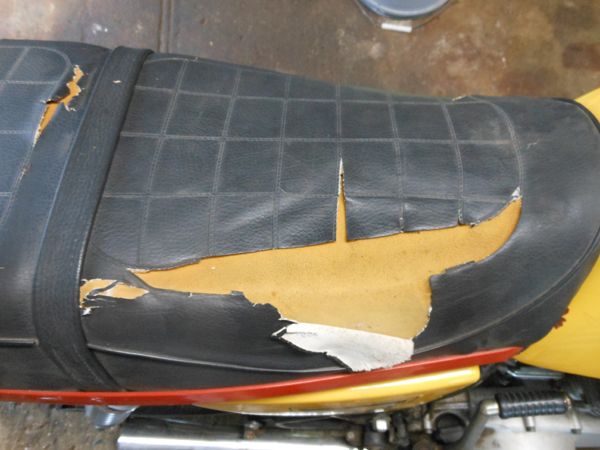
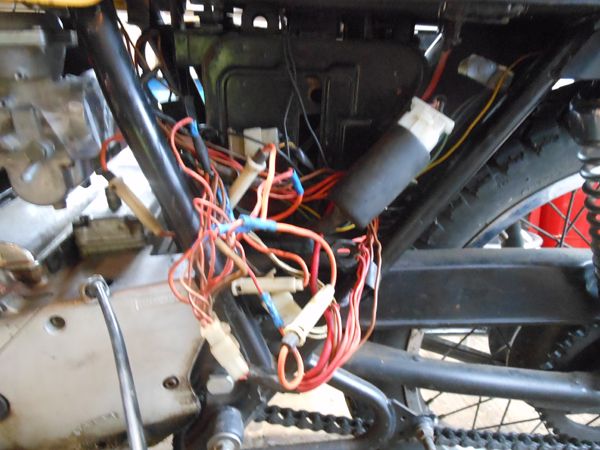
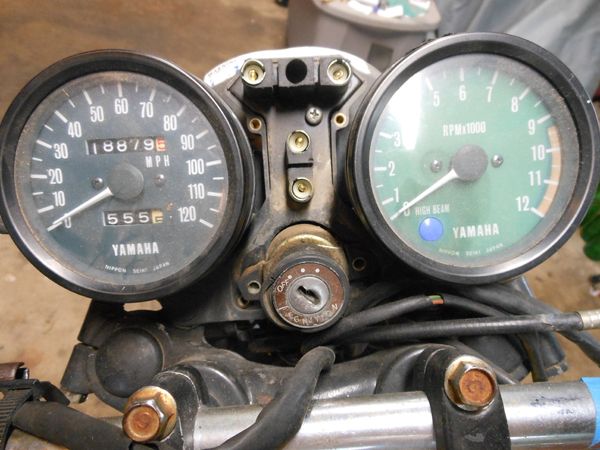
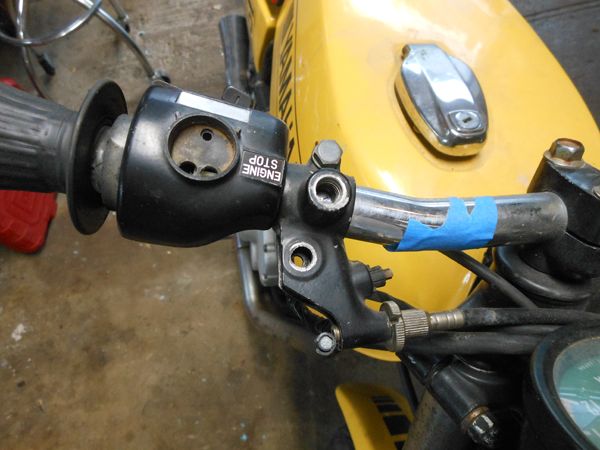
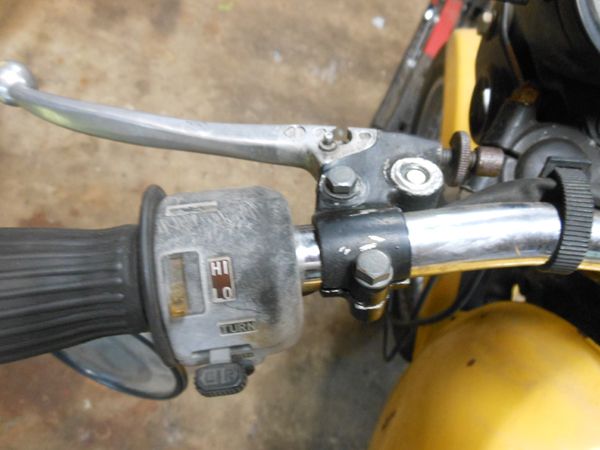
Other than the seat being torn up, the rotted mis-matched tires, rusty spokes, frayed clutch cable, broken brake cable , missing brake lever, busted switch gear, leaky forks, missing indicators, busted up pilot light console, vandalized ignition switch, shitty bumblebee spray bomb, wonky kickstand , a 30 amp bullet fuse spliced into each and every circuit , cheap ass emgo filter pods, dead battery, rusty jardine 2 into 1 pipe, toasted headlight etc. etc. etc. .... it's in pretty good shape for my next project.

This is a bare bones budget rescue using only the change in my couch and whatever is lying around my mess of a garage. It will make a fine Sheeple inspired Brat replica ;D

Here are some "before" photos:


oh, I'm a New Member, here is my intro :

http://www.xs400.com/forum/showthread.php?p=142358#post142358
 
Looks like a great project. I've been tinkering with my 360 for a while now, trying to get it close to stock.

Any idea what condition the engine is in?
 
Thank you for the kind welcome everyone!


Added some oil... and out it came ! ( as expected) I just had to follow the multiple tubes worth of red rtv to the leaks

The alternator wire grommets where they pass through the case / stator cover were a mess and the neutral switch housing was missing the O-ring.


I had O-ring for the switch in a bin and made up a gasket after I Yamabonned the fook out of the damaged grommet


I filled it with fresh oil... and check the compression, 129/131 ,, acceptable on dry, cold cylinders


It had totally wrong hot iridium plugs that I tossed (on right) , and I spent half my entire project budget on new spark plugs.


I dressed and gapped the points and adjusted the valves after I cleaned the carburetors

ick , more sillycone... this time it was used as electrical tape :wtf: I'll clean all this up when I go through the wiring


I had to solder and end on the clutch cable so I could take it out and run through the gears. I went ahead and shortened it for the drag bars that came on it. They are staying


yea, it's an upside down clutch lever... campy !


cuckoo for coco puffs


I need to make up some short runners for the $1 pods that came with it and do a series of proper plug chops, however I need to go through the wiring. In addition to all of those 30 amp bullet fuses patched in, there are a bunch of random frayed wires, tape and silliness.

Both the high and low beam of the headlamp are indeed burnt, so instead of replacing it, I have an entire 5" unit with housing on the shelf I will fab up a bracket for.


battery ground ;D

 
i really dig the classic Yam yellow and black...
It was originally a red scheme from the factory. The yellow looks to be rattlecan and the kmart "decals" are curling and flaking off. As this will be a brat replica, the new color will be something less flashy

As both the high and low beams are burnt, I'm going to mount up a cheap 5" head light I have had sitting around. It was a low wattage 6v Italian copy with a gauge socket in the top. I had already converted it to 12v but have not had a need for it until now. Depending on which I run across first, a cheap mini tach or speedo will dictate what goes in there... The factory tach had been apart at some point as sounds like there are "cards in the spokes" starting at 4k but I do have a good cable ;D

The stock bracket for the 7" head lamp was quite a hunk that also accommodated the horn ( not working) and blinkers ( missing ) instead of the usual fork shroud ears.


Typically the headlight ears are scrap on a custom, however I'm keeping the drag bars in the stock clamps and need to mount the very narrow 5" side bolt housing, so I made up a custom set.... and as a bonus, they will hide the horribly pitted fork tubes ( a bit too gone for even the aluminum foil & WD40 treatment ) The functional slide area is good as it was protected with a film of oil from the leaky seals ;D

I had a floor lamp rod in the scrap bin that fits over the 34mm forks perfectly !


Cut that down to a proper length set


cut up some scrap steel and laid down some "fancy boogers" ( my version of welding )


after some metal finishing and a coat of (something), they will look great


I had a set of ear damper rings and have since drilled the mounting holes for the lamp housing. It looks high, however the tach or speedo or whatever I go with in the top of the housing needs to be visible. I might also add pilot lamps for oil and neutral to the top of the housing vs. adding another bracket. The shrouds also make the tubes look a bit beefier and I might add some gaiters I have sitting here

So on with the wiring... it is all quite a mess
 
you are making some quick progress already!
and i meant in general, the racing yellow black looks awesome, maybe not a brat!

yamaha-rd400-1976-cafe-racer-01.jpg
 
oh yea Sesty, +1 on that.

So, I'm going to completely rework the wiring on this bike. What is hooked up is working fine, it's just there are so many splices, evidence of burned insulation, frayed connections, old tape over older tape and many components that are currently missing with miles of dead end wires...

The blinkers, flasher and auto cancel unit are all completely missing anyway so I'm going to eliminate the wires etc. left behind. The entire binnacle was trashed, so I will pair that back to just the pilot lights for N and Oil, plus an illumination wire for whatever gauge I end up with in the head lamp . The replacement headlight is a single beam, so no H/Lo switch. The original ignition switch was chiseled so only a screw driver was necessary to turn it on. I'm going to use a simple DP/DT keyed ignition switch I have here in a drawer-, so no "park" light position. The front brake switch was busted, so I will just have the rear ( It's also nice to be able to use front only when a cops going by so you don't illuminate the stop light ;) ) I already threw out that rat's nest of multiple 30amp bullet fuses, so I do need to spend the other half of my budget on a few blade fuse holders with pig tails.

Here is what I sketched out. I will use stock Yamaha wire colors that future owners will appreciate :)

 
thanks for that link, I will keep those in mind for the future.

I actually have a nice Yamaha 4x fuse block, however I prefer to use the individual waterproof fuse sockets for space savings on projects like this. You can see how small they are compared to a giant fuse block:

 
I made an ignition bracket for the new location on the down tube:

It will go here:


ready to cut out:


I will prep/ paint to match whatever I do with the frame finish:


I'm taking my time with the wiring... here are some examples of the random po's bodged repairs and what I believe was insulator damage from possibly a fuse block "fire"


I am soldering in replacements/repairs and heat-shrinking everything


When I re-wired, I also extended the alternator and field coil electricals, so I can hide the connectors under the seat :


Modified rectifier junction :


The original brake switch bracket was broken, I fabbed up a new one :

 
what do you use to cut out those tiny parts like the ignition lock holder?
most of the time I have stuff that's big enough to use my angle grinder, but that doesn't work too well for small stuff
 
Back
Top