levdir
Rounded bolt brigade
Your engine looks great!


Looks good and those anti gravity batteries are nice! I put one in my last build and thinking the 4 cell for my latest one I am working on.
As for the ankle that sucks..............I know how the bone thing works I did that back in 2013 and in the end an external fixator had to be used..........hopefully you were spared that ordeal.......
Hah yeah I've got some metal about an inch up my fibula. But I Ran 4 miles the other day so it's down to "sports medicine" from here.
 I am just happy to walk right now without a limp.......
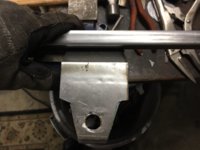
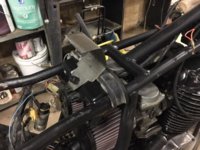
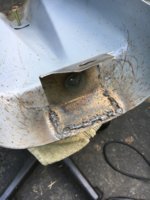
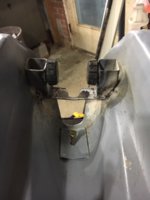
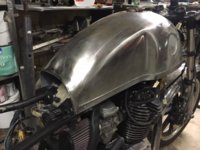
Curse you Ph-Bucket.. Sure, you can go back now and check it out. I also added some perpendicular stabilization to the rear mount so it wont bounce under load. But you'll need access to a welder and and angle grinder or something that can precision cut metal. A bench grinder is extremely handy too. The front mount is made using cuts of boxed metal and a couple of half inch cuts of pipe that fit snugly inside the stock tank bushings for a natural fit.I purchased the same tank as you and was wondering if you can repost the pics of the modifications you did to get the tank mounted. I seem to get a photobucket error message instead of a photo.
Curse you Ph-Bucket.. Sure, you can go back now and check it out. I also added some perpendicular stabilization to the rear mount so it wont bounce under load. But you'll need access to a welder and and angle grinder or something that can precision cut metal. A bench grinder is extremely handy too. The front mount is made using cuts of boxed metal and a couple of half inch cuts of pipe that fit snugly inside the stock tank bushings for a natural fit.