FUBAR's Build

FUBAR

XS400 Addict
Messages
437
Reaction score
2
Points
18
Location
Alberta Canada
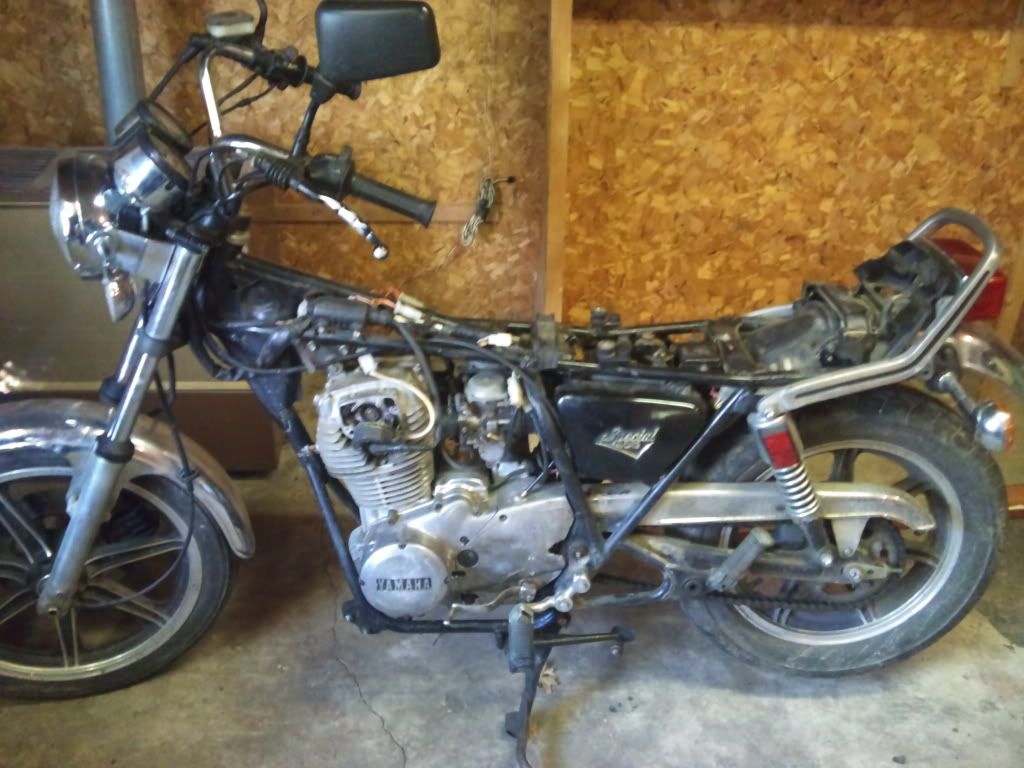
I finally got 5 minutes time to look at the bike and snap some pictures, can anyone clear up what exactly i have?

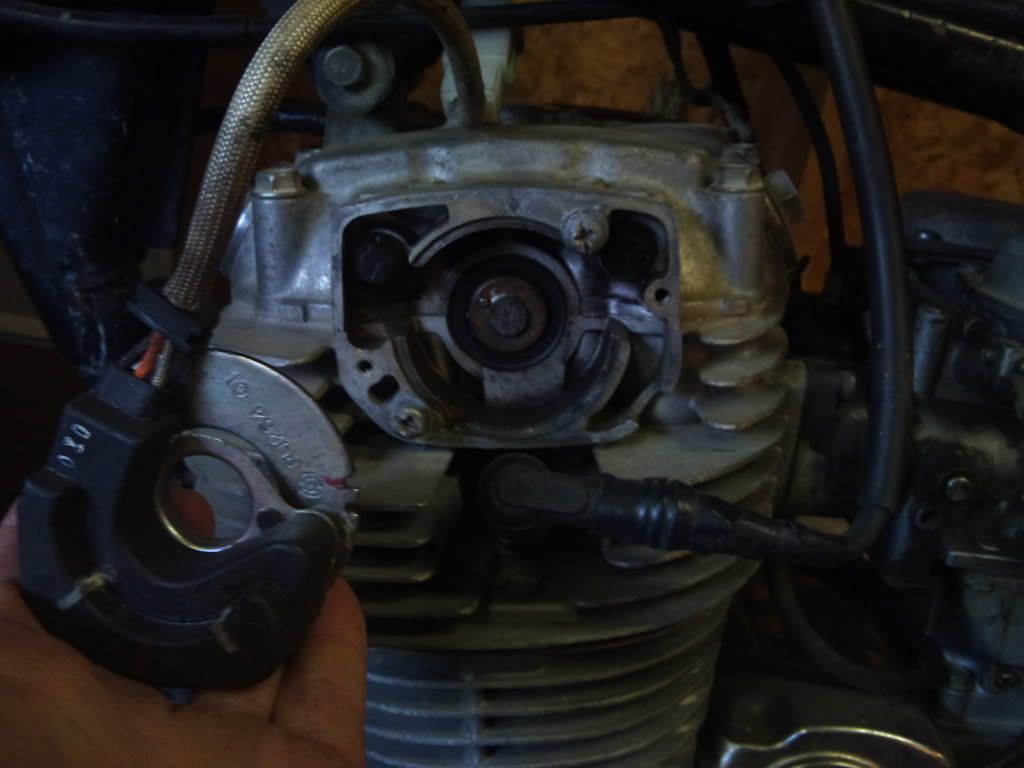
i think is a SOHC 81 400 special..?
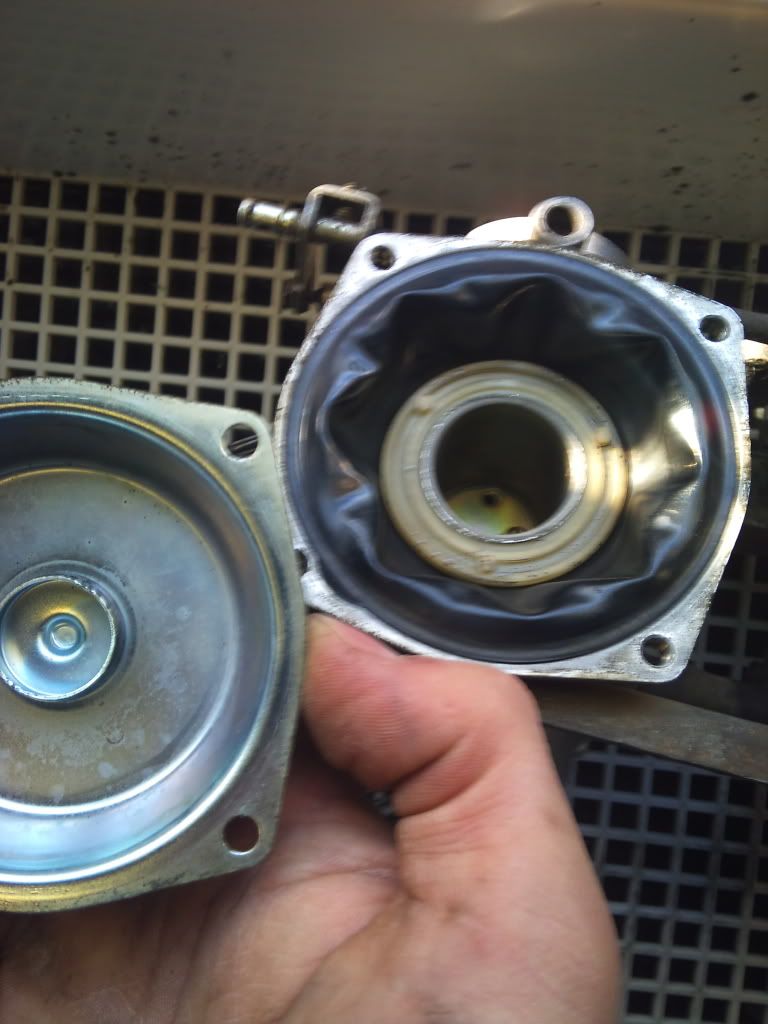
i also ripped apart the carbs and it looked to me like either someone recently changed out the diaphrams and cleaned everything up or it was well cared for in the past.

i also got a 2nd engine with the purchase but im not sure what plans the PO had with it.. im not sure if the one in the frame is a runner but i assume so, these jap engines can go though hell. it reads 20000 KM on the odom. i need to pick up a deep socket to pull the plugs and check compressn.

shifted through all gears easily and is nice and firm on the kickstart. thoughts?
DSC_0253.jpg

DSC_0243.jpg

DSC_0238.jpg
 
very nice. thanks for posting the pics. looks like you got a nice start to that bike. you lucked out on getting what looks to me a very well cared for machine. and the second engine seems to be rather clean too. whats your plan for it?
 
my plan for the bike is to fab up my own hardtail system with a stretch and loose the secondary backbone tubes and just have one main tube other than that decide as i go. i just got the heater fired up in my garage to take the edge off these -30 degree days.

im getting lots of cool ideas from this site in the mean time
 
You have yourself a SOHC bike Fubar....and it looks to be in really great shape! I would take a real close look at the diaphragms. Take them out of the carb and hold the rubber up to a light...this will show you any small cracks and such. The last picture is the electronic ignition....or I guess that's what you mean, right? Your bike shouldn't have points.
 
thanks HT yeah ive only ever worked on a kz650 with points so thanks for clearing that up. ill try that light trick tomorrow
 
today got the wiring harness out and other stuff. if anyone needs side covers or original parts let me know im not using 80% of the stock parts.
also i did a compression test and got around 2 "bar" per side (dry) im not sure the proper way to do it so this was just 1 kick per side.. any insight?

DSC_0268.jpg
 
2 bar is only 32psi

you are looking for 145 -150 psi

carbs need to be full throttle and both spark plugs out and you need A N Other to hols the compression tester in (unless its a screw in job)
 
@drewpy : i have a screw in one and the carbs were off. i took out 1 plug at a time then replaced it for the other side.

@volcom : yea i have an idea to get rid of the side tubes on the backbone and brace it, but im stumped as to how im going to make the rear wheel rigid. no pipe bender and no welder. what are you guys using to bend the tube precisely? or did you cough up the dough for a psm kit?
I bought the universal kit from Travis...PM him for details. You would still need the welder though...Maybe borrow one to tack it in and then pay someone to finish weld it? That's my game plan I think.
 
my buddy has a bender so ill be using that with the sand and heat method to keep the kinks away, otherwise itll look like that guys lol /\
but travis' kit is pretty legit looking. follow HT's build thread and itll give you an idea of how its gonna look. as for plates you can use the stock ones but im gonna use travis'
 
To test the compression,take out both plugs,screw in the tester,making sure the o-ring's in place,open the throttle,and kick the heck out of it about 5 times,then it should mark the highest psi.If they are low,put 1 tablespoon of oil or atf.repeat and record the numbers.If there is a big increase,you have ring probs,if the numbers are low,and it jumps after adding the oil,the rings are suspect,if not it's the valves.The rings may be stuck,especially if the bike's been sitting a long time.Put some atf[automatic transmission fluid] and leave it overnight,or longer.Turn it over a few times quickly,plugs out to rid the chamber of extra atf,and start it[smoke will happen].Warm it up,then cool it off,and recheck.This may not work if the rings are cracked,but at any rate it won't do any harm. lha
 
Last edited:
an update:

i pulled the engine and found that a rear motor mount on the case is broken off.
so i plan on using the spare case, more work than i planned and i dont know if the bottom end on the spare is any good

i started on a reverse knee dent pattern hammered into my tank, it was in rough shape to start so i figured i couldnt make it any worse i have pictures ill put up

and just waiting on a hardtail kit from travis to arrive.. cant wait to cutt'er up!

and i know its listed a few places on here but as for float level the book says 32mm, drewpy says 26mm im going to do 26, but how is the carb oriented when measuring?
 
i swapped bottom CASES on mine. i took the shift forks and everything and swapped it all into the new bottom end. including the oil pump and stuff. took about a 2 hours or so. its really not that hard. i just looked at the pictures a lot then did it from memory. i fixed the shift forks into the right places when i got home. lol

very careful about swapping half the case. not certain, but when the journals are machined, i would assume they are machined as a matching set. so it may be .1mm off, but thats still enough to hurt stuff. if your gonna swap cases, i suggest swapping the whose case. not just half.
 
after reading that i dont feel so bad about it haha

i guess ill just sit down and do it all in one day that way i remember all the steps - this weekend?? i think so
thanks for the tips about matching them. am i gonna need a new gasket set?
 
On 2 cycles,many times no gaskets are used on the cases when joining them.I just bought some Gaskacinch gasket maker at my local Yamaha shop.Put a layer on both sides,wait 5 minutes,then join.You might ask at your local shop. lha
 
Back
Top