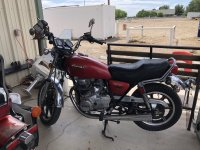
New guy building XS400 Softail Bobbers

Thanks JP. I use glass bead, never tried soda. Does is shine the metal?
Depends on the metal.
It is really nice on aluminum, as it will shine it without eating into it. Takes gunk and rust off steel, but not actual steel - I've used it on chromed things like that. You can even strip paint off wood with it.

The best part is that when you are done you can wash it away. It's soda, it dissolves. So, you can use it on carburetors with no fear of clogging.

I hear you on the road worthiness part, thats what my plan is also.
What's your riding season like where you're at? Here we're lucky if we get 6 months, and thats stretching it. I remember riding to work in the spring when I was a lot younger of course at 40F (4C), I had to stop every 10-12 miles and put my hands on the engine to warm them up, lol
About the same, really.

That kind of riding, Hippo Hands is where it's at.
 
Hi Buddha, congratulations on a great thread. Will look forward to the rest of the build and the carb set up. just wondering if you e looked at some of the posts here on keeping the H pipe, and suggest you add some spacers in the forks when you get around to them.
BR
 
Hi BR, great to hear from across the pond! Yes I've read discussions on deleting or keeping the H pipe, I will be using pod filters attached to the H pipe.
As for adding spacers in the forks, please enlighten me, I know nothing of this. This is done for what purpose?

Got my tank back from the boy's shop. Took my wheels/tires/tubes in to get mounted, will pick them up Friday.

Tomorrow, if all go good, I will be picking up the 1980 XS400 and bringing it home. It's a basket case that was running, fellow bought ~$1000 of parts to make it into a scrambler. Funny thing about this deal, found it of KIJIJI, started texting with the guy, made an offer unseen, got his ph number to talk to him and when I call him he asks me if I worked for the company I retired from 5 years ago. I say yess??, how do you know me?, turns out he was a contractor I worked with back in 2010, small world. There will be a pile of OEM parts I'll be offering up for sale from these 2 bikes like handle bars, fenders, lights, battery box, yada yada yada.
 
Thanks BR, will research your thread.

Got the '80 XS400 home today. It's a basket case. Some minor missing parts but overall the bike is there. Lots of parts to get rid of.
IMG_2509.jpg
 
Out to the shop for a bit today. Been working on the rear fender placement. After much discussion with self, we decided to do a 'hugger' type fender mount. Thats means attaching the fender to the swing arm and not the frame (it will be unsprung weight).
Bought a steel fender from Amazon. Fabbed up and plug welded some doubler/refer plates to spread the load.
fullsizeoutput_12c1.jpeg

IMG_2533.jpg


Then scratched, then scratched some more figuring out the lower fender mounting, ended up with this. Using M6 hardware. Mounts still need full welding and refer plates.
IMG_2537.jpg


Then it was on to fabbing up the fender stays. Had to incorporate a dog leg in the RH stay to clear the top caliper mount bolt so I did the same on the LH stay (the other bike will get the same stays as these as I made 4 of them).
IMG_2535.jpg

IMG_2536.jpg


Then I stood back with some adult liquid refreshment and took a couple of money shots. The only thing I had to sacrifice asymmetrically is the fender to tire space that will change as the chain is adjusted, although you won't be able to tell at 60mph. I think I'll take the rest of the weekend off.
IMG_2534.jpg

IMG_2539.jpg
 
So this morning wifey and I took a test drive in the bus. This is the maiden test flat towing the Rubicon, did a 3 hour round trip drive to get the feel of it as it's different without tongue weight on the motorhome.
We've towed a trailer with the Super 7 to Palm Springs a couple of winters but now we've decided to take the Rubicon. Won't be going south this winter, hope to next winter.
IMG_1024.JPG


Once home we put everything away and I managed to get to the shop for a bit. Worked on fabbing up the headlight/signal light mount. Going for the bare bones look. Disregard the fab bolts, going to be using metric SS acorn nuts and gr8 threaded rod as fastening hardware and of course more lightening holes. Some pics.
IMG_2559.jpg

IMG_2560.jpg

IMG_2561.jpg

IMG_2562.jpg
 
Out to the shop for a bit today. Fabbed up the head light mount (for this build and the '80 build).
IMG_2564.jpg

IMG_2565.jpg

IMG_2566.jpg


Then as always I do a mock up on my builds to give me an idea of the end result. This will be one of many mock ups before final assembly.
IMG_2567.jpg

IMG_2569.jpg
 
I hear you JP, everyone has different tastes. Thanks for the kudos!

Really nothing pic worthy. I took the steering head apart and am upgrading with cone bearings. I will post a how to if anyone is interested, it's fairly straight forward on these bikes.

Frame is stripped down to the bones, removing bits and pieces non bobber. Noodling battery placement, forward control mounts, muffler mounts, and aftermarket rear MC placement, Once I get that figured out I'll glue the pieces in place.

Throwing a question out to the group here - What grade gas is best for these bikes? I have a choice of 87, 89, and 91 octane (which may or may not contain some ethanol, or corn whiskey or plain old rheumatism medicine).
 
Last edited:
9120E07B-C416-45FC-AAD7-31F9D75EFF25.jpeg
Hey guys! This is a great build thread. Just got my 1980 400 off an online auction pretty sweet setup but got it with a 1987 Honda 700 I like the look of the Honda more so wanted to try out my re-build skills on the Yamaha. I may fall in love after the build because just stripping it down has been fun! My question is why are you going to do about the battery as well as the air cones to the carbs? I noticed you were talking about that H pipes, is this the hose that connects the two air boxes together in between the carbs? I saw this and saw the little hose that goes down into what looks to be the crank case?? Why would their need to be a hose going there? Is it a bad move to put cones on and remove that H pipe? Thanks guys excited to see how it turns out. Wish I had your talents
 

Attachments

  • A4A9F0AA-3F59-4F80-B676-DDBCF417DFBB.jpeg
    A4A9F0AA-3F59-4F80-B676-DDBCF417DFBB.jpeg
    227.3 KB · Views: 257
Lots of threads on pods and the stock H-pipe. You should really start your own build/bike thread to keep things from getting messy.
Thanks Chris, I know DM didn't mean this as an intentional hijack, no worries:cheers:
My question is why are you going to do about the battery as well as the air cones to the carbs? I noticed you were talking about that H pipes, is this the hose that connects the two air boxes together in between the carbs? I saw this and saw the little hose that goes down into what looks to be the crank case?? Why would their need to be a hose going there? Is it a bad move to put cones on and remove that H pipe?
Hey DM, there are guys on this forum that have way more knowledge of XS400's than me, I'm a newbie here, but I will try and answer some of your questions (I could stand corrected though). The H pipe is the rubber piece that goes between the carbs and the air filter assembly. The hose that goes from the crankcase breather to the H pipe scavenges crankcase vapours and allows the vapours to pass through the carbs and into the combustion chamber to be burnt instead of these vapours going onto the atmosphere (this is how this manufacturer deals with emissions on this bike). If you do eliminate the H pipe you will have to put on an after market breather on the crankcase that will vent the crankcase vapours to atmosphere. Crankcase vapours are the result of combustion, piston rings seal 99.9% but some combustion pressure will slip by, this accumulates in the crankcase as oil and water vapour, if there were no place for these low pressure vapours to go they will eventually leak past any rubber seals in the crankcase, hence the crankcase breather solution. This applies to practically any internal combustion engine. I'm just scratching the tip of the iceberg on emissions, this is a very vey very basic explanation.
After doing a lot of reading on this site on air pods vs OEM filters I've decided to use the H pipe to reduce the issues of re jetting the carbs when using pods. Why am I using pods? I think they're sexy, they may not be OEM functional, but they still look sexy IMHO. Only time will tell if they will create issues on carb/combustion performance.

Anyhooo, spent some time in the shop this afternoon. Fabbed up and tacked the MC mount and the MC reservoir mount. Mocked up battery placement. It will be situated so that it will not contact the swing arm at full shock compression (1/4" clearance). Welded in a refer plate for the rear brake shaft pivot after deleting the rear passenger foot peg frame tubes (last pic).
On any build fabbing is like playing chess, you have to have to think ten moves ahead because the laws of physics will not allow 2 solid pieces to occupy the same space at the same time:laughing:
Some pics in no particular order
IMG_2572.jpg

IMG_2573.jpg

IMG_2574.jpg

IMG_2575.jpg

IMG_2576.jpg
 
Thanks for the response Buddha yeah not a hijack at all. I saw you talk about the H pipe so figured I’d ask and then I thought since you were still in the build might be a good time to ask what you were gonna do with your battery. I posted some pics because everyone likes to show off their stuff right?!

That’s good knowledge on the crankcase breather. If I don’t have to pass emissions I would imagine I could take it off and get away with it . I am with you I think the pods look pretty dang awesome, I just love the minimal look when you can see through the bike. Especially when there is a lot of stuff that has to be there it is a cool way of showing your craftsmanship and ability to be able to modify and hide the parts so you get that cool see through look. You’ll definitely be done before I am but I’m excited to see how yours plays out
 
With these type vacuum operated carbs the H-pipe along with the factory air boxes create smooth air flow for them to work at their best. Removing them make for poor air flow/turbulence making the slide flutter and or move erratic. The stock boxes and H-pipe with the boxes being strapped to the battery box support the carbs from sagging in the rubber mounting boots. I have five of these bikes for the last 22 years and have tried many setups for pods and all types of them. For the best for overall performance and reliability go with the stock setup. If you must have pods for looks then use the stock H-pipe with black foam uni's on the ends of them. If you get 6" long ones you can use the stock air box straps to hold them into place. Most people that get one of these bikes never even run them in the stock setup before going the pod route.(exhaust also) They can't really understand why the Japanese engineers did this in the first place. Yes some of it is for emissions but it all has a purpose and making the most out of what it is.
 
Wire mesh and cloth pods are also just not very good filters and let a lot of fine dust in.

I really don't get the sexiness factor in them.

They can't really understand why the Japanese engineers did this in the first place.

The pod is very cheap to produce. Probably cheaper than an airbox by a factor of 10, or more if you figure R&D costs.

So, why doesn't any bike ever come with pods from the factory? Instead of using a cheap common pod and maximizing profit, manufacturers are spending all this money on designing and making airboxes. There has to be a practical reason.

It's not really emissions. There were no emissions regs on bikes in 1977 when the XS setup was designed. Emission controls on bikes started with Cali edition bikes having a charcoal canister to capture evap from the tank and carbs and various air injection systems in the late 80's. It's mostly to avoid oil vapor settling out on the bike and your clothes and making a mess.

On cars, airboxes serve to make the intake quieter. On a small and loud engine this is beside the point

So, the only rational reason left is to make it run right.
 
Thought I'd share a tip with the forum, it may not be new, but it's a tip anyhoooo.
To clean rubber pieces like grommets, hose, cable casings, battery box liners and such I use Spray Nine and a scrub brush then rinse with water. It makes rubber pieces almost look like new.
Here's a pic of the battery box lower pad after a 30 second scrub and rinse. I'll give it a final wash with Spray Nine before final assembly.

Before
IMG_2587.jpg


After
IMG_2588.jpg
 
Back
Top