Renegade
XS400 Enthusiast
In 2006, at the young age of 18, I bought my first motorcycle: a black 1982 XS400J Maxim. I didn't even know how to ride at the time. I learned to ride on that bike, I learned to wok on motorcycles on it, even customize motorcycles on that very bike. I loved it. I rode as often as I could, even took a trip from Cape May, NJ, to Washington DC (200 miles one way) on it.
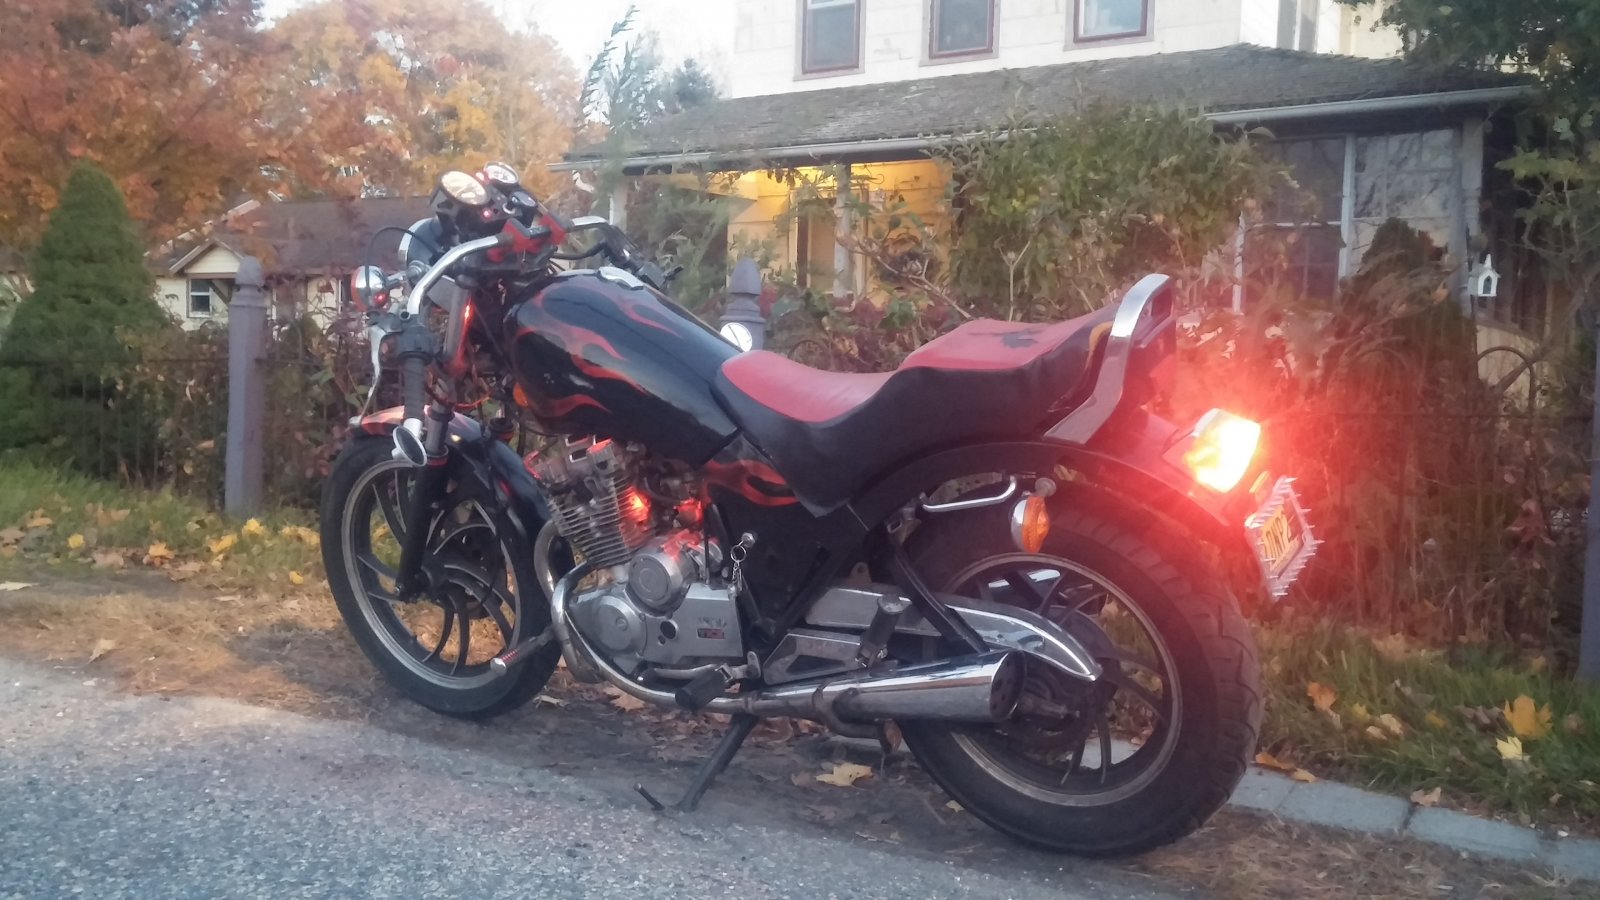
Then, tragically, on Thanksgiving morning, while I was drinking coffee and watching the parade, a young girl veered off the road and hit my bike, sending it bouncing the width of my yard, and totalling it.
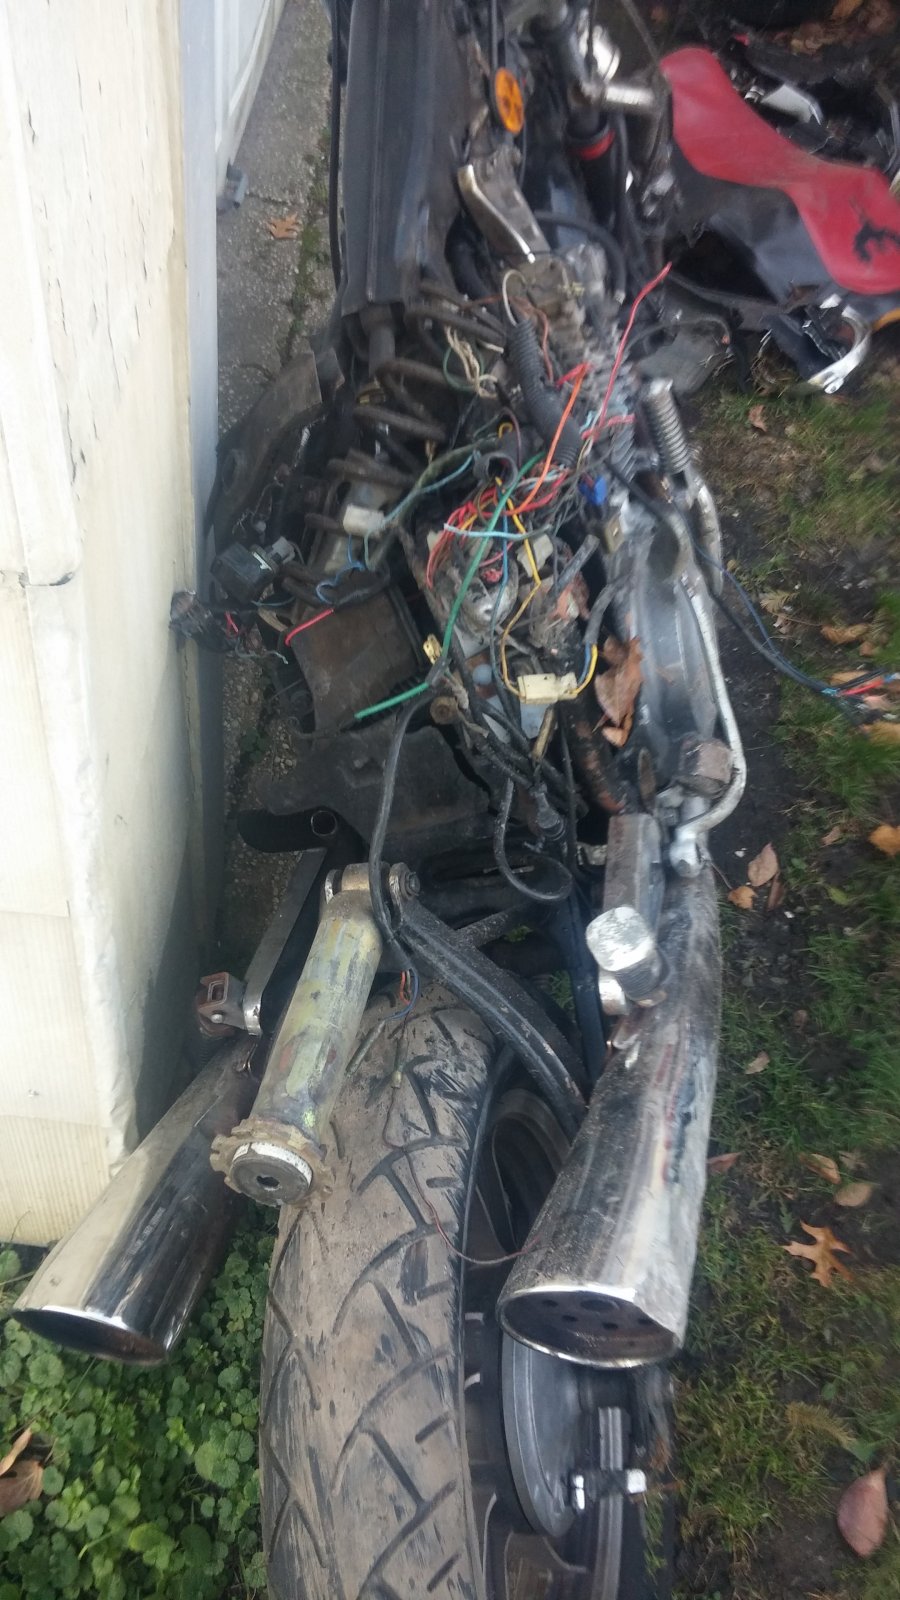
I being the junkyard dog that I am, saved as much as possible in case I could ever use the parts again. The Yamaha badge from the glovebox now lives on the tail of my new bike.
Why do I tell you all this? Well that is the back story to what's to come.
I bought another bike, a 93 XJ600S and did a custom build on that, and though I love that bike, after all these years...the thought of my XS400... I miss it,
Soooo..... to paraphrase the 6 Million Dollar Man: We can rebuild it. We have the technology....Better, stronger, faster...
AND thanks to modern technology, and my current projects: I can do it all and put it on YouTube as a series! Ok, shameless plug. I will of course be going through the whole thing here, but if you want to watch it, thats an option too. Just click HERE
The plan here folks is to rebuild the bike, but to also customize it...cafe racer style. Now, not the way that a lot would thing to do it, one seater with the flat seat, that little hump thing... but to do it my way; fusing my background as a junkyard dog, what I learned on my sportbike, and my love of the cafe racer style and the XS400J.
The first thing to deal with was the frame. Now I could repair it, maybe use a donor tail...but the insurance company deemed the bike totaled and paid me out for it (less money because I opted to keep it than if I turned it over as it was). I never got any paperwork to change the title....but if I rebuild it, what legal issues could I have? I dont like legal hassle.
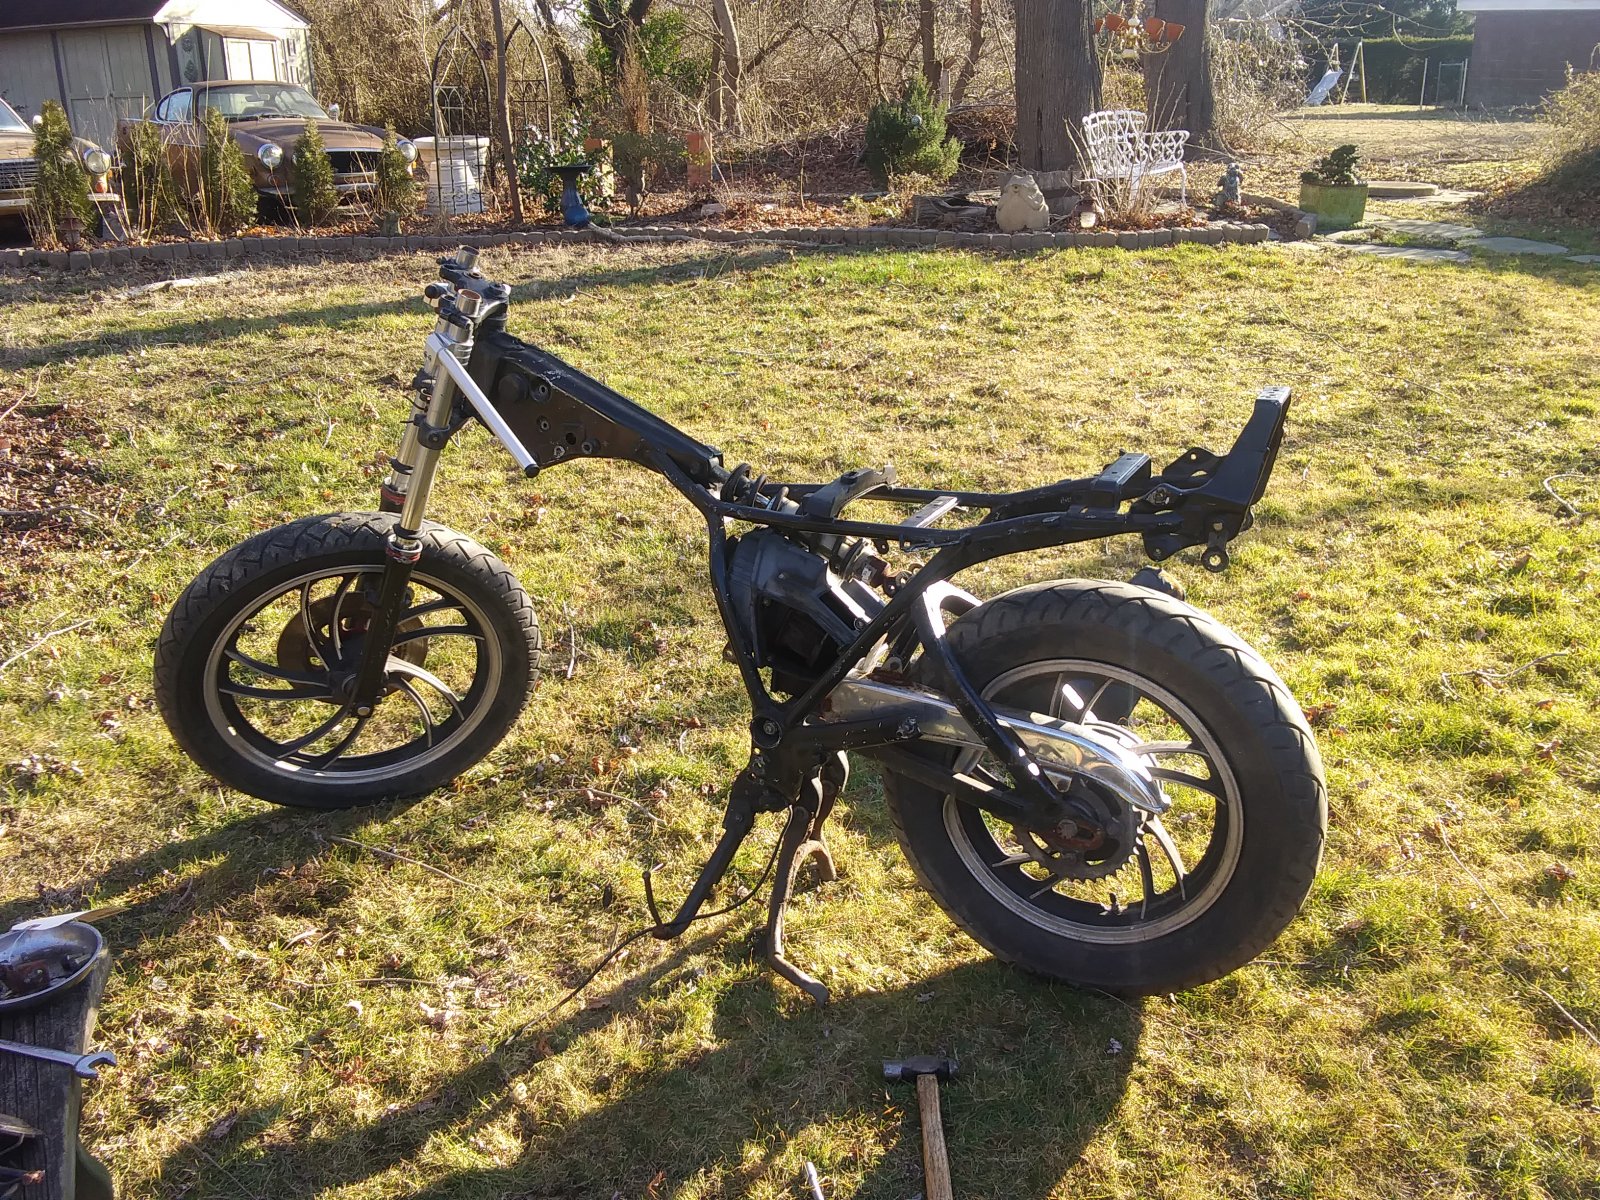
So to the internet I went, and on eBay I found it: a 1983 XS400 good frame, with a title. 200 BUCKS! Now thats a great start. Only one little catch that I hadn't noticed.. The listing said XS400, the photos looked right except for this weird thing on the tail what I assumed was a mod from the P.O. Ignorance will get you....
Its the frame from an XS400R...the Seca. So its not exact. The rear gas tank mount is about 2 inches furthe back than I need to use with the Maxim's tank that I got and the tail is different, and its longer. Bugger..
Its ok though; Im modifying it anyway! So I put it into a roller (using the parts I had, included the detroyed rear wheel)
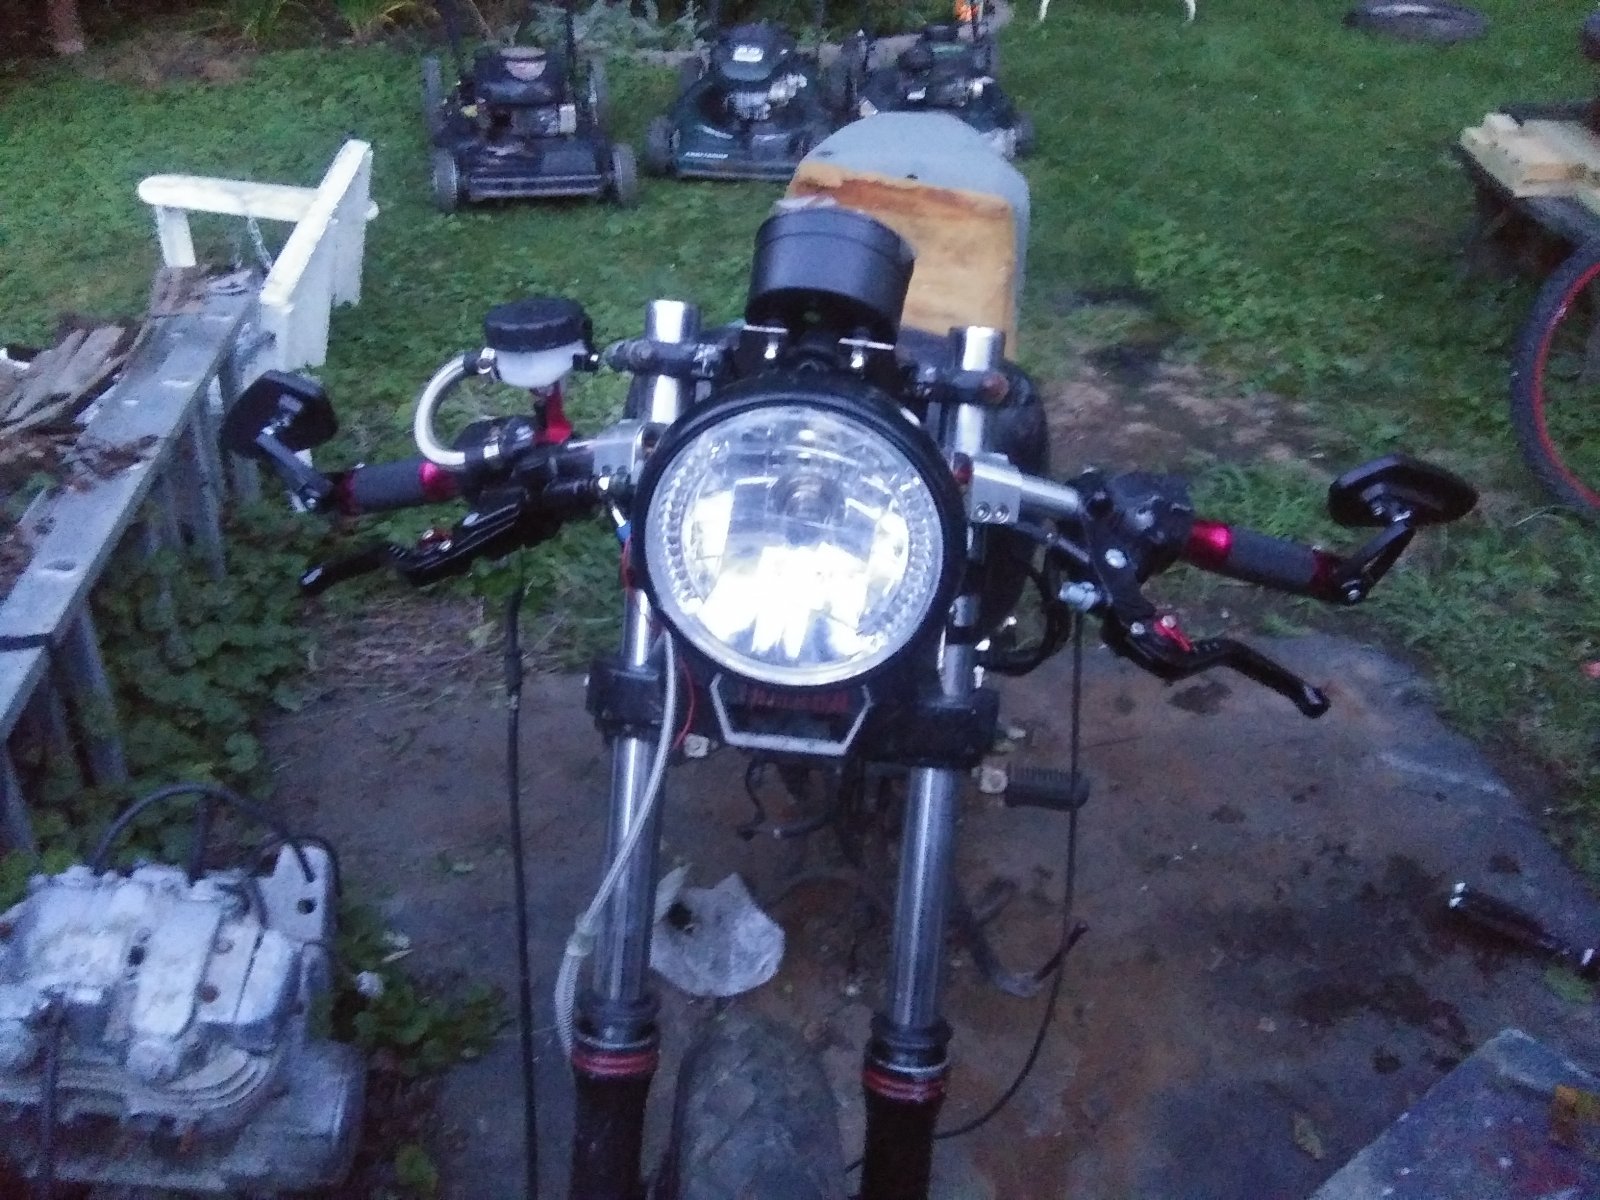
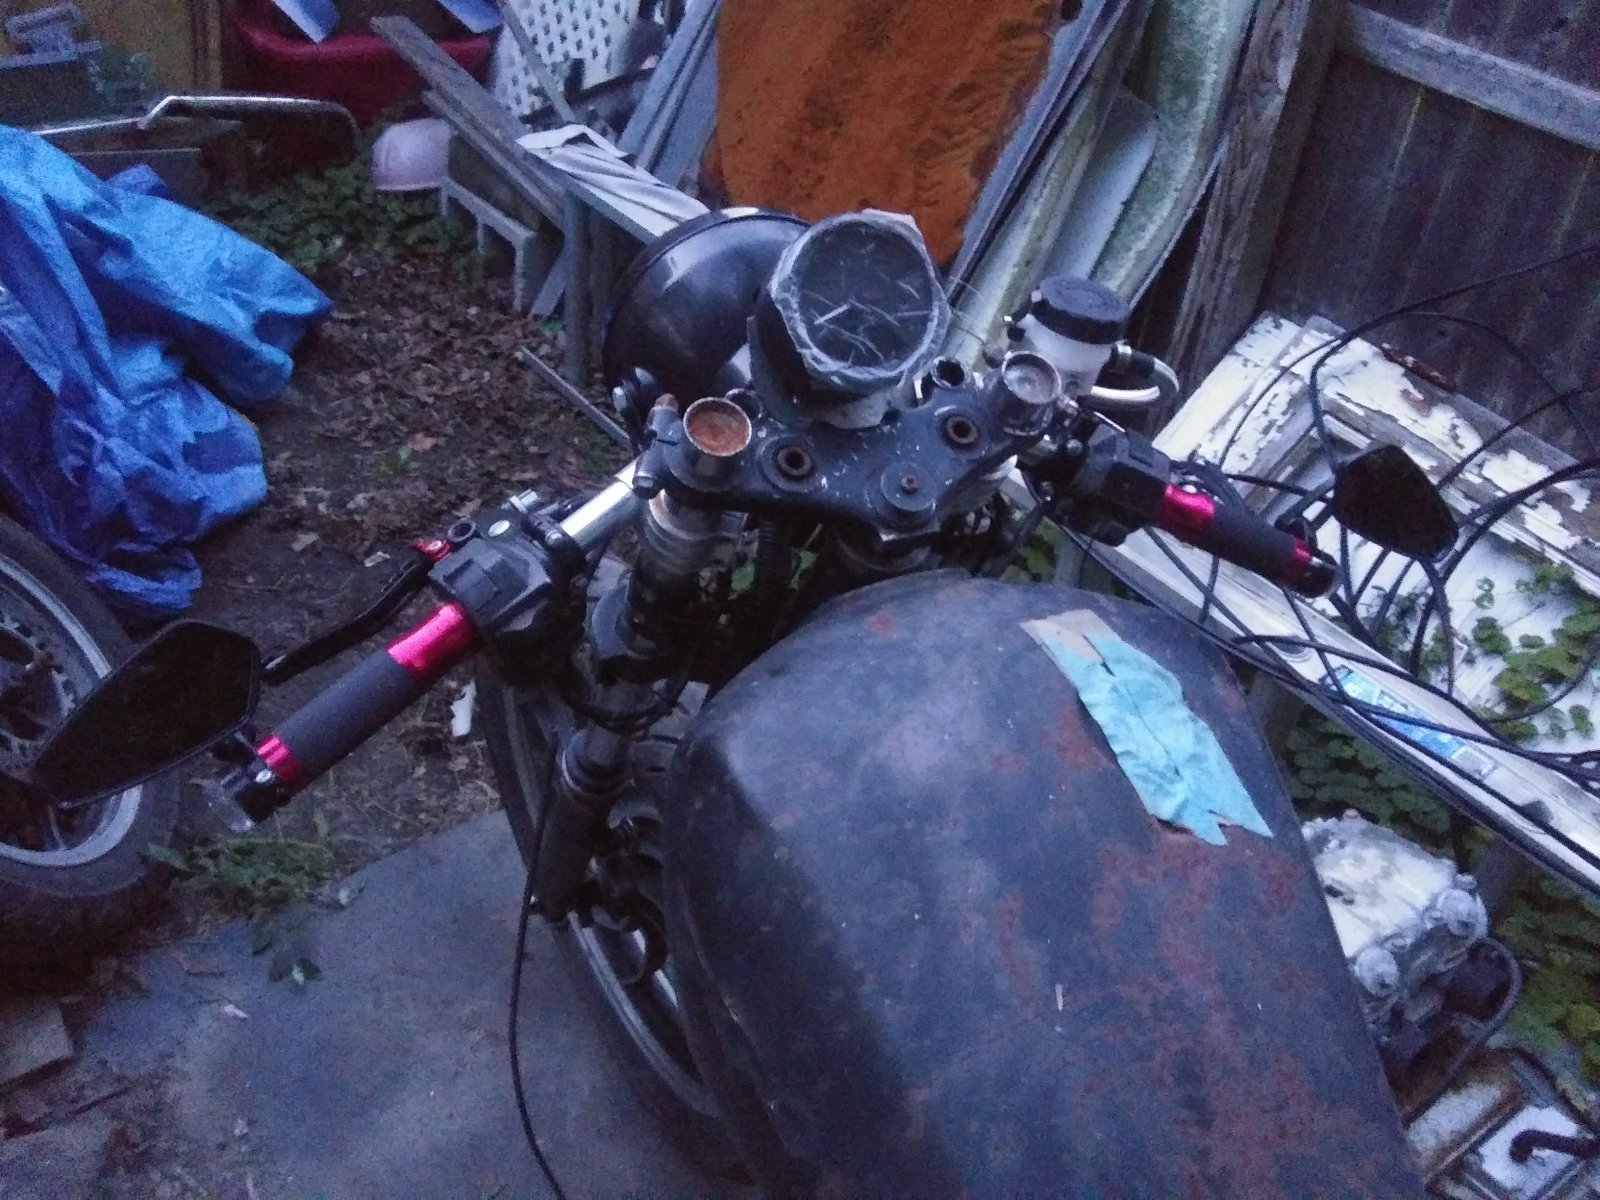
I moved the rear tank mount bar, and did a rough fit of the tank, the stock seat, and the clip-ons I will use.
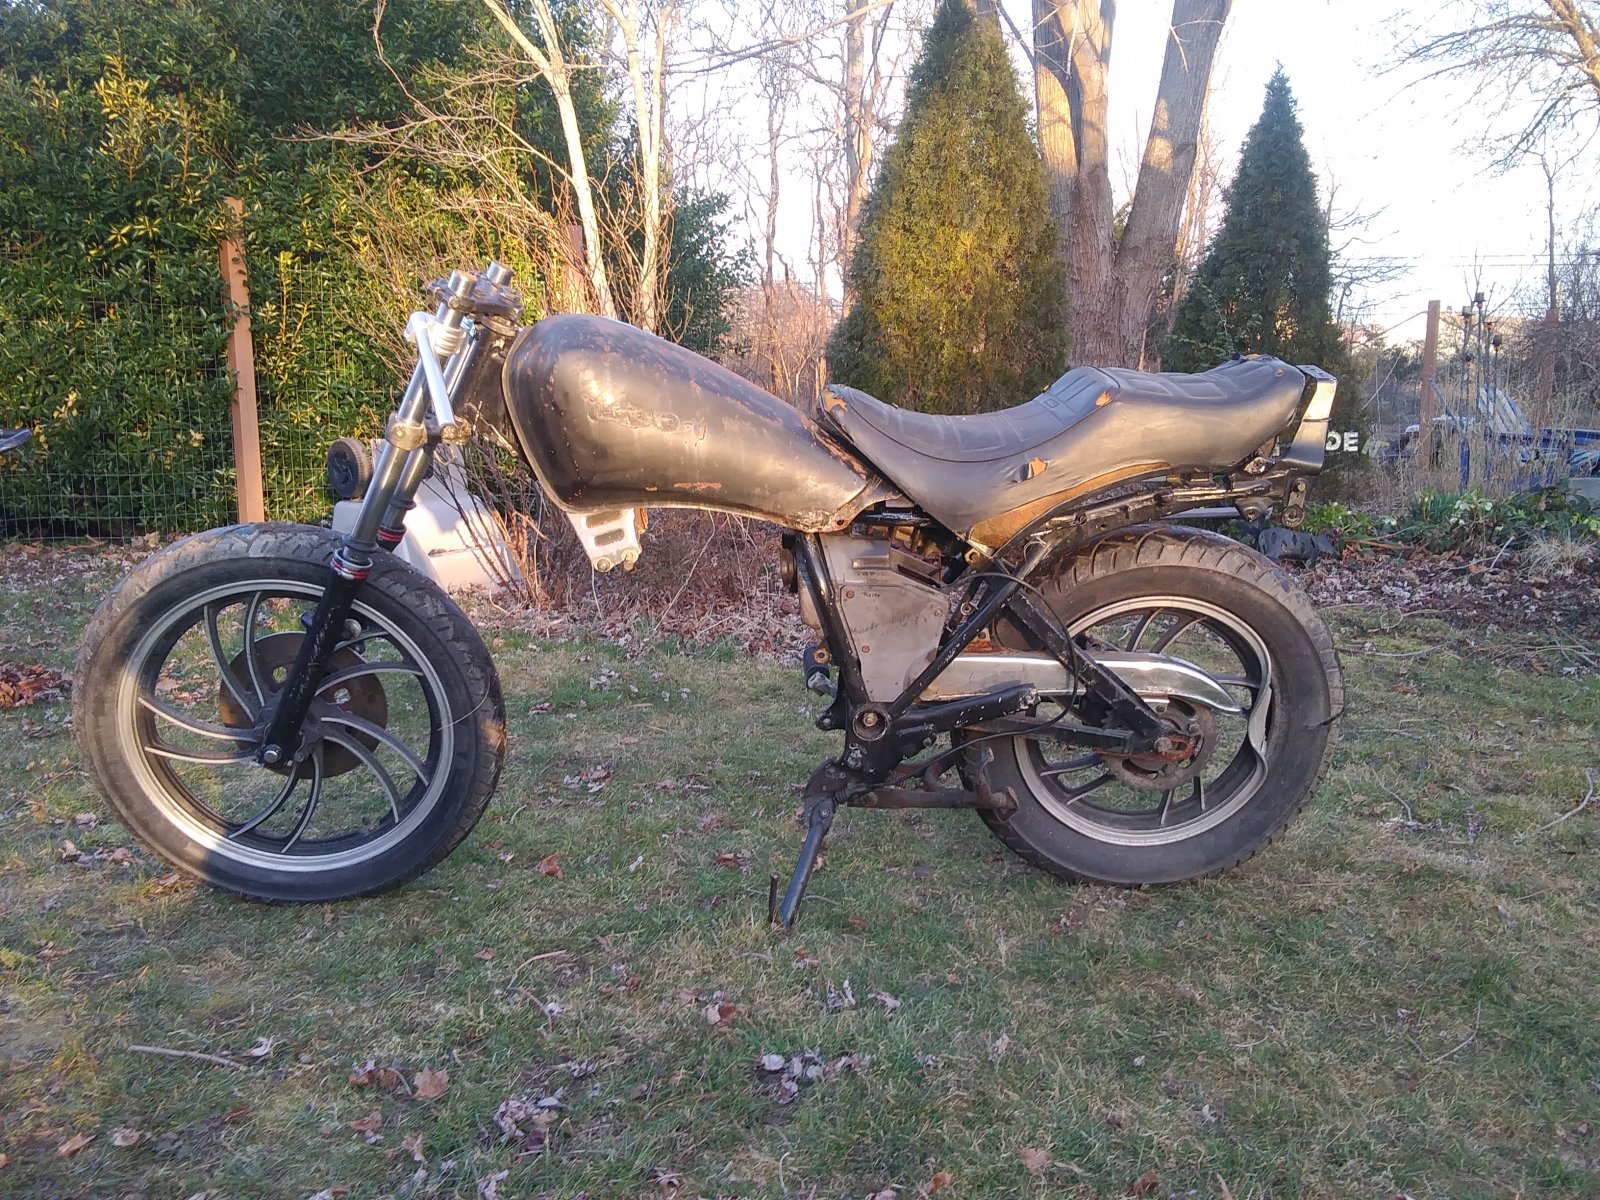
By the way...put that airbox in BEFORE the swingarm...I had to take it back off to fit the airbox.
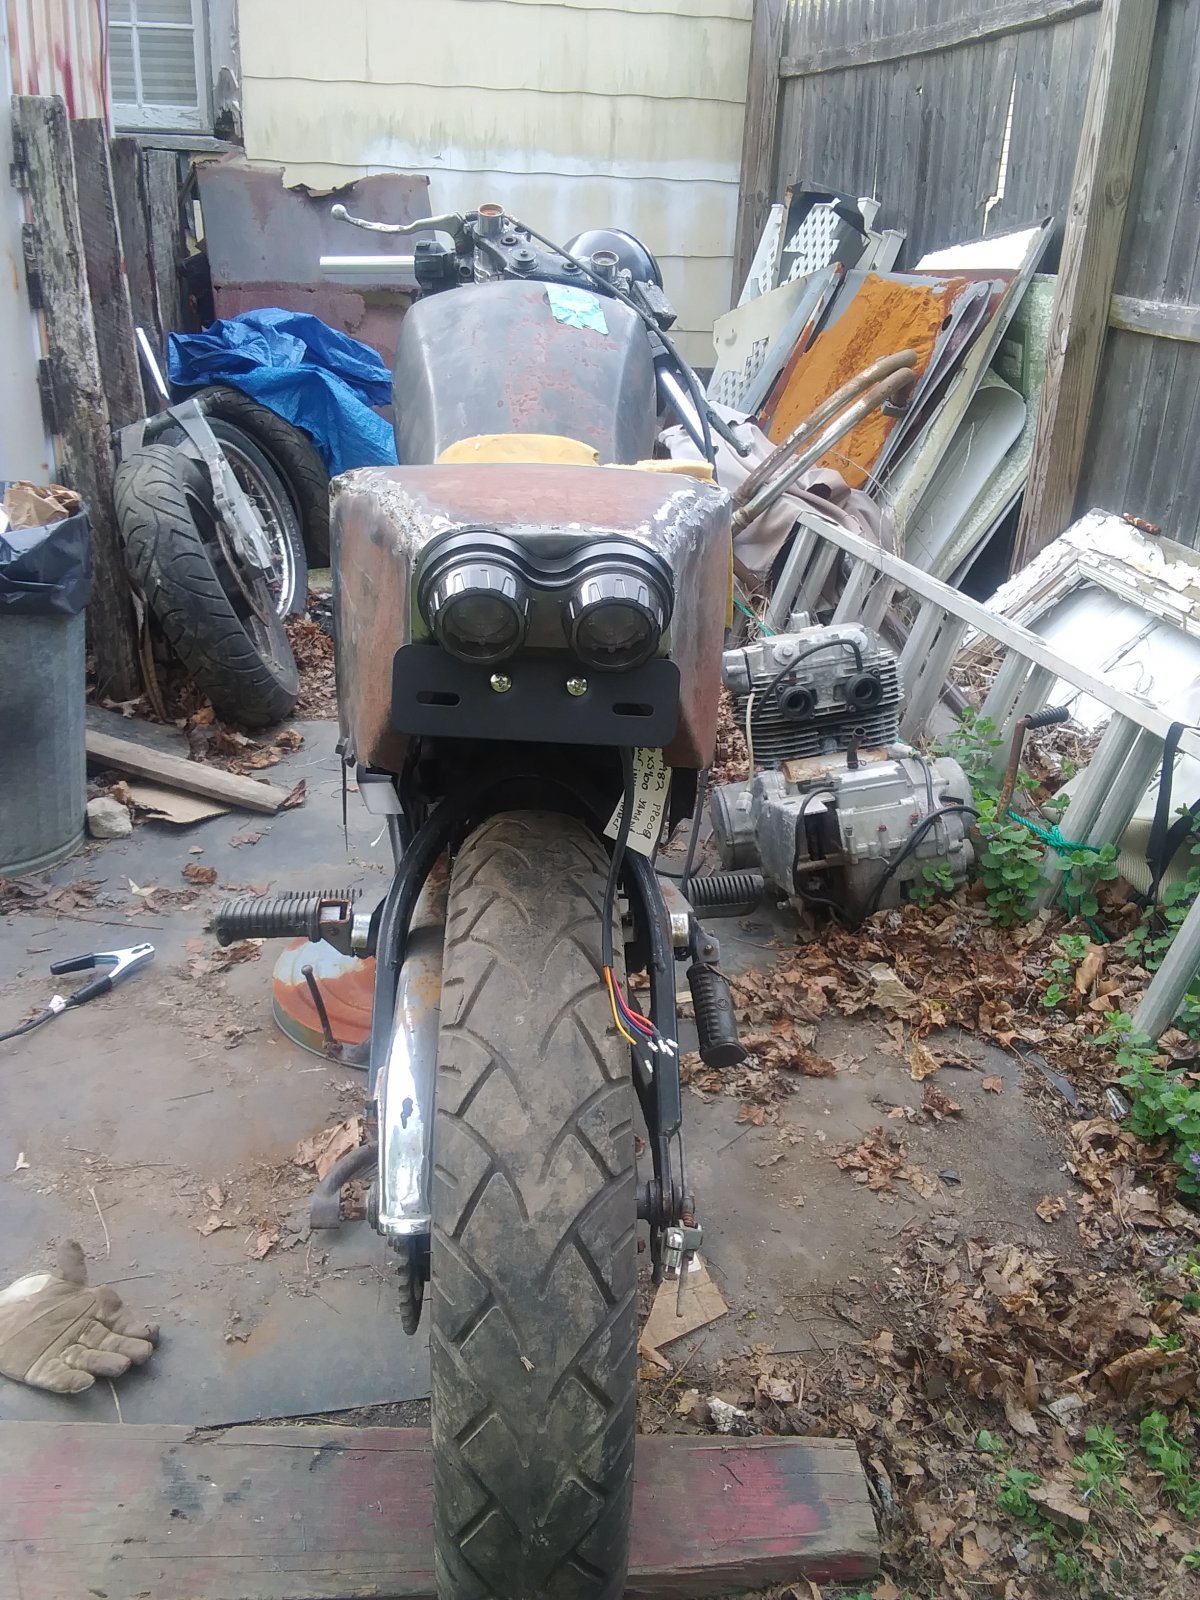
Now by this point I had an idea of what I roughly wanted the finished bike to look like. But before I go doing anything major, I want to make sure I know where everything is going to need to be. So using some cardboard, I make a mock-up of the tail that I want. I used the new tail light that I got as a guide for the size of the rear panel, cut a spare seat foam I have in half, and went about connecting the two.
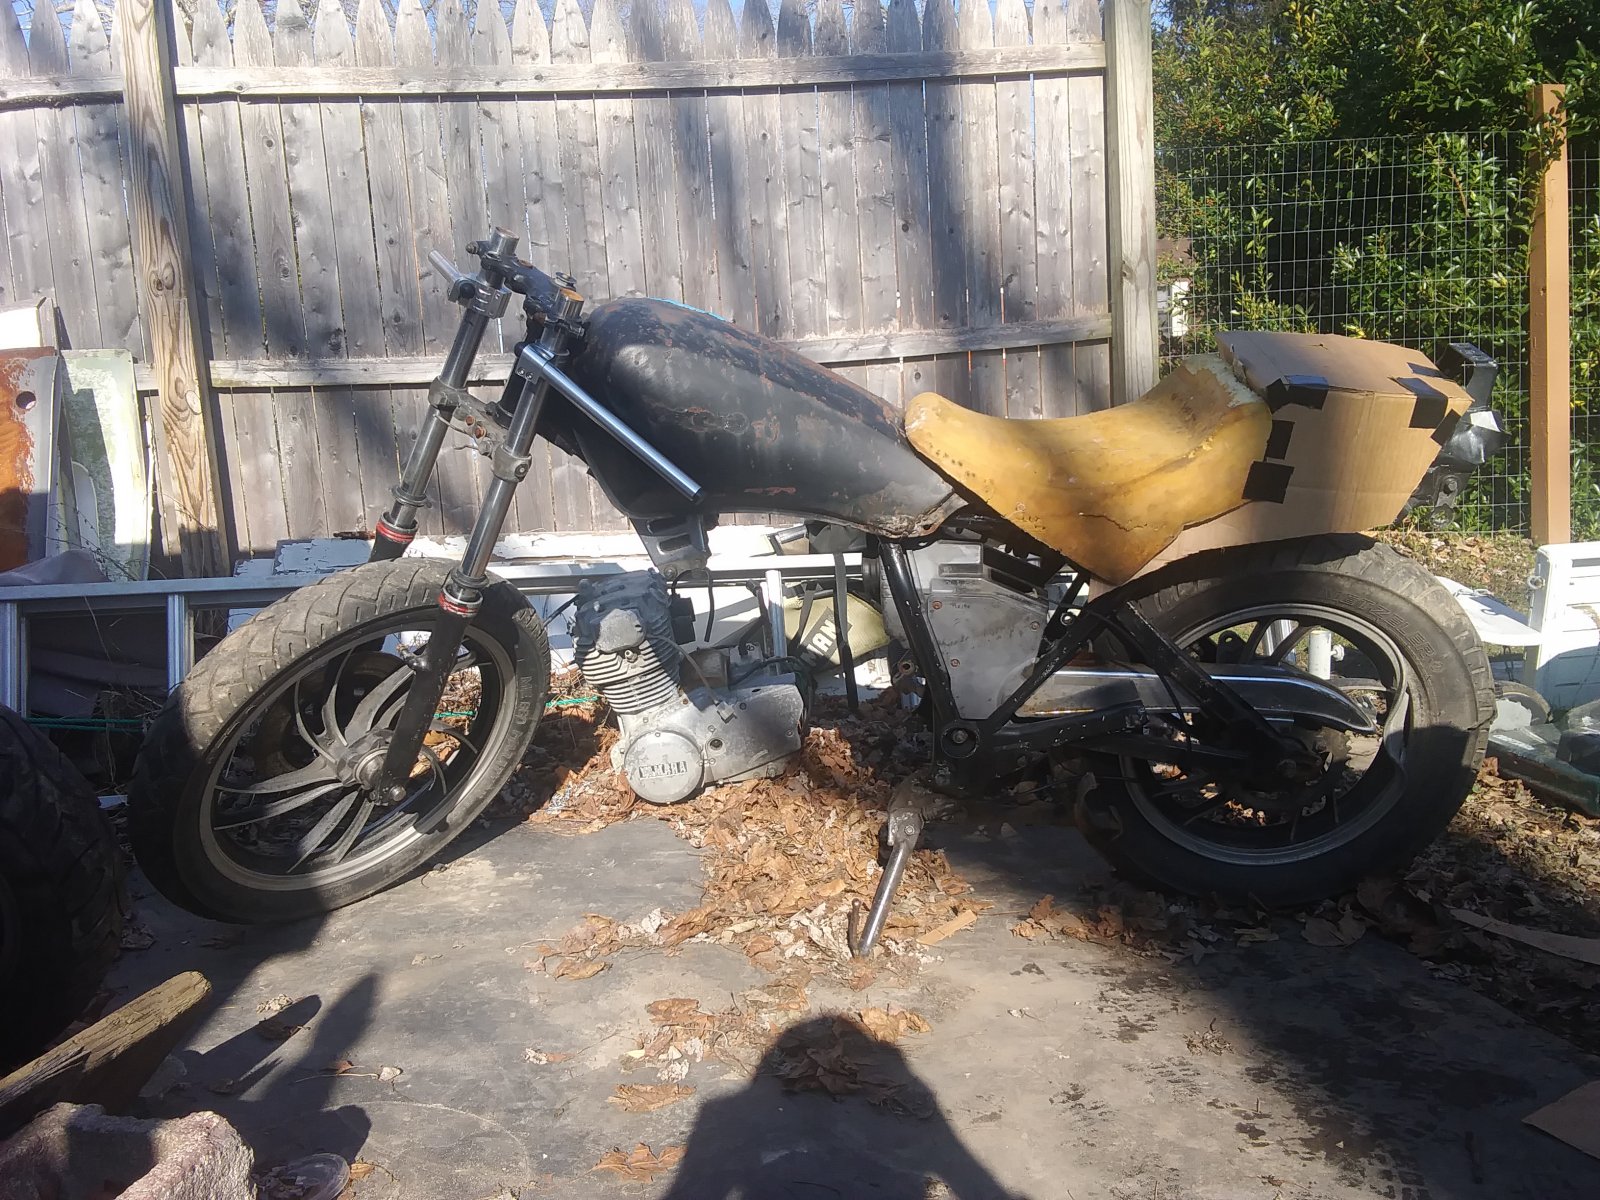
This is of course a very rough shaping. The plan is to cut the frame shorter and pair the front of the rear piece to the contors of the stock side panels. I'm also going to make the cushion for just the one rider, but want the tail to allow for the OPTION of a passenger. Just in case.
And this folks is where we sit for now. I will be updating this as I go, and trying to work as qickly and diligently as I can. Hopefully it goes well and hopefully those of you reading this will enjoy it
Then, tragically, on Thanksgiving morning, while I was drinking coffee and watching the parade, a young girl veered off the road and hit my bike, sending it bouncing the width of my yard, and totalling it.
I being the junkyard dog that I am, saved as much as possible in case I could ever use the parts again. The Yamaha badge from the glovebox now lives on the tail of my new bike.
Why do I tell you all this? Well that is the back story to what's to come.
I bought another bike, a 93 XJ600S and did a custom build on that, and though I love that bike, after all these years...the thought of my XS400... I miss it,
Soooo..... to paraphrase the 6 Million Dollar Man: We can rebuild it. We have the technology....Better, stronger, faster...
AND thanks to modern technology, and my current projects: I can do it all and put it on YouTube as a series! Ok, shameless plug. I will of course be going through the whole thing here, but if you want to watch it, thats an option too. Just click HERE
The plan here folks is to rebuild the bike, but to also customize it...cafe racer style. Now, not the way that a lot would thing to do it, one seater with the flat seat, that little hump thing... but to do it my way; fusing my background as a junkyard dog, what I learned on my sportbike, and my love of the cafe racer style and the XS400J.
The first thing to deal with was the frame. Now I could repair it, maybe use a donor tail...but the insurance company deemed the bike totaled and paid me out for it (less money because I opted to keep it than if I turned it over as it was). I never got any paperwork to change the title....but if I rebuild it, what legal issues could I have? I dont like legal hassle.
So to the internet I went, and on eBay I found it: a 1983 XS400 good frame, with a title. 200 BUCKS! Now thats a great start. Only one little catch that I hadn't noticed.. The listing said XS400, the photos looked right except for this weird thing on the tail what I assumed was a mod from the P.O. Ignorance will get you....
Its the frame from an XS400R...the Seca. So its not exact. The rear gas tank mount is about 2 inches furthe back than I need to use with the Maxim's tank that I got and the tail is different, and its longer. Bugger..
Its ok though; Im modifying it anyway! So I put it into a roller (using the parts I had, included the detroyed rear wheel)
I moved the rear tank mount bar, and did a rough fit of the tank, the stock seat, and the clip-ons I will use.
By the way...put that airbox in BEFORE the swingarm...I had to take it back off to fit the airbox.
Now by this point I had an idea of what I roughly wanted the finished bike to look like. But before I go doing anything major, I want to make sure I know where everything is going to need to be. So using some cardboard, I make a mock-up of the tail that I want. I used the new tail light that I got as a guide for the size of the rear panel, cut a spare seat foam I have in half, and went about connecting the two.
This is of course a very rough shaping. The plan is to cut the frame shorter and pair the front of the rear piece to the contors of the stock side panels. I'm also going to make the cushion for just the one rider, but want the tail to allow for the OPTION of a passenger. Just in case.
And this folks is where we sit for now. I will be updating this as I go, and trying to work as qickly and diligently as I can. Hopefully it goes well and hopefully those of you reading this will enjoy it