Refinishing my gas tank - Part 2

Sean Shameless

XS400 Enthusiast
Messages
43
Reaction score
4
Points
8
Location
Ottawa Ontario
So at the recommendation of people on here I hunted down a much nicer gas tank.
It's leak free with a good petcock, only surface rust and one tiny ding.
I plan on stripping to metal, etching primer, filling primer, black auto paint and a two part urethane matte clear to coat all with rattle cans.
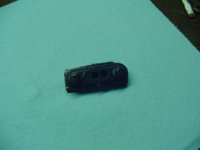
My main question is how to handle the Yamaha logo bracket/indent.
I've read a post here where someone mentioned filling the screw hole with weld but that's not an option for me.
If I'm not mistaken the alternative is to cut away as much of the tab as possible with a dremmel or grinder and then filling the dent with body filler.
Am I on the right track here?
It looks like I can spray in the shop at work over the holidays so I'm excited to get started.
image.jpeg
image.jpeg
 
Yep remove the tab (careful not to dig into the tank), and then body fill, sand,refill,sand,refill,sand.....you get it.
 
I'd be afraid that the tab would vibrate whilst ridind and cracking/dislodging the filler but that's my OCD.
.
 
I have done it on three xs tanks with no issue.
Fair enough. Proof's in the pudding I suppose.
Did you do a chemical strip right to metal?
I was planning on going at it with paint stripper after a light sand. I assume that's the best way to really clean up behind and around that little tab before filling?
 
All I did was give it a sand to get rid of any rust and clear coat then fill it. I did this on a xs650 also and if you have ever rode one you would know how much they shake. No bondo came off. :lmao: If your bike shakes enough for bondo to come loose then it might be rolling down a mountain side.
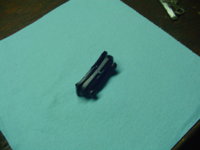
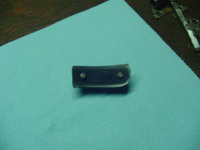
 
image.jpeg
Alright, my holidays are here, I've got all my paint, primers, clear coats, filler and abrasives ready to go.
I have one last question before I really dig in.
I'm wondering how to handle the petcock and the area on the tank it bolts too.
Should I clean the area up, reinstall it, mask it and paint around it or leave it off and mask the little are it attaches to and reinstall after everything is dry and more or less cured or just plug the holes and let the petcock seal land on the new paint?
 
Last edited:
I would make sure it is cleaned to bare metal and then cover it before you paint. I use an old petcock bottom with a bit of rubber under it for painting tanks. You may net have one that you can do this with but maybe you could fab something up.

DSC03169.JPG DSC03170.JPG DSC03171.JPG
 
So I tried to get the petcock off of my old tank to use as a template but it's epoxied on there pretty good.
Looks like I'm going to have to get creative.
Although the tank I'm prepping apparently didn't have any leaks it looks like there had been at least a slow leak of some kind around the petcock. Seeing the paint has peeled on the one edge in the pic above tells me there's be a little something happening.
Is there any proper way to help ensure a good seal on the petcock when it all goes back together?
Maybe a sealant of some kind?
 
Do not use any sealant!! There should be an o-ring between the tank and the petcock. Also the bolts that secure it there should be sealing washers. https://www.mikesxs.net/yamaha-xs650-tap-to-tank-o-ring-oem-2g2-24512-00.html https://www.mikesxs.net/yamaha-xs650-tap-to-tank-mount-screws-washers-oem-256-24143.html https://www.mikesxs.net/yamaha-xs650-petcock-non-vacuum-type-oem-447-24500-02-00.html The petcock that was on your old tank is off some other model. I would replace it with a new one that fits like it should.
 
Thanks.
I seem to have the o-ring and screw seals on the petcock that came with my new tank but I might go ahead and order fresh ones to be sure.
I was only messing with the old one to possibly make a painting template thingy like yours.
 
Last edited:
image.jpeg
image.jpeg
image.jpeg
image.jpeg
My arms feel like they might fall off but I had a productive first day stripping the tank down.
I'm struggling to get into all the little nooks and crannies and am finding it hard to work on the tunnel so I'm going to check out the hardware store tomorrow to see what I can find to help.
I have a dremmel, some air tools, drills etc. so I'm sure I'll find some helpful sanding goodies for curves and tight spaces.
So far this has been a palm sander and a sanding block.
 
image.jpeg
image.jpeg
I decided to cut away as much of the logo tabs as I could in order to clean up in behind a little better. It's probably for the best. It was a little rusty behind there.
 
Back
Top