Here we go! My 79 restoration/ cleanup

New guy

XS400 Member
Messages
29
Reaction score
0
Points
1
Location
Kamloops BC
Greetings all. First of all I just want to say how great this site is. I have been checking it out for a while and I am really stoked to have all this info at my finger tips. Thanks to everyone that offered me advice so far, it is appreciated. Hopefully as I go through this bike I can keep you guys informed of my progress and pick your brains as needed for things I can't figure out. Its pretty cool to have so many experts checking in all the time and willing to help guys with their bikes. I will try to figure things out for myself with the search and past posts so I don't bombard you guys with noob questions all the time. So once again thanks in advance to everyone who has some ideas for me.

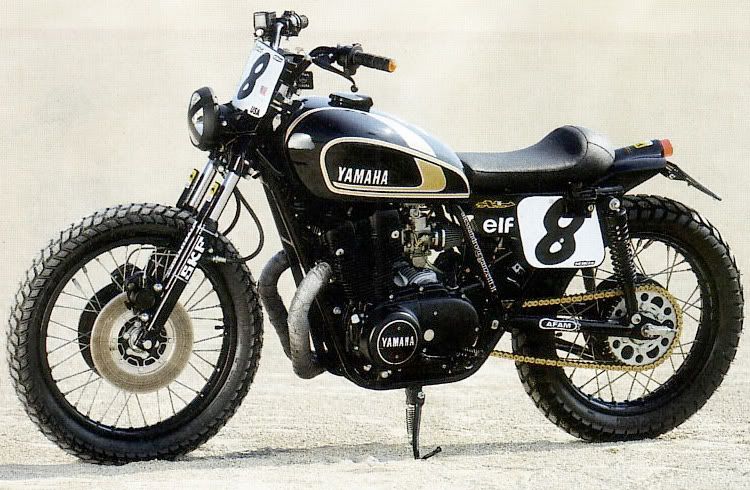
A little background. I bought this bike two weeks ago and had intentions of turning it into a tracker style but now I think I will just clean it up as best I can and get some collector plates for it. Its growing on me as stock bike. This is the style I have in mind for a later date. This bike speaks to me! Its saying "say good-bye to your licence bro!".

-273flyamaha_xs500_flat_track_01.jpg


My bike is a 79 xs 400-2f-sport. I know this because it is written in the manual. Well, the half manual actually. My manual is up to page 18, the start of chapter 3. The rest is missing so I will try to track one down. If someone has one lying around and wants to get rid of it let me know.

I put a vid up of me starting it for the first time so here it is again. Its 6 min long and not really that exciting so watch it if you want. I have pulled the carbs off for a cleaning now so the next vid will hopefully be me starting the bike and it purring along.

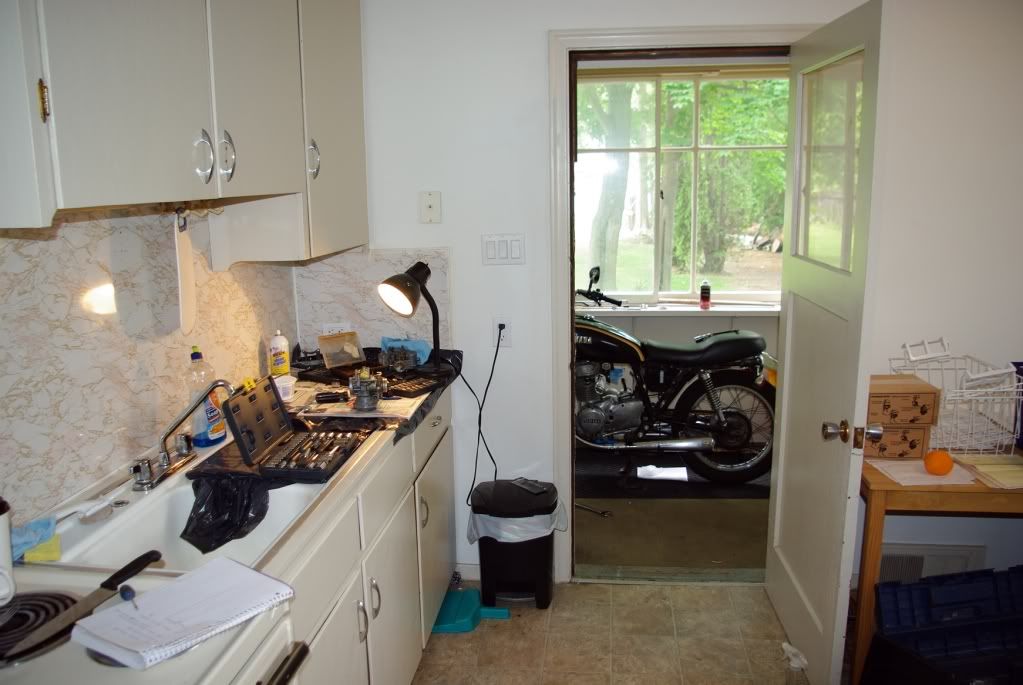
Here is my garage. It looks a lot like my kitchen.
kitchen.jpg


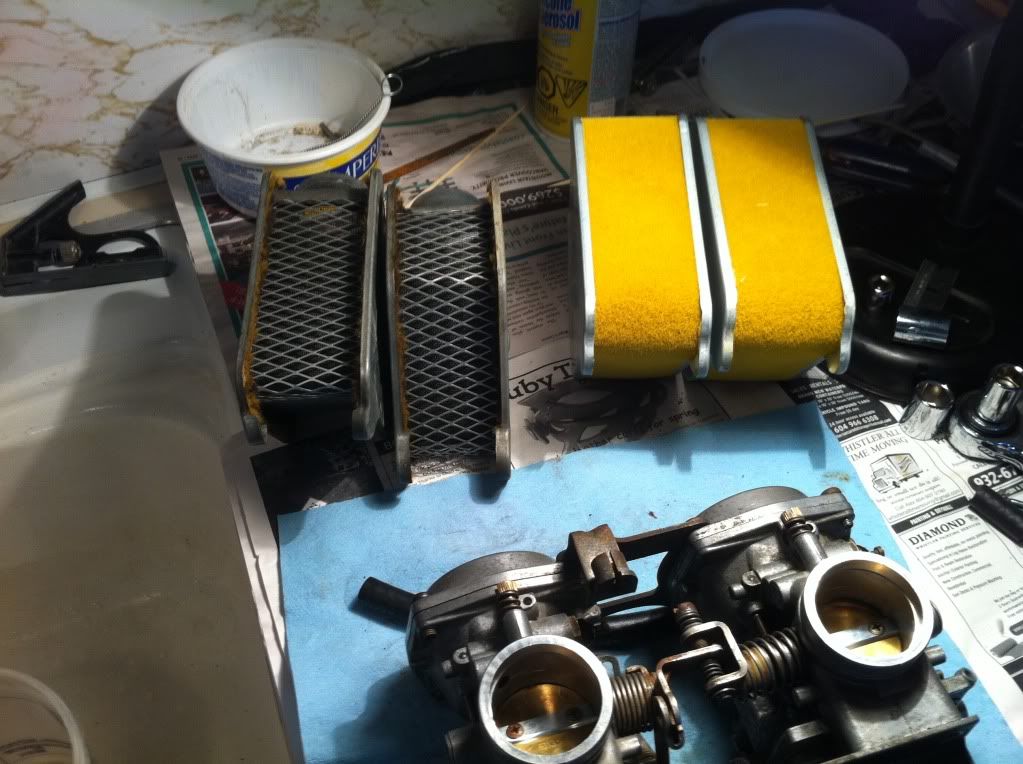
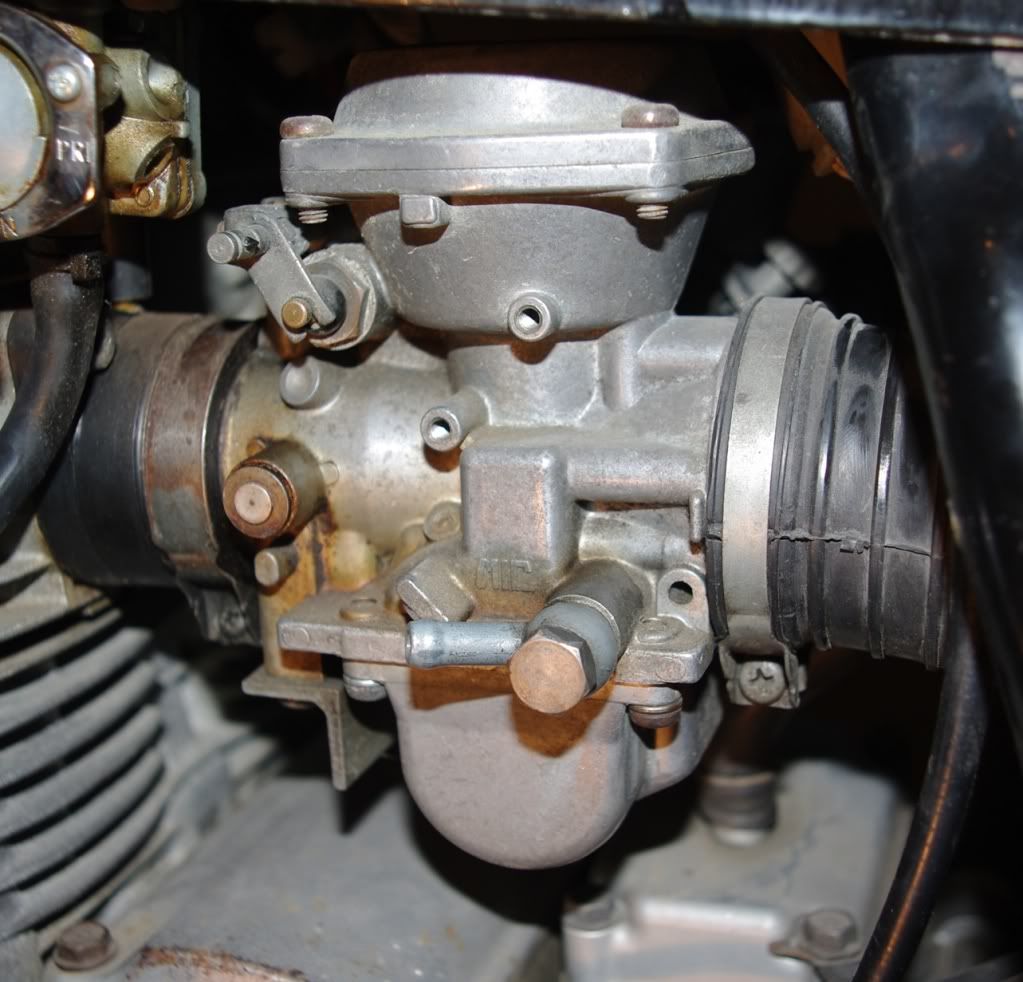
This is my first time trying to clean a set of carbs so I am looking forward to learning how it all goes together. There has been a few things right off the bat that are causing me some concern. First of all there is no choke lever. If anyone has a good photo of how the choke lever looks and sits on the bike maybe post one up for me. I tried looking for one but can't find a close up of it.

carb3.jpg


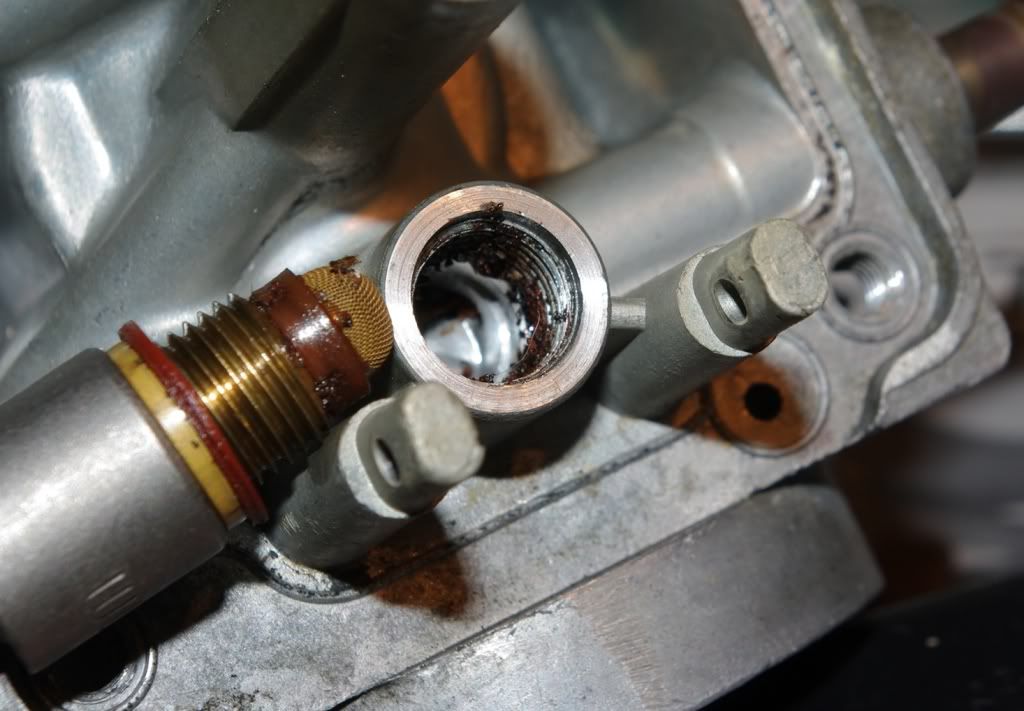
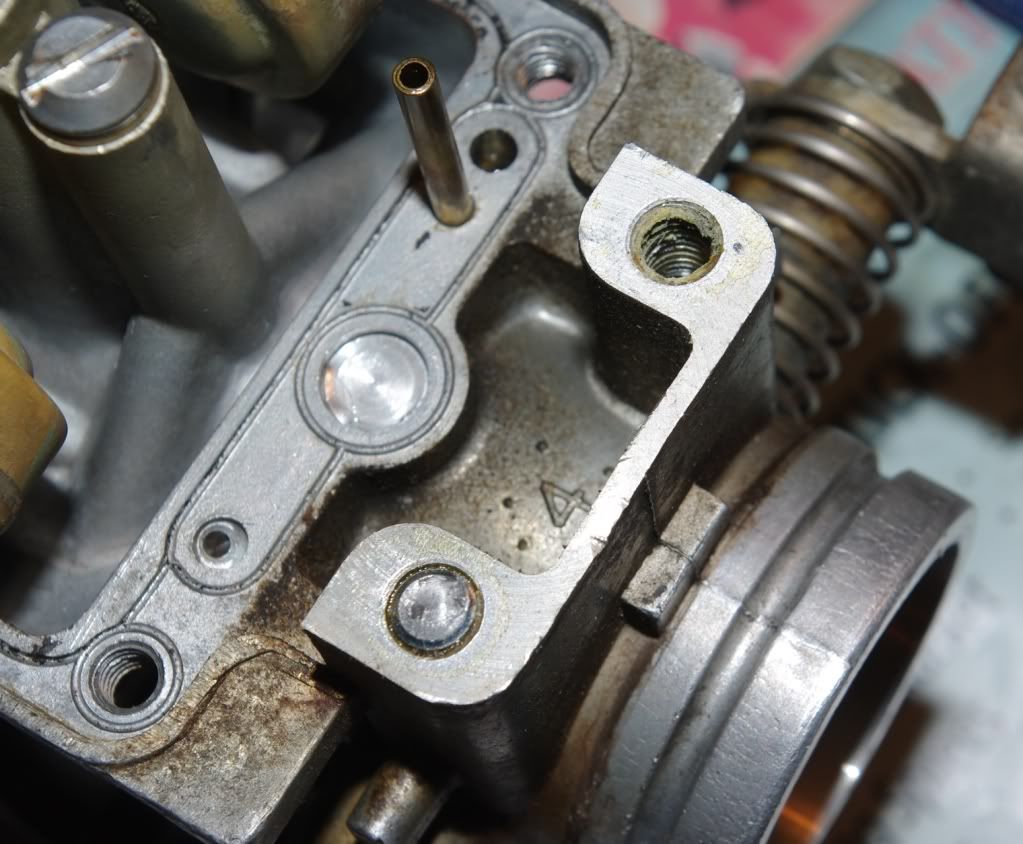
Second concern is I snapped of one of the bolts holding on the bracket. The other three were a nightmare to get out as well so it was pretty stressfull but I got them out. Not sure if they were loktited in there or just old age. I am trying to take it easy taking everything apart to avoid breaking anything else. Im not even going to try to get that bolt end out! Will have to make due with the one bolt holding it together.

carb1.jpg


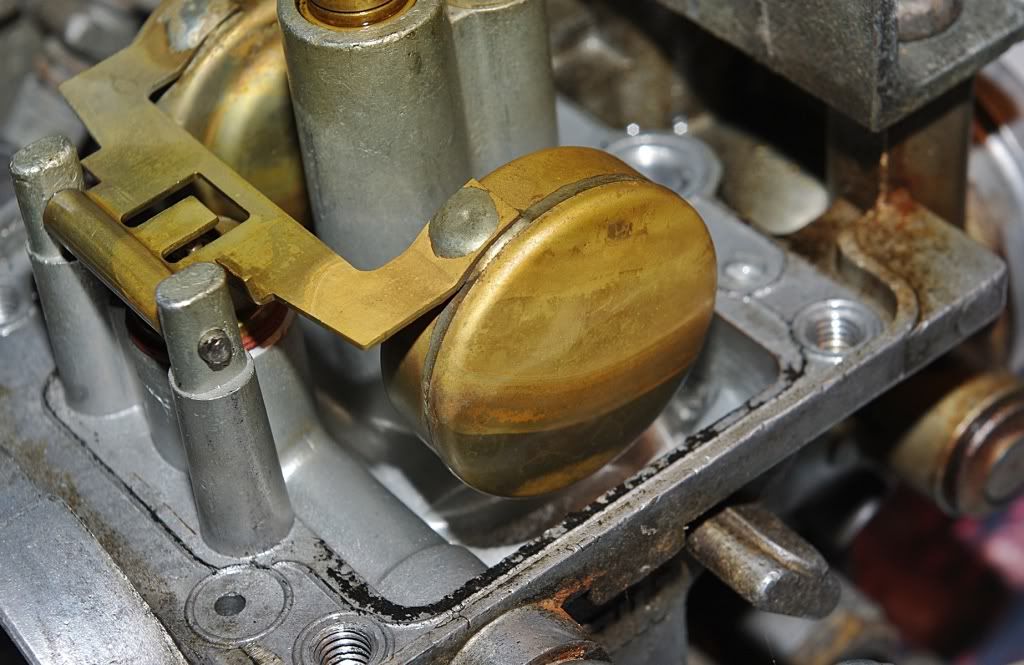
So here I am with taking things apart. So far so good except I am trying to take the floats off and they are giving me a hard time. I watched bcware's carb tutorial and I am pretty confident I will be able to get them out and back together and working. Thanks to bcware for posting that carb vid, its awesome, even if it looks like it was filmed with a banana!:D Thanks bcware.:thumbsup:

carb2.jpg


Thats about it for now. Going to town on this carb and see how it goes. Hopefully I will have it figured out to tackle the second one with less time watching the computer for tips. Its supposed to piss rain all weekend here in beautiful British Columbia so I have lots of time to work on the bike. My goals for the weekend. Peace.
Andrew

-Get carbs cleaned and back on.
-install fuel line filter I bought
-change fork oil(manual says 10w/30 motor oil?)
-clean chain. How much rust is too much for a chain?
-lube all cables
-drink beer and watch hockey
 
I see your choke lever. It's missing the black plastic piece to grab onto, but it's still there. In your first carb picture it is up by your diaphragms. The pull lever passes in front (to the left in this picture) of your diaphragms and the choke actuator is the rod that is brass and black connected to it at a downward 45 degree angle. If you can't find it I will post a picture once I get the bike out tomorrow afternoon.
 
Thanks JA, I guess I should have specified. I got that the choke was there, I was wondering what the handle looked like. I thought it would be a flip lever like a snowmobile but that makes sense its just a small plastic handle. Any idea what the two ports directly to the right of the choke are? They are both threaded but don't seem to connect to anywhere.
Thanks
 
Look for houghmade's 5 point carb clean process. its on here somewhere. Also the choke pull knob is just a black round piece of plastic attached to that rod sticking out. A little piece of the black knob is still stuck to it. Top left side of picture,beneath the diaphram housing. Probably really hard to pull on it w/out a knob though.
 
Looks like a different carb than mine Drewcifer. My choke pulls out the side of the bike. I have it figured out now.
I can't seem to get the emulsion tube out. Is it supposed to just slide out up towards the diaphragm? In bcware's vid his tube just fell out when he removed the diaphragm. Not sure if I should tap it out or what? Plus I screwed up and mangled the top of the pilot jet trying to unscrew it. Looks like it staying in there for now. Not sure if it will affect the way it works with the slot opened up a bit but it is in the same position, it didn't move at all.
 
It's actually the other one, Drew. He has the pull lever like on the more recent version of the carbs. The threaded holes that don't seem to go anywhere on the side are for the lever type that you have on yours. From what I can gather, the same carbs were fitted with either choke at final assembly based on what bike it would be going to.
I'm done with my tangent :)

I use a screwdriver to drive out the emulsion tube from the bottom. Use only VERY light taps to get it out as it is made of brass and is permanently damaged very easily. You can use a vicegrip to remove the main jet (I believe) if you're OK with it looking a little more mangled but coming out.
 
Ill try tapping out the tube. I mangled the top of the actual jet, not the cap. Not getting that bad boy out easily. Bummer. Its a skinny hole and I ground down my screwdriver to make it wider to fit the slot but screwed it up any way. Back to it. Thanks JA.
 
Here ya go.

Sweet, thanks! I have the carbs all back together and ready to put back on the bike. The right carb was a mess compared to the left. Lots of crap in there!

carb4.jpg


carb5.jpg


I noticed the right air box connector is a little mangled. Its pushed back in the box a bit so will fix that and get a good seal. Maybe thats why there was so much crap in the carb. Hope to have it all back together quickly but not looking forward to it. Sounds like a shit show getting all this back together from other posts I have read. Id use the hair dryer but I don't have one! One more reason why being bald sucks, lol.
 
Carb has been cleaned and put back on the bike. Starts up nice and sounds great. A nice burble to it. But there are some problems. I took some vids and will post them up when loaded.
Here is how I set up the carb.
-floats set at 26mm
-pilot screw out 3 1/2 full turns from finger tight
-Wasn't sure how to set the idle speed so I set it fully closed and just went out from there.

I did put a gas filter on and not sure if its screwing things up. Seems to have a little gas in it at all times.
I did screw up the top of the pilot jet on the left side. I mangled the slot on top so I didn't take it out. I didn't touch the right side pilot jet, I just cleaned them up well.

Now the bike starts and will idle but when I give it gas it lags then revs up. After I shut off the throttle the revs stay high. I took it for slow ride out front and the revs kicked up without increasing the throttle, causing me to accelerate. The end of the vid shows how the revs stayed high for a while and did not come down at all so I shut the bike off.
I'll post the vid so you can check it out.
 
Elaborate on the pilot screws. The pilots are inside the float bowls. I expect you meant idle mix screws (on top of the carb barrels) so I'll relax :p
The rev climb and lag might mean that your mixture is set too lean (perhaps not a perfect seal on the air intakes) as well as your idle being set a little bit high. The idle set screw can be found on the bottom, in between your carbs. It should have a spring stuck to the threads and will press on the throttle junction. From my experience, I've set it about 4 turns from 0 lash but you may want to set it higher or lower based on your comfort with high or low idle revs.
 
Sounds like your almost there. Carbs sometimes need multiple cleaning. Took three trys for me bcs I did the 'squirt carb cleaner in all the holes' method. Sometimes that dosnt get it all. Not sure about that pilot jet getting jacked up,that might have to come out and be replaced. I believe the pilot jet is part of the idle circuit and helps start the bike and run at idle? Those usually get 'coked' and frozen in the threads.Looks like the rest of yer carbs were filthy so would not surprise me if those were filthy too.The pilot jet has tiny holes like the emulsion tube.
 
Drewcifer- The throttle cable seems good. It doesn't lag at all. Everything moves at the same time when I twist and it snaps back pretty good. I will try to lube it but not sure how to get in to it at the top and I figured I had enough things apart at the moment.

JA- I meant the idle mix screws. I have a diagram that calls them the pilot screw so thats what I went with. They are out 3 1/2 full turns from finger tight. The idle adjust was fully closed after cleaning and I turned it out while messing with the bike. You will see in the vid where the bike is idling higher and thats after I turned it open a few turns everytime. At the start it was pretty much off and open as I went along.

xsneo- You may be right on the pilot jet. I looked at a pic and noticed the small holes like the emulsion tube, they may be clogged for sure. I didn't even try to get it out on the right side after mangling the left. Better pull it off and see if I can get it out. I soaked it pretty good with carb cleaner and overnight in vinegar so it was way cleaner than before but the pics speak for themeselves as to how messy it was in there. Guess they are coming back off for another cleaning.
The boots are in good shape and I think I have a good seal but I will take them off and reattach them. They slipped on pretty easily so maybe they are stretched out a bit. From what I read here they can be tough to get on but mine were a breeze. Is there a product you can put inside the boot openings that will help seal it without causing it to slip off?

I sprayed all the holes out like the 5 step spray clean said and it was good.

Now how to get a mangled pilot jet out of that tiny hole??

Heres the vid. Thanks for the help guys!

 
Ok that might be getting into the needle valve and sliders.Next time you have the carbs off, blow into the large oblong shaped orifice on the 'intake' side of the carb 'bell' and watch the slider go up smoothly and slowly down.
Read this: http://www.dansmc.com/carbs2.htm so you know what all the different carb systems do and what to possibly look at. Good luck.
 
Howdy, time for an update.

I figured out why my carbs were so dirty! The new filters look a little different.
005.jpg


I knew the air filters were not right or at least missing something and now I know. Its amazing how you can miss the most obvious things when you are tearing down a bike. Thoughts of riding into the summer sun can cause you to get a little ahead of yourself so from now on only logical, deliberate investigating when diagnosing a problem with the bike. I got pretty lucky getting the new filters. I was in the local Suzuki shop looking for jets and the counter guy asked what kind of bike I had. I said 79 XS and he looks at me and goes " hold on, I have something for you". Comes back with two dusty boxes from the back. Two new air filters! Said they were there from when they moved shop in 2001 so he gave them to me for $15 each. Sweet.

I tore the carbs apart and cleaned them again as recommended and reinstalled them. New fuel filter as well. The bike is running pretty well now. Sounds great with a nice burble. I want to do the points and timing and check the valves next. Should be fun. I am a little concerned because it seens about one in every 10 bolt will not come out and ends up getting stripped.
I cleaned the chain and decided to take the small sproket cover off and stripped a bolt. FAK! Broke a bolt in the carb body that holds on the brace and its never coming out. Stripped the pilot jet but got it out! I couldn't even get the drain plug or the oil filter bolts off. Will try again with a hot motor and looong wrench. I am getting seriously gun shy about touching any bolts or screws.

The throttle cable was hooped after all and a new one has been installed and works perfectly. No more revving and lag with the new cable. Did a few laps up and down the block and was running well and sounded great. Its better to listen to you guys at the start and save lots of wasted time.

Now to tackle the next problem. Electrical problems.
1- The brake lights.
The brake light is on at all times. Not sure if the problem is the rear sensor or the front. I am assuming using the front brake only will turn the brake light on. Is this correct or just the rear? Any way to check or is it just replace sensor and move on?
2- The turn signals won't blink at idle. They are on but no blink. If I rev the bike all the lights start working(brake light still on). Not sure what this means. Any ideas.

Thanks again for all the advice, wish I could buy all you guys a few beers for the help. :thumbsup:
 
Back
Top