Intro and Questions 1982 XS400

Charles

XS400 Addict
Messages
379
Reaction score
1
Points
18
Location
Jacksonville, Fl
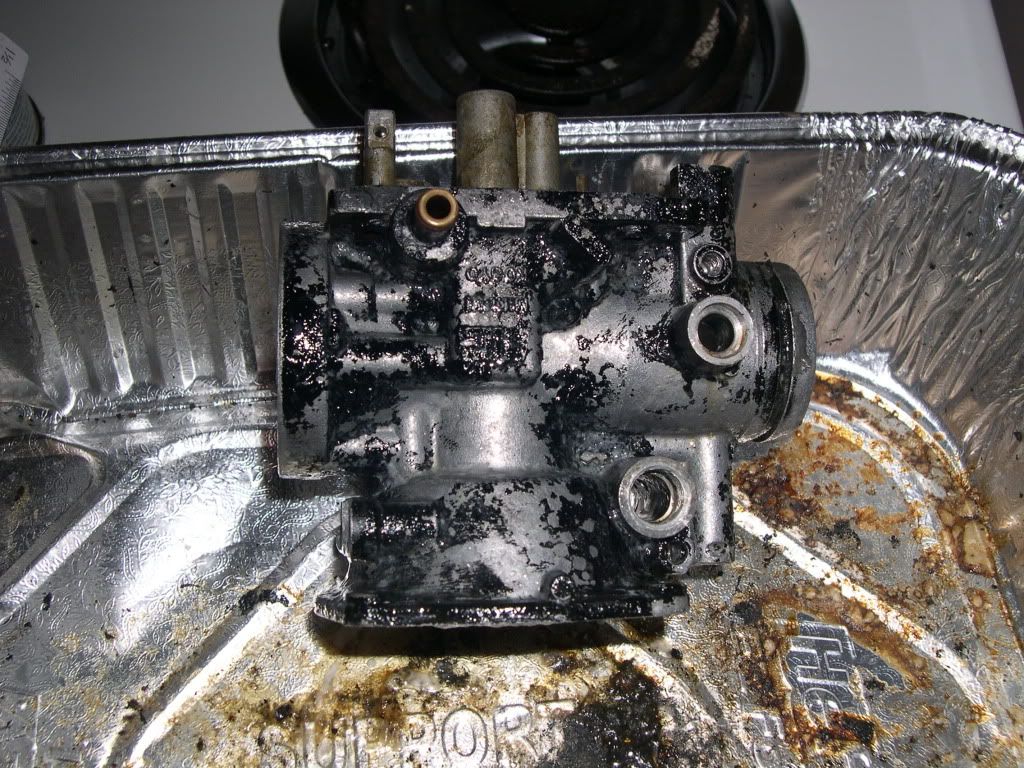
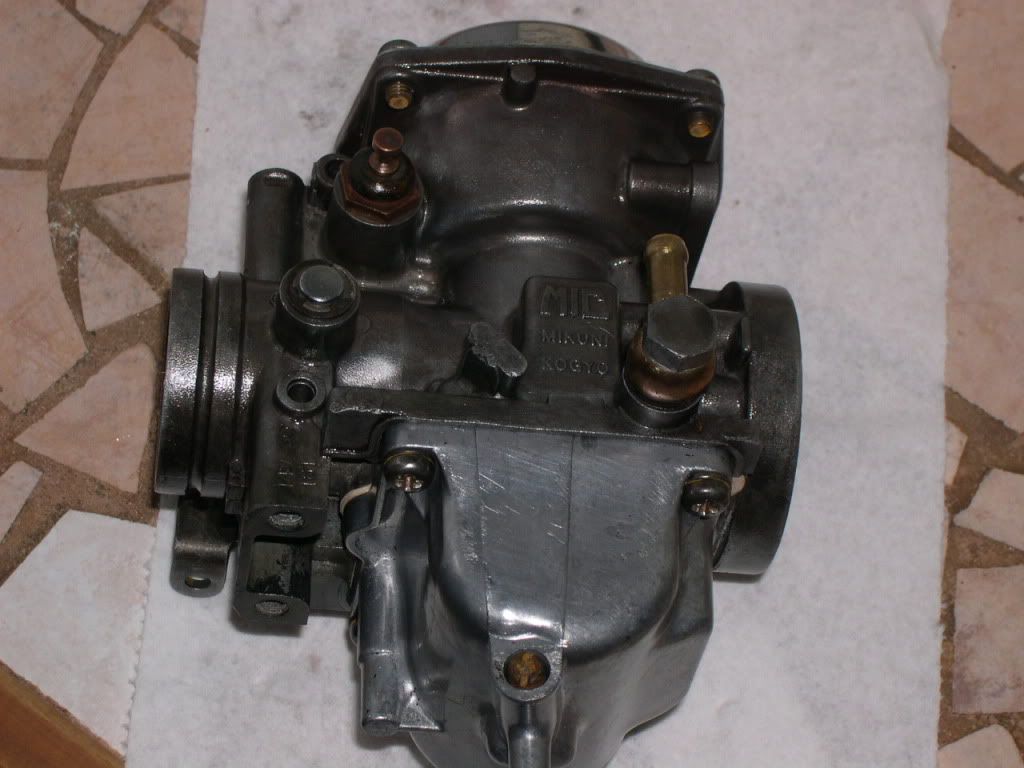
Hey guys. I just recently bought an 82 XS400 as a rebuild project for my son and I. This will be my 3rd bike, but the first one where I've messed with the carbs. I know right off I have bad diaphragms, which have been ordered from JBM, so given that, I decided to go ahead and tear them down and clean them up. The first carb seems to be going well. I boiled them in lemon juice and they look pretty good. Now...the float level. I keep hearing multiple numbers here. I have an 82, so it's a post EPA change BS34. I read that turning it upside down and measuring from the float top (top of the float when it's upside down) to the top of the carb flange will work. I'm getting 22mm. Good?? I've read 22, 26, 32, so I'm not 100%.
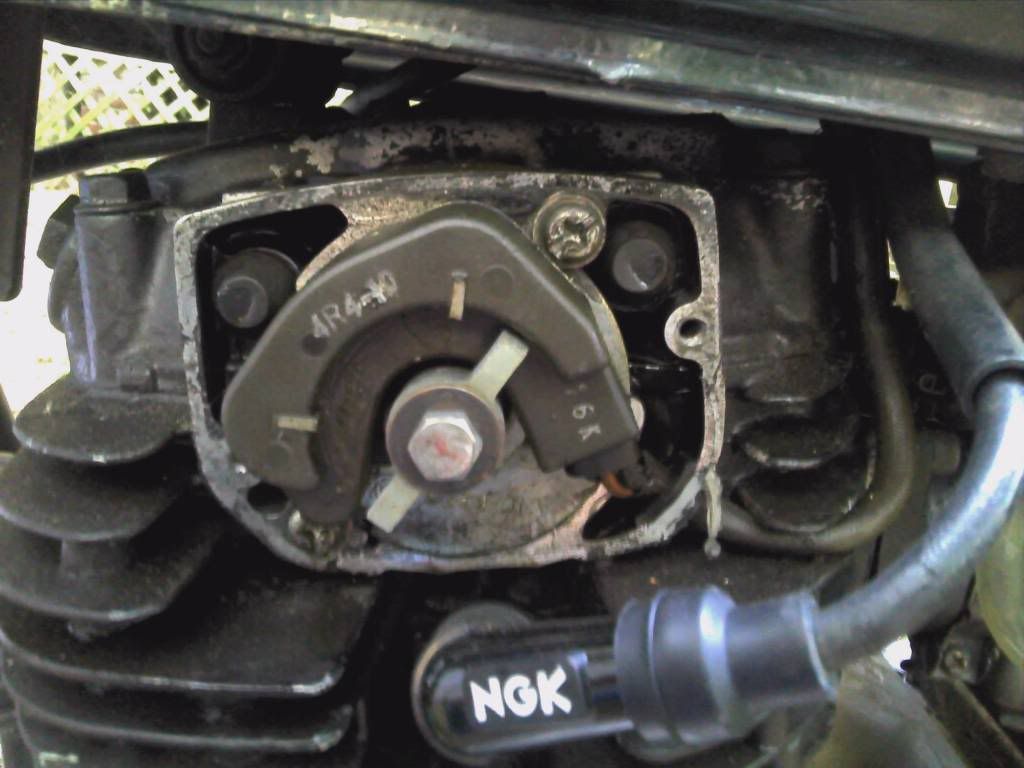
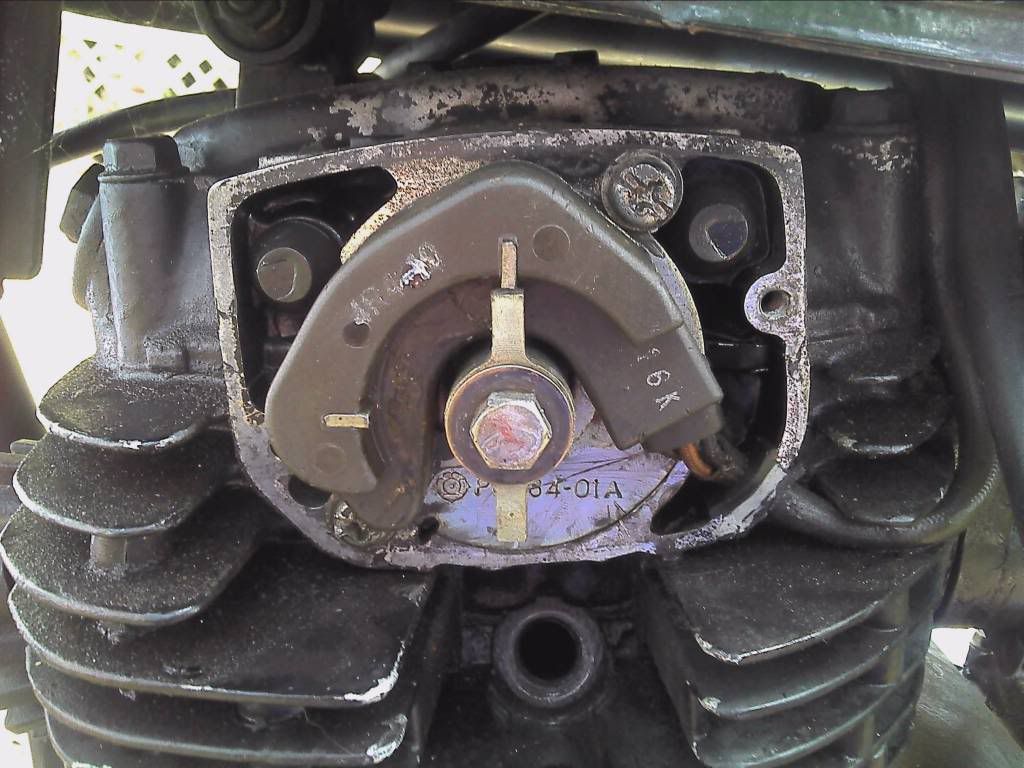
Second, right behind the pilot adjustment screw (is that the same as the idle mixture adjustment??) is a ball and spring. I'm missing both of those. I'm assuming I can run up to the dealer and snag those, but will they prevent it from running correctly?
Third, the bike doesn't have air filters, so I thought I might as well get some pods. It already has drag pipes. Currently, it's running a 135 main and a 42.5 pilot. Think that will work for pods/drags?
I think that's it for now. Looking forward to making this a bike worth posting about. :)
 
for the later carbs, you need to take them off and set them up on the bench as a set.

run a clear tube from under the float bowl and wire it up past the top of the float bowl. fill with fuel and the level should be 2mm below the joint.

adjust by taking off the bowl and bending the tang and rechecking.

A ball ache I know but that is the easiest way.

those little balls and springs are for holding the choke out against the carbs spring pressure, otherwise it will just pull back and you have no choke! can be still bought from dealers
not sure on yuor jetting
 
Another thing I was confused on. Looks like I have the brass floats (round ends...looks like brass ;) ), but I thought those were on the older carbs. Maybe someone swapped them out? I can't seem to find any markings on them, aside from a 14V on the carb body, which from my research means it is indeed an 82 Heritage Special XS400.
 
Got one carb done.

Before (P.O. painted it black)
DSCN3563.jpg


After
DSCN3576.jpg


I tore it completely down and boiled it in lemon juice for a few hours. The lemon juice gave it a finish that I kind of like...almost parkerized (note, the bowl was not boiled...I kind of like the contracting finishes with that and the chrome on the top). The brass looks super cool too. But, beware, buy your gf/wife a day at the spa, maybe send her off to Book Club, anything to get her out of the house, cause it will fill the house with a stench that only a man who's survived inhaling the fumes of a dead skunk...that ate poop...which was excreted by a horse that ate 5 day old Indian food that was cooked with automatic transmission fluid. I learned this the hard way. The sex...I miss it. Anyhow! The other carb I'm going to have the boy do. I wanted to do the first one so I have an idea of what's in store and so I can guide him along a bit. Hopefully we'll be able to get her started by the weekend.
 
Last edited:
you sure it was a PO that painted them black?

Mine are black, and it looks factory, and seems powdercoat tough.
 
I don't think Yamaha would paint EVERYTHING on the carb. Might be wrong, but it looks like a crappy job...ie, not factory.
Tonight my son and I are going to rebuild the second carb, then try to get her started tomorrow. Wish us luck.
 
Ok, I'm kind of confused. I can't get her to start. Cleaned the carbs (see above), got new iridium plugs, plug caps, and can see a spark when I ground out the plug. I have about 140 psi on each side. I can feel suction on the air filter side of the carb. I know my float bowls are full of fuel and the float level is about 3mm below the gasket (when on the bike using a clear tube to gauge the level). When we shoot some carb cleaner in the carb, we get a half assed sputter and that seems to backfire out of the carb instead of the exhaust (not sure if it's supposed to be like that). Neighbor thinks we need to check timing. Obviously I can't set it with a strobe cause it's not running and I have an electronic ign, not points, so do I need to check static timing?? I've looked in the manual and it only seems to mention the points model settings.

Ideas?
 
check the coil wiring hasn't been swapped over. if its been standing a while, might need to make sure your battery is fully charged as the TCI needs a good 12v
 
Before I replaced the plugs and caps, we swapped the coil leads and it didn't change anything. I've also been using a portable battery booster this whole time, so it should be seeing 12+ volts.
 
I also have the electronic TCM, but I was able to use a timing light to align mine. You can get a rough estimate by taking the rotor cover off and rotating the crank to where the rotor indicates "LF", and the top pin of that module should be aligned with one of the rotating posts (mine only fits in two positions, so it shouldn't be too hard to align). Those notches on the bottom seem to match pretty well to where mine is setup, but even a few degrees off was enough for me to get backfiring. :twocents:

edit: if it's only off a little you should rotate the base plate!
 
Ok, Not 100% sure of what you mean. I'm assuming that piece, with the bolt in the middle, rotates (That's the rotor?). As I rotate the crank, the rotor passes those two metal bars on the black piece (rotor cover?). If I remove the black piece, I should see the "LF" marking under it. As I rotate the engine/crank, wait until the rotor end points to the "LF" mark (does it matter what end is pointing to it?). Then put the rotor cover back and one of those metal bars should be aligned with the rotor end that was aligned with the "LF".
 
I'm stumped. I rotated that module with the two metal pieces, no dice. Even after we sprayed carb cleaner in the cylinder, not much happened, which makes me think there's a spark issue, even though I see spark when I pull the plug. Is that possible? Guess I'll be checking the ignition module and the coils.
 
Take out the sparkplug, take a flathead and GENTLY scrap the top of the piston through the spark plug hole and kind of get a glimpse of how much carbon is built up in there... Its a shot in the dark, but if there's enough it could prevent ignition of the air/fuel mix.
 
Ok, Not 100% sure of what you mean. I'm assuming that piece, with the bolt in the middle, rotates (That's the rotor?). As I rotate the crank, the rotor passes those two metal bars on the black piece (rotor cover?). If I remove the black piece, I should see the "LF" marking under it. As I rotate the engine/crank, wait until the rotor end points to the "LF" mark (does it matter what end is pointing to it?). Then put the rotor cover back and one of those metal bars should be aligned with the rotor end that was aligned with the "LF".

Let me clarify: assuming you have properly aligned the crankshaft with the camshaft (the manual has your back on this one) you need to take off this guy rotor cover.jpg, which gets you to this fella rotor.jpg. The arrow shows you where the timing marks show up on the rotor. After you rotate the crank to where that rotor indicates "LF", then you take a look at the timing mechanism.
ignition.jpg This is how mine was aligned when I took mine apart (the rotor is not at that position here, so ignore that orientation) notice how the base plate (red) is aligned with the head (blue). Now look at yours; one of the arms on the timing mechanism should be close to the top pin (green), if it is just leave it alone: to time it properly you need to have it running and take a timing light to it. You should be able to take it from there.
 
Back
Top