Joe's XS400 Heritage classic custom build!

Telecasterjoey

XS400 Member
Messages
23
Reaction score
0
Points
1
Location
Ontario, Canada
Hey all, I've been looking at this site for a while now... Tons of useful info and an all round good vibe.

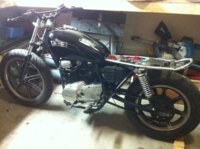
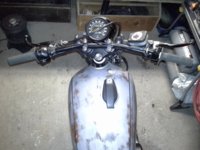
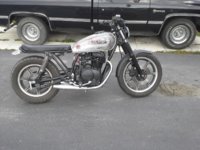
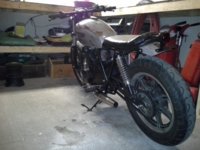
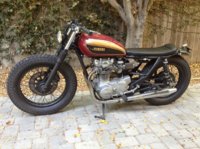
I recently picked up an 82' heritage special, after a lot of debating with myself lol I'm gonna build a simple, clean cafe'ish xs! I've got so many ideas and inspiration from all of your bikes.

I'll be updating this thread as much as possible and would love some input and questions answered haha.


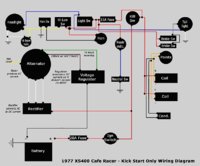
I'm looking to delete the stock harness and wire up a new simple and clean harness, much like Drewpy's FAQ thread.

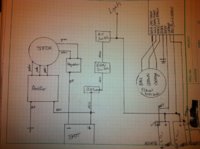
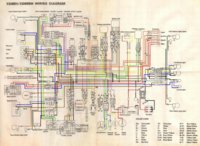
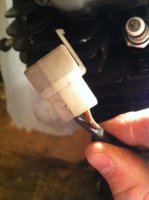
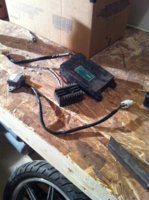
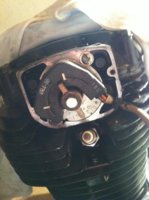
I've been looking at the wiring diagrams in the FAQ section and have a fairly good idea how I'm going to wire this sucker the only difference I can find is I've got electronic ignition and most of the diagrams show points style systems.
Does anyone have a simple diagram for a bike with the ignition module, rectifier, regulator, no electric start and simple light circuits?

Lots to figure out, but I've got time there's still a lot of snow on the ground!

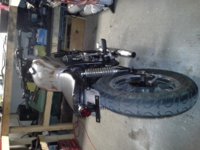
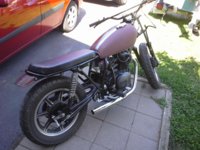
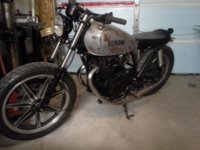
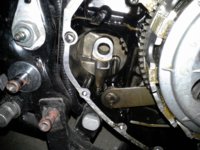
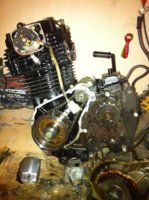
So far I've just done some disassembly and frame tidying up, Gonna have to run a battery (I'd rather not) but as far as I know they don't make the alternator mod for the 400's

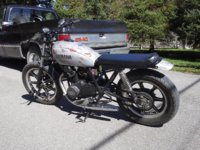
The black & red complete bike I posted is the style I'd like to achieve (hope the original poster doesn't mind) and the wiring diagram is what i'd be aiming for as well....

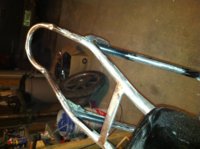
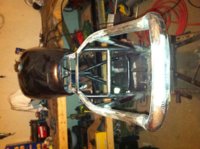
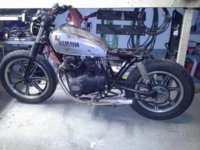
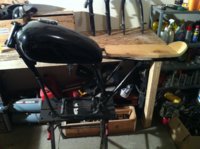
I bought the bike in pieces and the original owner hacked the rear of the frame off, so i'll have to get creative with some fabricating. I mocked up a wood seat just to aid in the fabrication process.

Thanks a lot!
 

Attachments

  • IMG_1518.jpg
    IMG_1518.jpg
    223.7 KB · Views: 296
  • IMG_1500.jpg
    IMG_1500.jpg
    252.9 KB · Views: 289
  • IMG_1509.jpg
    IMG_1509.jpg
    219.9 KB · Views: 271
  • IMG_1525.jpg
    IMG_1525.jpg
    203.5 KB · Views: 285
  • IMG_1524.jpg
    IMG_1524.jpg
    283.1 KB · Views: 265
  • XS400_1977_Wiring_sm.jpg
    XS400_1977_Wiring_sm.jpg
    109.4 KB · Views: 920
  • 8067651623_a70b5bebef_c.jpg
    8067651623_a70b5bebef_c.jpg
    104.1 KB · Views: 340
  • IMG_1526.jpg
    IMG_1526.jpg
    229 KB · Views: 263
Welcome! Another member from Ontario! We seem to have an abundance of XS's around.

Looks like you have a virtually blank canvas to work with. I can't help much with your wiring as I've been adding to the harness rather than removing. That said, rather than feeding power to the coils and grounding through the points as shown in the diagram you posted, you will be feeding the TCI module and the coils, with the TCI module providing the ground for the coils. The triggers are connected to the TCI module. You should be able to reuse much of the stock wiring to do this.
 
Welp I've got my wiring diagram drawn out, well at least for the engine anyways......
It would be awesome if you guys could chime in and lemme know where I screwed up lol
I based it off the simple digram I posted above, and then figured out the Ignition module from this factory diagram I found online. Mushed the two diagrams together and this is what I get lol...

also did some more fabricating, made the pan I'm going to mount under the seat between the frame rails for my electronics and the cross braces to support my new rear section. Feeling confident!

I'm guessing that the coils ground out through the frame! Also wondering, prolly a dumb question, but when you have wires intersecting at a "T" Where to you tie them together? At the last component? Ie. in my little diagram, there's red wire that comes out of the rectifier and ties into the positive battery wire, where do I actually tie them together? At the battery?, I'm not master electrician but I'm sure you wouldn't "T" them....... I'm a visual guy I hate wiring diagrams!

Bare with me lol!

Thanks!
 

Attachments

  • IMG_1538.jpg
    IMG_1538.jpg
    217.7 KB · Views: 249
  • IMG_1537.JPG
    IMG_1537.JPG
    224.1 KB · Views: 251
Gonna be a busy weekend, but I'm gonna try and find time to start wiring!
Gonna try to write up a spreadsheet of all my materials and pick em up on my way home.

any wiring advice or tips would be much appreciated!

Thanks!
 
Didn't get started on the wiring yet, but I got my rear frame piece bent. I came straight home and got it all welded up few more welds and the frame is done!

Picked up a bunch of wiring supplies too!

More pics soon..
 
Here's my fabricated rear end section!

Gotta weld on one or two more braces, clean it up and paint it.
Won't let me upload more than one pic at a time on my phone, and it's sideways lol
 

Attachments

  • image.jpg
    image.jpg
    229.3 KB · Views: 239
Nother update, got the frame cleaned up and welded, tabs ground off and electronics tray built. Just assembyled the bike and wired it up. Started right up. Super simple wiring right now, I read drewpys wiring thread daily lol.

I'm gonna finish mocking up the fenders, tear it back apart, and finish up all the welding.

I don't think she's charging properly though, I'm gonna have to investigate a bit further into that.

Also it only fires on one cylinder when idling meaning the right side carb idle circuit is still dirty ( I completely disassembled and cleaned em but guess it wasn't good enough).


I think that's it for now, ill try and get some pics up.
 
So its been almost a year since the last update, I've done a lot of work to it, as well as lots of changes.

last summer I got it all tuned up and running well, built simple wiring harnesses for the engine, now just adding the final touches wiring up lights and getting it to look how I want.

Picked up lots of little parts, mini horn, bronze swingarm bushings, drag bars, exhaust gaskets, petcock (old one leaked like crazy), all new brake switches, new mufflers ect.

I'd like to have a nice seat upholstered and maybe rearsets.

I wasn't happy with the way the rear hoop looked so I shortened it by 5'' haha.
I changed the dirtbike bars out for some drag bars shortened the seat and picked off all the little things one by one to get it ready for the road.

Next step is get my safety done and then wait for nice weather.

here are some pics of the progress and changes.
 

Attachments

  • 20140107_214509.jpg
    20140107_214509.jpg
    190.7 KB · Views: 231
  • 20140107_214435.jpg
    20140107_214435.jpg
    197.1 KB · Views: 219
  • 20131107_195844.jpg
    20131107_195844.jpg
    220.2 KB · Views: 232
  • 20131014_160528.jpg
    20131014_160528.jpg
    297.2 KB · Views: 234
  • 20130914_122246.jpg
    20130914_122246.jpg
    317.4 KB · Views: 203
  • 20130824_115547.jpg
    20130824_115547.jpg
    283.6 KB · Views: 222
Here's a few more of how it sits now.

Also took off my clutch cover to look at the kick start guts. The odd time it doesn't engage and slips but I think its due to not giving that little line up before I give it the kick. I'm always cautious to not karate kick the thing cause I've seen dirtbike kickstarters break, but I took the cover off just to be sure.
 

Attachments

  • 20140108_151839.jpg
    20140108_151839.jpg
    161 KB · Views: 213
  • 20140107_214421.jpg
    20140107_214421.jpg
    178 KB · Views: 215
  • 20140107_072716.jpg
    20140107_072716.jpg
    233.6 KB · Views: 248
Mine sort of does the same thing when kicking it over. Occasionally it doesn't seem to engage but otherwise seems to work perfectly.

I like the roughed up tank paint job better than the original.
 
Back
Top