EasyE
XS400 Member
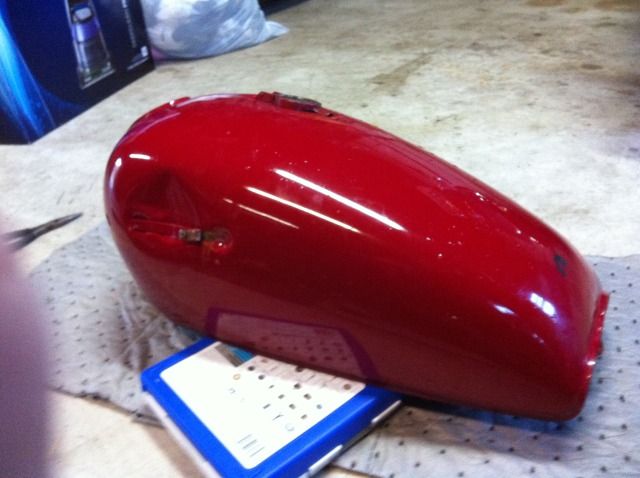
Started with a bright red tank, not my style, but also wanted to remove the side emblems and had a nice tip over on left side of tank
Started out process with the mindset of cheap but as quality as possible
Used dremel tool to grind off emblem mounts and took down to bare metal where I was going to be applying bondo, just roughed up paint on rest of tank. Wire brush and rough pad drill attachments help this process go a lot smoother
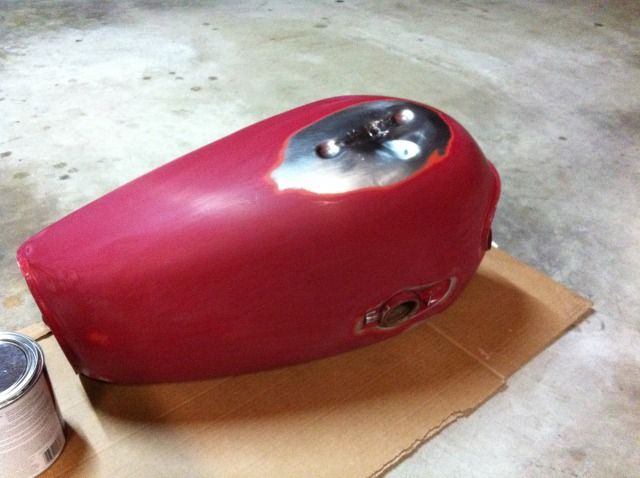
Time to lay down the bondo. First thing was cleaning up the tank so the bondo would stick. Applied first base layer of bondo thinly being sure to not trap air under bondo, let dry and applied two more thin layers being sure to keep lines as close to final product as possible bc it's a pain to sand though a lot easier to do soon after drying period. Used a 120 grit sand paper to shape

Time to lay down the layers...
I used best looking plain rustoleum from lowes and their filler primer
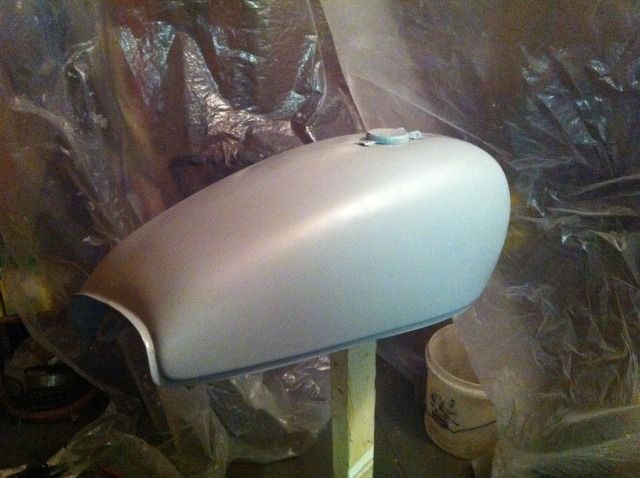
Cleaned tank, screwed together some boards to make me a tank sawhorse, and stapled up a tarp in the shed for a "booth"
Layer down first layer of filler primer and sanded down with 400 grit paper after drying, sprayed second layer and sanded down with 800 grit paper
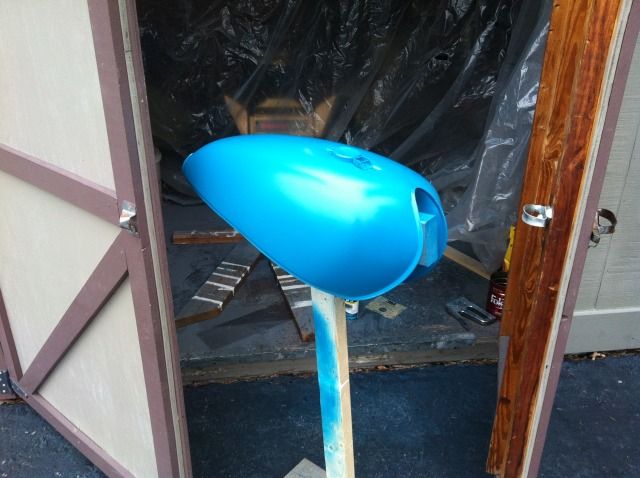
Cleaned up and ready to lay down some color, layed down 2 layers of some green-blue
Layed down the painters tape and shot with black...DON'T PEAL TAPE OFF TILL PAINT IS COMPLETELY DRY!!!
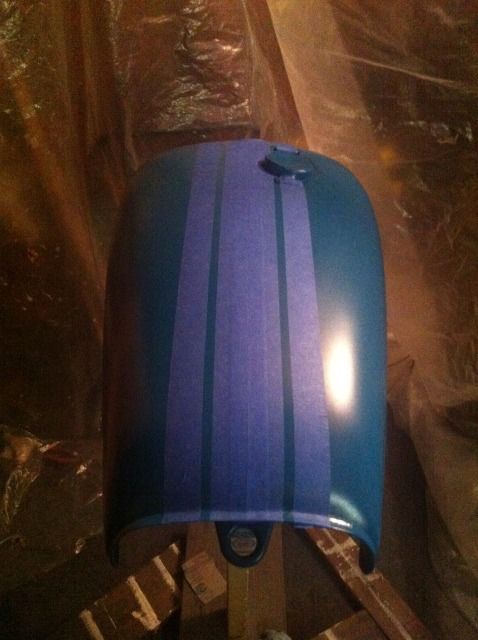
Tape is off
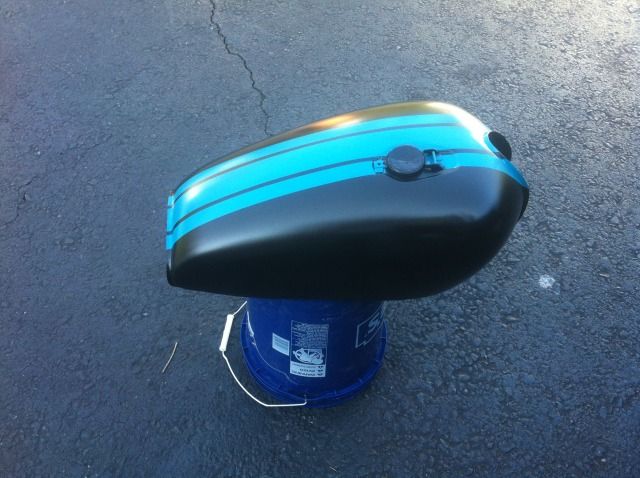
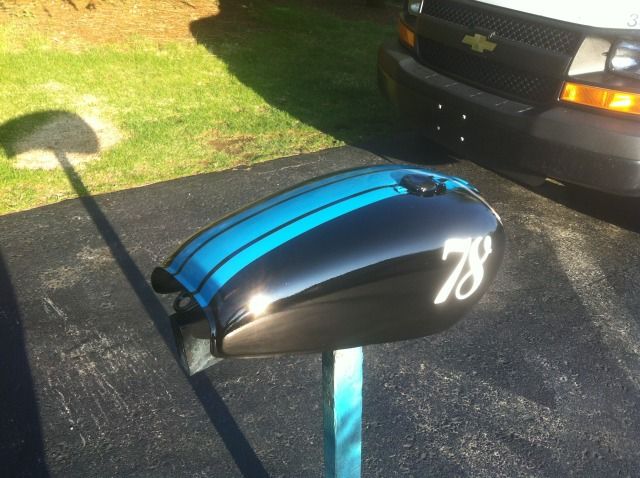
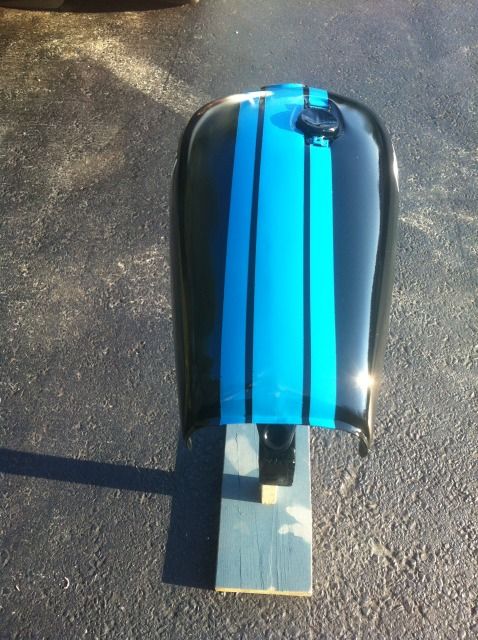
Went to the local mall and got some numbers printed up, stuck them on and put a few coats of car hard coat semi gloss, the clear coat is the most important thus that if gas is dripped on rustoleum clear coat, all of your hard work get "washed away" literally. Let dry and couldn't be happier with the turnout
Did the same process on the side covers.
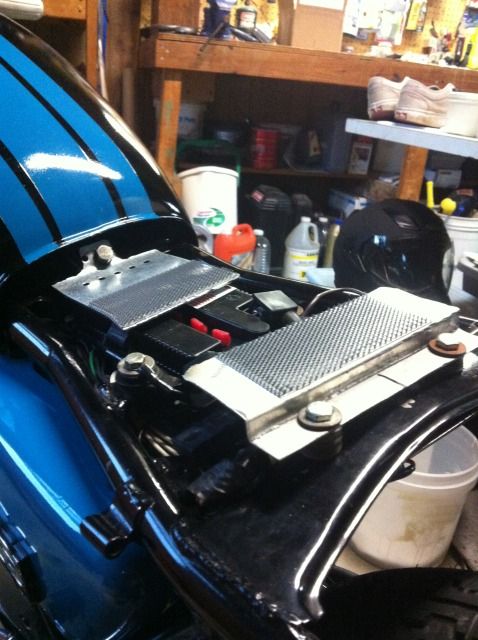
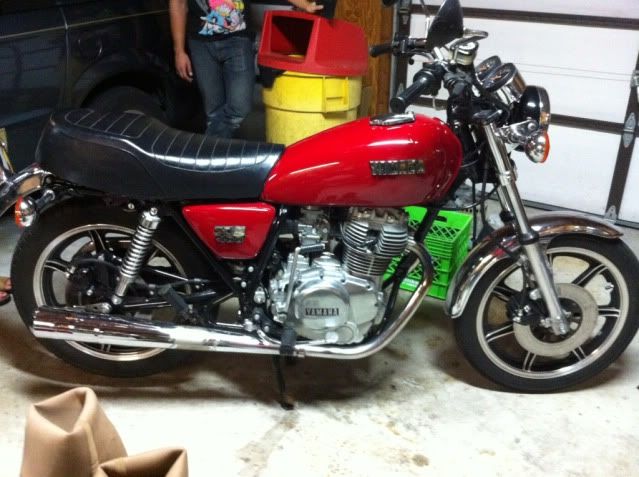
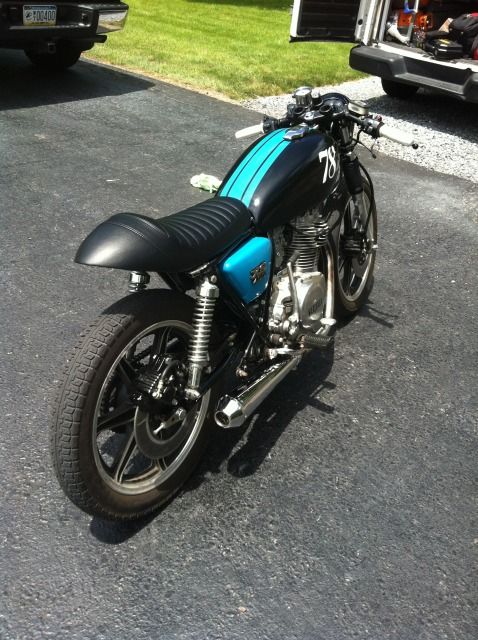
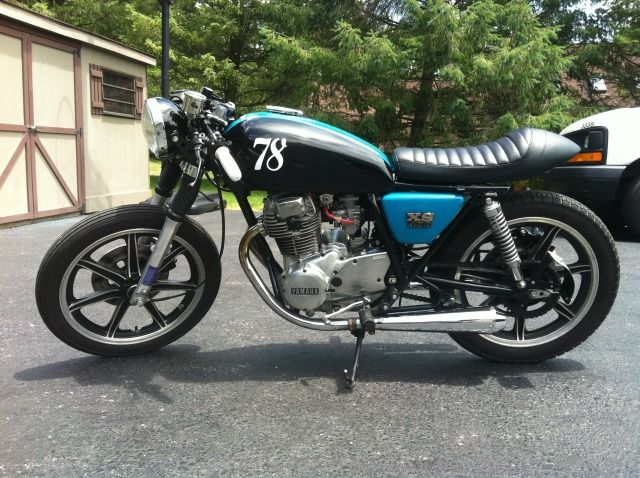
On the bike
Started out process with the mindset of cheap but as quality as possible
Used dremel tool to grind off emblem mounts and took down to bare metal where I was going to be applying bondo, just roughed up paint on rest of tank. Wire brush and rough pad drill attachments help this process go a lot smoother
Time to lay down the bondo. First thing was cleaning up the tank so the bondo would stick. Applied first base layer of bondo thinly being sure to not trap air under bondo, let dry and applied two more thin layers being sure to keep lines as close to final product as possible bc it's a pain to sand though a lot easier to do soon after drying period. Used a 120 grit sand paper to shape
Time to lay down the layers...
I used best looking plain rustoleum from lowes and their filler primer
Cleaned tank, screwed together some boards to make me a tank sawhorse, and stapled up a tarp in the shed for a "booth"
Layer down first layer of filler primer and sanded down with 400 grit paper after drying, sprayed second layer and sanded down with 800 grit paper
Cleaned up and ready to lay down some color, layed down 2 layers of some green-blue
Layed down the painters tape and shot with black...DON'T PEAL TAPE OFF TILL PAINT IS COMPLETELY DRY!!!
Tape is off
Went to the local mall and got some numbers printed up, stuck them on and put a few coats of car hard coat semi gloss, the clear coat is the most important thus that if gas is dripped on rustoleum clear coat, all of your hard work get "washed away" literally. Let dry and couldn't be happier with the turnout
Did the same process on the side covers.
On the bike