skillzman1
XS400 Junkie
So I've been away far too long...60+ hr work weeks suck10 months outa the year.
Anyhow....been thinking about another option for kne dent style tanks.
The other style/write up works fine except you will lose a bit of volume...and its not practical for square tanks like the older XS400's have.
Mainly the reason I dreamed this up was.....my bike is an '81....and I bought a tank and wheels setup from a '77 400d ...which took some fabrication for tank mounting...yet when its done is going to look like a cafe'd stock XS400 D.....cant have that....must customize and make my own.
So heres the start of the write up....bear with me...this is going to take some time to complete due to work schedule.
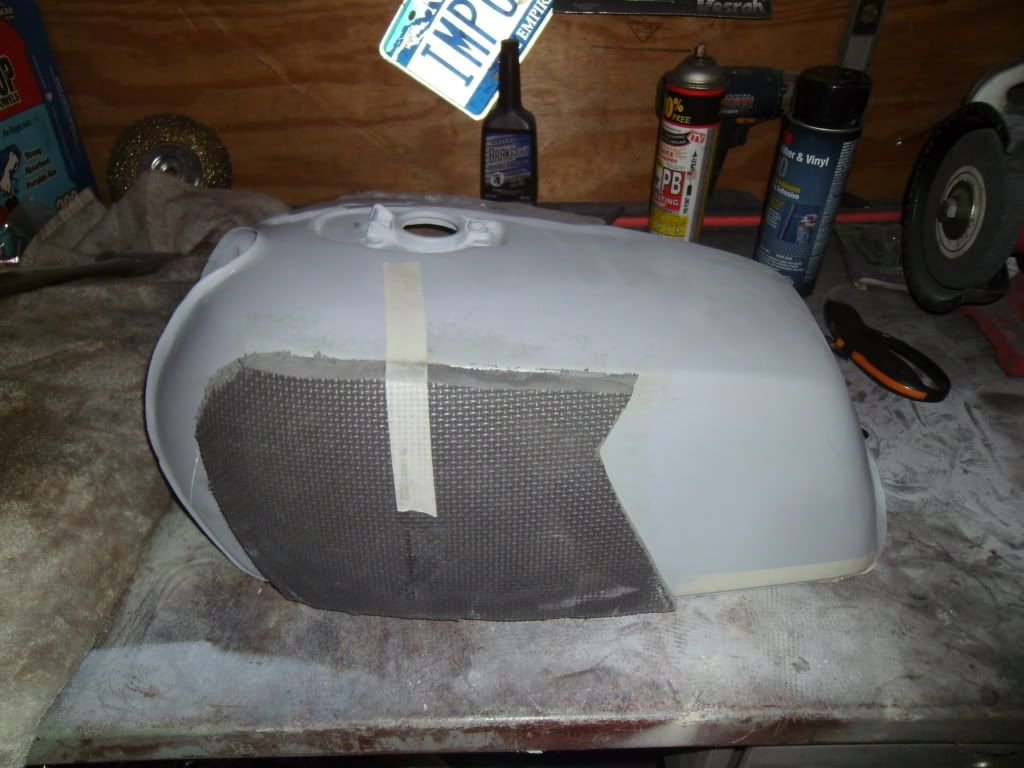
This is the square older style tank....my idea is to glue foam rubber pads with the design to the outside of the tank.Then fiberglass over the top of it with fiberglass cloth and resin and finish off with the necessary body work and paint.
Step 1- I sanded the area for the work down with 80 grit paper.This is to create 'tooth' for the adhesion of the glue at first,but also for the resin and 'glass work to follow.
Step 2 - Use a good wax/grease remover to clean the adhesion area.
Step 3 -I used 1/2" foam rubber padding I bought from Harbor Freight...the stuff you use for standing on top of a cement floor for comfort...comes in a package with 4 pieces 2'x2'...sells for like $10...and was intended to be used as my seat padding...but I haven't made it that far yet......Anyhow...make a paper template/pattern for the design you would like.
Then transfer it to the pads and cut it out with a good sharp razor blade.
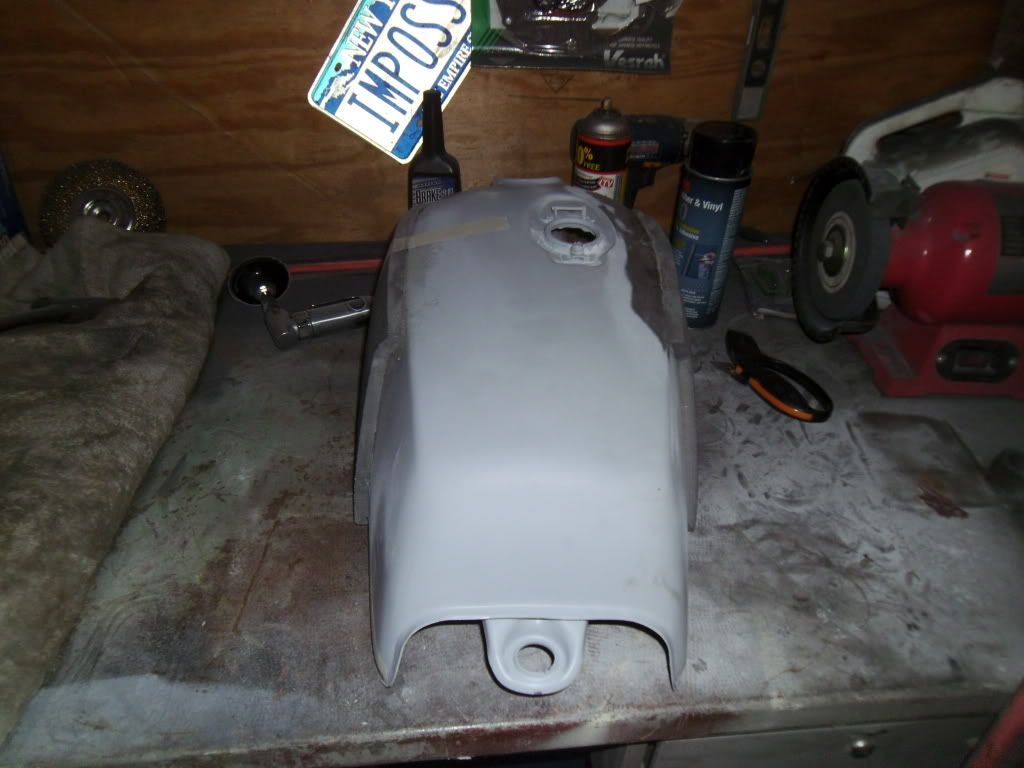
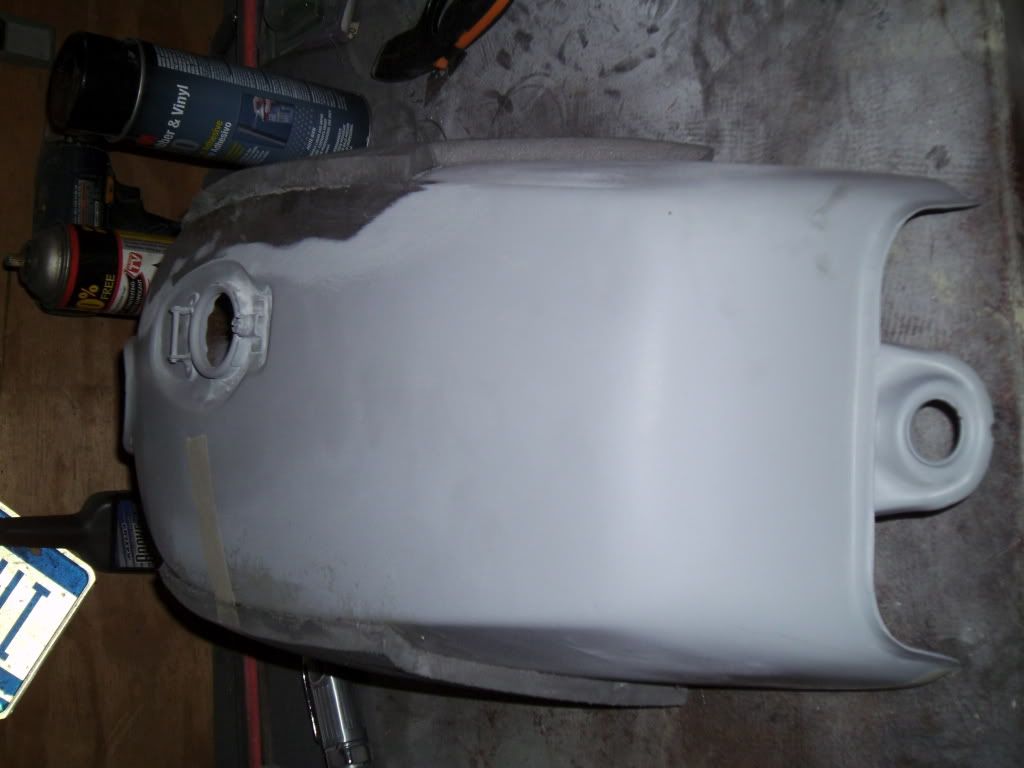
Step 4 -test position it to the tank....remember when making the pattern that you will want to cut it back...or shorter than the edges of the tank you are modding.What I mean by this is, you will want the top of the finished tank to be flat.Therefore you have to allow room for the 'build up' of fiberglass/resin/body filler.So calculate for this when you cut,you need the layers of glass/resin to be lower than the metal surfaces initially,so that lees body work will be necessary later.
Basically,as you look at the outline of the tank,you want the pads to be 'inside' the outline.The padding is just a filler/mold to hold the fiberglass later.It doesn't have to be exact/perfect at this point.
Step 5 - Spray an even coat of adhesive on both mating surfaces...one on the tank..one on the rubber/foam...let it start to tack up for a minute or so...then carefully put them together.This is kind of a 'one try to get it right' type of thing...once th adhesive starts to tack...it doesn't slide around ...so keep this in mind when you 'stick' them together.Press it firmly down all the way around...tape the edges down if necessary.
Heres a few pics of where we are at this stage, more to come later.

Anyhow....been thinking about another option for kne dent style tanks.
The other style/write up works fine except you will lose a bit of volume...and its not practical for square tanks like the older XS400's have.
Mainly the reason I dreamed this up was.....my bike is an '81....and I bought a tank and wheels setup from a '77 400d ...which took some fabrication for tank mounting...yet when its done is going to look like a cafe'd stock XS400 D.....cant have that....must customize and make my own.
So heres the start of the write up....bear with me...this is going to take some time to complete due to work schedule.
This is the square older style tank....my idea is to glue foam rubber pads with the design to the outside of the tank.Then fiberglass over the top of it with fiberglass cloth and resin and finish off with the necessary body work and paint.
Step 1- I sanded the area for the work down with 80 grit paper.This is to create 'tooth' for the adhesion of the glue at first,but also for the resin and 'glass work to follow.
Step 2 - Use a good wax/grease remover to clean the adhesion area.
Step 3 -I used 1/2" foam rubber padding I bought from Harbor Freight...the stuff you use for standing on top of a cement floor for comfort...comes in a package with 4 pieces 2'x2'...sells for like $10...and was intended to be used as my seat padding...but I haven't made it that far yet......Anyhow...make a paper template/pattern for the design you would like.
Then transfer it to the pads and cut it out with a good sharp razor blade.
Step 4 -test position it to the tank....remember when making the pattern that you will want to cut it back...or shorter than the edges of the tank you are modding.What I mean by this is, you will want the top of the finished tank to be flat.Therefore you have to allow room for the 'build up' of fiberglass/resin/body filler.So calculate for this when you cut,you need the layers of glass/resin to be lower than the metal surfaces initially,so that lees body work will be necessary later.
Basically,as you look at the outline of the tank,you want the pads to be 'inside' the outline.The padding is just a filler/mold to hold the fiberglass later.It doesn't have to be exact/perfect at this point.
Step 5 - Spray an even coat of adhesive on both mating surfaces...one on the tank..one on the rubber/foam...let it start to tack up for a minute or so...then carefully put them together.This is kind of a 'one try to get it right' type of thing...once th adhesive starts to tack...it doesn't slide around ...so keep this in mind when you 'stick' them together.Press it firmly down all the way around...tape the edges down if necessary.
Heres a few pics of where we are at this stage, more to come later.
")