The $50 '79 xs400

Round glass fuses are crap. Always have been always will be.
If you don't want a fuse block then get individual inline fuse holders.
I like the ones from Radio Shack. They have covers. Not tight enough to be weather proof but keep the big stuff out.
Good job on the clutch adjustment. Proper adjustment solves several issues, Shifting of course also finding neutral. Creeping forward while holding the clutch in while stopped.
Leo
 
I've been scouring the forum for information on HID headlight options, but the useful posts are spread over several threads and for a little surety, I want to ask questions pertinent to my particular situation.

I think I have settled on a 35w Bi-Xenon 4300k with ac ballast.

seen here:
4300K-Stock-White-H4-2-HB2-2-9003-2-Motorcycle-Bi-Xenon-HID-Kit-Slim-Ballast

My main concern is mounting the bulb. I have a burned out oem sealed lamp that I was able to successfully remove the glass lens and bulb from without damaging anything. I have read one thread where someone cut the back of the reflector open and epoxied an h4 bulb socket from a torn apart car headlight to it.

So, to the question:
If I were to modify my reflector to accept an h4 bulb, would the above linked bi-xenon bulb work properly to give me the correct road coverage with the oem reflector and lens, or would I have to get some kind of projector lens and find a creative way to mount it? My goal, if possible, is to have a bi-xenon in a stock headlight bucket, behind a stock motorcycle headlight lens, as I do like the classic look.
 
I've been hoping to do the same, or convert the stock bucket to a projector lens. I'll be following the progress here.
 
So, since I have had no input about a bi-xenon in a stock lens, I have decided to trudge on and find out for myself. Worst case scenario, I'm out $35 and have a bi-xenon bulb to put into something else.

I purchased the aforementioned bi-xenon headlight kit and had some time this evening to do some preliminary testing with it. The eBay seller obviously took a car bi-xenon kit and split it up so it had a single ballast and bulb, then proceeded to ship it in a simple bubble envelope. Surprisingly, it survived the trip and everything was intact. I half expected to open the bag and pour out a handful of broken glass. No installation instructions were included aside from a sticker on the wiring harness with a rudimentary wiring diagram labeled with Chinese characters and broken English, but, everything was pretty straightforward for anyone with moderate understanding of electronics. Red lead with inline fuse goes to positive battery terminal...black lead goes to ground...connect all the plug ends that look like they might fit together. No problem.

Once I had everything hooked into the bike's electrical system, I turned the key and hit the starter. I was greeted with a quick start and a high pitch whine that reminded me of splinter cell, and a hazy glow that quickly turned into an astonishingly bright light. Then the bike quit. I guess the old girl wanted a little more choke than none for a dead cold start. I tried hitting the starter again, but found the light was making things a little sluggish. So, I turned the ignition off, then on again to reset the headlight relay and hit the starter again. This time we had enough juice to start the bike before the bi-xenon kicked on, and we were running good and strong.

As for mounting the bulb, I didn't have time this week to try to make it fit the existing reflector. I see that the hole for the bulb in the reflector is a tad smallish to just drop the bi-xenon in, so I'll have to size it up a bit. And, the h4 mounting bracket is a bit larger than the original bulb holder deal. I'll probably be finding an h4 headlight out of a car and harvesting the bulb socket part so I can epoxy it to the xs reflector. Current concerns are figuring out how deep the bulb needs to set into the reflector to create the proper beam, length of the bulb and if it will interfere with the lens when mounted, and length of the rear portion of the bulb and whether there will be room in the bucket for it.

But, we are making progress. We have light and the bike doesn't seem to have any problems with it.
 
My sealed beam still works or I'd disassemble it.
I came to the same conclusion as you about harvesting the socket out of a car headlight. Couldn't find many options online to buy the socket alone.

We can probably assume that the stock filament is at the correct focal point.
Is it possible to get some measurements off the old bulb?
 
I was thinking the same thing. The flange on the old bulb and the flange on the bi-xenon both seem to be the same distance to the filament, but I was just eyeballing it. I will have to put my sealed bulb back together to get an accurate measurement, and I'll probably measure from the rim of the reflector to the filament as I think it'll be the easiest way to ensure repeatability. The bi-xenon bulb is about a third longer than the stock bulb, so hopefully it will still fit behind the lens once I get the focal point lined up.

For anyone wondering what it's like to tear open a sealed bulb:

It looks like they soldered a flange to the bulb base, put the insulator & three prongs in it, put a rubber bushing around it, and put it in the reflector. From there they would put the brass ring in and fold down the tabs, then insert the glass part of the bulb from the other side of the reflector, then solder the wires from the glass part of the bulb into the three prongs on the bulb base, then epoxy the lens in place. If you try to de-solder the flange from the bulb base to remove the bulb, the plastic insulators will just melt, rendering the bulb useless. I wanted to see if I could get the old bulb out unharmed, so I used a die grinder with a small cutting wheel to carefully cut the flange off the bulb base. Also, removing the lens is a slow, tedious process. I used the edge of a medium size precision screwdriver since it was the perfect size to scrape the epoxy out from between the lens and the reflector rim. Don't expect to get it out in an hour. It took me three to get all the visible epoxy scraped out, then I used a torch with MAP-gas to gently heat the rim of the reflector. This softened the remaining epoxy, which let the lens fall out without the need to pry on it. Another note: if you are trying to save the old bulb, any excessive vibration, shock, or heat can cause the filaments to break. So, be mindful of that.

Of course, if you're just scrapping the old bulb and are after the reflector and lens, you can always just remove the lens, smash the bulb, peel the tabs on the back and the bulb should come right out.
 
I might just buy a H-4 bulb conversion, then put the xenon bulb in that.
You will know it's right that way.
Leo
 
I read up on the candlepower conversion. Between the cost, the need for further modification and the cir. 1998 web store they use, I'd rather just recycle the stock bulb parts and see what I can come up with.
 
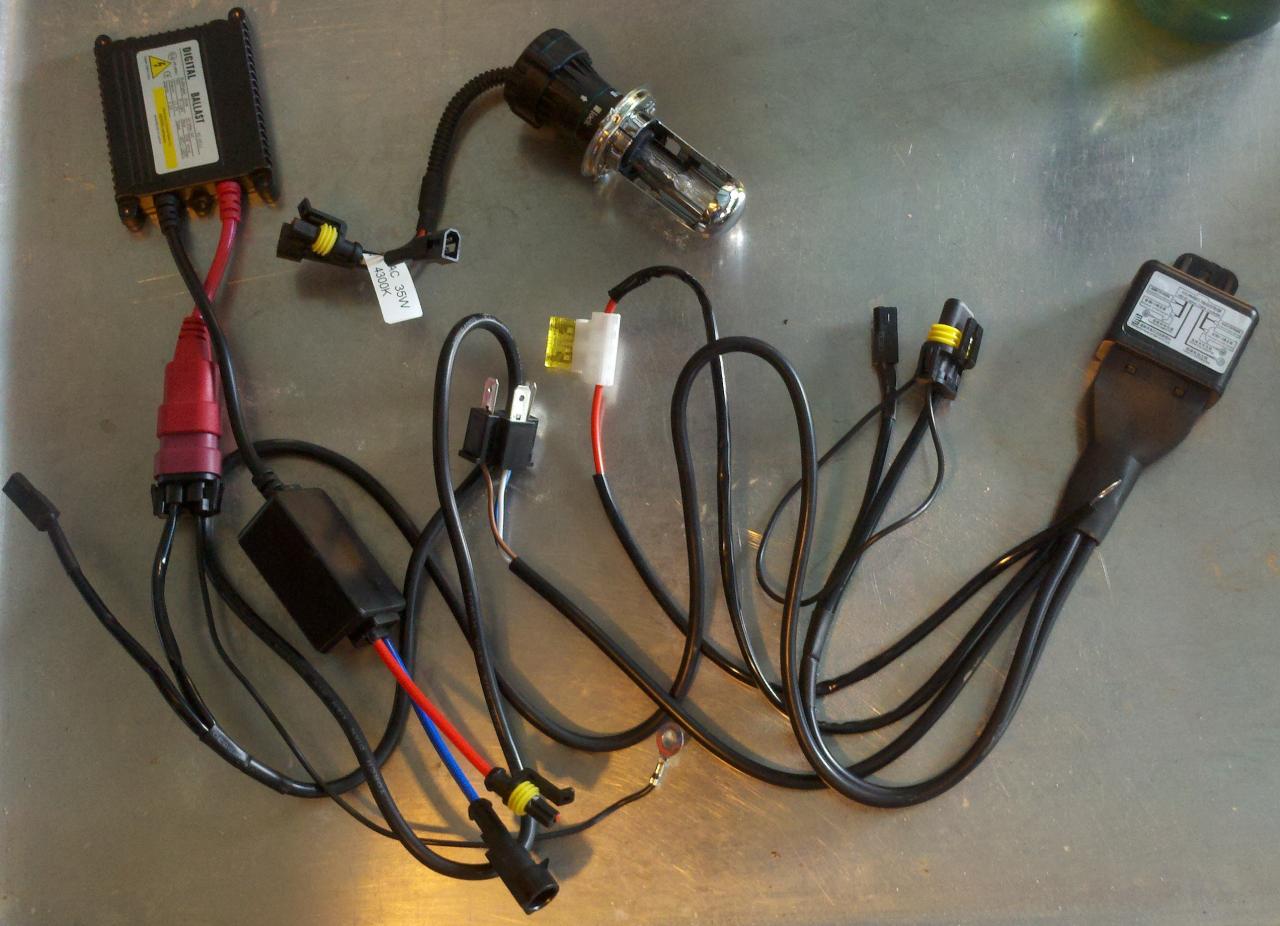
Bulb progress. eBay bi-xenon kit came in. Inside was a bulb, a ballast with igniter and a wiring harness that is obviously designed for a car.
full


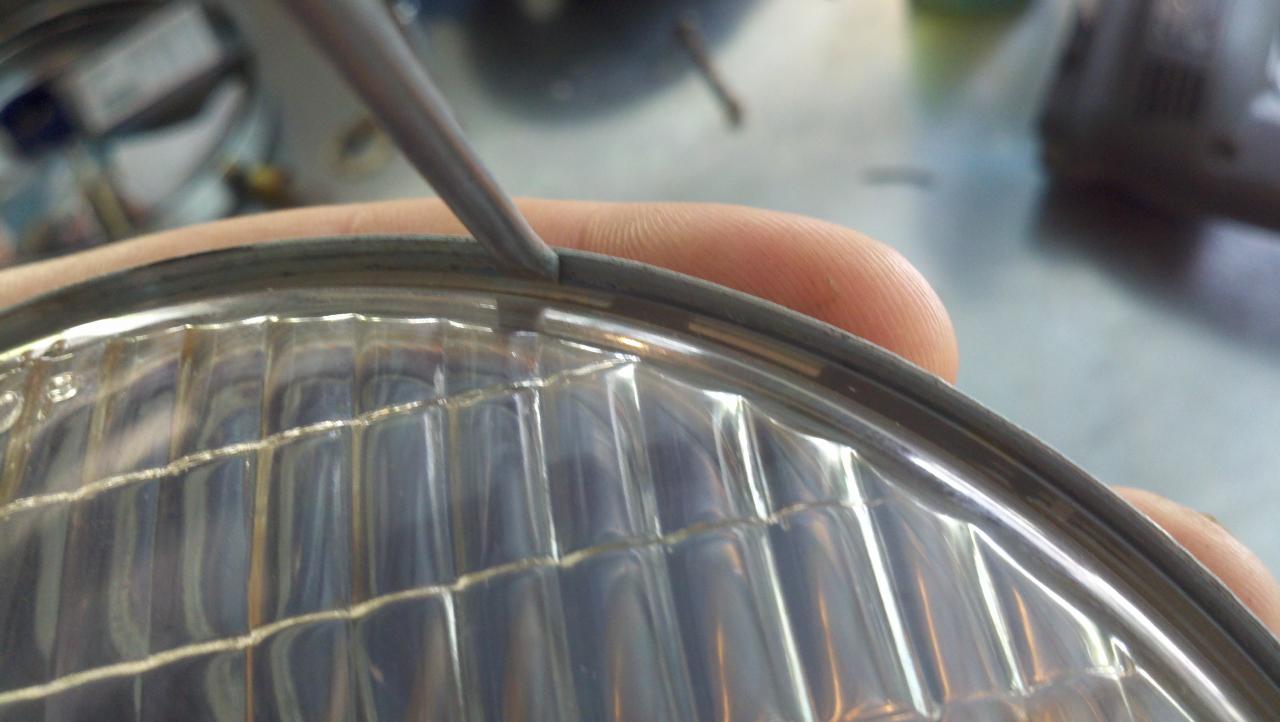
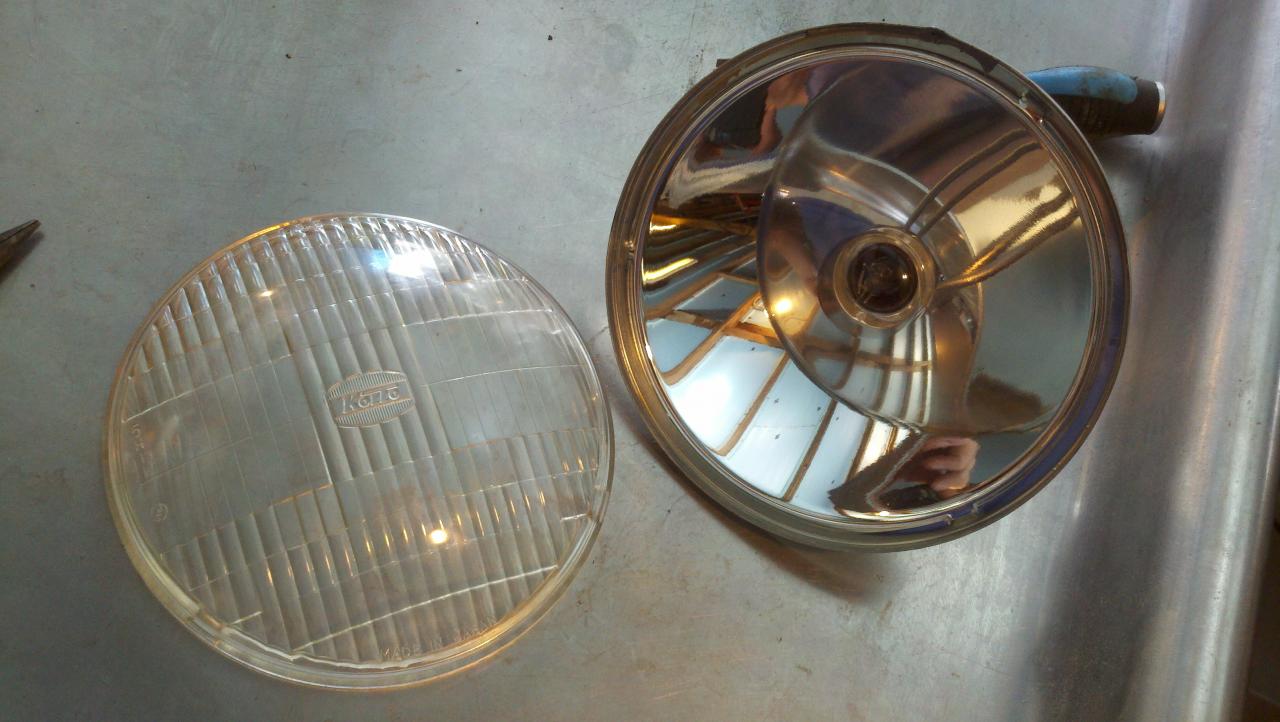
I had to tear apart the old sealed beam bulb in order to modify it. This involved scraping all of the epoxy out from around the glass lens. It was slow and careful going, but eventually I had scraped everything I could get to out. At this point, there is still a little epoxy under the glass. I took a torch with MAP gas and gently heated the rim of the reflector. This loosened up the remaining epoxy and the lens fell out of the reflector and into my hand.
full

full


The next step is to remove the bulb from the reflector. The tabs around the base of the bulb need to be bent up and away, then you can either break the bulb glass (the easy way) or remove the rubber grommet and cut away the flange at the base of the bulb to remove the bulb from the reflector.

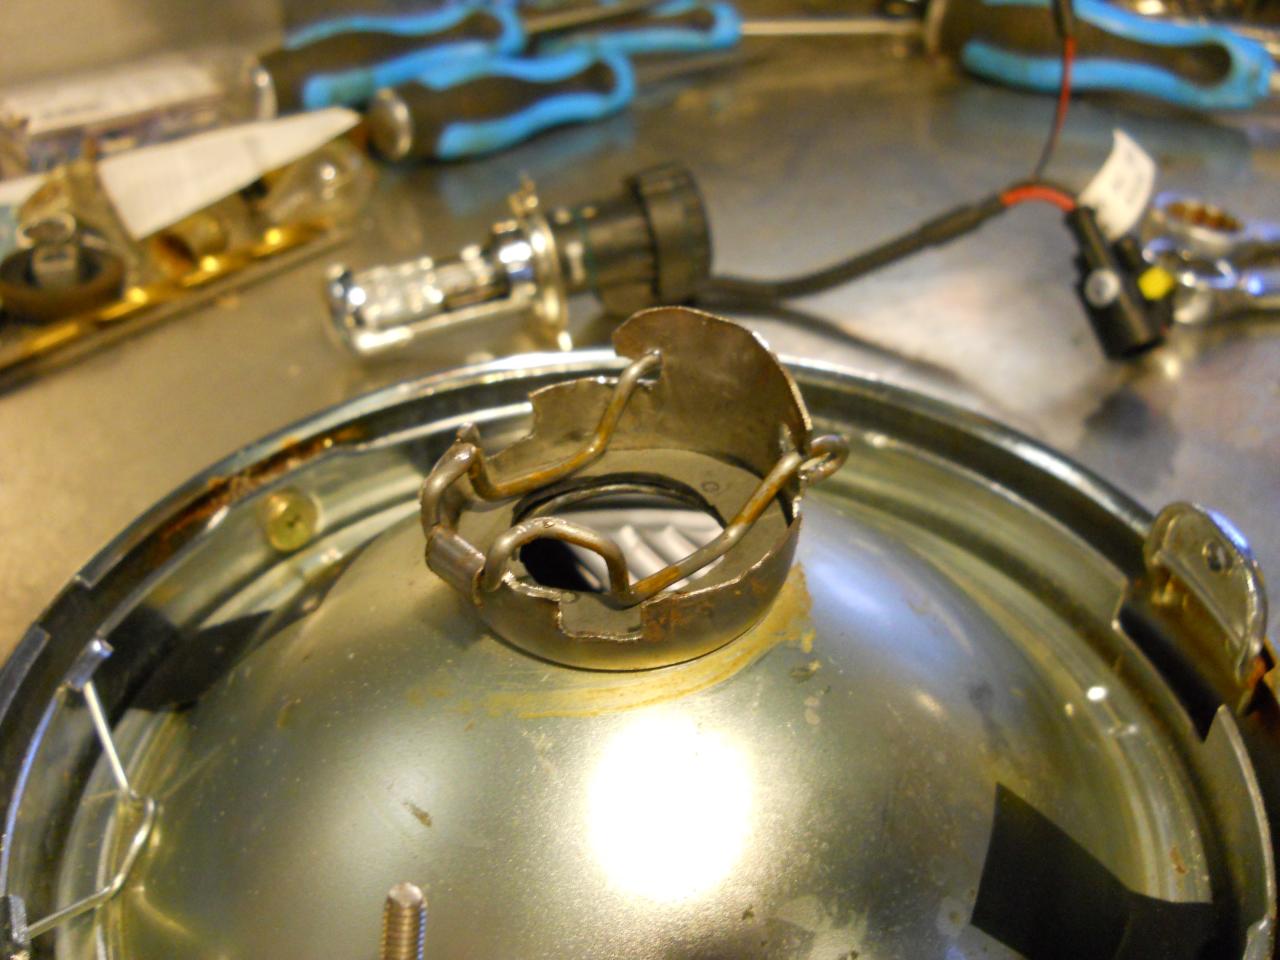
Once that is done, you have to remove the old bulb holder from the back of the reflector. This is done by carefully bending the flange holding it up and clear of the bulb holder. A little patience and the holder ring comes right off. From there, the fabrication begins! Please excuse my lack of photos here...sometimes I get in the zone and forget to set up and take pics. :shrug: 
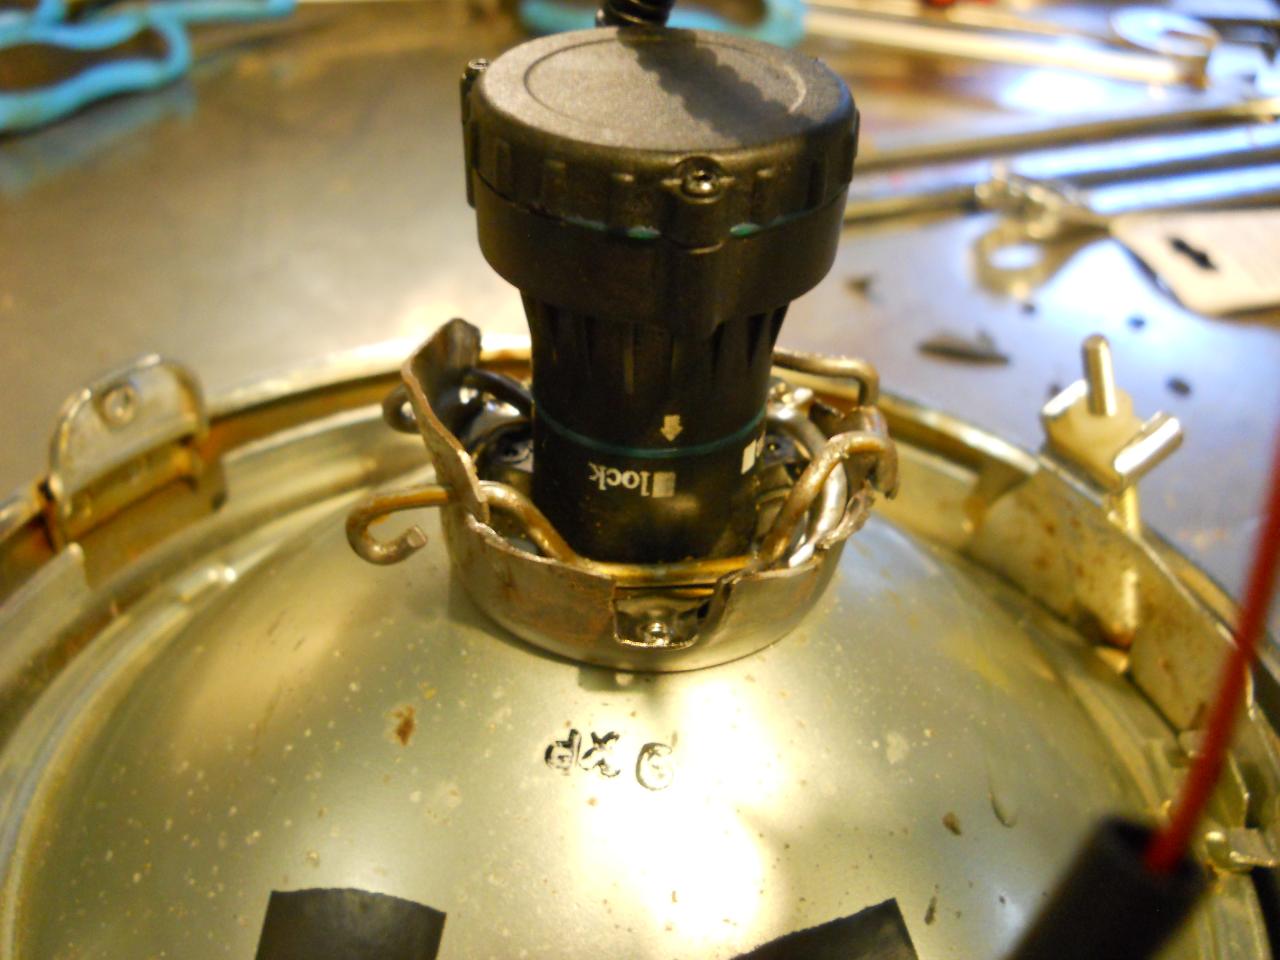
I took a couple of chunks of steel laying around the garage and lathed up a punch and die (cut to some fairly specific dimensions) that would allow me to increase the size of the hole that the bulb sets in on the reflector. After you rig it up in the press and throw 12(ish) tons at it, the hole in the reflector becomes large enough to slip the bi-xenon bulb through without messing up the flange that is already present. I also made a punch and die that I could use to press out a cup that would accept the H4 flange. I had a scrap piece of 20 ga (I think) sheet steel that I formed into this cup. From there, I drilled a hole in the center of the cup that would allow it to just fit over the flange on the reflector. Then I used a die grinder with a cutting wheel to cut out the recesses for the h4 and the tabs that would be used for making a "bale top" that would lock the new bulb in place. At this point, I took the cup, put it over the flange on the reflector, and carefully bent the flange down to hold the cup on the reflector, just like the stock holder was. I bent up a piece of coat hanger into a spring / latch and carved out some parts of the tabs to allow the coat hanger to "lock" in place. Finally, I cut up a chunk of old worn-out inner tube to make a sort of vibration-dampening gasket, and, viola:
full


With the bulb:
full


In all, it took me about 8 solid hours, 3 of which were measuring and mathing, and the rest, slow and careful metal work. Since the flange securing the bulb holder is not a true pressed fit, the holder can rotate on the reflector. So, I think I am going to scour the joint between the two a bit and fill it with some JB Weld. This will eliminate the rotation and offer a little more assurance that the holder is secure.

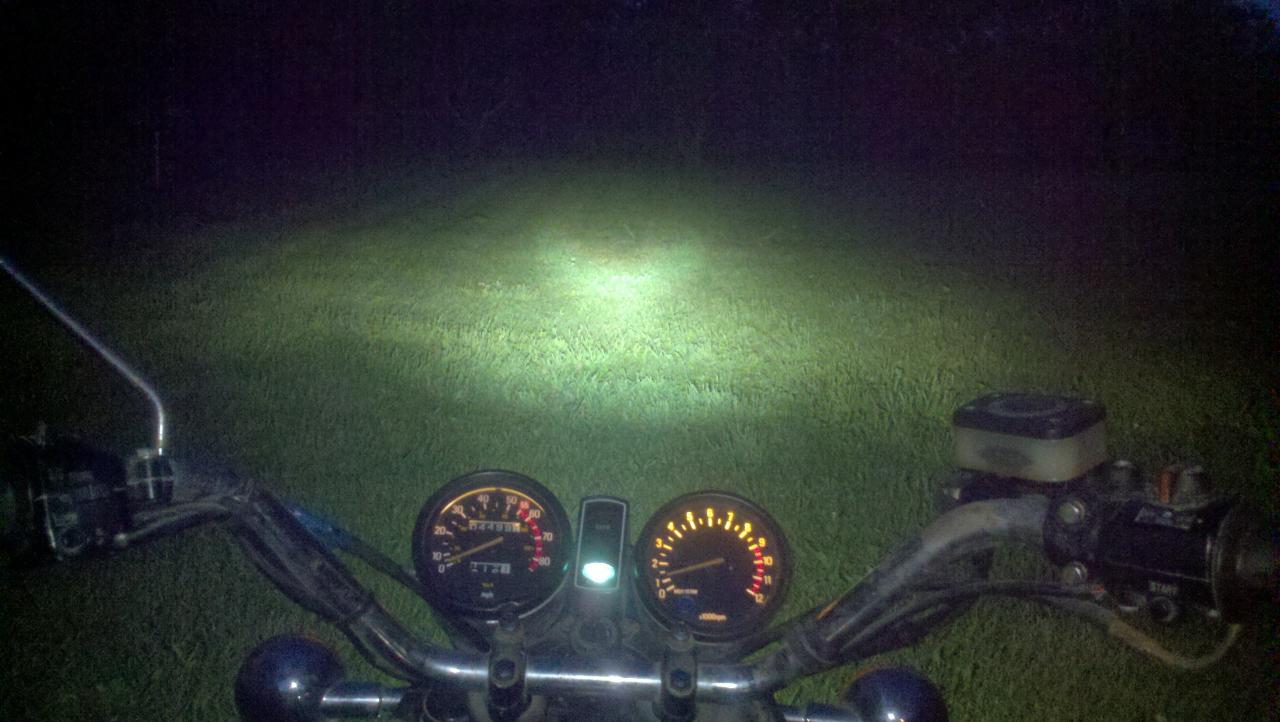
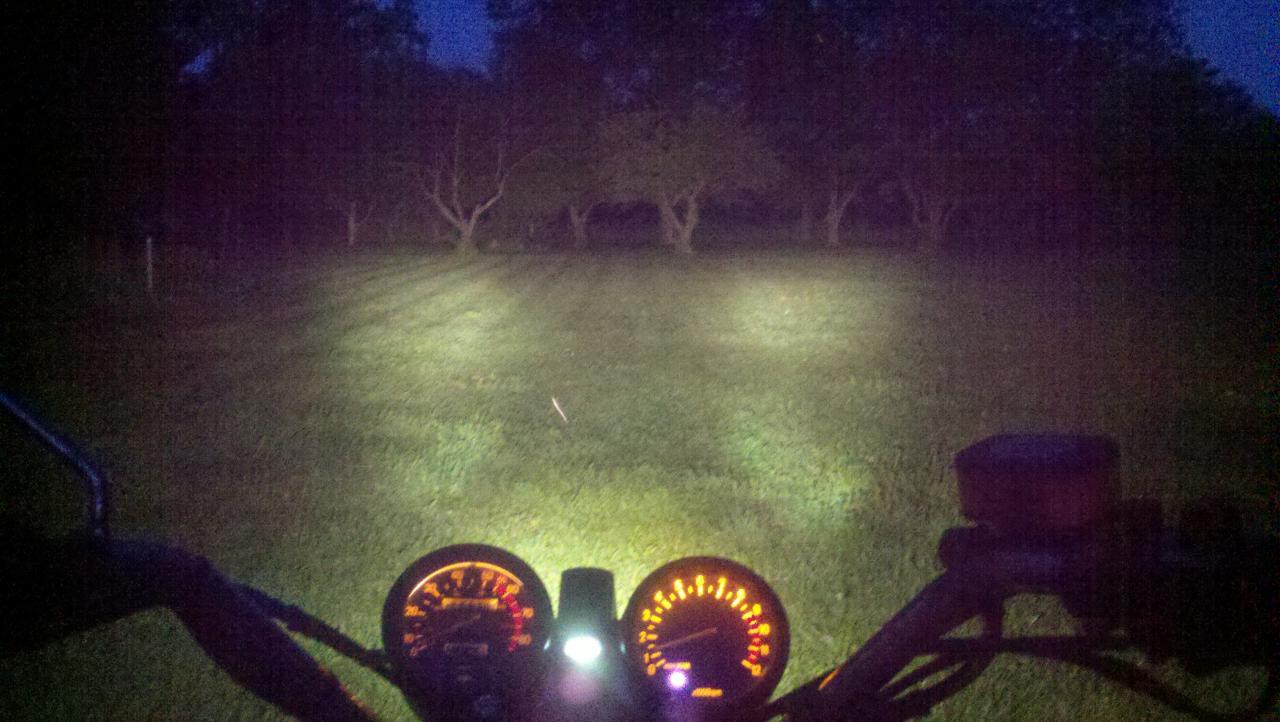
It took a little shuffling of wires in the headlight bucket to get the bulb to fit, which it did without modification, and some creative placement of the wiring harness to get everything connected and hidden, but that was easy enough. A kick of the starter and it lit up the wall of the garage. I might have even gotten a little sunburn from it...
 
Busy busy. Memorial Day weekend gave me some quality tinker time with the bike. Got everything set and situated for a vin and on-road equipment inspection as required by the Secretary of State (or DMV, for those non-Michiganders) in order to get a title when the po didn't have one to give me when I purchased the bike, and I couldn't contact him after that. Contacted the local police department to set up the inspection, waited 3 hours for a patrol car to drop by and perform the inspection. Just when I finished explaining what I needed from him he gets a call from dispatch about another officer needing assistance. He takes off, I wait two more hours and this time a State Trooper rolls up. He didn't need any explanation, just starts with the inspection. Bike passes with flying colours. By the time the inspection is finished, I have about 30 minutes to get to the Secretary of State before they close. I walk in the door and am greeted by about 30 smiling faces waiting their turn. Fortunately, I have a "return pass" from a previous endeavor, so I pretty much bypass everyone waiting and walk right up to the counter. Five minutes and $18 later and the title is legally mine.:thumbsup: I just have to wait 6 weeks for the official blah blah and for the state to drop a physical copy in my hands.:doh: According to them, however, I will be able to register/plate it and drive it while I am waiting for my title.:D

Back-tracking a little. Bi-Xenon headlight installed, not sure how it compares to other people's headlight setups, but it's quite a bit brighter than the stock sealed beam I had (before that burned out). The 4300k bulb is a nice natural white (some places listed it as "stock white"), where the stock sealed beam was much more yellow.

Low Beam vs High Beam
full

full


I'm happy enough with the results. I don't plan on doing much night riding, but at least I'll be able to see if I get caught somewhere after the sun goes down.
 
Mail bag day, mail bag day, hey everybody, it's mail bag day!

Few goodies in the postal box today:
full


New Bridgestone Spitfire front tire to match my recently purchased rear and a lefty fork and caliper to start on my dual front disc conversion. Now I just need a dual m/c and another disc, along with some new braided lines.
 
Good job. Thanks for documenting the HID conversion. I've been waiting for someone to do that.
 
Anytime. I felt like there were a lot of people trying odd things with xenon bulbs, but most ended up with a Frankenstein projector lens in a bucket. Some looked cool, others...sketchy. None had the classic stock look.

A note on the light pattern, post bi-xenon install; I think a little tinkering with bulb depth within the reflector housing, modification of the shield around the bulb itself, or maybe both, could reduce or eliminate the "dark space" in the center of the high beam. I will be experimenting with this in the future.
 
I spent a good deal of time this past week cleaning the internals of my carbs. Every jet had a chalky crust on it and was at least partially clogged, and every jet had either black crusty chunks, reddish varnish paste, or more chalky stuff in/under/around it when I pulled them out. The fuel inlet screens were surprisingly clean. The diaphragms and choke system were very clean, no holes. I was having trouble getting the butterfly screws out, so I went searching the forum on the issue. I found that the screws were commonly swaged to keep them from vibrating out. Since the screws are brass, I decided not to force them out, therefore I would skip pulling the butterfly o-rings. This meant I would have to hand clean the crabs, rather than just dropping them into a boiling pot of vinegar. Easy enough, just a little more energy intensive. I did, however, boil the brass jets and whatnot.

After about 20 minutes on the stove, everything came out looking like new. Reassembly was pretty quick and painless, until I hit the floats. Picked them up and noticed a slight, sloshing sound. Three of the four floats had pinholes, and one had filled about halfway with fuel. I carefully boiled the fuel out, and following a how-to from the forum, I soldered up the holes. After that, I put the needles in their seats, pinned the floats in, and measured heights. All was well, so I finished reassembly and slapped the crabs back on the bike.

I pulled the peacock off the tank and gave that a good cleaning as well. For anyone trying to delicately remove those stuck-on diaphragms...a drop of wd40 and a dull razor or knife blade helped loosen them up on mine. The prime port on the peacock was VERY cruddy...only half open with lots of varnish and that chalky fuel residue and the rest of the ports had a little film, as expected. After the cleaning and reassembly, and reattachment to the tank, the peacock worked great and without leaks.

With a fresh set of crabs and a fresh peacock back on the bike, I primed, half choked and hit the starter. After about 5 cranks she fired. :thumbsup: Once we were warmed up, we were idling at a solid 1400 rpms.

It's pretty nice when things work like they should. :D
 
Someone else was inquiring about my tire setup, so I might as well post some pictures. I also picked up an xs1100 master cylinder to keep on with the dual front disc conversion. Waiting to rebuild my forks and swap the outer left tube until I can get a couple stuck bolts loose and my master cylinder rebuild kit comes in.

Anyway, here's what a '79 xs looks like with Bridgestone s11's (100/90-18 front, 110/90-18 rear, stock mag disc wheels).

full

full

full
 
Back
Top