-
Enjoy XS400.com? Consider making a donation to help support the site.
XS400.com receives a small share of sales from some links on this page, but direct donations have a much greater impact on keeping this site going.
You are using an out of date browser. It may not display this or other websites correctly.
You should upgrade or use an alternative browser.
You should upgrade or use an alternative browser.
XS400: A ScottLuke Saga
- Thread starter ScottLuke
- Start date
ScottLuke
XS400 Addict
Yes, we removed the butterfly seals. The seals were worn and hard. I purchased new ones, along with new Viton Valve seals and a new A/F Screw w/ spring.
ScottLuke
XS400 Addict
yes, you're correct. I meant Valve Seals for the head.

ScottLuke
XS400 Addict
Well, my wife had my niece and daughter all day. Which gave me the chance to work on the engine most of the day. I only broke 1 thing today, so I am fairly satisfied with my efforts.
Started out the day by soaking the Valves and Pistons to de-carbon them. The parts cleaner I used worked very well on everything, except the exhaust valves..I might just purchase new ones?
Before:


After:

Cleaner on (Left) and dirty on (Right)

I Lost the battle with the Exhaust valves. I even let them soak for 4 hours and still couldn't remove all the white carbon residue. The intake valves cleaned up very well, and look nearly brand new.


Next the Pistons! They came out very nice, one is still soaking, but wow I could not believe how well the first one came out. I used hot soap, water and a 3M scotch pad to remove the tough spots. This stuff loosens up the carbon, if it doesn't strip it off first.
Before:


After, very satisfied with the outcome.


Started out the day by soaking the Valves and Pistons to de-carbon them. The parts cleaner I used worked very well on everything, except the exhaust valves..I might just purchase new ones?
Before:
After:
Cleaner on (Left) and dirty on (Right)
I Lost the battle with the Exhaust valves. I even let them soak for 4 hours and still couldn't remove all the white carbon residue. The intake valves cleaned up very well, and look nearly brand new.
Next the Pistons! They came out very nice, one is still soaking, but wow I could not believe how well the first one came out. I used hot soap, water and a 3M scotch pad to remove the tough spots. This stuff loosens up the carbon, if it doesn't strip it off first.
Before:
After, very satisfied with the outcome.
ScottLuke
XS400 Addict
Then I moved onto addressing my carburetor's choke assembly. I replaced the plungers last night. I found out early today from XSChris and RSHutchinson that I was missing the detention bearings that hold the choke open or closed. So I went down to the local Hardware store and found some 3/16" RK ball bearings, nothing they had was smaller. I ended up purchasing them and a 3/16" drill bit and figured I could easily drill the hole to allow the ball bearing to slip through. Here is what I did...
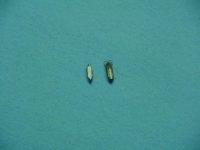
I purchased a total of 4 bearings.

Next I drilled the hole with a 3/16 drill bit, reamed the hole very carefully . I was not able to take pictures of this part, I was afraid of drilling too deep or the outside ring cracking. Sorry, just After pictures. I ended up having to use 2 ball bearings in each hole.


voila! the Choke now stay open.

I purchased a total of 4 bearings.
Next I drilled the hole with a 3/16 drill bit, reamed the hole very carefully
. I was not able to take pictures of this part, I was afraid of drilling too deep or the outside ring cracking. Sorry, just After pictures. I ended up having to use 2 ball bearings in each hole.
voila! the Choke now stay open.
ScottLuke
XS400 Addict
Lastly, the cylinder head. This was no fun, and quite messy. I used a dremel and a brass wire brush, which I like to use for jobs such as this. It cleans off the carbon well from the intake and exhaust throats. Leaving a nice shiny look too, also great for brightening up aluminum parts without polishing.
battling more carbon once again..


the finished product


Last but not least. I was finished with the dremel, went to head inside for a cup. When I clipped the extension cord with not one, but both my feet. Knocking the head off my cart and directly onto its Top......


I purchased a new valve guide, but how are these removed or installed? I figure/d they're pressed in? Does the Circlip fall around the guide as it is pressed into the slot? Damn. I was upset, but now its just another thing to do. I won't be back at it again until next weekend, lots of work to do. Back to my Semi-truck tomorrow
battling more carbon once again..
the finished product
Last but not least. I was finished with the dremel, went to head inside for a cup. When I clipped the extension cord with not one, but both my feet. Knocking the head off my cart and directly onto its Top......
I purchased a new valve guide, but how are these removed or installed? I figure/d they're pressed in? Does the Circlip fall around the guide as it is pressed into the slot? Damn. I was upset, but now its just another thing to do. I won't be back at it again until next weekend, lots of work to do. Back to my Semi-truck tomorrow
I use a water based degreaser (such as Castrol Superclean or similar) mixed with an equal part water in a steel wash tub, and heated over a camp stove to a simmer - the best my stove can do. This will degrease and de-carbon parts in short order. At most, a light brushing with a nylon brush is required to remove stubborn deposits.
Some cautions:
- Full safety equipment is required! When heated, the cleaner and its fumes are very potent! The cautions on the jug are under stated!
- Alloy parts will be oxidized and steel parts will flash rust almost instantly. Don't put polished parts into the tank unless you are willing to polish them.
- Immediate rinsing with clean water, drying, and oiling of cleaned parts is required. WD-40 works well and is inexpensive.
ScottLuke
XS400 Addict
Thanks for the information XSchris and 16CGTIDave!
I want to switch to 520 chain, all my Dirtbikes are all 520 chain, which makes it easier for me when I buy chain. I already have a spare pro-taper MX gold chain that I want to use.
Stock gearing is (530) 16/39= 2.44 final drive. The final drive 14t/34t= 2.43 (520). I found Sunstars 5Y1-14T for the Front Sprocket per an old post from Drewpy. What about the rear though? The one of MikesXS website will match my rear wheel, correct? Are there more options, and which bikes does the XS400 interchange with. Thanks!
You are aware that the smaller the sprocket, the faster the chain will wear? JTSprockts will have a listing of all the different sprockets that will fit. I know that for the DOHC bikes there are 3 front and 2 rear sprockets that will work without modification. The Dual Sport boys are sure impressed with my massive 530 chain. They look confused though when we get around to discussing engine displacement...
ScottLuke
XS400 Addict
You are aware that the smaller the sprocket, the faster the chain will wear? JTSprockts will have a listing of all the different sprockets that will fit. I know that for the DOHC bikes there are 3 front and 2 rear sprockets that will work without modification. The Dual Sport boys are sure impressed with my massive 530 chain. They look confused though when we get around to discussing engine displacement...
That is true. MX chain is meant to not last long, where as street is meant to last longer. Seemed like a good idea, until I heard it from someone else. Again my lack of street bike knowledge has knocked me down a peg, right when I thought I was onto something.
Thanks Dave, I appreciate it.If you want to go 520, Rebel Gears has them as well as Sprocket Specialists. The catch is that they don't list them on the sites, you have to call/email and ask for them. You would want the sprockets for a 79 RD400 Daytona. They have them in any tooth count you want.
ScottLuke
XS400 Addict
If you want to go 520, Rebel Gears has them as well as Sprocket Specialists. The catch is that they don't list them on the sites, you have to call/email and ask for them. You would want the sprockets for a 79 RD400 Daytona. They have them in any tooth count you want.
Thanks Wolfe. Very good to know that the 79' RD400 is interchangeable. I would love to find a RD350-400..nothing like a two stroke, especially one with YVPS. My 92' WR200(white bike in the background) has YVPS, its a very nice linear hit. Mixing gas, and hauling ass
 lol.
lol.Thanks Wolfe. Very good to know that the 79' RD400 is interchangeable. I would love to find a RD350-400..nothing like a two stroke, especially one with YVPS. My 92' WR200(white bike in the background) has YVPS, its a very nice linear hit. Mixing gas, and hauling ass
If you ever see an RD/RZ 500 laying around, let me know
Would love to start piecing one together. I just want to pretend I'm Wayne Rainey while I drive to work I've never messed with Yamaha's power valve setup, but on my sticks (stand up jet ski's) we add Rave valves (same concept). You can really feel when they are working, and you can feel it even more when they get stuck from carbon buildup

ScottLuke
XS400 Addict
If only I had one of those damn magic lamps...I'm not very familiar with Wayne Rainey, but I know his bike. YZR500! Have the box of tissues ready @ 1:40
Yes, boyesen. Rad valves = true bolt on HP. Never have ridden a stand up jet ski, I can only imagine the power, must be a S-load of fun.
Yes, boyesen. Rad valves = true bolt on HP. Never have ridden a stand up jet ski, I can only imagine the power, must be a S-load of fun.
ScottLuke
XS400 Addict
It's been awhile since I have posted any progress. Recently I got my frame back from sandblast and powdercoat. I have been collecting, and replacing miscellaneous parts on the Bike, not much else besides that.
Frame, triple tree, swingarm and kickstand.


Frame, triple tree, swingarm and kickstand.
ScottLuke
XS400 Addict
I replaced the old Nylon Swingarm bushings with the ones off MikesXS. Seem to be of good quality and should work out very well. I wish I could have afforded to replace them with Needle bearings, but I figure for $32 bucks I couldn't go wrong. The old Nylon bushings were so worn-out and the holes were very distorted. I also replaced my steering stem bearings with new roller bearings from Pivot Works, but I didn't take any pictures of installation, because I did it very late one night after work.


Last edited:
ScottLuke
XS400 Addict
I also decided to make my own rear hoop, and after a few screw-ups. I finally got the bend I wanted. Now, since I jumped the gun on the powder coat. I will have to grind away the rear a little bit so i'll be able to weld it on. Originally I was just going to leave it and go without a hoop, but boredom got the best of me last weekend.

