Thanks for getting back to me on this stuff. How does the vacuum regulate the fuel leaving the gas tank going through the petcock exactly?
No problem. You can have a look yourself, just disconnect the fuel line (the one with the filter) when the petcock is in ON or RES position. A little bit of fuel should drip out, but no more than was in the fuel line itself. Then try to start the bike (of course this won't work) and when the engine turns over, fuel should start pouring out of your fuel line. How this works exactly is hard to explain in words, there's a membrane in your petcock that regulates this. Keep in mind that the petcock doesn't really regulate the
amount of fuel flowing, it's just flowing or not flowing. The amount of fuel sent to the cylinder is determined within the carbs.
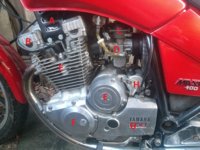
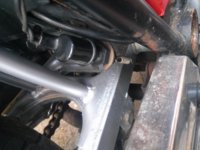
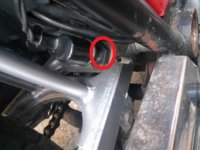
And is the sprocket located somewhere with the clutch plates? I hear a lot about this but not quite sure how it relates to the gear system.
They're in the same area of the engine (the one you indicated in a previous post). The clutch connects or disconnects the front sprocket (which, of course, drives your chain) with the turning parts in your engine. When you take the sprocket panel off you can see the sprocket, but the clutch is somewhere on the inside of your engine.
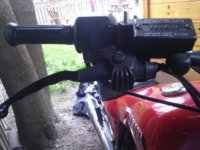
As for the clutch cable, does this connect directly to the clutch on the handlebar? And does the electrical wire going to the starter come back from the start button?
Thanks for clarifying the throttle cable contraption, I'll take a look at it next time I'm in neutral.
Yes, it connects directly to the clutch on the handlebar. The electrical wire connects to a few things, but ultimately to the main fuse, the battery and of course the start button. Check your wiring diagram for this. The throttle cable you can also check when the bike is off, it's just a cable which you pull when turning the throttle.
Hmm I do know how a choke works on older cars but as far as I can tell my bike doesn't have a choke - there's just a clutch switch on the left handlebar and the regular lights and kill switch.
That would be strange. I think all our bikes have or have had a choke, I honestly can't live without it since without it my bike just won't start. Maybe someone who has your model can shed some light on this.

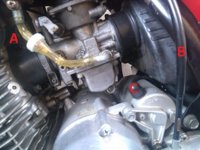
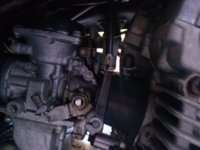
Or you could take a picture of your carbs on the right side of the bike showing the rest of the carbs, it should be somewhere on the top of your carbs or maybe a bit more on the left, maybe it'll just be there somewhere and I can identify it
")
That's interesting about syncing the carbs, would this be done after cleaning them? Or in which scenario should I sync them? Suppose you wouldn't know of a link on the site with directions to do this would you?
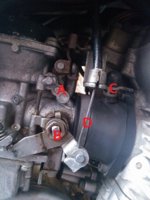
As Mark said, you do it once in a while. Definitely always after checking and adjusting your valve clearance, but also when you feel the bike could run a little bit better. This is sort of a fine-tuning thing, a last step in making your bike run smoothly. There is a screw in the middle between your carbs (hard to see when theyre on, it usually also has a spring on it like your idle screw) which is the one that you would turn in the process. If you've accidentally turned this when you took your carbs off for cleaning (like I did the first time around), you'll have to do it.