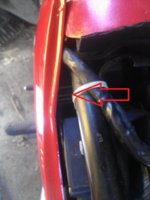
Hmm that explains why I couldn't find that bolt then haha. So to remove the tank I could just loosen the two side bike covers and the petcock fuel line and just pull the tank off?
Yes. Again, be careful when pushing it back on after, don't push the bike off its center stand by accident while you have both hands on the loose gas tank.
Was wondering for lubricating the chain, ride the bike a bit and then spray it on and wipe away dirt with a wire brush/rag? How often do you remove your chain and place it in solvent though?
Yes just lube the chain when it's warm. Don't use hard brushes since there are rubber rings in there as well. I don't remove my chain at all, nor do I use solvent. You can brush off most gunk with a soft brush or wipe it with a dry cloth, and then just lube it up. It keeps itself pretty clean. Taking it off is not necessary.
Just had a few more off topic questions after reading through the manuals if you don't mind...
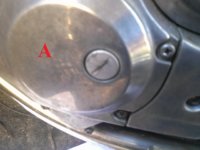
1. Have you ever had any issues with blow by and had to replace your piston rings? If so, how did you know this occurred?
not at all. I haven't personally. But all engines have wear on their piston rings over time, so a piston ring might be replaced at one point or another. The way to find out is that your compression becomes poor, and you've ruled out the valves being out of spec. Basically, if your compression is poor and there is significant improvement when you spray a little bit of oil into your cylinder, it's your piston rings. But I haven't read about anyone needing to replace the piston rings (or honing the cylinder and putting in oversized pistons) since I joined a few months ago.
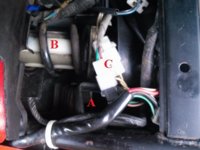
2. To check the wiring all over the bike, do you just unhook wires and make sure the voltage is 12V? Or do you cut wires a little and check for the 12V that way?
Don't cut wires just for measuring. Just measure at connectors. Those are usually the weakest points anyways, and you don't have to cut anything. There is no one way to measure all wiring on your bike, but if something is supposed to be getting power there should be 12V on it, yes. For example, your wires connecting your horn should have 12V on them when you press the horn button. Your multimeter also has a connectivity meter (usually with a sound, like a beep). Use that to check if wires are connecting.
3. Have you ever had to adjust anything with the clutch plates or tranmission on your bike in the period you've had it?
I haven't. But other forum members have. But again, if it isn't broken, don't fix it. When you feel like your clutch isn't working properly and you've checked that it's definitely not your cable, it could be your plates.
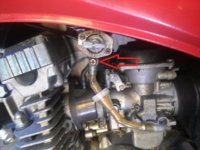
4. Where would the master cylinder reside on these bikes? Somewhere near the handlebar/brake fluid?
near the brake fluid reservoir, yes. Google some images, that helps.
No problem
")