Intro: Lots of cursing and a eventually an 79 XS Rebuild.

Looks like you've got some rust in there! There really isn't anything terribly complicated about tearing down these engines, but patience will pay off in this process. The usual advice (take pictures, bag & tag each step, check for washers/locator dowels/woodruff keys, etc.) will be sufficient for the most part. Keep oil on the machined surfaces and check them for wear/scoring. When you get to the crankshaft record the engraving on the counterweights, since you need that info should you have to order bearings for it. I would consider vapor blasting at least the top end to get it nice and clean after what I've seen of it so far. So far so good! :thumbsup:
 
@haga41cat I know I thought so :) . I have picture of the next step that tell a different story I will post them soon.

@ThePsuedoMonkey, I thought it was rust at first but I think it is a paint marking. Whats is a 'woodruff keys'?

I was thinking about soda blasting the motor since I have a large air compressor. I also have a low pressure paint gun so I was thinking about putting paint thinner or a degreaser in the reservoir and blasting the motor with a DIY degreaser air gun spray and see if that had a cleaning affect. Have you guys read of anyone making or using a "paint gun cleaner" before? Sounds like a good idea to me. :thumbsup:


How is vapor blasting different from power washing?:shrug:
 
Woodruff keys are a metal spline that have a rounded end. They are used to seat gears to shafts that rotate at high speeds, since the round mating surface allows centrifugal motion to keep the gear balanced perpendicular to the axis of rotation. A la wikipedia:
Woodruff2.png
They are also easy to lose and annoying to install. :mad:

That DIY degreaser sounds like a mess! I don't know see a low pressure spray gun being much different than a rattle can of engine degreaser or brake cleaner though. If it does work, that'd be pretty sweet though. All of the power washing equipment I've seen is just (really) pressurized water, but vapor blasting uses high temperature steam and tiny glass beads. I've never done it, but everything I've heard about it was all "inexpensive" and "great job."
 
Hey psuedo, just while were on this topic just wanna ask you about the bearings on the crank shaft. My question is why is there no bearings like that on the cam? Thats spinning around too i was surprised there wasnt any there. (those half circle bearings)
 
I agree, outside corrosion did not affect that motor inside. It looks pristine. We obsess over exterior cleanliness but the important part is right there in front of you, uncorroded parts, and clean oil. Looks new, honestly. Congrats. That's going to shine up nicely.

If it's not outside the budget I might have it vapor blasted. It produces a satin finish that looks really great on the older bikes.
 
i had heard that too about rolls and burying engines... it had to do with the metal stabalizing or something back in the day when engines were made out of cast iron.
 
Vapor blasting is a high powered jet of water vapor, far higher than a power washer or pressure washer, and the mist or jet carries very small glass beads that clean the surface of the metal without distorting it. You can watch it done on youtube. It's pretty cool. Soda blasting works great as well but takes more time and patience.

As for the paint thinner, you'll be vaporizing a flammable substance and probably breathing it unless you have a great respirator that seals perfectly. I'd stick to the soda blast.
 
Hey psuedo, just while were on this topic just wanna ask you about the bearings on the crank shaft. My question is why is there no bearings like that on the cam? Thats spinning around too i was surprised there wasnt any there. (those half circle bearings)

Now that you mention it, that seemed strange to me as well. There doesn't seem to be room to install plane bearings anyway, so it was clearly by design. Maybe the notches in the head behave like a plain bearing?
 
Nice looking inards for sure!! makes me feel really good about my block too :p Where on the Island are you? I'm in Vic and we have a DIY Sandblasting company that sets you up for $1/hr. They have sand, glass, and walnut blasting materials to choose from. Just a thought!

Are you just doing a restoration on it? I'll be following closely :)
 
Hey,

So I finally had some time in-between studying for exams, so I did some work on the old motor.I also got my Gasket set so im excited :).

6932067030_059fb24f98_z.jpg


Wow did that ever take a lot of work to get the timing chain off! My motor would not rotate 360 because of crap on the Cylinders The cylinders were hitting the valves stoping rotation. This stopped me from being able to get at the second bolt off from overhead cam sprocket.

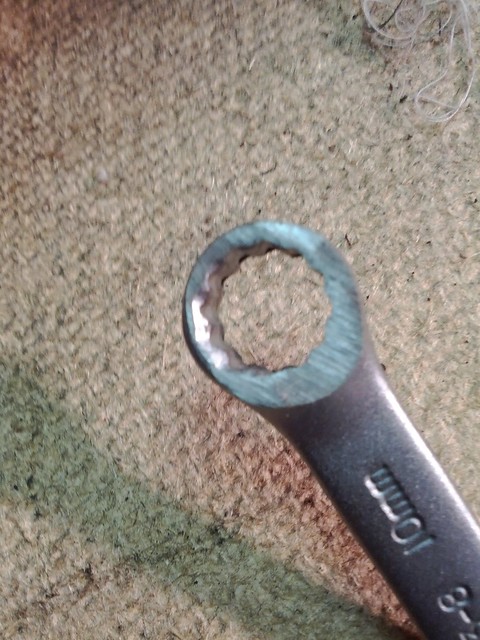
I was able to grind down one a wrench so i could fit it in between the sprocket and carefully unbolt it. Im lucky nothing got striped. The cam pulls out really easily once the timing chain is off.

6932066762_18f9dfee99_z.jpg


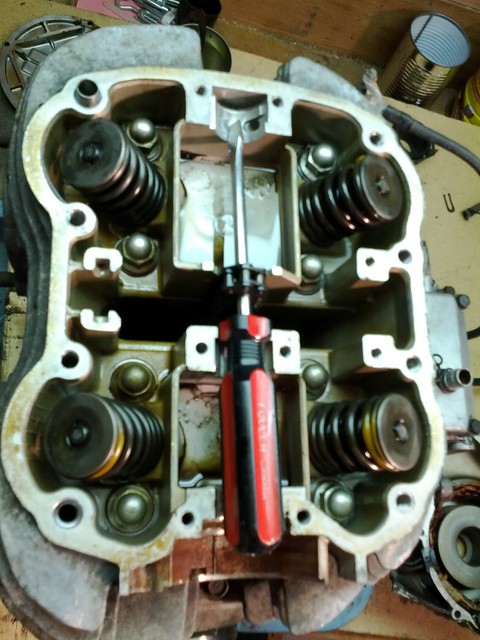
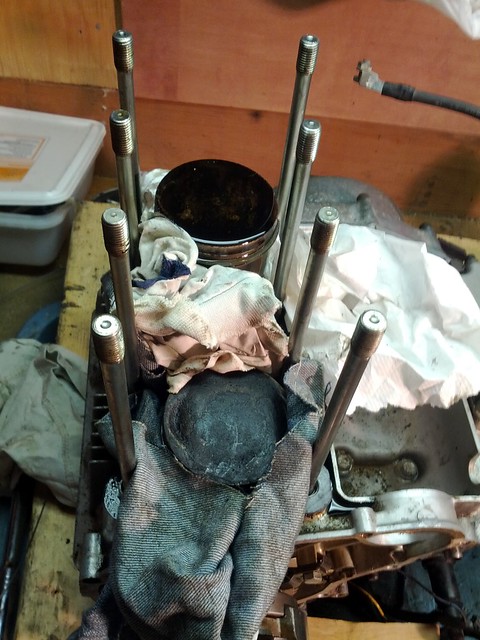
Support the timing Chain so it does not disappear into the abyss. I later swapped out the screwdriver and used a 'cut up' coat hanger.

6932066926_2e98049c86_z.jpg


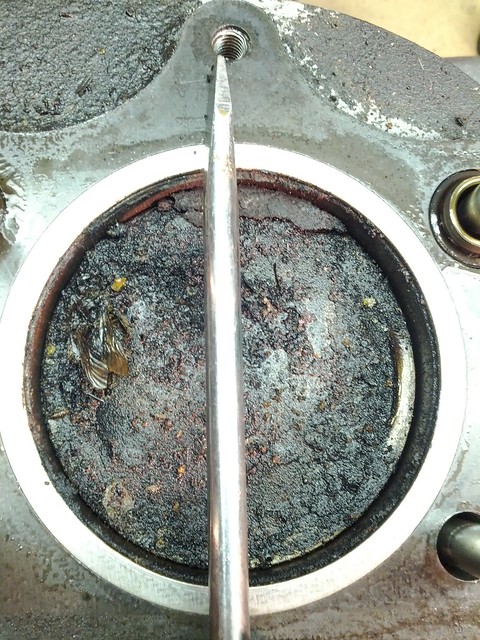
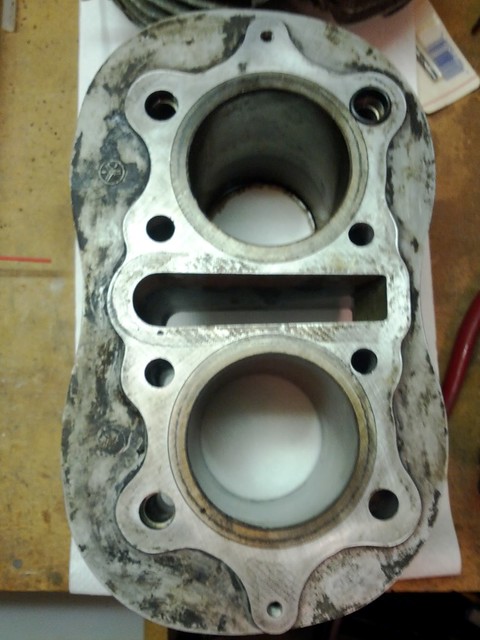
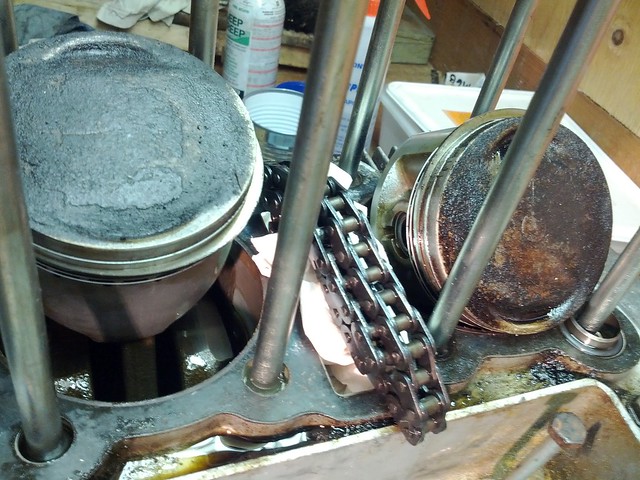
The head came off fairly easily. I just grabbed ahold of it firmly and rocked it back and fourth with my hands.To my relief the cylinders rotated 360 freely once the head was off, but this is what I found.

7078142575_d812a84c0b_z.jpg


:wtf:

6932066442_62853b9a1a_z.jpg


A bee trying hard to turn into fossil fuel. :)

I sprayed bunch of cleaner-degreaser onto the piston heads and then used a shop vac to clean them while there were still in the cylinders. I had just gone to the dentist so I was inspired by the tooth cleaning, I try and use my shop vac all the time to keep things clean and dry along the way.


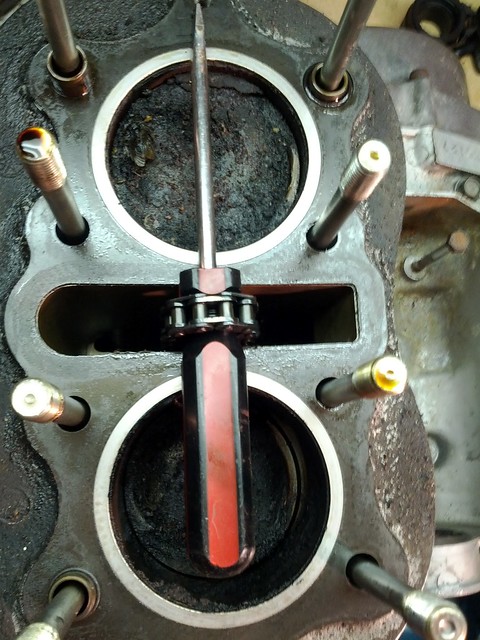
So the next step was to remove the cylinder head. This was tricky I should have lubed up the cylinders and rotated the pistons up and down in the cylinders before removal, because I found the top end really tricky to pull off. To pull off the top I just pulled and pulled on the top end. Perhaps this is a good thing they were had to remove does this mean the piston rings are still good?

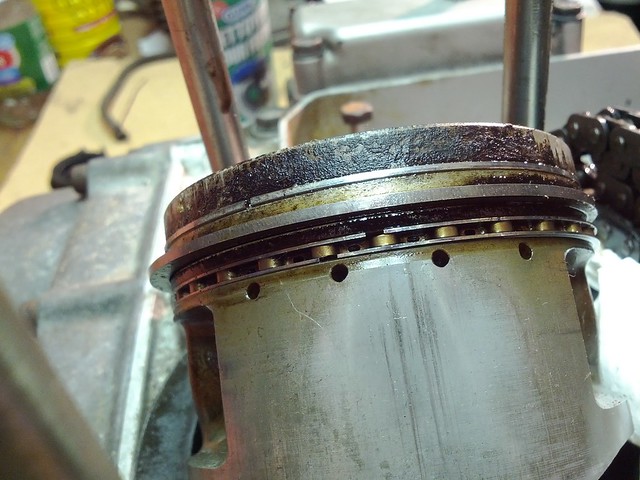
I used lots of support around the pistons to stop them from damaging themselves while I pulled the top off.


6932130926_ffc3d8f0e6_z.jpg


7078206223_cb23c6da55_z.jpg


7078206015_08f6199fa9_z.jpg


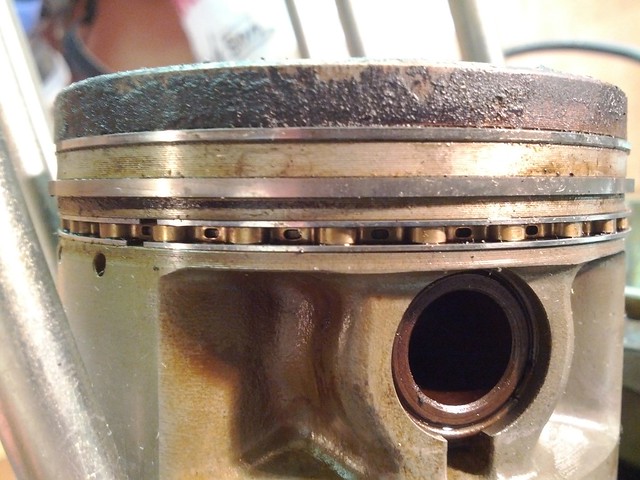
Is it ok that the gunk is below the first ring? The bike did sit for 5 years?


6932130604_c0f6fdfdd7_z.jpg


Towels off looks clean below :thumbsup:


7078205737_b7159638b3_z.jpg


I really hope I dont have to replace the piston rings what do you think?


@haga41cat :laugh:

@ThePsuedoMonkey thanks for the info, I think im going to try Soda Blasting.

@tritowns thats cool I cant find anything about motor burial, wish I could find out more about that.

@ Drewcifer "paint thinner, you'll be vaporizing a flammable substance " Good point I think I will stay away from that. I could make a cool flame thrower :)

@drewpy :laugh:

@Liamthedevastator Do you mean $10/hr? I am in vic, I have heard of the DIY sandblasting. I think im going to try Soda blasting the motor because im cheep and like DIY things. But Perhaps ill sand blast my gas tank and frame.


Here is my other project.
7049077281_c5b721c195_z.jpg
 
I chuckled when i saw the crud on the piston and thought, "that looks like a bug lololol". Then i saw that it was a bug :laugh::laugh::laugh:

And nope, i mean straight up $1/minute. It's a minimum 15 minutes, but it's kinda shocking what you can get done in even a few minutes with a sandblaster. They have glass beads and walnut shell (apparently good for taking off just paint) so i think it would be sweet for cleaning the frame up. Bare aluminium? yes please!
 
Exams done for the summer. Now back to the Bike. :)

I have cleaned up the jugs and the motor exterior some more. I removed the head-gasket by carfully scraping it off and then using 300 grit wet sand paper to lightly sand and completely clean the surface.

The head-gasket was leaking. It was reason the last owner parked the bike for 5 years. Now that I have completed that step (remove old Head-gasket) I'm not sure if I should go deeper into the motor to explore and clean or if I should Put the motor back together and get it running.What do you think? is it work opening up the bottom end to clean it up.I have the whole motor gaskets set... The bike has 30'000 km on it hurrm.. decision decisions?


Cant wait to get It running :gun:
 
I'm paranoid, so I would want to check it out. The crankcase mating surface is machined, so they use an oil-proof seal (e.g. black RTV) instead of a gasket. I say go for it and check the condition of everything.
 
I agree with Pseudo, definitely worth a look! Maybe there will be a bee's nest in the crankcase? The way I see it, you've come this far and a good cleaning would be handy.
 
splitting the case a little added work but may be worth a look. At the very least I would remove the pistons and piston rings, clean the ring grooves good, use a micrometer to measure piston pins etc. Then with pistons off, put the gearshift lever on, turn the motor by hand slowly making sure it shifts through all the gears. Or split the crankcase since your'e already that far into it :thumbsup:
 
Since the subject of Woodruff keys popped up, would you take a photo of it and perhaps what it looked like before you removed it? I got the retaining bolt off the rotor (it was like 60ft/lbs) and i can see the cutout for the woodruff (i think) but i can't see it there. Which surface of it did you see? thanks man, hope to see more progress soon :)
 
Maybe it's just me, but if there's nothing wrong with it, don't f with it. Head gaskets deal with tremendous pressure and heat - more than any other gasket or mated surface on your bike. If you start to pull it apart, you may create a problem that you don't want.

Just my .02
 
Back
Top