just a pic of where im at build thread old and messy

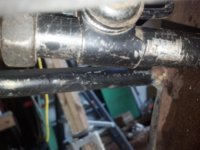
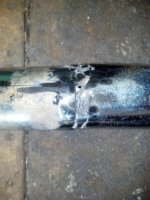
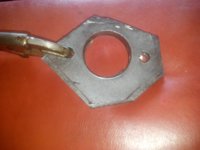
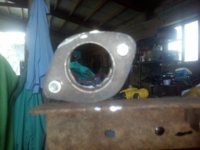
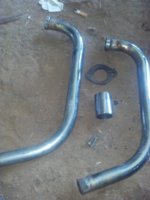
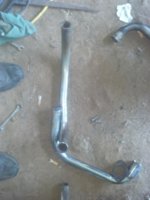
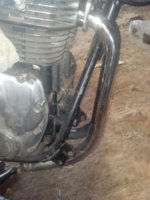
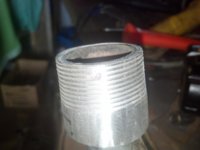
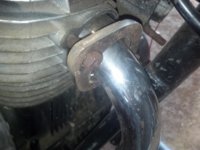
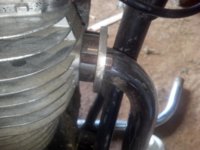
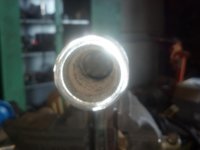
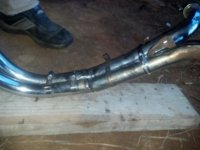
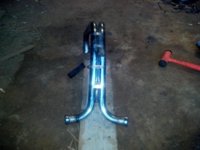
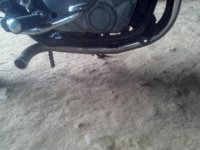
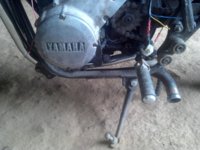
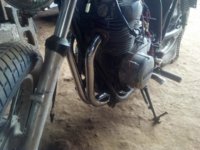
putting up pics of exhaust pipes im gonna try and use. the flanges are just copies of what mac does on their headers. The fat short piece of pipe is being fitted to block end of header and used as a type of split collar without split. the second pipe will be cut and welded to header if my skills let me get it done. they will go under belly of bike and turn out the sides rightt past end of lower frame.
 

Attachments

  • raw cut outs of header retainers.jpg
    raw cut outs of header retainers.jpg
    172.2 KB · Views: 210
  • now they are matching up.jpg
    now they are matching up.jpg
    141.5 KB · Views: 189
  • after some flap wheel work.jpg
    after some flap wheel work.jpg
    100.9 KB · Views: 199
  • header and future tailpipe.jpg
    header and future tailpipe.jpg
    157.9 KB · Views: 196
  • more or less how thet will look when cut and welded.jpg
    more or less how thet will look when cut and welded.jpg
    123.7 KB · Views: 210
Got some of the header work done today. one pipe has collar welded on the other one is ready to weld. had to beat the collars on with a hammer so they are tight. the pipe parts are from a 4 cyl nighthawk i think son had them. did 4 plug welds them some tacks to the face seam then flapwheeled it smooth. it sits tight to gasket and still has some play in bottom of exhaust well up up down side to side. if i ever collect factory collars and such i can cut my sleeves back with cut off wheel. here are a few pics.
 

Attachments

  • front shot of headers.jpg
    front shot of headers.jpg
    153.9 KB · Views: 183
  • pipes on bike.jpg
    pipes on bike.jpg
    153.2 KB · Views: 195
  • did 4 plug welds and some tacks on face seam.jpg
    did 4 plug welds and some tacks on face seam.jpg
    110 KB · Views: 196
  • mock up header 2.jpg
    mock up header 2.jpg
    193.3 KB · Views: 187
  • mock up of header.jpg
    mock up of header.jpg
    148 KB · Views: 193
  • had to drive collars on with hammer.jpg
    had to drive collars on with hammer.jpg
    91.2 KB · Views: 191
dont have any pics of welding first pipe. right now i grind better than weld but thats changing. these are just a few pics using hose clamps[good use for them] to clamp second pipe to first so i can make them match before welding. one thing i learned doing this. i figured a 4 into 2 the inner pipes would match and so would the outers. they all 4 have slight variations so pipes are not a perfect match but close. i beveled the outer pipe so i could weld inner first then fill welded the to outer pipe. ill put up pics of mounted pipes plus the welds when i get them cleaned up
 

Attachments

  • 2014-06-21_20-35-51_39.jpg
    2014-06-21_20-35-51_39.jpg
    215.6 KB · Views: 190
  • 2014-06-21_20-35-59_558.jpg
    2014-06-21_20-35-59_558.jpg
    138.2 KB · Views: 197
  • 2014-06-21_20-36-15_761.jpg
    2014-06-21_20-36-15_761.jpg
    165.9 KB · Views: 171
  • 2014-06-21_20-36-25_893.jpg
    2014-06-21_20-36-25_893.jpg
    168.2 KB · Views: 169
Okay guys here is the pipes on the bike
 

Attachments

  • 2014-06-24_11-05-42_32.jpg
    2014-06-24_11-05-42_32.jpg
    182.4 KB · Views: 171
  • 2014-06-24_11-05-52_351.jpg
    2014-06-24_11-05-52_351.jpg
    209.8 KB · Views: 164
  • 2014-06-24_11-05-03_826.jpg
    2014-06-24_11-05-03_826.jpg
    241.2 KB · Views: 174
  • 2014-06-24_11-04-46_822.jpg
    2014-06-24_11-04-46_822.jpg
    209.7 KB · Views: 199
  • 2014-06-24_11-04-33_258.jpg
    2014-06-24_11-04-33_258.jpg
    247.3 KB · Views: 185
polish or clear coat on carb bodies ?
 

Attachments

  • 2014-06-26_18-39-05_515.jpg
    2014-06-26_18-39-05_515.jpg
    198.5 KB · Views: 162
  • 2014-06-26_18-39-20_560.jpg
    2014-06-26_18-39-20_560.jpg
    158.6 KB · Views: 173
  • 2014-06-26_18-39-31_892.jpg
    2014-06-26_18-39-31_892.jpg
    139.4 KB · Views: 170
polish or clear coat on carb bodies ?

Did you sand blast those?:eek: 
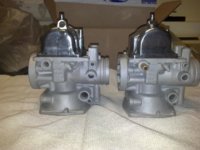
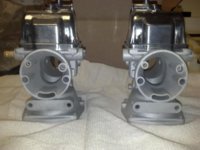
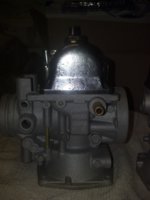
You will damage a lot of the small fine holes and the bores for where the slides go should be smooth. You should have used baking soda for aluminum. It wont pit the metal.
 
well i did some more welding and grinding on pipes starting to look bit better. the pics are of the first pipe it was messier than the second. it is a double wall so its solid. the second thing i got to was the seat ive been banging this idea around for a bit just had to figure out a way to do it without welding in case it don't work out. used a big bolt and a piece of handle bar to give the stock bicycle seat clamp something to hang on to and i can still tilt and slide back and forth some . its bolted through the plate i used to close up front of shock towers and shield back of engine fro debris.
 

Attachments

  • 2014-06-27_12-53-53_517.jpg
    2014-06-27_12-53-53_517.jpg
    146.1 KB · Views: 178
  • 2014-06-27_12-53-33_707.jpg
    2014-06-27_12-53-33_707.jpg
    179.2 KB · Views: 168
  • 2014-06-27_12-53-23_761.jpg
    2014-06-27_12-53-23_761.jpg
    175.8 KB · Views: 182
  • 2014-06-27_11-35-14_817.jpg
    2014-06-27_11-35-14_817.jpg
    117.1 KB · Views: 174
  • 2014-06-27_11-05-24_998.jpg
    2014-06-27_11-05-24_998.jpg
    229 KB · Views: 171
yes i did plugged every hole with various items that would fit. cut pressure to 30 psi then washed hot water and then air then carb cleaner. my slide passage is still shiny. if i screw them up i got a set from a maxim if i make a t pipe for them. im gonna give it a shot new jets and diaphragms and seal getting here first of week.
 
well tank is about done here it is.flip cap and emblems gone
 

Attachments

  • 2014-07-13_20-27-23_188.jpg
    2014-07-13_20-27-23_188.jpg
    112.5 KB · Views: 178
  • 2014-07-13_20-27-09_118.jpg
    2014-07-13_20-27-09_118.jpg
    119.1 KB · Views: 148
  • 2014-07-13_20-26-31_669.jpg
    2014-07-13_20-26-31_669.jpg
    128 KB · Views: 170
  • 2014-07-13_20-25-44_537.jpg
    2014-07-13_20-25-44_537.jpg
    175.6 KB · Views: 161
Hey Bud.....
Just been over and taken a look....Good Job
Looks much nicer smoothed and with a screw in cap.....
maybe we'll start a new trend
I'm also building a new tail light from a vintage Lucas one I scored at an auto jumble
Pics to follow.....
Keep up the good work
 
no new pics but did get engine running this weekend. had a major blonde moment. the right side was spitting fire went through the carb twice no problems found. i said self it ran good before i took it apart. remembered i changed over to points right side was firing late now its fine tuning and cable making. i did notice that i only have a full set of timing marks for left cylinder and top dead center for right since this was a tci bike i figured it was normal so a little more tinkering i should have right side good. it aint trying to burn my foot off anymore :doh:
 
got timing straight and built throttle cable today. have question can i upload small vid with audio or do i need to post that off site
 
Back
Top