Replacement petcock does not have valve

butterbeats

XS400 Addict
Messages
126
Reaction score
9
Points
18
Location
Brisbane
Hi All,

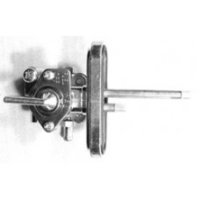
I have a leaking petcock. I wanted a new replacement and also to try to repair the old. I just bought a replacement petcock from an Australian xs650 specialist. I assumed the petcock where the same within the year models, so hopefully a XS650 petcock from 1977 would swap for my XS400 1977 petcock. He suggested and sold me a modern / updated replacement. When the replacement arrived I realised it doesn't have a valve for the vacuum tube/pipe. Which I could not see in the image on his website. The petcock fits but does not have valve for the vacuum tube, which is found at the back of the petcock. He reassures me that it will work great and all I need to do is add a cap to the valve end.

Anyone had any experience with these replacement petcocks?? Or any tips??

(more info on the replacement http://www.geoffsxs.com.au/OpenCart/index.php?route=product/product&path=4_34&product_id=441 )

I am also trying to repair my existing petcock. I opened it up and nearly all the rubbers were in good working order. Except the largest rubber, the main point of contact with the tank. Time and usage has made the washer/gasket flatter. Taking it off the tank rendered the seal not as tight as required. Rather than buy a whole replacement kit, I am in the process of adding some depth to the top gasket on the petcock with some electrical tape. I put an image up at the halfway point. I added two thicknesses on electrical tape to the bottom and then cut the shape out of them.

Any tips?? Any suggestions for glue or fuel proof filler to add to the bottom of the gasket to add some depth and increase the point of contact with the tank and thereby seal the petcock.
 

Attachments

  • 20-0019-228x228.jpg
    20-0019-228x228.jpg
    7.2 KB · Views: 174
  • petcock.jpg
    petcock.jpg
    215.5 KB · Views: 190
The new petcock is a manual petcock, not vacuum operated. So you manually have to open and close it to allow fuel to flow.

You can leave it in the on position and provided that your floats are working correctly you'll have no problems. Also, you can turn it off whenever you're done riding for any length of time. Turning it on and off just to go into a store is unnecessary I would say though.

I have used Seal-All on tanks and it works great. It's a clear gel-like sealant, doesn't flow out like a liquid really. I am not sure how it comes off though so if you go to remove it it may take paint with it.
 
Put the new tank and new petcock on 2 days ago. Still working well. The fuel valve was a different diameter to the old one. Skinnier. Plus the petcock lever, when on the on position rubs up against the tank. Not good. But still works.

So to make it work I had to put skinnier fuel pipe into the thicker existing fuel pipe and use a clip to tie the two together. Then I had to put a pipe/tube with drill bit plugging up other end of the tube, on the other end of the vacuum. To seal the vacuum. Seems to be working well. Bike 5-10kms faster. I will obviously look for better solution first chance. Although I do like a bit of hillybilly mechanics.

The old tank still leaked after trying to bodge the flattened big washer with some duct tape. No surprise that I need to buy a real repair kit. looking online now. KL does some on Ebay.... ???
 
Last edited:
In regards to the petcock not being able to turn the lever all the way- It's been covered before, you can either grind down the inside edge a bit as I did and it will turn fully to the reserve position. Or as XSchris has reported, you can just turn it as far as it will go and it will still flow for the reserve. Shouldn't need to put it in that position much if you are filling up at regular intervals.

Just so you know- Lever down is the on position. Horizontal is off. Lever up is reserve.
 
here is an image of my bodge job on the fuel line that is doing the job... (repainting tank soon)

Right too about it being the reserve position hitting the tank. Needed reservoir yesterday after going for long ride and trying to recharge batteries.

Going to try to return existing tank and petcock back to working condition.
 

Attachments

  • petcock.jpeg
    petcock.jpeg
    148.3 KB · Views: 1,037
I swapped the outlet to the other side and put the new petcock on my old tank today. I definately need to find a better solution to the joining of the different fuel pipes. At my local bike warehouse today part not much in the way of interesting parts. Ebay I guess.

The new petcock needs a fuller tank to keep the fuel flowing. The new replacement petcok has metal tubes which reach deeper into the tank rather than the old plastic filter.
 

Attachments

  • IMG_2453.JPG
    IMG_2453.JPG
    181.9 KB · Views: 247
Any ideas on the best way to step down the two different size fuel lines/pipes. Rather than what I have done which is to stick the long skinny pipe inside the thicker factory standard fuel pipe, and then clamp them.

I have tried looking on ebay and online via google for petcock valve stepdown.... valve stepdowns etc but no luck.
 

Attachments

  • IMG_2463.JPG
    IMG_2463.JPG
    236 KB · Views: 178
Last edited:
First off don't use automotive braided fuel line as it is too stiff. I use ethanol resistant motorcycle hose and some clamps. All four of my bikes run the mikes xs petcocks and I have never had any issues.

DSC03139.JPG DSC03140.JPG
 
Finally got the petcock sorted out. Easy in the end.....Rather than a step down valve and two pipes I got a new pipe. Got a cheap stainless steel fuel line from Ebay. It was the same width as the smallest valve. Cut the stainless steel down to size. Loosened up one end with hot drill bit. Then stuck same end in hot water and soaked it till it was a lot softer and able to be slowly pulled over the larger valve. Then I sealed either end with brand new clamps.
 

Attachments

  • IMG_2485.JPG
    IMG_2485.JPG
    191.3 KB · Views: 186
Last edited:
... THEN I ROAD HOME FROM WORK AND BROKE DOWN. ....aaarrrggghhhh.... spluttering and then died in peak hour traffic..tried push starting a number of times and it would start but die a minute or two later. ..then the invigorating 25 minute walk to home.... the walk of shame jacket and helmet in hand.

No wonder Uber is so popular.. not one empty cab/ taxi, in the middle of the city during 5.30 peak hour.

It poured rain last night in Brisbane and I have no garage. I have a bike cover which was used last night but I suspect water go into the system. Find out tomorrow when I pick up my bike using the trusty Toyota van.

I step forward two back.
 
Picked up bike this morning and there was residue from leaking fuel. After getting the bike back home and having a look there is fuel coming out the hoses leading into the air pipe on the left hand side??
 
Was it sitting on its side stand? Fuel flows downhill, to the left.
Usually see that from leaky petcocks.

The sputtering and dying sounds like fuel starvation. The smaller diameter tube on the petcock will flow slightly less than stock, maybe enough to eventually starve the engine.
 
The bike was dying whilst running. Which was strange as it ran to work in the morning well. No spluttering. Then after work headaches. It had been on its stand all day while I was at work with the tail facing downhill. I left the bike with the petcock in the off position. I took off in the off position.

I had repaired the leak in the tank and there was no fuel underneath the tank so part of the that repair was successful.

It sit all night on the stand and thats when I saw the large amount of fuel leak.

I will look first thing tomorrow morning and hopeful make some sense of it.
 

Attachments

  • IMG_2485.JPG
    IMG_2485.JPG
    191.3 KB · Views: 166
Last edited:
Checked in the morning and carbs were full of fuel. The fuel leak continued throughout the night. There was a gas trail in the bitumen when I checked in the morning. The leak was from the new petcock and the washer was already faulty.

The image is of the bolt that held the bottom fuel valve. Obviously gave it a clean.
 

Attachments

  • IMG_2491.JPG
    IMG_2491.JPG
    266.9 KB · Views: 159
Took a while. Carbs were full of fuel. Had to use another fuel pipe as the skinnier inner diameter was starving the carbie. The engine kept dying at low revs. I made sure new fuel pipe had same diameter inside as the old one.

Also I had to seal the top end of the new fuel pipe with new clamp down on to the skinnier valve. Changed the petcock fuel barb outlet from the left to right side, as well. Changed the side the fuel outlet was on to make the fuel pipe flow with ease. Changed the orientation of the bottom fuel inlet too. Changed the cheap fibre washer on the side of the petcock to a new wider stronger one, once I changed sides. Had to get rid of old fibre washer as it was split I guess from over tightening. It was super thin with no diameter/body.

Recharged the battery as it had run flat from trying to start it while the bike was flooded. I also took the time to fix the connection points with the battery. Soldered two bolts upside down either side of the battery terminals and fixed them solid with solder. Now I have a solid connection with no spinning bolts or nuts. With easy access for taking off connection terminals.

Successfully kicked the bike over.

Smile.
 

Attachments

  • IMG_2496.JPG
    IMG_2496.JPG
    148.7 KB · Views: 174
Last edited:
Back
Top