Stator rewire, making sure I have the right stuff. Need help.

cabbott12321

1977 XS360
Messages
30
Reaction score
0
Points
6
Location
Spokane
So before I start soldering things and what not I had a few questions and wanted to make sure I had everything I needed. Not I haven't soldered or anything lack that, just have everything basically laid out before I make any moves.

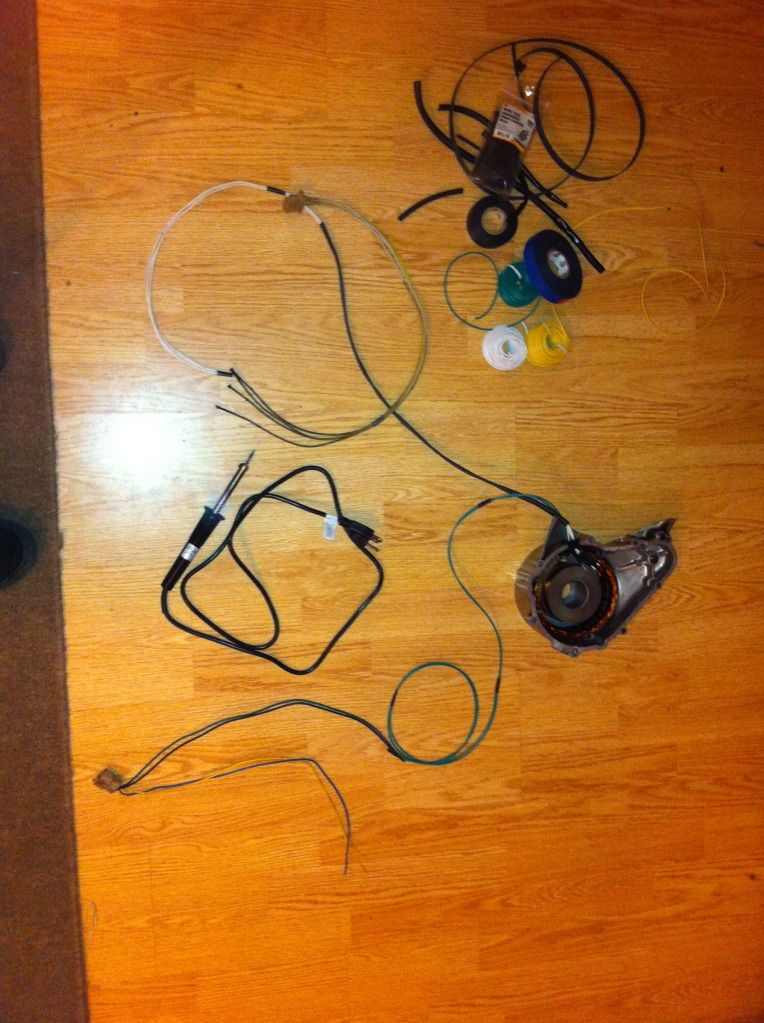
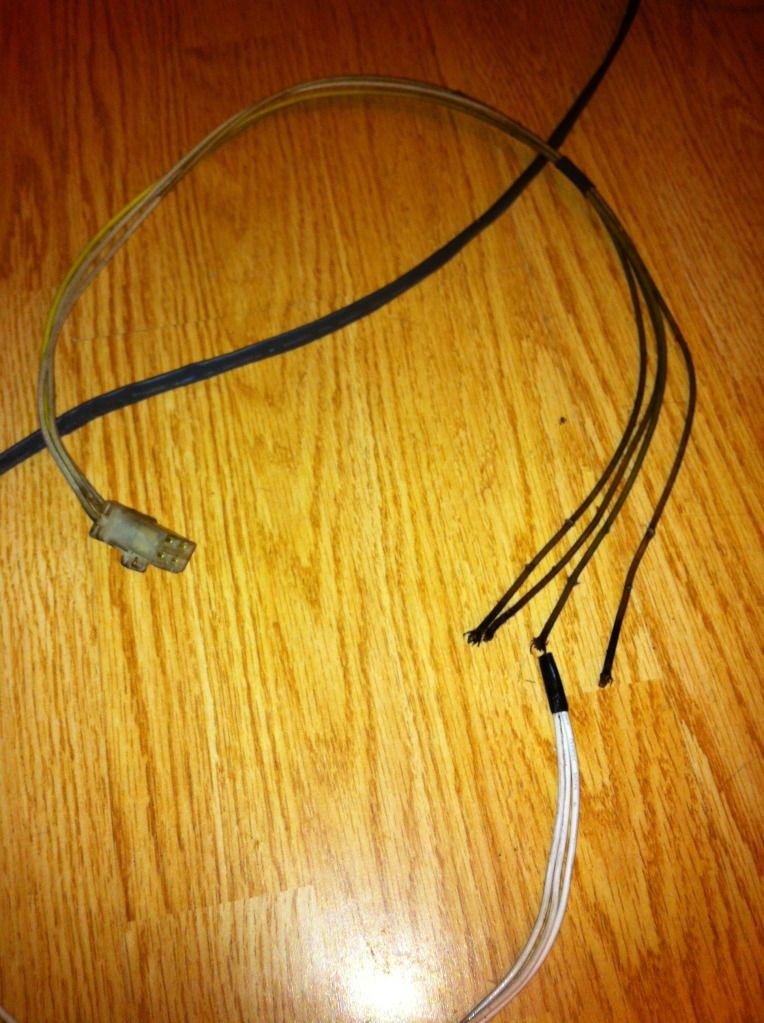
Here is simply everything I have.
IMG_1620.jpg


I ran 3 white wires through the top grommet and due lack of colors, two green through the bottom.
IMG_1614.jpg


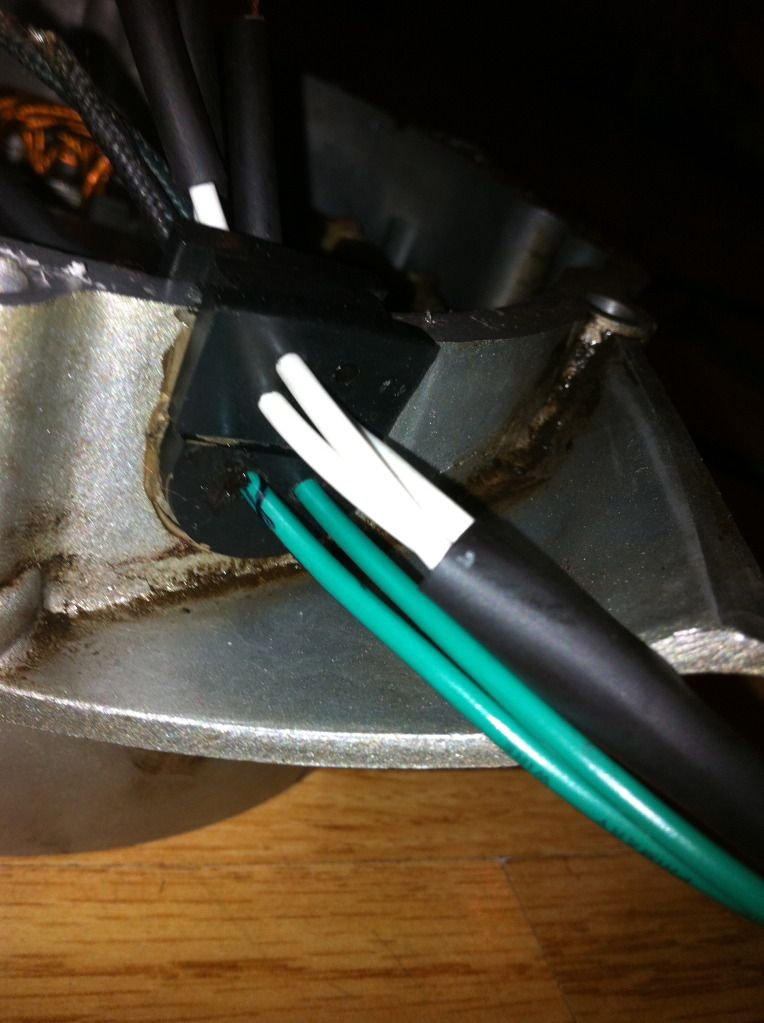
Here it is on the other side and where one of my questions comes up, on Drewpy's write up he said that the fourth wire is redundant and just had one wire run into the grommet and terminate there. So here I have it set up to have three of the white wires connect and then I need to run the fourth wire just into the grommet right?
IMG_1609.jpg


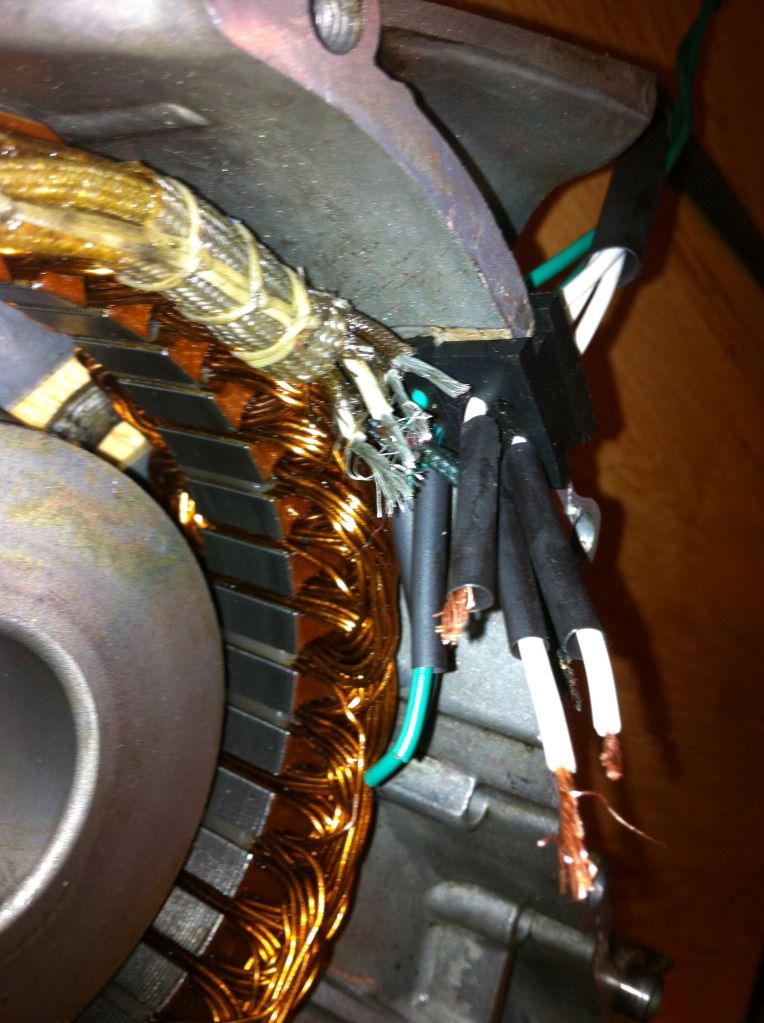
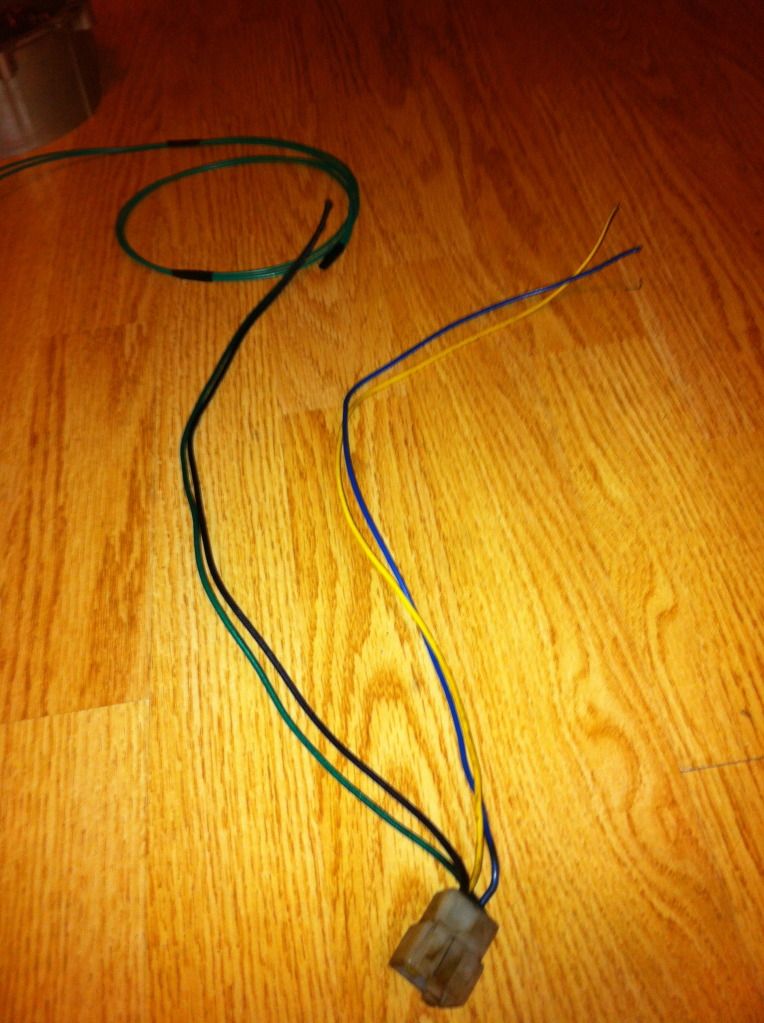
Then on the bottom I have my two green wires to connect (underneath eventually) to the blackish and dark greenish wires, which seems pretty simple.
IMG_1611.jpg


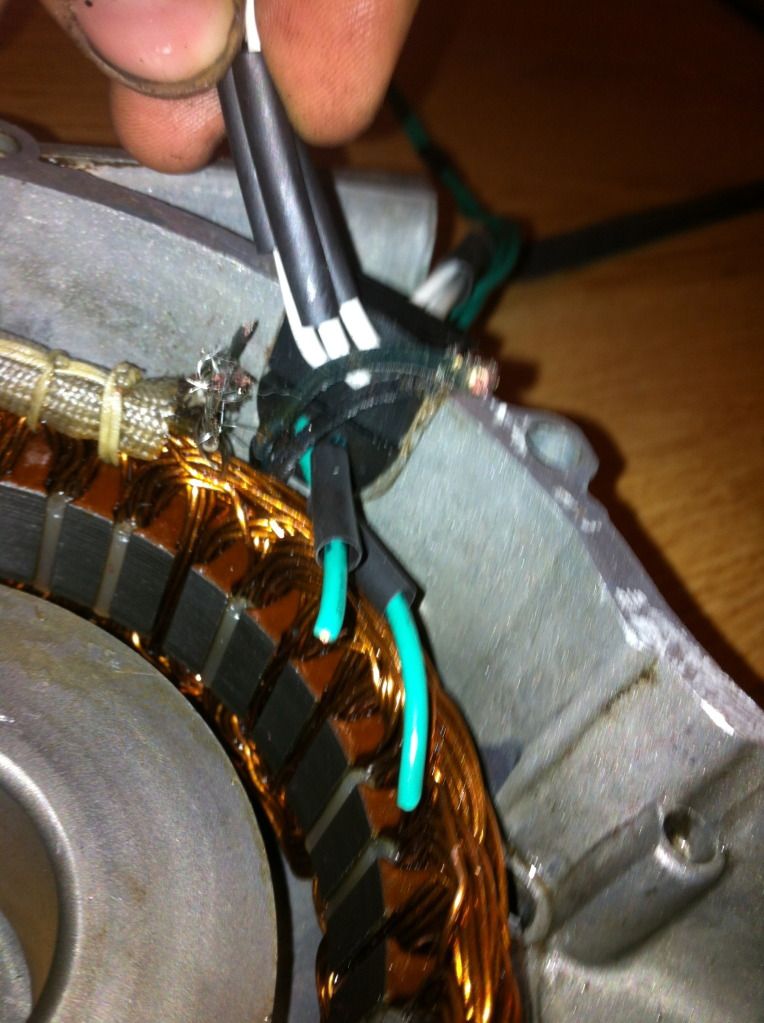
Then the three white wires go into this terminal which will go into the terminal on the bike that has three white wires coming out of it right?
IMG_1615.jpg


And the two greens will go into the dark greenish and blackish ones here that go into the terminal with a bunch of colors in it, which I don't know off the top of my head and can't check at the moment. Which brings me to another question, with this bunch of wires from this terminal there'll be a yellow and blue wire right (or at least there used to be, i'll probably have to use different colors)? and I'm pretty sure I know where the yellow is supposed to go because I left it attached down at the bottom of the bike, it looks like a ground or something but I have absolutely no clue what the blue wire is or where it goes i just know it goes to the same terminal as these wires.
IMG_1618.jpg


I still need to buy some pvc tubbing but I found some rubber insulating tape stuff that I didn't know if I'd use but tell me what you guys think.
IMG_1622.jpg


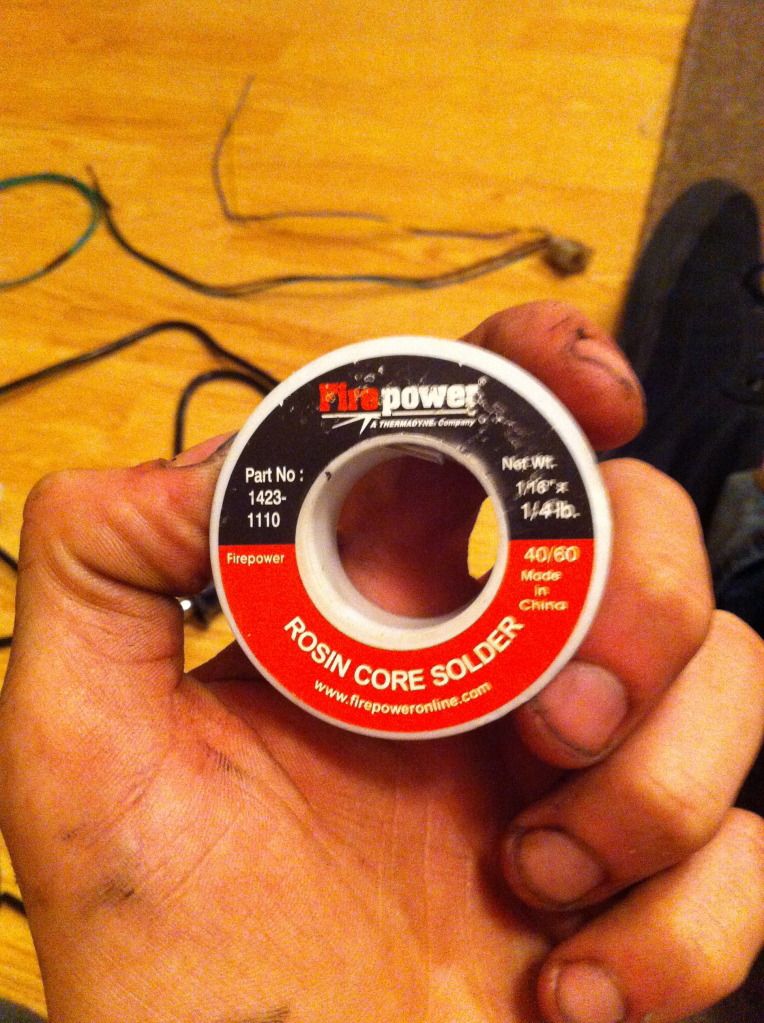
This is the solder I have, I don't know if its the right stuff or not.
IMG_1626.jpg


So what else do I need to buy/need to do? I'm sure I'm missing something, just need some help here!:thumbsup: Thanks!
 
You have rosin core solder, and if I recall, that means it has no flux to make itself easier to work with. Get yourself a small tub of flux, and it will "wet" which means preclean and pre wick all the parts you solder making soldering faster, less heat intensive, and therefore better for the parts.

Your goal is to melt the solder long enough for both wires to meet and bond, not to heat it so long it shoots way up into your wires and makes them unbendable. So don't tin them too much with the flux, just a bit. Clip some small aligators on each exposed wire outside the area being soldered to draw heat away from the forming bond.

So far you are doing everything right! Good job. Be patient. It only has to be completed right one time. Not the FIRST time. Just the one time it all works right. Be patient and you'll be riding tomorrow.

PS, you will have very little room to push the wires out of the way of the stator so don't leave toooo much slack in them. I think the way you cut them close to the stator is fine. Should all go very well. Remember to solder them to the new wires at an angle instead of directly in line. Overlap them at about a 45 degree bend, then solder, and nip off the excess before heat shrinking. Helps them reach up and out through the grommet.

Drewcifer

PS, to remove those wires without shattering the socket, you need to press them deeper into the socket, and then reach in along the wire from behind following the wire and try to press the white snag tab up and out the way so you can pull on the wire and ease it out backwards. Make sure the tab is up before pulling, or you'll shatter your connector. Do this right and you'll have the original to keep and reuse, just put new tabs on your new wires and push them into the old connector til the tabs click and hold them.

otherwise you'll have to solder and heat shrink the connections. Makes later diagnosis much more annoying.
 
Last edited:
Okay so I did all of it before I read this and ended up just splicing them to the old connectors. I may have to re-do it, cause now I can't figure out how to get the wires to fit with the clutch cover, I may just take some work tomorrow, I'm pretty tired and don't want to worry about it tonight. For now, Everything is wired, I can always re-do the connectors (instead of splicing) I'll post some pictures tomorrow.

What happens if I have to redo it all but don't have much wire left to work with on the stator? Do you know how to connect new wires completely to the stator? Or was I supposed to do that before (As in on the stator side of the grommet). I've got a busy week with work and may not be able to get it it all done but if I do end up having to redo it all, It shouldn't be to hard now that I've done it once (sorta) i think I have a pretty good grasp on it all. I didn't use flux and just used the resin core solder I had already. I see what you mean with the 45 angle and tried to do it, but still it didn't fit well, so I think I need to redo that as well. Thanks for all you guys help.

-Charlie
 
Charlie, hang in there.

Your rosin core is not flux core. You will need some flux, unless you enjoy the solder taking longer and making a mess.

Yes, as I said, there is only about 1/4 inch to 1/2 inch max space from the grommet to the wires and they need to stay out of the way for the stator to fit back in. If there's no room for the heat shrink I think you can seal up the joints with rtv or gasket seal, which will protect the joints.

in my experience splices that aren't soldered soon fail. Be warned.

Drewcifer
 
I just did the same thing about a month ago. I did order the replacement clips from Mikesxs. http://www.mikesxs.net/product/12-0633.html
I am sure I found the replacement 4 prong/5 prong connectors from there as well, (I dont remember, its late, and i remember I have yet to finish that , once I load the engine back onto the frame, and finish the connectors then. I went crazy with the Shrink wrap. I tried to reuse the Oil pressure/Neutral switch wires. I was very disappointed that I couldn't find a PVC tubing to replace what was on there. Now I do like the Heat shrink. It just seems that this will repell Oil and dirt and grim. I have been using this Tommy tape I picked up from Menards. (I think)
http://www.tommytape.com/miracle-wrap/mwhome
If it holds up to its advertising, I dont know how I survived this long with out it. Good luck Tobie
 
Last edited:
You can reuse the old connectors by not pulling on the wires until you've shoved something down them to lift the pressure tabs before you yank. If you press the tabs up and away, you can slide the wires out and reuse the connectors. Nothing against Mike's XS but why spend the money?

Drewcifer
 
True that! I did pop off my connectors (plastic shell) and run the wire down and out of the spot where it connector is, to where space where the drive sprocket. my connector shell would not fit though the space between the engine and the bike frame. Since I haven't yet put the generator on the bike yet, I haven't finished the putting the connector on yet.

(story of the day, got primer paint on it, and then I have been waiting for the Clutch oil seal. Its been soo long, I have to find the rubber thing that holds starter chain off the case. Alternator side is ready to be put together, Clutch side, I am ready to assemble that stuff. Final spray can coat, and then back to getting it Ride ready!!!!!
 
So I got it all wired back up and it won't start at all... it's a huge bummer. I have no clue now what the issue is.
 
Main fuse is all good. I think I just did a shabby job on the wires down real close to the actual stator, to due to lack of effort, I just didn't have much wire left coming of the stator because I cut them to short. I'm to the point that I'm considering doing a complete rewire and make my own harness, that way I can simplify it down and troubleshooting won't be so much of a mystery. I met some chopper guys the other day that are down to help me out as far as making sure I have all the right parts and what not. We'll see. Because it keys on, I have all the lights and what not but when I go to kick it over, absolutely nothing.
 
It's not the stator. The bike can run without the alternator/stator system off battery alone. You have to trace the wiring from battery positive out to the short, one step at a time, moving further and futher down the voltage chain until you get the the volts to drop.

The charging system recharges your battery as a convenience to you, you can run the whole bike with it taken out, the battery just dies off over three days.

so your short is causing this, not your alternator/or stator.

check for headlight relay too.

Drewcifer
 
Back
Top