1982 XS400 Heritage Special Scrambler Log

Peter Y

NoobWithAHammer
Messages
21
Reaction score
0
Points
1
Location
Canada
Hello all,
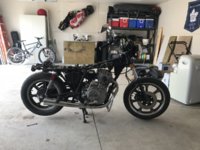
My name is Peter and I am from Canada, I have gotten so much information from this forum and decided to contribute by posting what I will be doing to my XS400 this summer, and hopefully get some advices and tips on how to make my XS400 into a scrambler style bike.

The bike is inspired by the Lion's Den Scrambler, and Andrew Hall's Scrambler.

Little history behind my bike: Bought it from an older gentleman who put on 10,000 KM. Really mint shape, rode it around last year doing basic maintenance that I learned from this website, but it is time for me to take the leap and make this bike into how I want it.

Cheers,
2C9209D3-4C9C-4EAA-BB69-967EC70BA74B.JPG
C52AD6F6-8DAA-4911-B5D6-7E449485A3AC.JPG
7045DD7D-AACE-409C-8125-71A9AAB32389.JPG
 
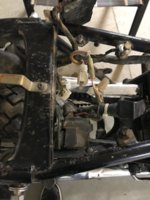
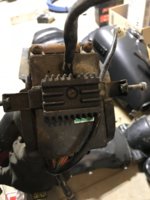
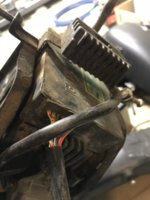
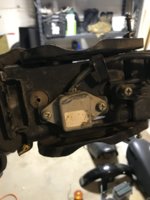
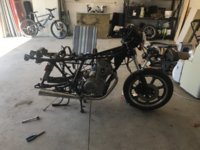
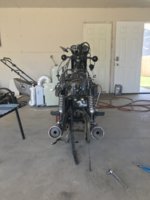
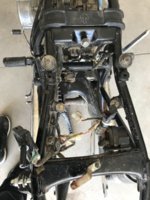
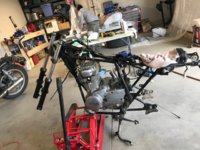
So I have started removing parts this weekend, it seems that lot of the scrambler bikes I see have either removed some of the electrical components or relocated them. Since I want my Electric starter I will be relocating most of them by extending them with wires between. But I am open to ideas if the community wants to pitch in their thought.

Thanks!
IMG_4936.jpeg IMG_4947.jpeg IMG_4948.jpeg IMG_4949.jpeg IMG_4950.jpeg
 
Also would like to mention that my engine started leaking oil last summer after I changed the oil last summer. Just couple of drops overnight after riding and it stops. Anybody had similar issue?
 
I
So I have started removing parts this weekend, it seems that lot of the scrambler bikes I see have either removed some of the electrical components or relocated them. Since I want my Electric starter I will be relocating most of them by extending them with wires between. But I am open to ideas if the community wants to pitch in their thought.

Thanks!
View attachment 31561 View attachment 31562 View attachment 31563 View attachment 31564 View attachment 31565
I have used piece of the rear fender or a piece diamond plate attached to the rear of the air cleaner opening. They serve 2 purposes,mounting the fuse block and rectifier and acting as a shield for the engine's intakes.
 
I

I have used piece of the rear fender or a piece diamond plate attached to the rear of the air cleaner opening. They serve 2 purposes,mounting the fuse block and rectifier and acting as a shield for the engine's intakes.
Thats very smart! thank you for that, I will keep that in the back of my mind when rebuilding starts.
 
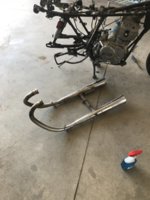
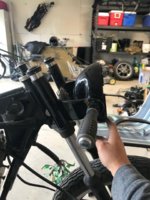
So this weekend more removing was in the way, removed the chains, rear wheel, handle bars (cut off the grips), exhaust and mufflers (was welded together), rear shocks.

Removing the exhaust was fairly easy, the middle connection came apart after some wiggling (lucky), but disappointed that the muffler and the exhaust was welded together, so I will have to grind them off when I get my new muffler. I would like to mention that I took the exhaust system off together connected in the middle. at this point the centre stand was in the way, but my friend just lifted the bike in the back and I slid the exhaust out. For people with exhaust stuck together in the middle this might be an easy way remove the system.

I want to remove the shock covers at the top of the shock, but it seems like I would need to compress them in order to remove/cut them out.

Chains and sprockets are in good condition, I checked the chain for stretch and compression, seems very reasonable. Still might go for 17 teeth in the front rather than the stock 16 teeth for more top end speed.

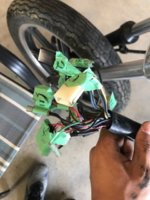
Opened the headlight today and realized how confusing it looks hahaha, will have to go very slow here.

IMG_4965.jpeg IMG_4968.jpeg IMG_4970.jpeg IMG_4974.jpeg
 
If you are going to all the trouble of taking things off I would just build a electronics box or mount a flat plate under the seat and mount all the stuff to it.

My latest build I left the factory battery box and am planning on using the factory air boxes also.
 
DON'T CUT THOSE MUFFLERS OFF!!!! Get a set of head pipes from an earlier xs400 that have slip on type pipes (77-79) If your set is in good shape I would use those as it will work/run far better that any aftermarket type exhaust. Also if you get another exhaust and have issues you can go back to what will work, stock. Also your type of exhaust pipe are double walled and have vent hole at the top near the head. If you cut them off and put a set of slip on mufflers they will be hard to seal at the bottom and will have a hole /leak at the top.
 
DON'T CUT THOSE MUFFLERS OFF!!!! Get a set of head pipes from an earlier xs400 that have slip on type pipes (77-79) If your set is in good shape I would use those as it will work/run far better that any aftermarket type exhaust. Also if you get another exhaust and have issues you can go back to what will work, stock. Also your type of exhaust pipe are double walled and have vent hole at the top near the head. If you cut them off and put a set of slip on mufflers they will be hard to seal at the bottom and will have a hole /leak at the top.
Interesting, this is why I am posting on here so I learn from the veterans. I will be looking for those! Thank you xschris. I would love to reuse my exhaust, but they just seem so ugly, are their other options? maybe a whole system I could buy?
 
Last edited:
So this weekend more removing was in the way, removed the chains, rear wheel, handle bars (cut off the grips), exhaust and mufflers (was welded together), rear shocks.

Removing the exhaust was fairly easy, the middle connection came apart after some wiggling (lucky), but disappointed that the muffler and the exhaust was welded together, so I will have to grind them off when I get my new muffler. I would like to mention that I took the exhaust system off together connected in the middle. at this point the centre stand was in the way, but my friend just lifted the bike in the back and I slid the exhaust out. For people with exhaust stuck together in the middle this might be an easy way remove the system.

I want to remove the shock covers at the top of the shock, but it seems like I would need to compress them in order to remove/cut them out.

Chains and sprockets are in good condition, I checked the chain for stretch and compression, seems very reasonable. Still might go for 17 teeth in the front rather than the stock 16 teeth for more top end speed.

Opened the headlight today and realized how confusing it looks hahaha, will have to go very slow here.

View attachment 31580 View attachment 31581 View attachment 31582 View attachment 31583
If you want to remove the shock tops they can be compressed by using 2 ratchet straps. The shock can then be disassembled. I was able to get mine off with a cutoff wheel, but be careful if you go that route so as not to cut into any of the spring or shock body.
 
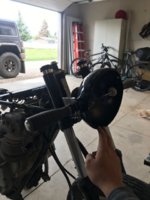
I was away for couple of weeks, but got back to the bike again today. the dreaded headlight removal wasn't so bad. I taped literally everything with numbers so I dont have to struggle when I have to put it back together. Since I am going for the Scrambler look I wanted a lower headlight, when I was removing the headlight "holder" I figured I could just flip it upside down and mount the headlight back on... What is the community's thoughts? It lowers it just right and it looks really good! Also I wouldnt have to buy cheap aftermarket ones.
image1.jpeg image2.jpeg image3.jpeg image4.jpeg
 
Also would like to mention that the swing arm was the greasiest thing ever, took a good 30 minutes cleaning the gunk off of it. I have questions about the led blinkers. When I change the signal module (EP34) do I have to do any extra work for the front ones? the forum talks a lot about rear led blinkers but not much on the front ones. Is it just a plug and play?

Thanks guys!

Have you bought the relay yet? I just picked up one of these and it works great 12 bucks shipped to my door https://www.superbrightleds.com/mor...ic-led-flasher-relays-for-motorcycle/787/842/

I sort of just mocked it in and well the LED front blinkers worked...…...I haven't mounbted the rear yet as I have no seat or fender on the project.

And as for flipping the headlight brackets if you like it run with it. I bought after market ones for mine and like the looks.
 
You should be able to find a MAC 2-1 exhaust system. Personally, I like the look of the exhaust you have now. It looks very clean.

My bike has headers which mean I use slip ons.. Its a pain because the slip ons are never a tight and sealed fit so you get backfiring. One of my mufflers even slipped off while riding.. I ended up using high temp sealant where the mufflers connect to the headers and it provides a good seal.

One of these days I will get to a fully welded system.
 
I would pass on the MAC if you have exhaust that works now...….I have an 81 and purchased the MAC and well it hits the motor mounts on the front......the earlier bikes didn't have the mounts sticking out and well I think they used one of those for mock up......I had to grind on the mounts a bit to give it some clearance......I like the factory exhaust but the 78s I think are the best out there......the mufflers bolted on so you can swap out whatever you want...…

I love the look of the MAC but the sound sucks...……...looking into getting a cone engineering muffler for it now...….
 
I was away for couple of weeks, but got back to the bike again today. the dreaded headlight removal wasn't so bad. I taped literally everything with numbers so I dont have to struggle when I have to put it back together. Since I am going for the Scrambler look I wanted a lower headlight, when I was removing the headlight "holder" I figured I could just flip it upside down and mount the headlight back on... What is the community's thoughts? It lowers it just right and it looks really good! Also I wouldnt have to buy cheap aftermarket ones.
View attachment 31700 View attachment 31701 View attachment 31702 View attachment 31703
Lots of guys do the same thing, it looks good and it works great!
 
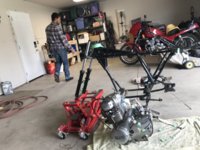
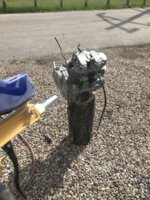
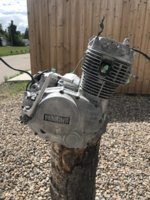
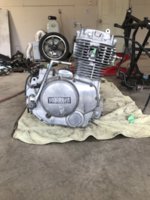
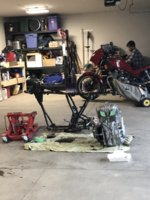
662D4141-8F8C-4454-B04E-69646AB37DA7.jpeg 5381E866-13DE-485F-A8B7-D844AC6FF71E.jpeg 20C3BE4B-379D-41B2-85E7-0B5B1BEEF33A.jpeg 3033E856-CD70-4522-82D1-F815ED27C551.jpeg 50B5D6EE-E436-4EF9-B376-5DC1D7A6A382.jpeg So the disassembly is now complete. I took all of it off except for the triple tree. My handy friend convinced me to do it, so I here I am with the engine out of the frame. Got a soda blaster from Princess Auto and soda blasted my engine. It looks so clean I love it. It’s raining here now so I will save the frame for a later date.
 
While youre at it, may as well upgrade to fork bearings and bronze bushings at the swingarm. If you actually plan to make it a functional scrambler it will help to have a solid frame. I may even go with a needle bearing swing kit for my own scrambler build.
 
Back
Top