OleDoc
FREEBIRDS MC Central NY
tell him you are fixing it up.most people fall in love with their machines and he is more likely to sign it over if he knows it has a good home.besides, you might make his day to know his old bike is still alive
yep, sounds right (if you have brass floats)cuz james dean would not use electric start....
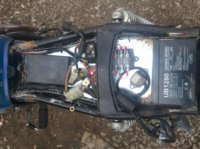
oh nice! i bought waay too many amp hours...oh well. twas only twenty dollars. another quick question....when you guys say to set the air needles at 3 turns, I assume that you mean three turns out from fully seated? Also, I reset my floats (they were at around 19-20mm...ahhhhh!). I bent the tab that the float needle hangs upon until the top of the brass floats rest at 26mm above the gasket surface (top of the float bowl housing gasket surface w carbs upright) with the carb upside down and resting on a bench. is this correct?
Thanks!