Camwyn
XS400 Enthusiast
Right, so folks have searched far and wide for replacement headlights, but I prefer to reuse what I have if possible (my wife says I just like doing things the hard way...)
Since my XS headlight (US made) has a metal back, I figured it could be converted.
First I talked it over with a friend or two and my local mechanic...after they realized I didn't care if they thought I was crazy, they gave me a few pointers (and in the case of the mechanic, a few parts!)
My headlight is converted to use a standard car headlamp. FWIW, while the power draw is higher, aside from the occasional flicker I didn't have an issue all last season.
Oh, if I'm unclear about anything (like the number of screws that hold on the rim...) holler at me and I'll pull it off and double-check, but I did this last summer and I'm working off memory (and some pics)
What you need:
Materials:
Tools:
For reference, here's a blow-up of what we're playing with:
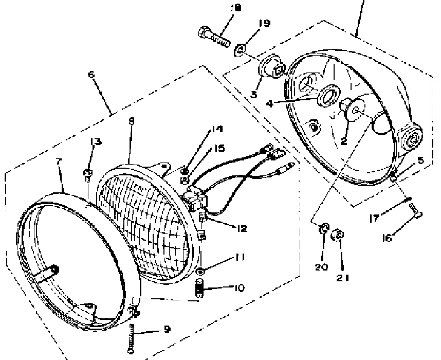
and a list:
2: BODY FITTNG COLLAR
3: DAMPER,HEADLIGHT 1
4: DAMPER,HEADLIGHT 2
5: SPECIAL WASHER
7: HEADLIGHT RIM
8: LENS ASSEMBLY
9: RIM ADJUSTER SCREW
10: SCREW SPRING
11: WASHER (#2) FRONT
12: ADJUSTING NUT
13: PAN HEAD SCREW, CARBURETOR 2
14: SPRING WASHER
15: NUT
16: PAN HEAD SCREW (1) REAR
18: BOLT (3JP)
19: WASHER YMUS (what's a ymus?)
20: WASHER,SPRING
(nod to bikebandit.com, whose image I ganked)
Ready?
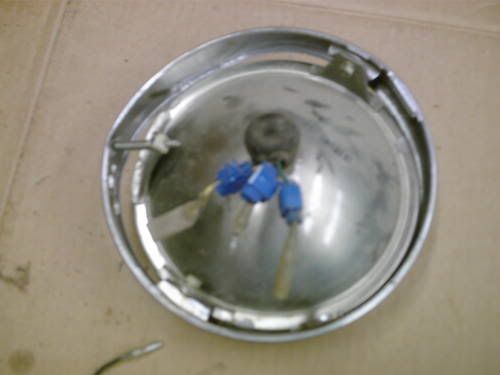
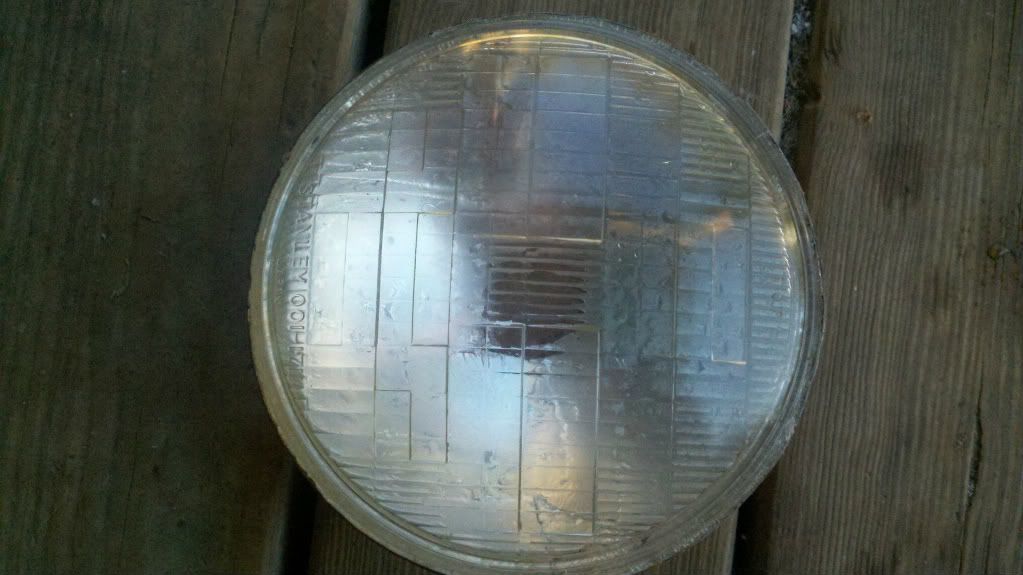
First, remove the headlight bulb from the bucket.
You should have something that looks like this:
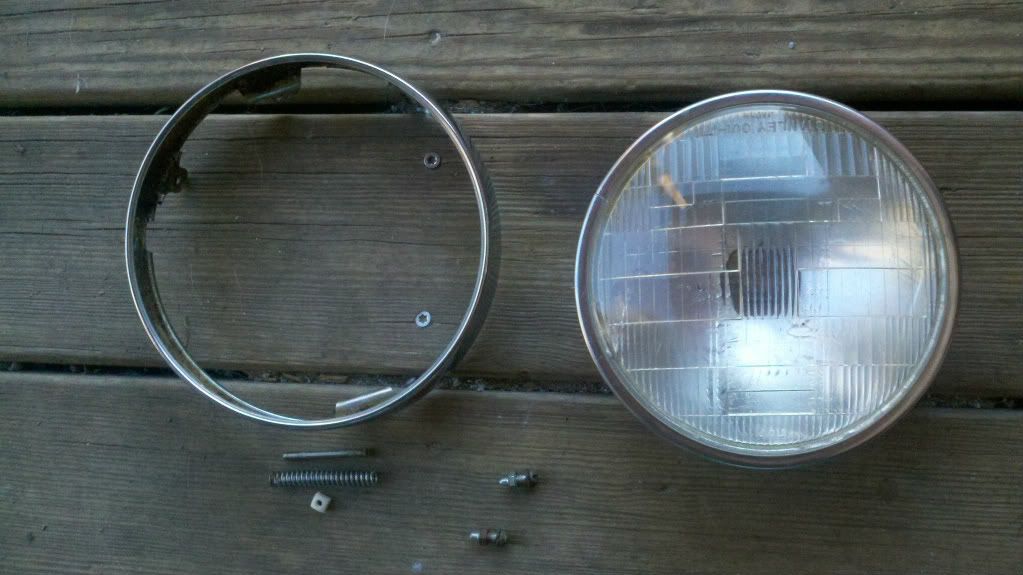
Next, you need to remove the headlight rim – this thing:
(pasty legs are entirely optional...)
It's best if you remove the rim adjuster screw first, making sure not to drop any of the little parts (I lost the plastic nut between the boards of my deck after taking the next pic...was a bugger to find a replacement! If this happens to you, make friends with your local hardware store...they wound up replacing the nut with a steel one and the spring when it snapped...even let me bring the light in and test fit stuff...)
There are two screws that hold the rim on other than the adjuster. The rim slides off the front after the screws are removed, although you may have to turn/wiggle it a bit as there is a locking lip/rim.
You'll have something that looks like this (in this picture the hole is already drilled...wait for it!):
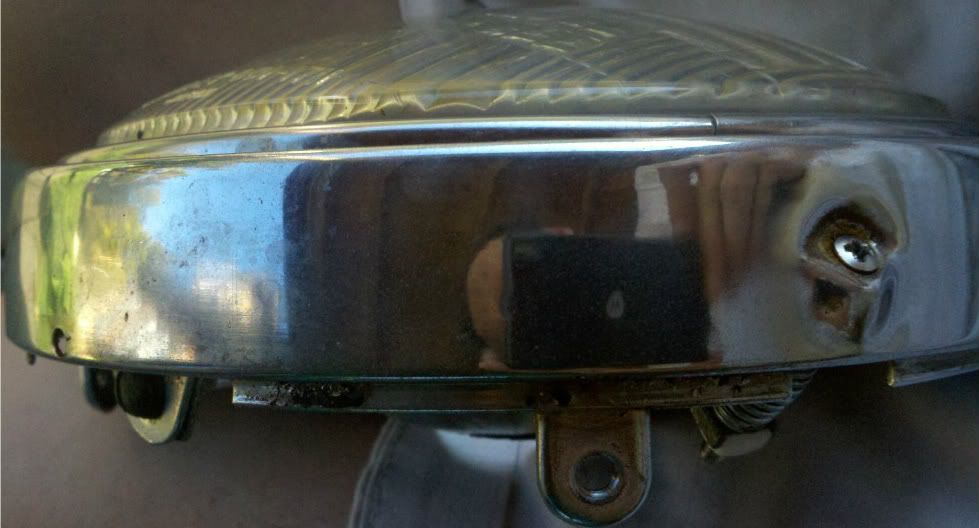
Next, bend up the tabs and pry off the metal ring on the front, this thing:
Here comes the real PITA part...see that edge between the the glass and the metal edge of the back?
First, run the box cutter around between the glass and metal to release some of the factory sealant. Be careful to not chip/break the glass...easy does it, take your time and don't cut yourself open! The stuff on mine was thick clayey grey...kind of like glazing putty. Once you've started it, you can use a very small flat screwdriver to clear enough of it out to gently remove the glass from the metal back. Mine took a bit of coaxing via the flat screwdriver. Again, try not to chip the glass, the metal can be bent back into shape!
Once you have the glass off, use the box cutter to clean off all the old putty, make sure you get it all off the ring too, then set it aside...time for fun with power tools!
Grab your Dremel and the car headlight fixture. I recommend cutting it out in a square first (easier with a cutting wheel) and then rounding. So, cut the “stem” off of the headlight fixture:
Mark it with a grease pen or paint so you know which side is up (it matters with a lot of auto bulbs - with some you might wind up "swapping" high and low beams).
You can be as neat or messy with the rounding, I'd recommend leaving a bit of a lip though, for the epoxy to grab onto. The inside of mine was covered with reflective chroming...scrape that off and scuff the plastic for good measure – don't want it coming off because you used a bit too much force putting in the bulb!
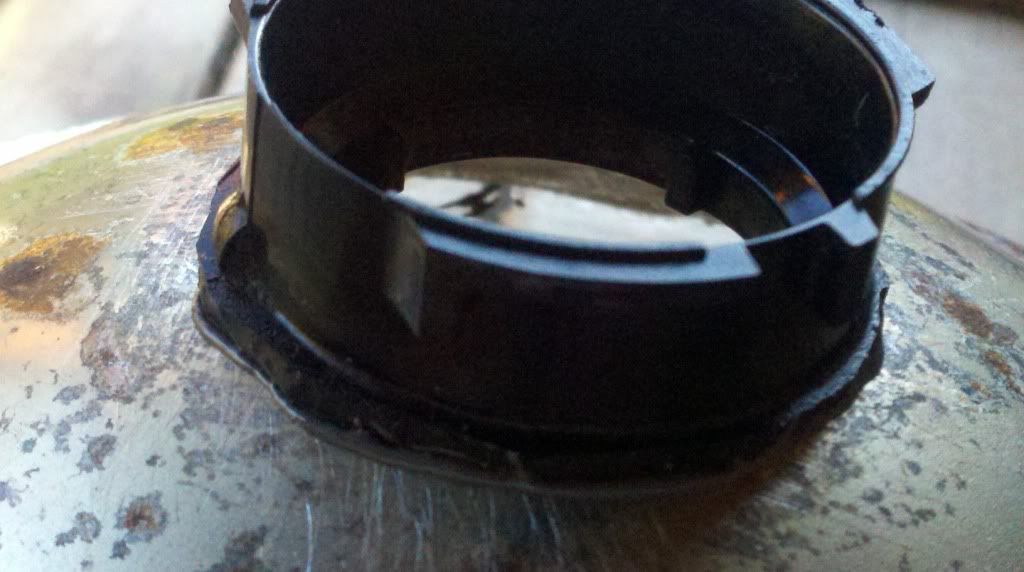
Great, now for the drill-press. Once I had the glass off the front of the headlight, I set the metal back face-down on a couple of 2x4 scraps and selected a hole-saw bit that fit over the back of the bulb – you'll have to take out the center piece of the bit, so you just have the hole part.
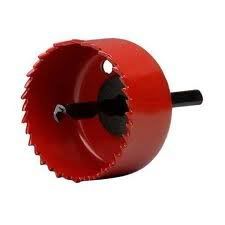
As luck would have it (since I was stupid and didn't measure first) it fit the headlight piece we just cut out almost exactly. Don't be stupid like me, check the sizes first! Compare the bit to the plastic and the metal back/bulb before cutting! The hole saw works great, and if yours is deep enough (and you're careful) you can manage to make the cut without breaking the bulb (messy!). Right, enough prattling on...put the hole saw in the drill press, brace your metal back and slowly drill out the bulb. You should get something like this:
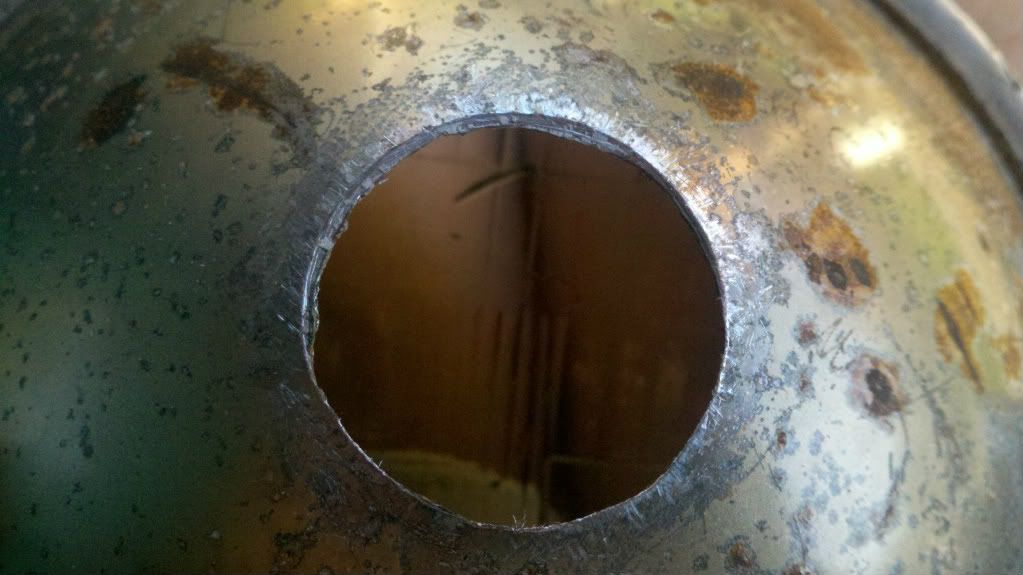
Now clean up those edges with a file and scuff the metal up around the outside to give the epoxy more to grab on to. (I used a coarse metal brush on the Dremel to start and some really coarse sandpaper after that.
Once that's all done, it's time to get sticky!
Apply a liberal amount of sealant around the edge of the glass and stick it back into the metal backing.
Let it dry, and (if you're anal like I am) test your seal. To do this, I just filled the thing with water and watched for leaks:

I'd recommend you test it before you add the metal ring around the bulb front – I didn't and as you can see, the thing leaked...which meant pulling off the ring and adding sealant. I'd recommend NOT doing that, as I'm not sure how often you can bend those tabs before they break. I went ahead and added extra sealant between the ring and the glass to try and make it really tight.
Put the bulb back into the plastic piece you cut out of the auto headlight and dry-fit it. Make sure it's lined up right (top of bulb will be up when assembled) and mark the metal with that grease pen.
Mix your epoxy according to directions, and attach the ring from the auto headlight. Make sure you line it up with those marks you made earlier!
Let it dry overnight (unless you're using something really fast-drying) and test out the bulb fit. If you don't use enough epoxy, the force of putting in the bulb will break the ring free – that's a bad thing! We want enough epoxy to make sure it hold up to vibration and the occasional bump!
You're almost there!
Reassemble the light, and dry-fit it. The back of the headlight will now take up more space in the bucket, so you're going to have to shift wires around a bit – essentially make a space in the center for the back end of the bulb.
Connect up your wires (testing along the way to make sure you don't cross-wire the thing) and screw the headlight back into the bucket.

Since my XS headlight (US made) has a metal back, I figured it could be converted.
First I talked it over with a friend or two and my local mechanic...after they realized I didn't care if they thought I was crazy, they gave me a few pointers (and in the case of the mechanic, a few parts!)
My headlight is converted to use a standard car headlamp. FWIW, while the power draw is higher, aside from the occasional flicker I didn't have an issue all last season.
Oh, if I'm unclear about anything (like the number of screws that hold on the rim...) holler at me and I'll pull it off and double-check, but I did this last summer and I'm working off memory (and some pics)
What you need:
Materials:
- 1 headlight (duh)
- 1 car headlight fixture (I got mine from my mechanic...I asked him about it, and he reached over to a junker Jeep Cherokee and ripped one off – bulb and all. Gotta love free!)
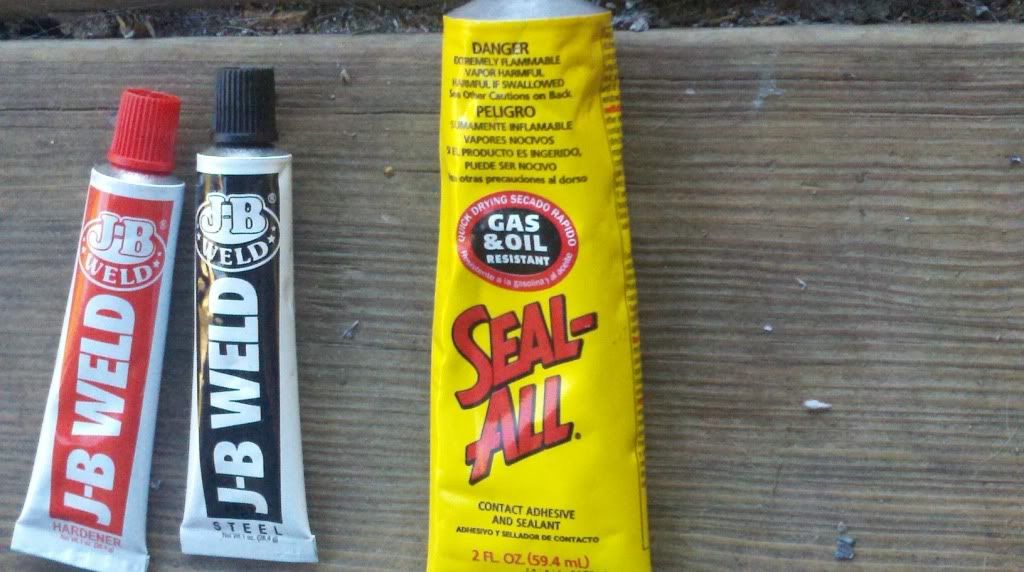
- Epoxy (JB Weld)
- some kind of sealant (silicone, etc. I used Seals-All because it was recommended to me with this job in mind)
Tools:
- Phillips and flat screwdrivers (to remove and replace the light, and to disassemble)
- drill press
- hole saw/bit
- box cutter (I recommend a heavy one)
- Dremel tool with a cutting wheel or small grinder.
- Grease pen or china marker
For reference, here's a blow-up of what we're playing with:
and a list:
2: BODY FITTNG COLLAR
3: DAMPER,HEADLIGHT 1
4: DAMPER,HEADLIGHT 2
5: SPECIAL WASHER
7: HEADLIGHT RIM
8: LENS ASSEMBLY
9: RIM ADJUSTER SCREW
10: SCREW SPRING
11: WASHER (#2) FRONT
12: ADJUSTING NUT
13: PAN HEAD SCREW, CARBURETOR 2
14: SPRING WASHER
15: NUT
16: PAN HEAD SCREW (1) REAR
18: BOLT (3JP)
19: WASHER YMUS (what's a ymus?)
20: WASHER,SPRING
(nod to bikebandit.com, whose image I ganked)
Ready?
First, remove the headlight bulb from the bucket.
You should have something that looks like this:
Next, you need to remove the headlight rim – this thing:
(pasty legs are entirely optional...)
It's best if you remove the rim adjuster screw first, making sure not to drop any of the little parts (I lost the plastic nut between the boards of my deck after taking the next pic...was a bugger to find a replacement! If this happens to you, make friends with your local hardware store...they wound up replacing the nut with a steel one and the spring when it snapped...even let me bring the light in and test fit stuff...)
There are two screws that hold the rim on other than the adjuster. The rim slides off the front after the screws are removed, although you may have to turn/wiggle it a bit as there is a locking lip/rim.
You'll have something that looks like this (in this picture the hole is already drilled...wait for it!):
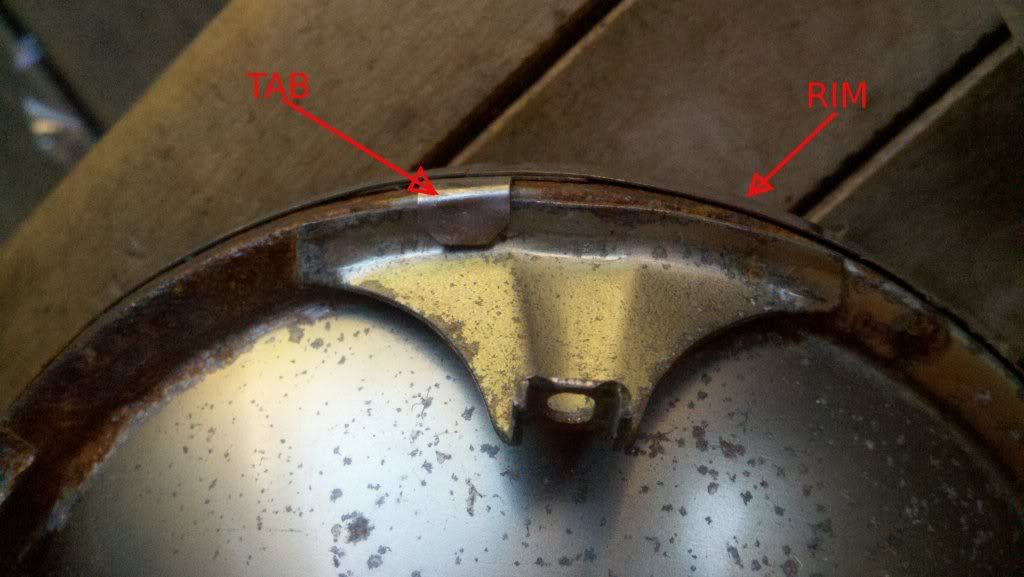
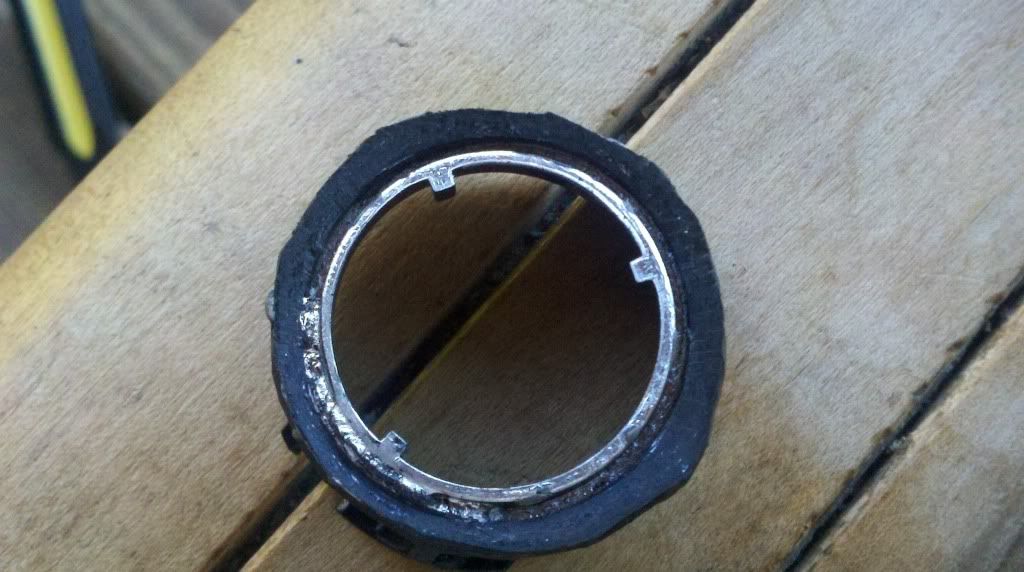
Next, bend up the tabs and pry off the metal ring on the front, this thing:
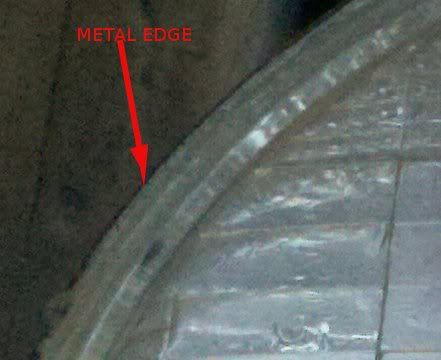
Here comes the real PITA part...see that edge between the the glass and the metal edge of the back?
First, run the box cutter around between the glass and metal to release some of the factory sealant. Be careful to not chip/break the glass...easy does it, take your time and don't cut yourself open! The stuff on mine was thick clayey grey...kind of like glazing putty. Once you've started it, you can use a very small flat screwdriver to clear enough of it out to gently remove the glass from the metal back. Mine took a bit of coaxing via the flat screwdriver. Again, try not to chip the glass, the metal can be bent back into shape!
Once you have the glass off, use the box cutter to clean off all the old putty, make sure you get it all off the ring too, then set it aside...time for fun with power tools!
Grab your Dremel and the car headlight fixture. I recommend cutting it out in a square first (easier with a cutting wheel) and then rounding. So, cut the “stem” off of the headlight fixture:
Mark it with a grease pen or paint so you know which side is up (it matters with a lot of auto bulbs - with some you might wind up "swapping" high and low beams).
You can be as neat or messy with the rounding, I'd recommend leaving a bit of a lip though, for the epoxy to grab onto. The inside of mine was covered with reflective chroming...scrape that off and scuff the plastic for good measure – don't want it coming off because you used a bit too much force putting in the bulb!
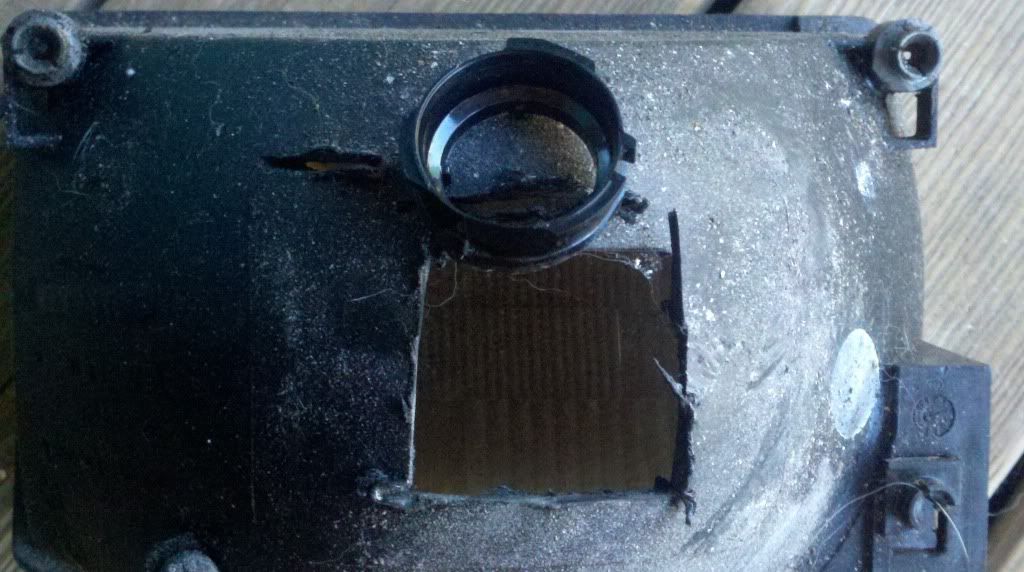
Great, now for the drill-press. Once I had the glass off the front of the headlight, I set the metal back face-down on a couple of 2x4 scraps and selected a hole-saw bit that fit over the back of the bulb – you'll have to take out the center piece of the bit, so you just have the hole part.
As luck would have it (since I was stupid and didn't measure first) it fit the headlight piece we just cut out almost exactly. Don't be stupid like me, check the sizes first! Compare the bit to the plastic and the metal back/bulb before cutting! The hole saw works great, and if yours is deep enough (and you're careful) you can manage to make the cut without breaking the bulb (messy!). Right, enough prattling on...put the hole saw in the drill press, brace your metal back and slowly drill out the bulb. You should get something like this:
Now clean up those edges with a file and scuff the metal up around the outside to give the epoxy more to grab on to. (I used a coarse metal brush on the Dremel to start and some really coarse sandpaper after that.
Once that's all done, it's time to get sticky!
Apply a liberal amount of sealant around the edge of the glass and stick it back into the metal backing.
Let it dry, and (if you're anal like I am) test your seal. To do this, I just filled the thing with water and watched for leaks:
I'd recommend you test it before you add the metal ring around the bulb front – I didn't and as you can see, the thing leaked...which meant pulling off the ring and adding sealant. I'd recommend NOT doing that, as I'm not sure how often you can bend those tabs before they break. I went ahead and added extra sealant between the ring and the glass to try and make it really tight.
Put the bulb back into the plastic piece you cut out of the auto headlight and dry-fit it. Make sure it's lined up right (top of bulb will be up when assembled) and mark the metal with that grease pen.
Mix your epoxy according to directions, and attach the ring from the auto headlight. Make sure you line it up with those marks you made earlier!
Let it dry overnight (unless you're using something really fast-drying) and test out the bulb fit. If you don't use enough epoxy, the force of putting in the bulb will break the ring free – that's a bad thing! We want enough epoxy to make sure it hold up to vibration and the occasional bump!
You're almost there!
Reassemble the light, and dry-fit it. The back of the headlight will now take up more space in the bucket, so you're going to have to shift wires around a bit – essentially make a space in the center for the back end of the bulb.
Connect up your wires (testing along the way to make sure you don't cross-wire the thing) and screw the headlight back into the bucket.

 Looks like the hard way, alright!