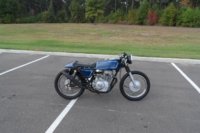
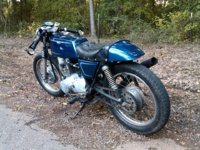
Follow along with the video below to see how to install our site as a web app on your home screen.
Note: This feature may not be available in some browsers.
Enjoy XS400.com?Consider making a donation to help support the site. XS400.com receives a small share of sales from some links on this page, but direct donations have a much greater impact on keeping this site going.
When you say custom jetting, you mean you enlarged the jets yourself ?
Can you give up your secret dimensions, and what you did ?
I think this is a pretty awesome project and if it works as well as you say it can save a lot of folks money if they have bad/broken carbs.. I would love to see detailed carb photos inside and out haha
It looks fantastic, once its jetted it seems like it would be a bit easier to maintain because you would only have one thing breaking all the time rather then two
I actually find the position fairly comfortable... Largely because I flipped the top triple clamp over which allows me to mount my clip ons 2" higher.
Man I wish I could share my jetting! I just used an acetylene torch tip file and gradually brought the jet sizes up one size at a time until my plugs gave me the color I was after. I BARELY went any larger on pilot jet. Just one file size. I went up a significant amount on main jet. Slightly larger then the largest file that comes in one of the FORNEY file sets.
Well next time you have that carb off snap a couple pics of the jets, maybe they are sizes you can actually buy.. do you think? or would they be far larger then those available?
Am I missing a video 
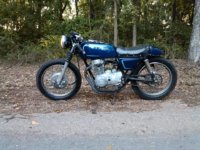
Ok I see it. Sounds good but also sounds like it hangs a bit. Watch dropping your clutch to fast lol a guy on here did that a while back and had the bike land on him. I would like to strip a bike that far down but it would never pass inspection where I live. Also looks like you have a 78 2-e not a 79. Good work hope you get a lot of use out of it.
Yes sir. Just flip the top brace over and it will let you raise clip ons 2" and will lower front of bike 2". It will pull the tire off very easily in first gear. IN 2nd gear it just roasts the clutch.
Note to anyone installing clip ons! I ordered the aluminum ones from china
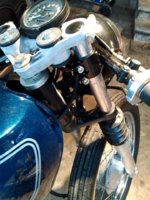
doh: I know right?).... Well, they are junk and just wore out after a couple hundred miles. Loosened up and aluminum stripped out. I ordered steel ones that I installed just before the video and they are much better. My throttle tube is sticking a little now though because the steel was power coated thick. Hence the high idle lol.
If you get on my youtube channel you can see a vid of my VMAX too.
Sesty, Here are the pics you requested. I tried to message them to you but it would not let me upload them to messages... I'm not crazy about the exposed bolts on top so I will prob find a way to eliminate them when I stop driving it and start working on it again. 
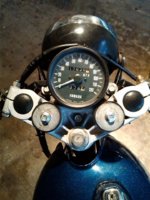
I hit the trip when I finished the carb setup, so 376.4 mi. and counting.
Yup. I dont want idiot lights since I was going for a very minimalistic and utilitarian approach with the bike though. I thought about putting the ignition switch in one but I liked the under tank location better. Ideally I would like to fab up a billet upper triple brace but you get into some big bucks there. I would hate to spend as much on the brace as I paid for the whole bike haha!
Thank you sir! I used factory seat pan. It still has functioning hinges and latch just like stock. I trimmed the back of the seat pan down and mated it to part of an old honda gas tank for the cowl. I re-used the factory seat padding and cut it down substantially and was also able to cut down and re-use the factory seat vinyl to keep with the retro look. I was very pleased the the bike I got had a good seat to begin with since the original seat is where I got all the raw components.