Charles
XS400 Addict
I felt part of making the bike a bit more safe, and better looking (to me at least) is doing a complete disc conversion. In actuality, my front drum was almost nonexistant and the rear was getting close. I mean, I needed to buy new drum shoes, so I figured I'd just put that money towards a whole new wheel and brake setup. It's a totally logical jump for me. ") For the front I have a USD fork from a GSX-R that will be going on in a few months. So for the rear, I have found a stock 18" mag and stock disc.
For the front I have a USD fork from a GSX-R that will be going on in a few months. So for the rear, I have found a stock 18" mag and stock disc.
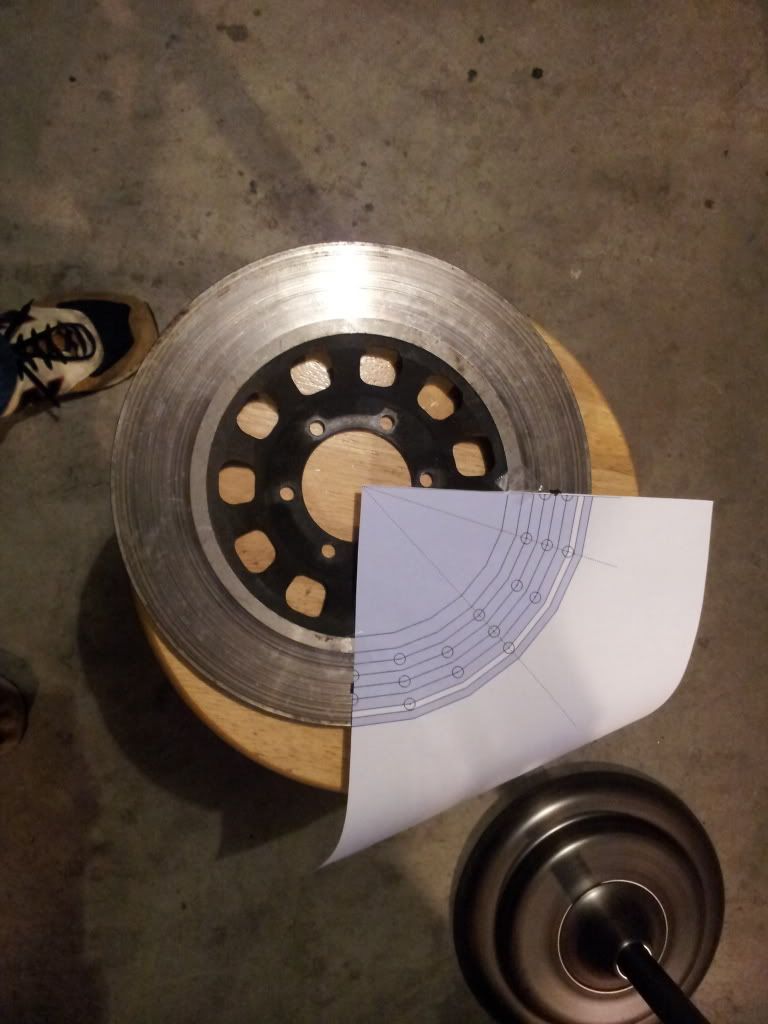
First things first, I figured I might as well drill the rotor. I created the pattern on Google Draw, or whatever the free Google rendering program is. I just put in the diameter of the rotor and started messing with hole patterns at varying degrees in relation to the center. It was fairly easy to get the hang of the program and have something sketched up.
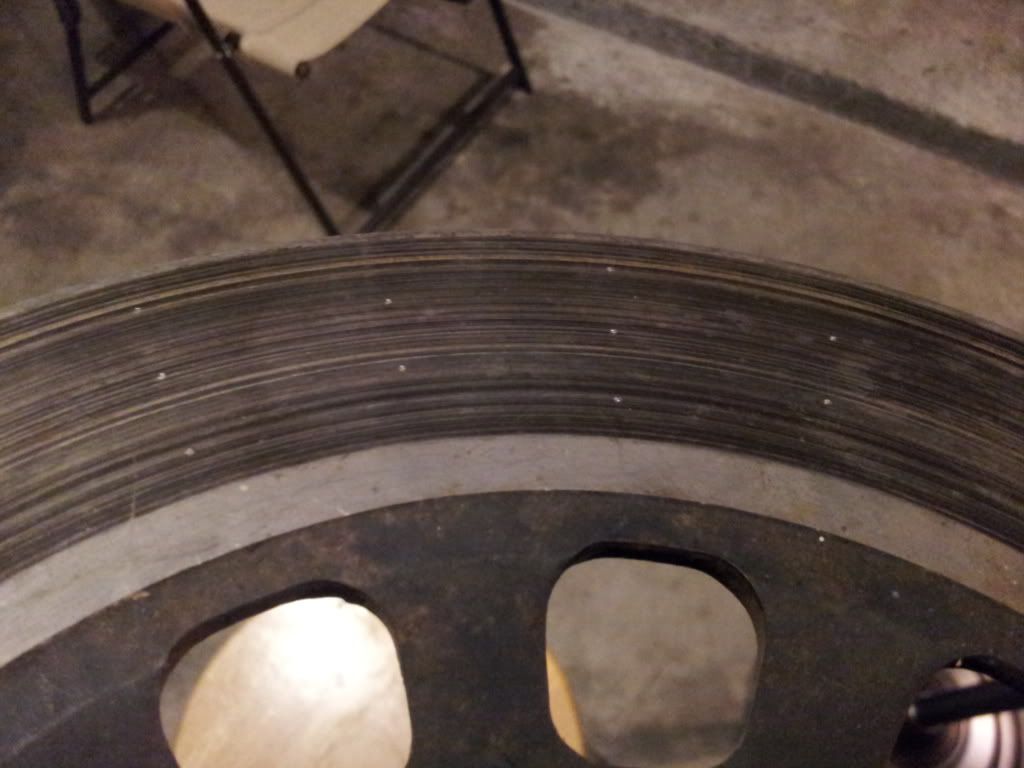
One quadrant at a time
Then I used a spring loaded punch for each hole. Makes lining up the drill bit easier. Then I just used the drill press to hit them all.
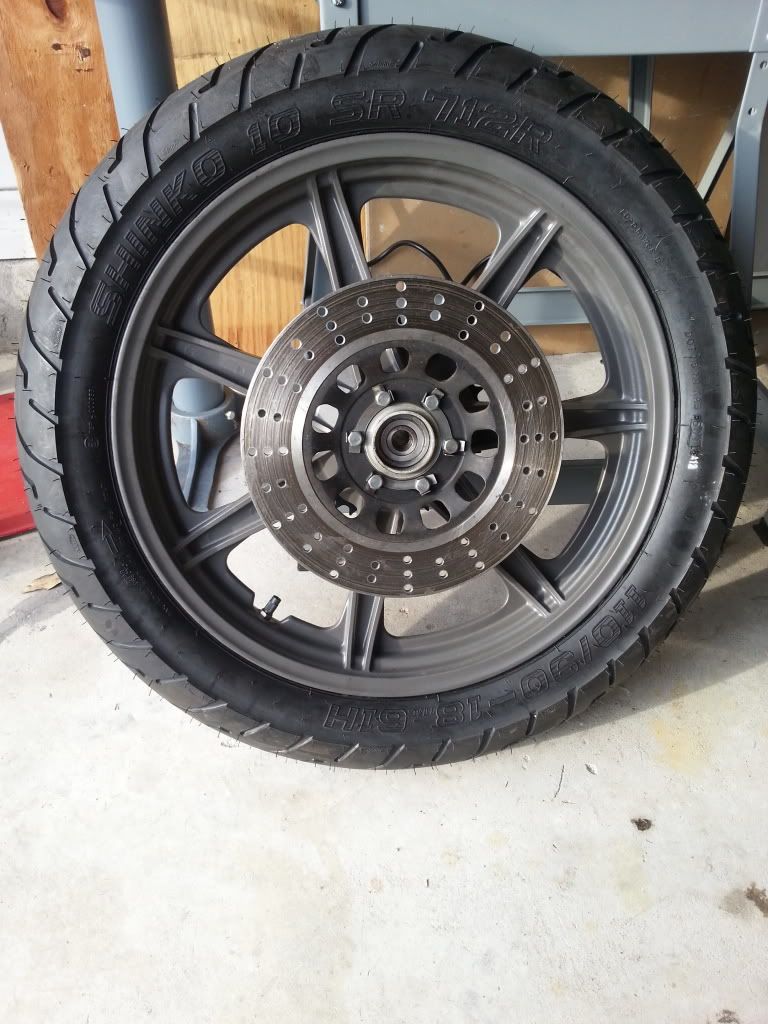
And the powdercoated wheel with the drilled rotor on it.
Now for mounting.
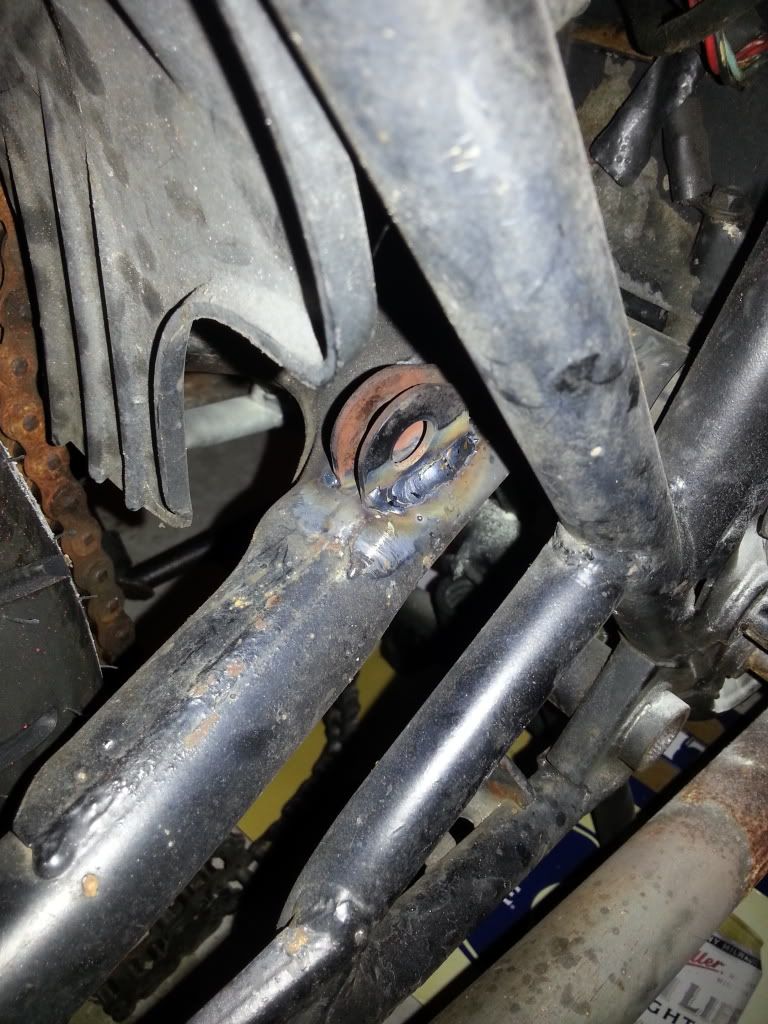
I was coming from a 1982 Special drum, spoked rear. For the most part, it was a direct swap. There were a few differences. The drum setup uses a torque bar that attaches on the bottom of the swing arm. The disc mag positions the caliper on the top, so the drum torque bar location wouldn't work. Some people just buy the disc swingarm to avoid this issue. But I have this:
So why waste money on something I don't really need? I simply hacked off the stock mount from the underside, then welded it to the top side.
Voila
The next issue I came across was the spacing. For the chain side, everything seems to be cool. I used the drum spacer/bearing cover thingy for the disc wheel. The brake side was more of a problem. I looked for a disc mag spacer, but it seemed it was no longer made. The stock drum setup comes with a spacer, but that was too long. No problem. I'll take it to my local lathe guy. Now, if you're in northeast Florida, I'd recommend him, but be forewarned, he harbors a lot of discontent towards liberals. And by liberals, I mean anyone who's not Glenn Beck. So if you like GB or Rush, you've just made a new bff. Lawzz...zomg!!! If you are not of that camp, well, just keep thinking "This is saving me 50% compared to going elsewhere"..and keep saying that, even after you've been there for over an hour trying to plot your escape without being too rude. Not that I had to do that...twice. Anyhow! Reduce the stock drum spacer to a length of 19-19.5mm. Measure yours just to be sure. With that being done the caliper carrier should be spaced properly as well as the wheel.
Now, for the master cylinder. I'm planning on doing a cafe-ish build, so I wanted rearsets. Most rearsets come with the master cylinder, so that's a bonus. I was able to get a set from a 2006 (I think) R6. Brembo rear master cylinder. Cost me like $50 bucks shipped. Depending on your fab skills, this might be an issue for you. The way these are mounted are via two holes. Those two holes do not line up with the stock footrest mounting points. If you decide to get universal sets, you might be able to mount them in the hole where the passenger pegs mount. I'd think you could do that without having to weld anything. I didn't go that route..whatever, I saved at least $100 bucks doing it this way, so I sleep better at night.
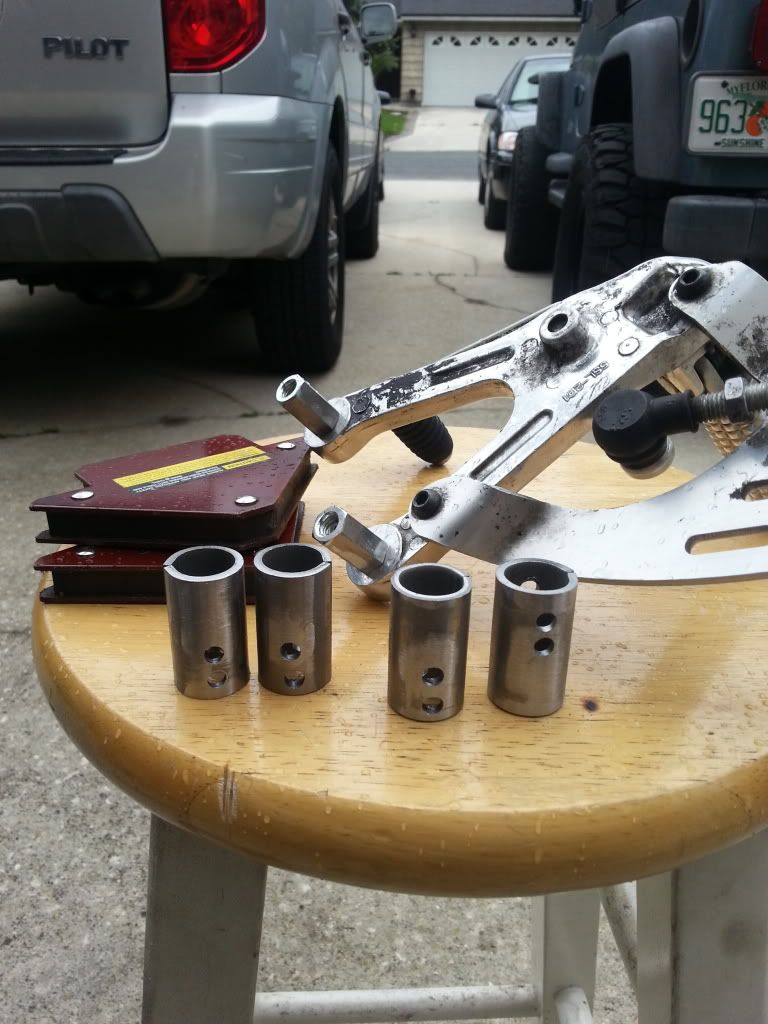
After trying various mounting spots, I realized I had to space them out from the frame a bit. I went to Ace (it really IS the place) to find some hardware. I settled on some 2" spacers and some M8 couplers to be used as bolt receptacles.
Here are the spacers with rosette holes drilled and you can see the couplers temporarily mounted to the rearsets
Clamped for welding
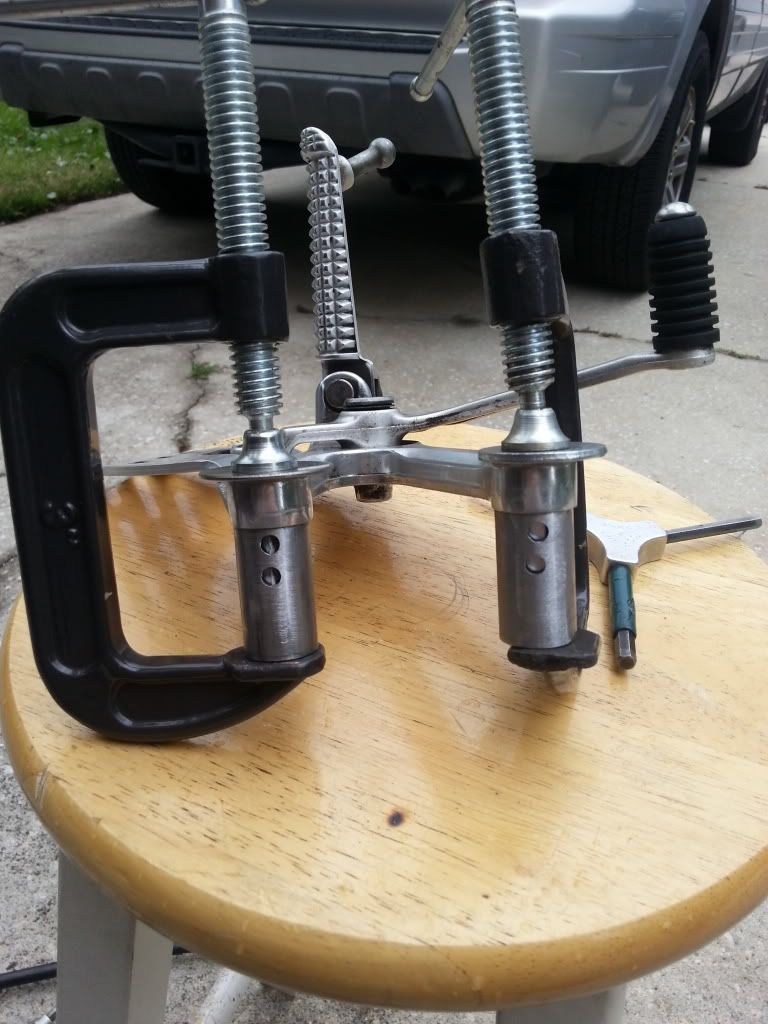
Once I welded the couplers inside the spacers, I sanded down the weld overflow, then welded them to the frame. I chose to weld them to the passenger peg hoop/loop
Now for the shifter rod. The R6 shifter lever came with a reverse thread nut. Usually that's fine cause you'll use that to tighten down a premade rod and adjust accordingly. That's an awesome plan...if I had only thought that far ahead. But hey, life's about learning lessons, right? When I welded my mounts to the frame, the angle prevent the shift linkage from being a straight shot. I was going to need to bend the rod, and most of the premade rods are aluminum. I guess I could have bent one, but they're anodized and I'd need to heat it and I'm sure knowing my luck, I'd snap it before I got it bent to the angle I needed. So, what to do? I decided to weld the reverse thread nut to a comparably sized spacer. Weld that spacer to solid rod, bend that rod to suit, then on the other end, weld on a threaded coupler and use a standard thread M6 for a jam nut. Phwew!
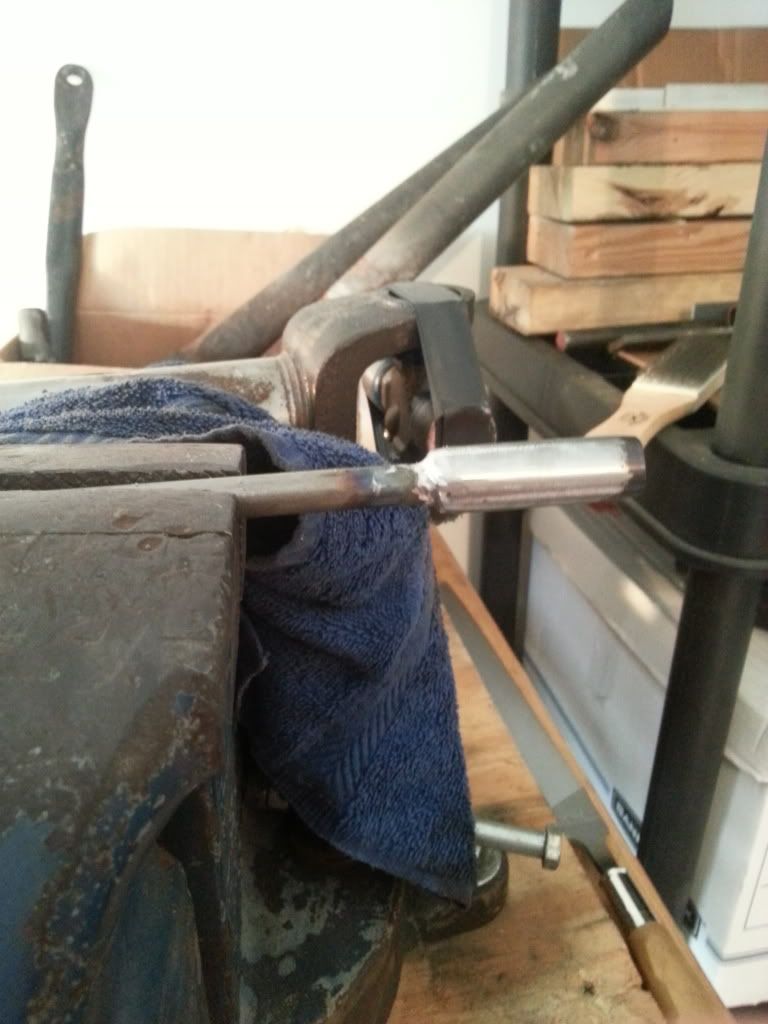
Here's a kind of blurry pic of the reverse thread nut already welded to the hollow spacer and the solid rod. I built up some of the weld material so after I sanded it down, it would look like one long spacer, not a spacer with a nut welded to it...if that makes sense.
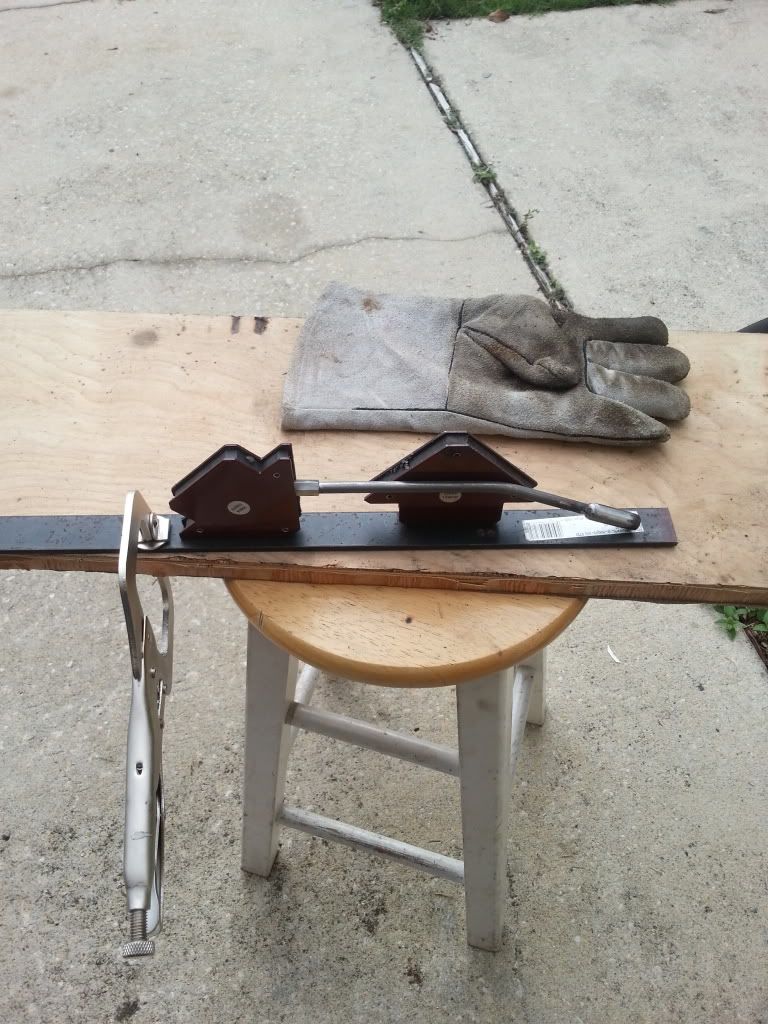
And me trying to set it up for the threaded coupler to be welded to the other end after I bent the rod
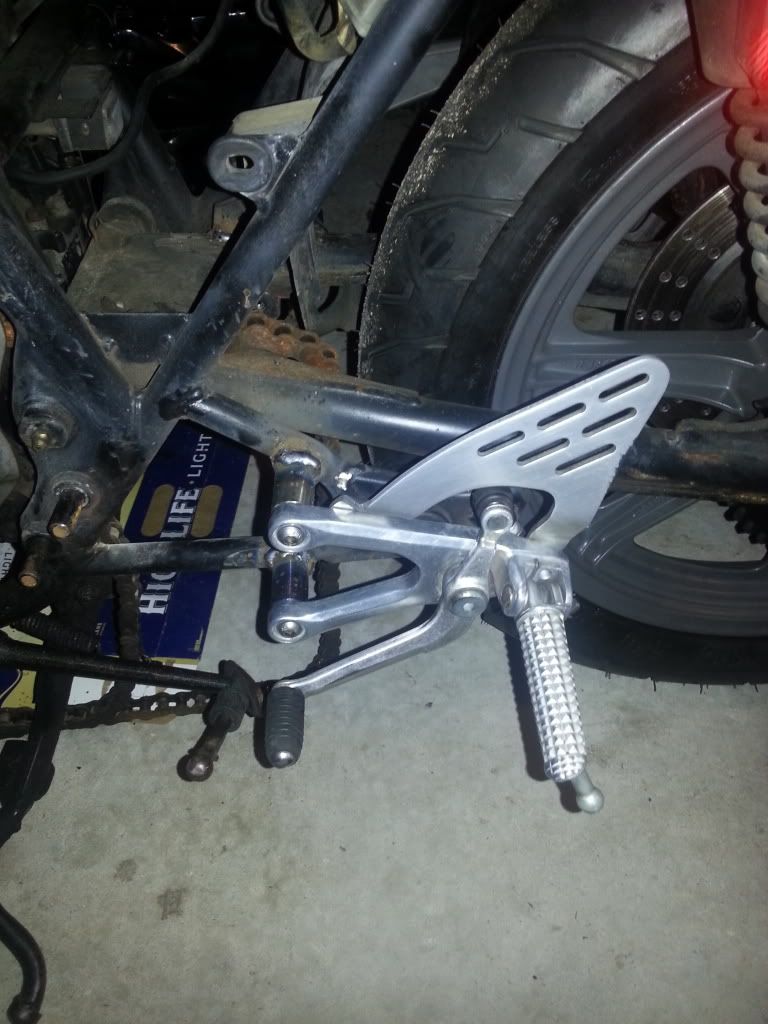
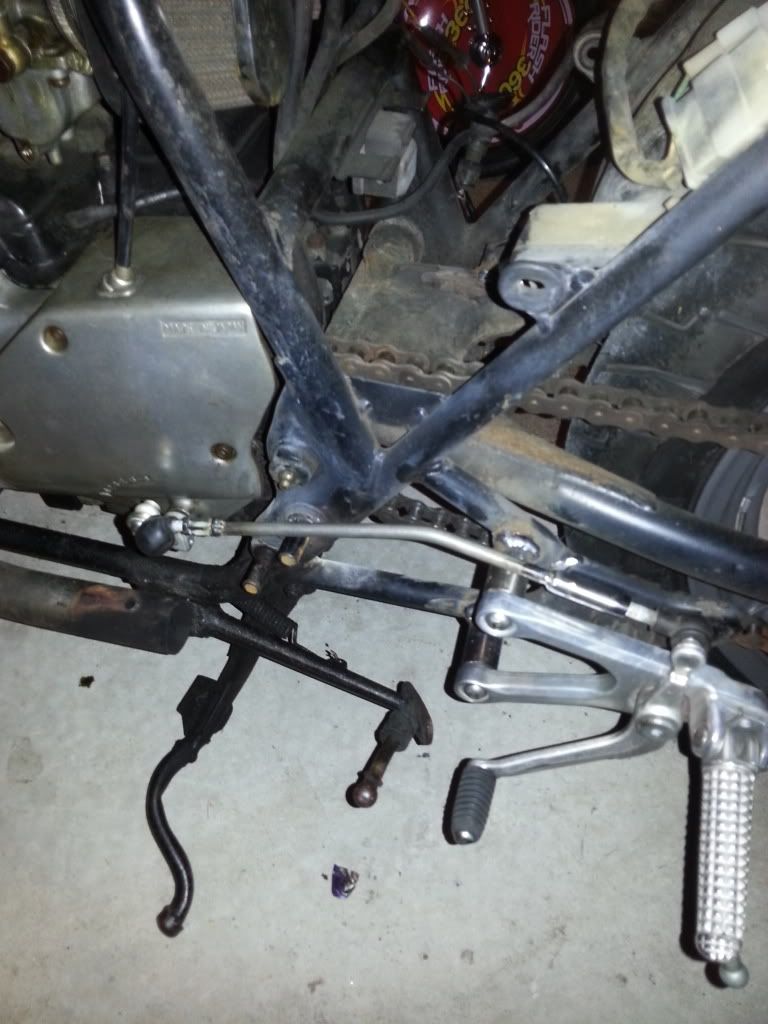
And here's the linkage attached.
Oh, there's another lesson I learned. When the center stand is down you won't be able to factor that in to the build, so when you go for a test ride and the center stand is retracted, you'll realize that it gets in the way of the foot shifter. Sweet! Luckily, it seems like there's enough adjustment that I can factor out the center stand...I hope.
And that's pretty much where I'm at.
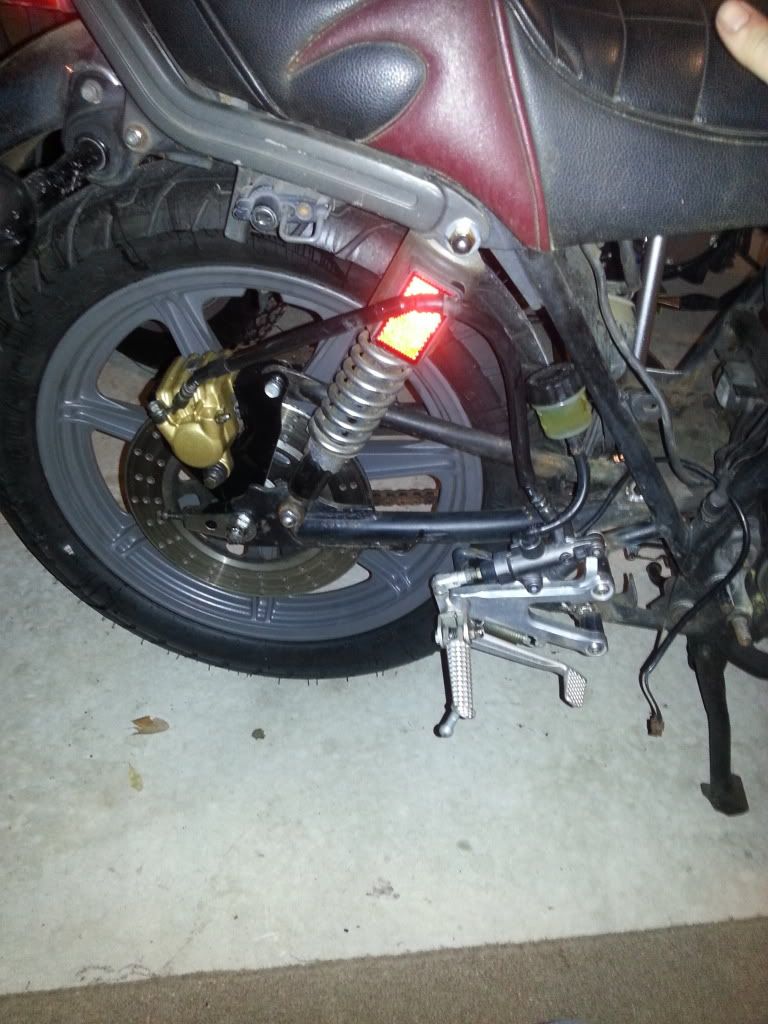
I need to paint/sand off slag, get a new brake line and splice in the stock brake light switch to the R6 unit.
For the front I have a USD fork from a GSX-R that will be going on in a few months. So for the rear, I have found a stock 18" mag and stock disc.First things first, I figured I might as well drill the rotor. I created the pattern on Google Draw, or whatever the free Google rendering program is. I just put in the diameter of the rotor and started messing with hole patterns at varying degrees in relation to the center. It was fairly easy to get the hang of the program and have something sketched up.
One quadrant at a time
Then I used a spring loaded punch for each hole. Makes lining up the drill bit easier. Then I just used the drill press to hit them all.
And the powdercoated wheel with the drilled rotor on it.
Now for mounting.
I was coming from a 1982 Special drum, spoked rear. For the most part, it was a direct swap. There were a few differences. The drum setup uses a torque bar that attaches on the bottom of the swing arm. The disc mag positions the caliper on the top, so the drum torque bar location wouldn't work. Some people just buy the disc swingarm to avoid this issue. But I have this:
So why waste money on something I don't really need? I simply hacked off the stock mount from the underside, then welded it to the top side.
Voila
The next issue I came across was the spacing. For the chain side, everything seems to be cool. I used the drum spacer/bearing cover thingy for the disc wheel. The brake side was more of a problem. I looked for a disc mag spacer, but it seemed it was no longer made. The stock drum setup comes with a spacer, but that was too long. No problem. I'll take it to my local lathe guy. Now, if you're in northeast Florida, I'd recommend him, but be forewarned, he harbors a lot of discontent towards liberals. And by liberals, I mean anyone who's not Glenn Beck. So if you like GB or Rush, you've just made a new bff. Lawzz...zomg!!! If you are not of that camp, well, just keep thinking "This is saving me 50% compared to going elsewhere"..and keep saying that, even after you've been there for over an hour trying to plot your escape without being too rude. Not that I had to do that...twice. Anyhow! Reduce the stock drum spacer to a length of 19-19.5mm. Measure yours just to be sure. With that being done the caliper carrier should be spaced properly as well as the wheel.
Now, for the master cylinder. I'm planning on doing a cafe-ish build, so I wanted rearsets. Most rearsets come with the master cylinder, so that's a bonus. I was able to get a set from a 2006 (I think) R6. Brembo rear master cylinder. Cost me like $50 bucks shipped. Depending on your fab skills, this might be an issue for you. The way these are mounted are via two holes. Those two holes do not line up with the stock footrest mounting points. If you decide to get universal sets, you might be able to mount them in the hole where the passenger pegs mount. I'd think you could do that without having to weld anything. I didn't go that route..whatever, I saved at least $100 bucks doing it this way, so I sleep better at night.
After trying various mounting spots, I realized I had to space them out from the frame a bit. I went to Ace (it really IS the place) to find some hardware. I settled on some 2" spacers and some M8 couplers to be used as bolt receptacles.
Here are the spacers with rosette holes drilled and you can see the couplers temporarily mounted to the rearsets
Clamped for welding
Once I welded the couplers inside the spacers, I sanded down the weld overflow, then welded them to the frame. I chose to weld them to the passenger peg hoop/loop
Now for the shifter rod. The R6 shifter lever came with a reverse thread nut. Usually that's fine cause you'll use that to tighten down a premade rod and adjust accordingly. That's an awesome plan...if I had only thought that far ahead. But hey, life's about learning lessons, right? When I welded my mounts to the frame, the angle prevent the shift linkage from being a straight shot. I was going to need to bend the rod, and most of the premade rods are aluminum. I guess I could have bent one, but they're anodized and I'd need to heat it and I'm sure knowing my luck, I'd snap it before I got it bent to the angle I needed. So, what to do? I decided to weld the reverse thread nut to a comparably sized spacer. Weld that spacer to solid rod, bend that rod to suit, then on the other end, weld on a threaded coupler and use a standard thread M6 for a jam nut. Phwew!
Here's a kind of blurry pic of the reverse thread nut already welded to the hollow spacer and the solid rod. I built up some of the weld material so after I sanded it down, it would look like one long spacer, not a spacer with a nut welded to it...if that makes sense.
And me trying to set it up for the threaded coupler to be welded to the other end after I bent the rod
And here's the linkage attached.
Oh, there's another lesson I learned. When the center stand is down you won't be able to factor that in to the build, so when you go for a test ride and the center stand is retracted, you'll realize that it gets in the way of the foot shifter. Sweet! Luckily, it seems like there's enough adjustment that I can factor out the center stand...I hope.
And that's pretty much where I'm at.
I need to paint/sand off slag, get a new brake line and splice in the stock brake light switch to the R6 unit.
 Really makes me wish I had a welder...and a garage... Next you need to do a write-up of your front end swap.