Bobber project in Sweden

That one at TCU looked nice, my microphone looks a little different.

fxcam_1295438896065_128049406.jpg


fxcam_1295438919105_128049422.jpg


I took out the interior and looked into putting some red led in it. See how it turns out...
 
So, had a quick trip home.
Fitted the tank, a mock-up of what it will look like.

fxcam_1296071403613_129516701.jpg


fxcam_1296071358592_129516729.jpg


had some worries about the coils, but I tried to switch them over to the other side of the mount, it worked out. Just have to change the bolts on them. But that is way easier than making new mounts. :)

The tank is a bit rusty, so i will have to fix it. Been looking into some different methods. Haven't decided yet, have you guys done something similiar?

and about the microphone, haha, made a mistake one could say. Showed it to my dad, (old musician) and he pointed out it would probably be worth some, 250-300 dollars it turned out (bought it for 3). So even though i took the microphone out of the shell and tossed it, he is gonna fix it and use it for his own. He makes guitars and use a microphone to tune them (the wood) so i'll let him have it and come up with something else. :)

I also received the shocks posted earlier in this thread, looks awesome. Will probably make a huge difference. Cad is way cool. Thanks again man!

Will try them during next week.

Now I want some warm weather and some free time!
 
So, now I had another day out in the garage.

I mounted the shocks, really like what those shorter shocks do to the bike.
fxcam_1296672638907_130713693.jpg

I also made some changes to the stock rear fender.
fxcam_1296680525647_130713738.jpg

I will make some mounts for it later, but at least now I know what will protect my ass. :)

To be able to fit the tank i had to either move the coils or switch side on the mounts already there. I chose the later, using nuts as distances.
fxcam_1296672527284_130713812.jpg


I also made a mock up for the sign, gonna put it on a bar on the side.
fxcam_1296686167892_130713967.jpg

Since we in sweden no longer need the tax-mark. (the red thing makred "10" in the picture) I'm gonna cut that piece off. It will make it slimmer.

I put my new old tank in an oxalic acid bath, to remove the rust. I also cut a piece out because of some holes the rust ate out. Luckily it was all in one place, the rest looks ok. Haven't decided if i should try to weld it myself or give it to a professional welder. Time will tell.
 
Wish it wasn't so damn cold here.....so I could have a day in the garage. Maybe that kerosene heater needs another buddy, because he isn't cutting it all by himself!

Looking good though!
 
Hey Jonathan, glad the shocks got there ok. Are you going to get the front end on soon so we can see the stance with the bike sitting on the ground with the shorter shocks?

Are there strict rules in Sweden about the size of reg plate? Here in UK the police can be a bit picky about it if they are looking to screw you.
 
Haha, yeah. I know what you mean hardtailed, I work in thermo pants. :)

My front end is on service. :)
It's currently 3 meters from the bike.
My dad is an old suspension technician, used to have a shop back when I was racing motocross. He has promised to give them a proper treatment. :)

Yes, there are some strict rules, it has to be 195x155 mm
But something in me doesn't want to have such a big plate hanging out on the side of the bike. :) Haven't decided what to do yet.

Just have to make up plausible excuses. :)
Do you think they would believe that someone recently cut it when it was parked?
haha..

And yeah, worked on the bike yesterday. Will post some pics later today.
 
So, now i'm home.
pic posting time.

I made a bracket for the rear fender (thanks CadXS for the idea!), the stock fender which I cut to fit further back.
I also made a thingey to hold it in place behind the seat.

fxcam_1297284008930_131894387.jpg


fxcam_1297292275917_131894425.jpg


fxcam_1297292344312_131894549.jpg


Then I realised, heck, that's where my blinkers oughta be!
So I cut a pipe and pressed the nuts in into the ends.

fxcam_1297283861332_131893965.jpg


And this is what it's supposed to look like when welded in place.

fxcam_1297292396720_131894016.jpg


I know it's kind of hard to see in the pics, but that's what i got for now.

I also made the seat-pan. 3mm thick :) , it's hard to get it symmetric but I think I got it almost right. Some more grinding and then it's done.

I have a seat-cover on the way, made out of an old leather jacket.
"El lobo" will be embroidered at the back of the seat.
That's now the name of the bike. :)
 
you need to get a decent camera mate, those pictures are horrible. All i use is my phone and they come out great!

the build is looking good:thumbsup:
 
haha, yeah. I hear you. :)
I use my phone, but the flash makes it shitty.
Will make sure to bring my camera next time. :)
 
Jonathan, Travis is looking for threads to kick off the Tech section of the forum.

Is there any chance you can document (with a camera :D) what your dad does to your front forks seeing as he was suspension technician and is giving them a "proper treatment".

I think that would really valuable info that could go in the Tech section.

Cheers, Caddy
 
Sure thing, i will try to keep up with him as he goes. ;)
If it turns out alright i'll post the guide.

We talked about putting some race tech gold valve cartridge emulators in the forks. (his treat he said :) )
I used to have race tech gold valves in my mx bike, it was like night and day compared to the stock. (Both correctly set up for me)

Not sure what he came up with though, have to figure out which ones to get since the xs400 isn't in the list over bikes.
Here is the list.
http://old.racetech.com/evalving/menu/searchstreet.asp


If no parts come along it may just be a service being done, but that may be of value as well.

I still want to ride this summer you know. :)
 
Hey you guys.

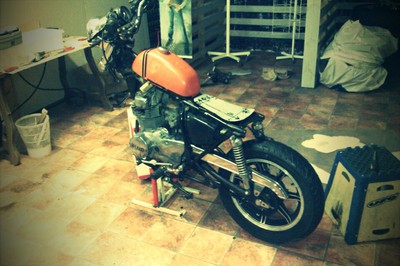
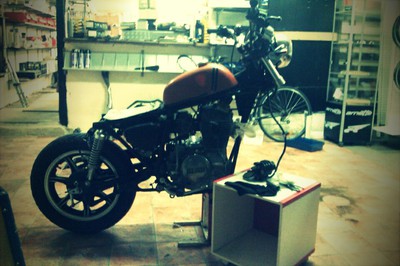
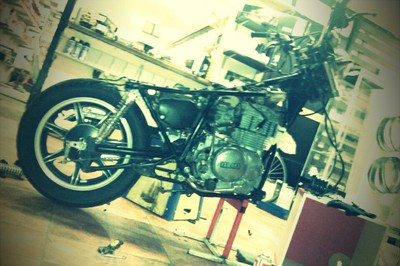
Guess what, I did bring a camera this time. Took some photos, and forgot to take it back. Haha. :)

So no pics until thursday.

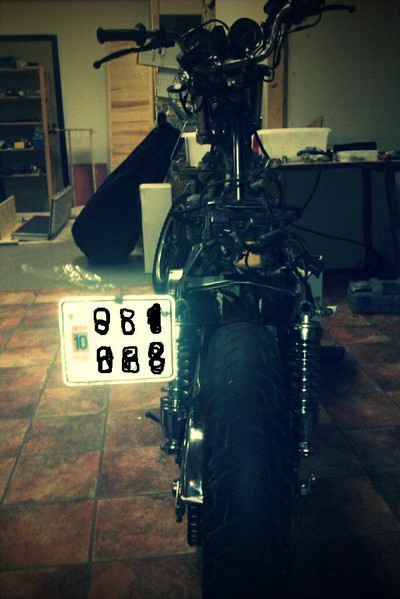
I found some new bar-mounts laying around, for a fat-bar. So i'm probably gonna go with that.
Put on a bar something like this:
82-353_l.jpg

Or make one a little more "chopperish". But we'll see.

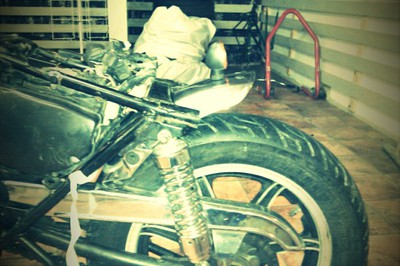
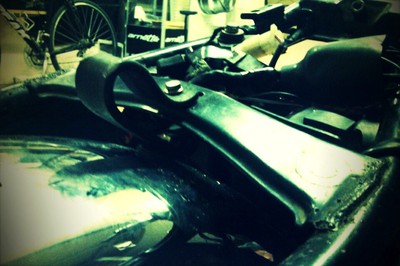
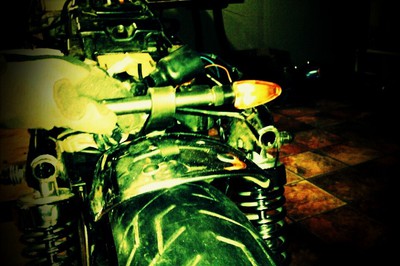
I also made a mount for the horn and light, they are now under the air-filter box on the left side.
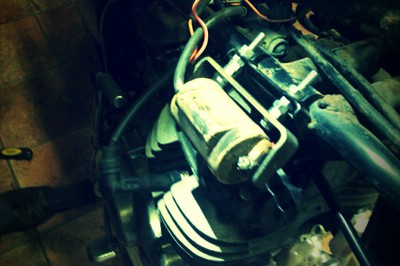
took the left handlebar switch apart and tried to figure out how to go about.

The horn was easy, pink and earth.
The light i figured out, after some trial and error.

Then I remembered the wire-diagrams.
Haha.

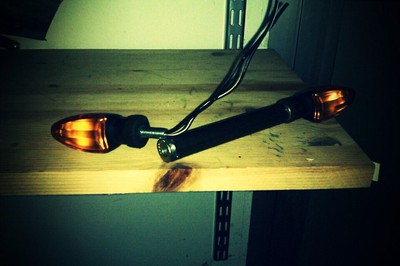
The blinkers wouldn't work properly, but I think it was because of a low charged battery.
They sometimes lit up but wouldn't blink. I can hear the flasher relay engage but it won't turn. What do you think? Just low battery?

But I can't figure out what the red/yellow cable goes to.
The chocolate, white/brown and green I get. But should the red/yellow and earth connect when no blinkers are activated or when they are?

I'm used to two-stroke machines without much electricity. It confuses me. :)

The tank in the oxalic bath. Just found another one, just the same, for less money than to have it welded, so we'll see what will happen to it. At least I'm rust-free. :)
 
Back
Top