This was my first effort at trying to rebuild or restore anything. After completed 1st time round it ran with oil leaking from cam seal, tach seal and BURNING oil.
I made a half-hearted but way too hasty 4-5 hour tear down mainly to check oil passage o-rings and because I re-read in service manual to make sure all timing chain slack towards the tensioner. With left points dead-on LF the right side breakers were fully to the right and still not on the mark.
So I also realized there was something else amiss with the return of burning oil out of exhaust after a servicio de Italiano.
Spent Saturday from 8 am to past midnight and got it started! Sunday got the points and carbs finely tuned and running real good")
What went wrong!
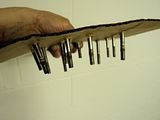
Firstly and foremostly I did not have the valve stem seals forcefully press-fit fully down into place I ended up using another new set of valve stem seals. Taking it apart, time to decarbonize again.
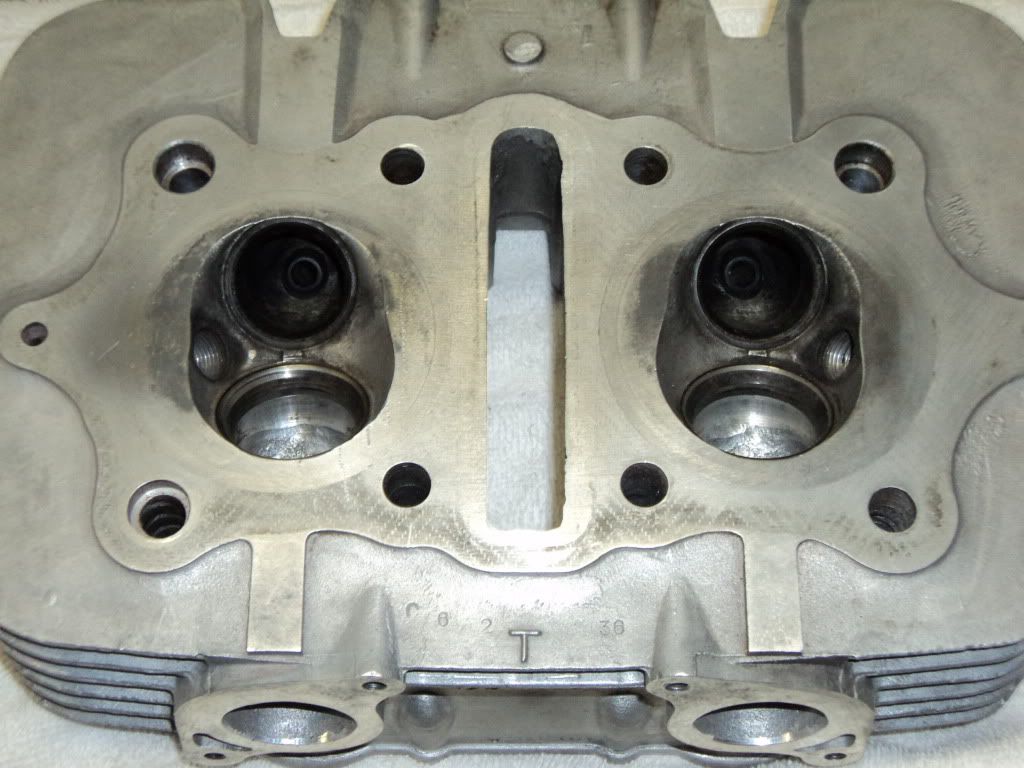
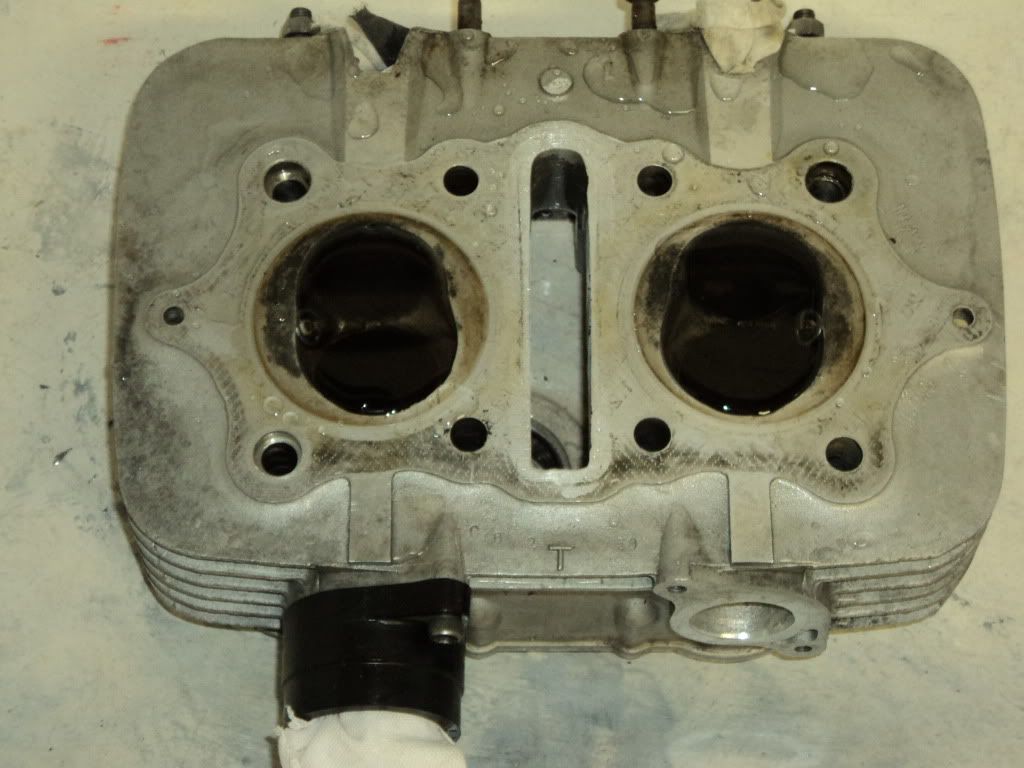
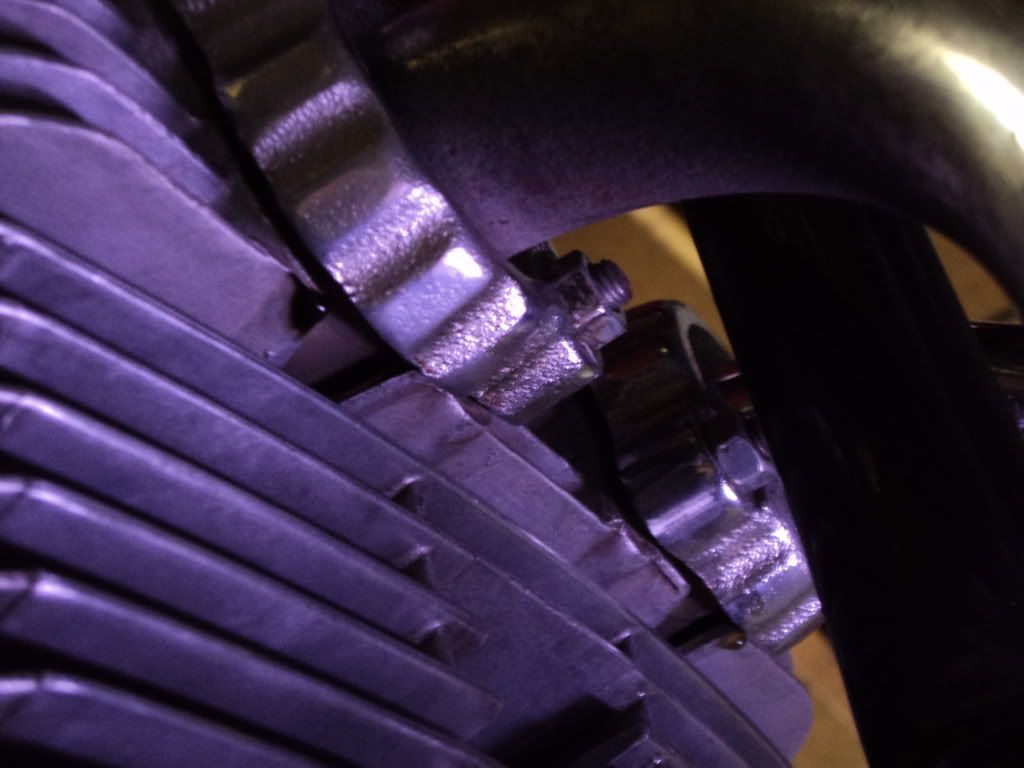
Notice the obvious intake side oil streak from valve guide.

I did check that my valve lapping job and seating still good. After 2 hours with water.
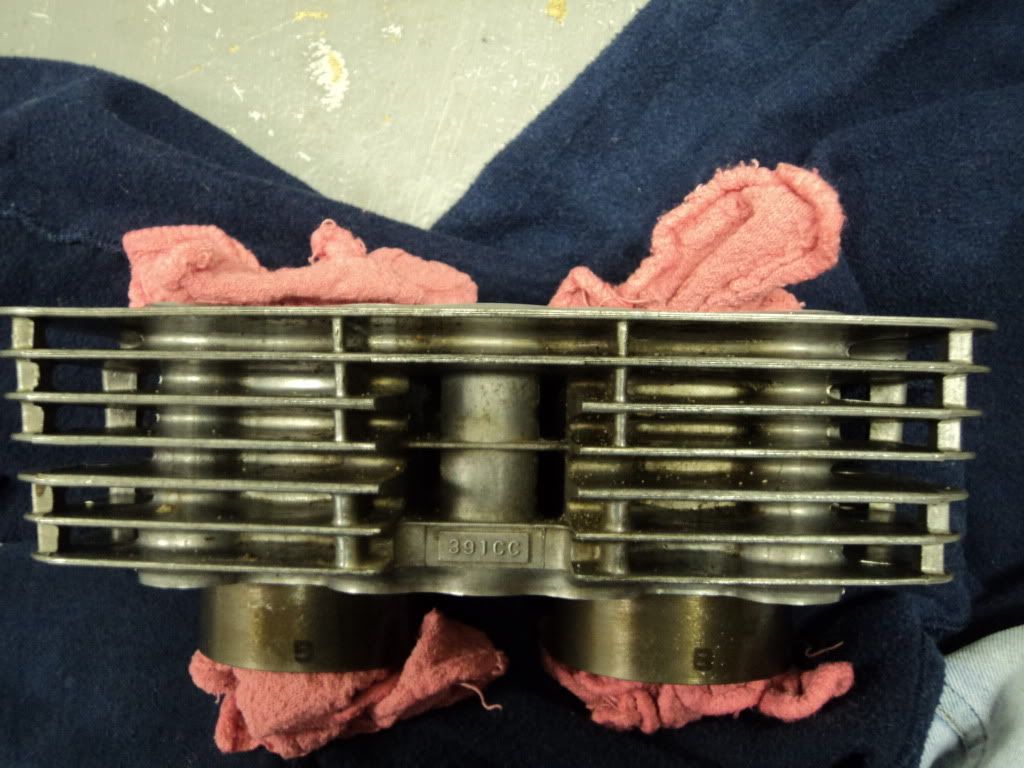
From my half-a**ed attempt I merely lifted the barrels to check the right rear oil passage seal. As a result, oil all over, although it didn't result in any gasket leak from outside of motor. But not good.

Same thing with the head gasket - no pic - but again not leaking from Outside of motor anyway.
I wasn't very happy with the cyl base o-rings i ordered, which were Yamaha parts and the gasket set o rings fit nicely in, whereas these seemed larger and had to TRY to press fit them in (was very uncomfortable with the idea, but worked out. . . so far).

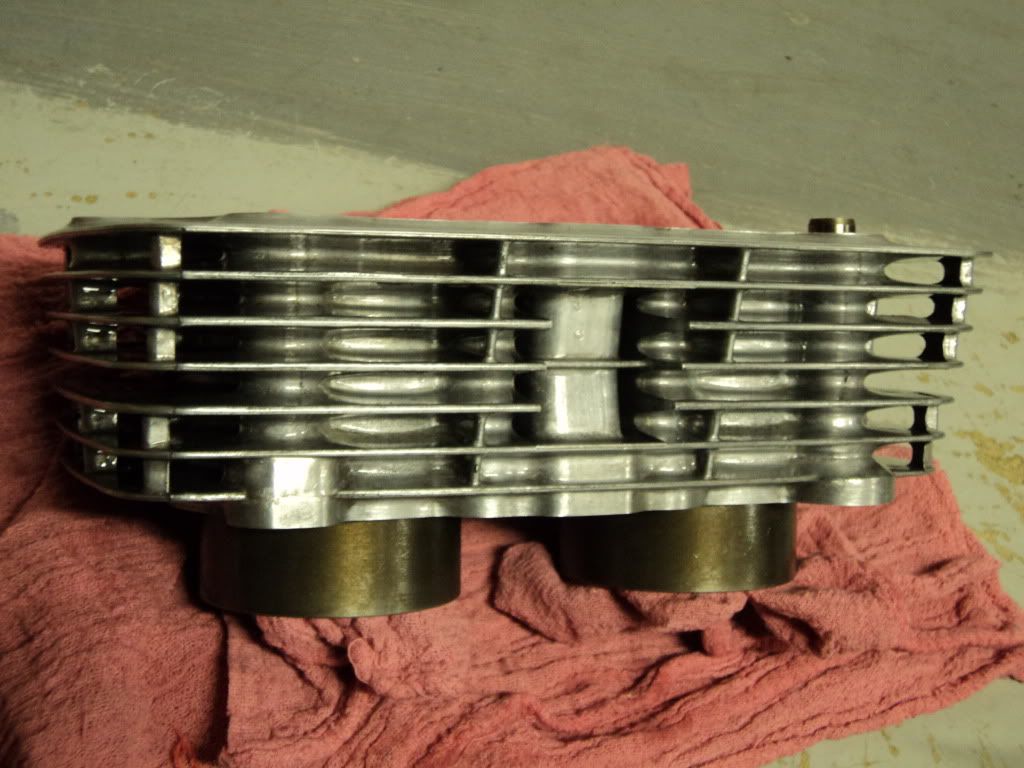
As an upside - i did find an upside to all this - i decided to do a better, if not best, job of cleaning the motor between the fins - that was my Thursday and Friday evenings.
Before and after. Also above pics show them cleaned. THINK POSITIVE!
Here's a stupidness lesson, if you use shoe string to hold up the timing chain, dont torque down all the head nuts on part of the shoe string! Again
I thought it would be gentler than wire, and not scratch any surfaces.

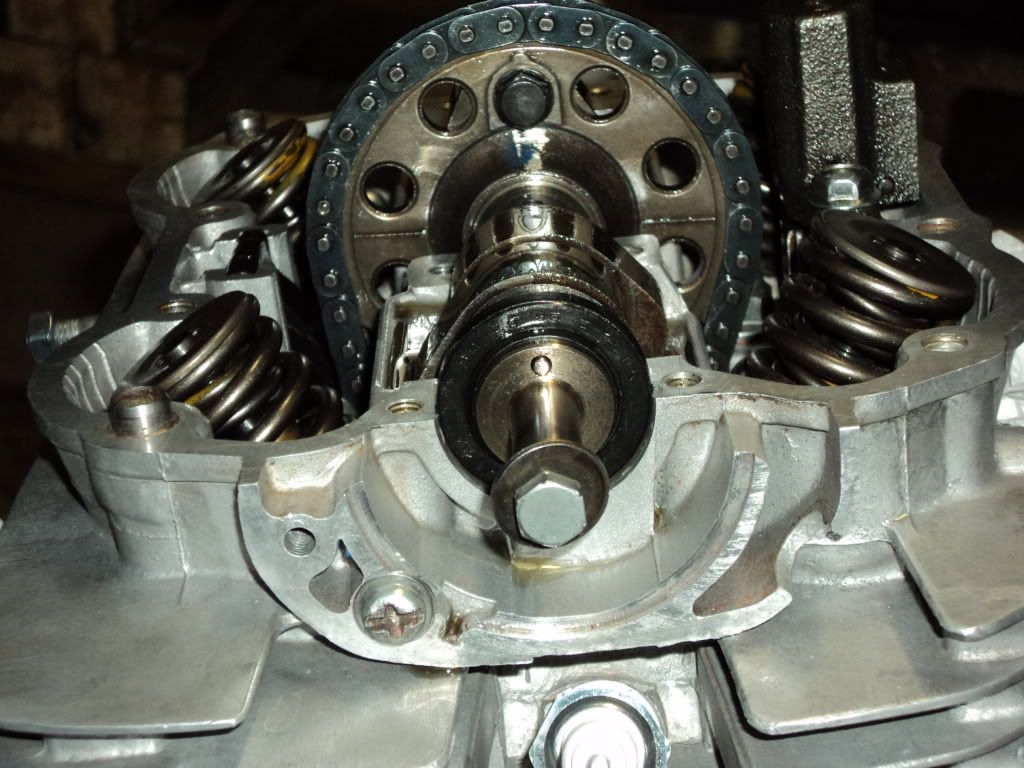
This time I made darn sure every link of timing slack from front side was taken up and even had the rotor positioned two hairs left of the TDC mark. Once tensioner in, then this picture i had the rotor exactly on the TDC line. All 12 o'clock
The new cam seal I replaced by pressing in when motor still together, was still leaking and i was convinced that I hadn't used gasket seal right up to the edge of where it sits. Turns out it goes farther in than i could press it in and triple checked this when torquing the valve cover on. ( also thought not a bad idea to fill the cam lobe baths with oil, which i didn't do before).

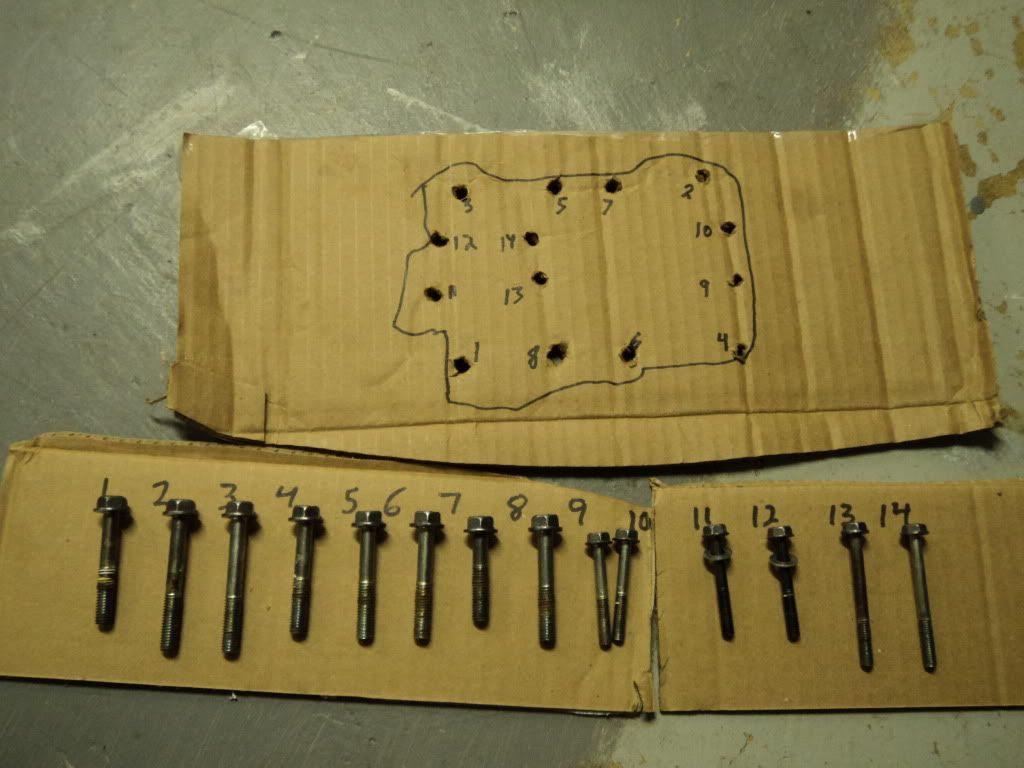
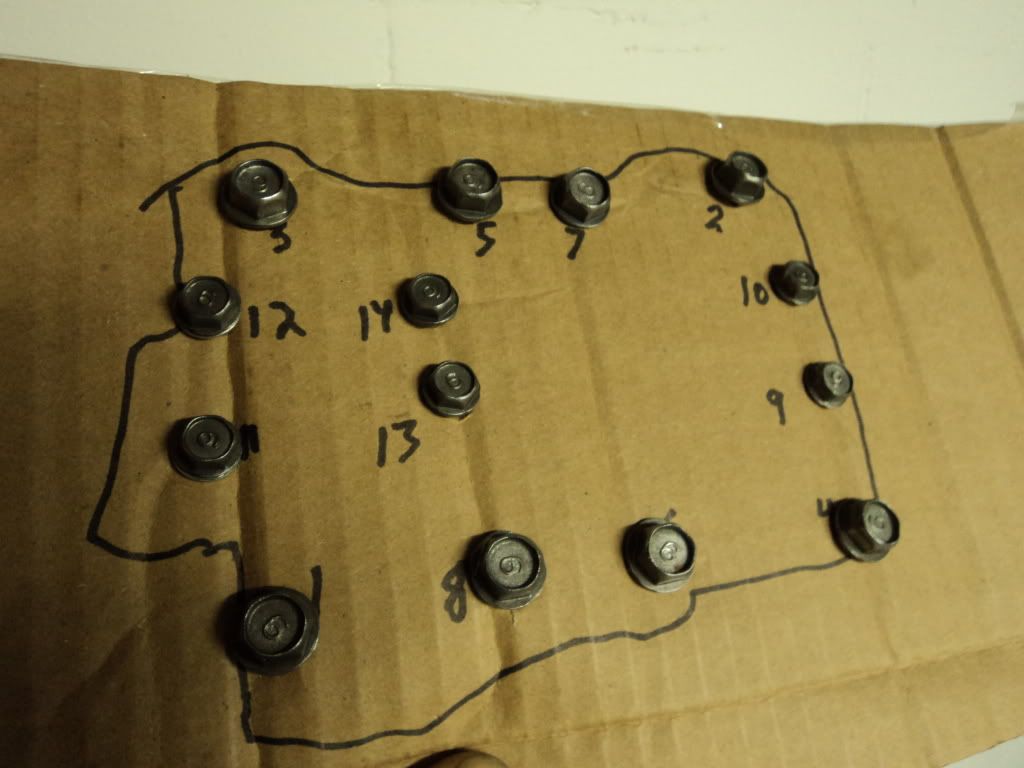
Maybe someone knows this, but this time I also used the liquid gasket where the two middle bolts go (#13 & #14).
This just as a reference for myself and anyone who can use it. The numbers are the loosening sequence and couldn't find tightening sequence and not sure, but i tighten in the reverse, starting with 14.
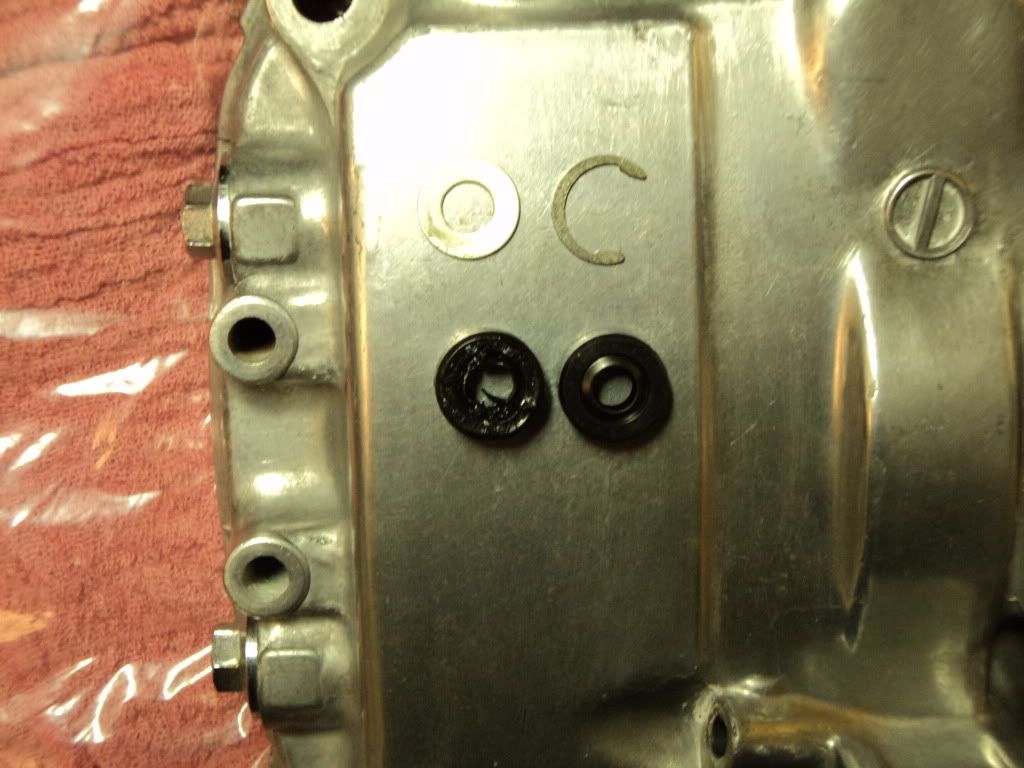
The tach cable seal leaked from when I got it which was quite obvious and don't know why I thought it would be fine Also don't ask why i took the circlip off since I ended up diging the old seal out. Don't know how to disassemble the tach gear But nice to know it can be best replaced with motor together. I could not get it pressed all the way in!! and inserted the cable and some carefully placed poundings with screwdriver and hammer (worked nice).
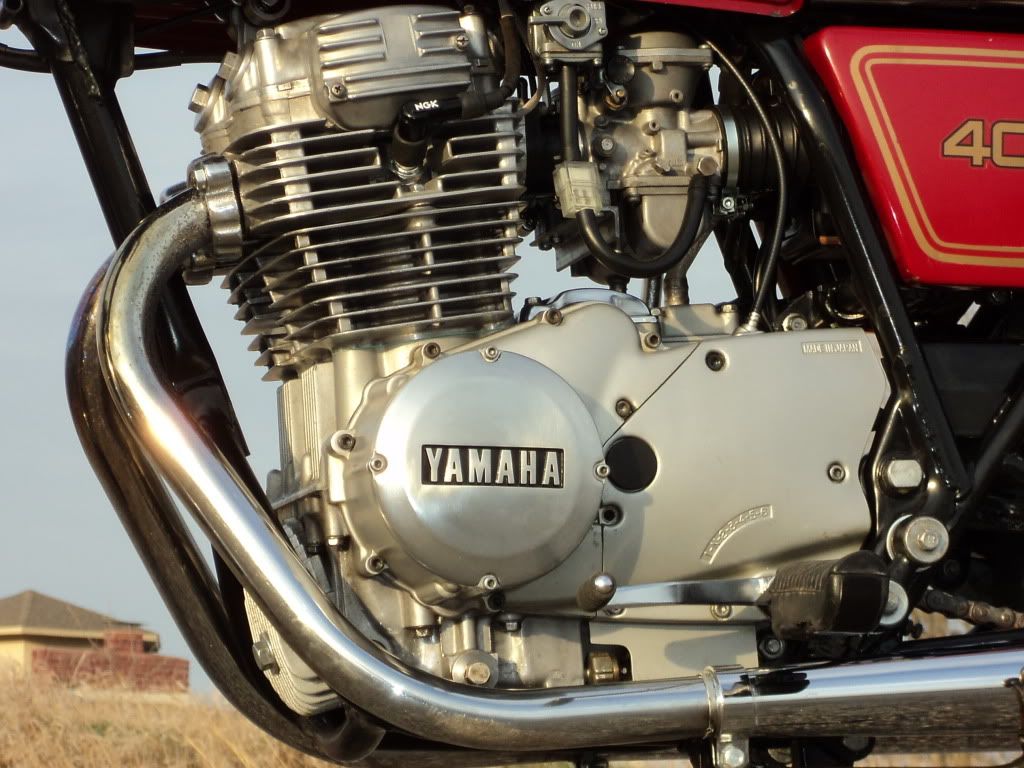
Things are starting to look up, and a bit more shiny even (again, coulda done better).
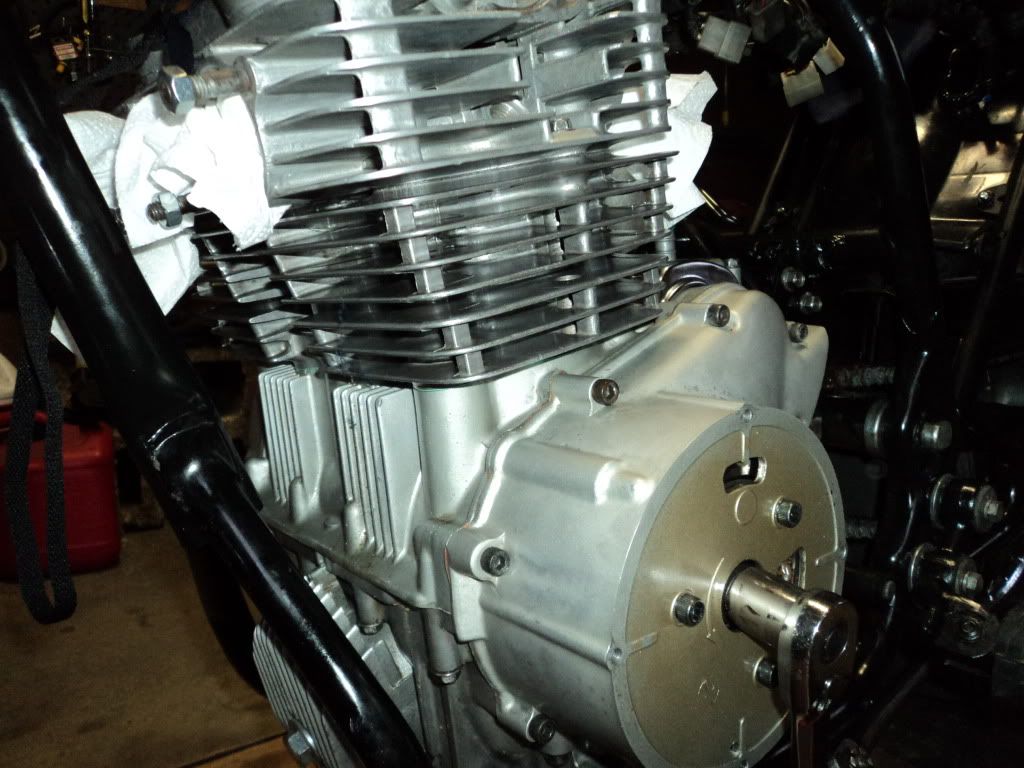
Carbs on, pipes on. Feelin lucky this time round. Just those cyl base large o-rings on my mind at this point.
(also. . . double checking, i discovered one of the carb slides was not lowering consistently smooth. Diaphragm out, the slide was perfect but i had to smooth the bore of it a bit, and good. Feeling even better about the THIRD-attempt rebuilding process.
This is getting long-winded. All assembled, 12:30 a.m., so HERE WE GO. . and . . . awwwwwww
I lost sleep over this. Oil out of both exhausts, looked very, very close to make sure it wasn't from the head gasket. Nope.
Hummed and hawed and just thought, next day- timing, carbs, ride it. I considered the fact that the cylinders are still freshly cross-hatch scratched up from re-honing. . and that the oil seals dont really expand outward so much like the compression rings and POSSIBLY, just MAYBE a tiny bit of oil getting past. I concluded this after examining the plugs after that first start-up and they were just right! There IS hope.
Next day I rode it and better.
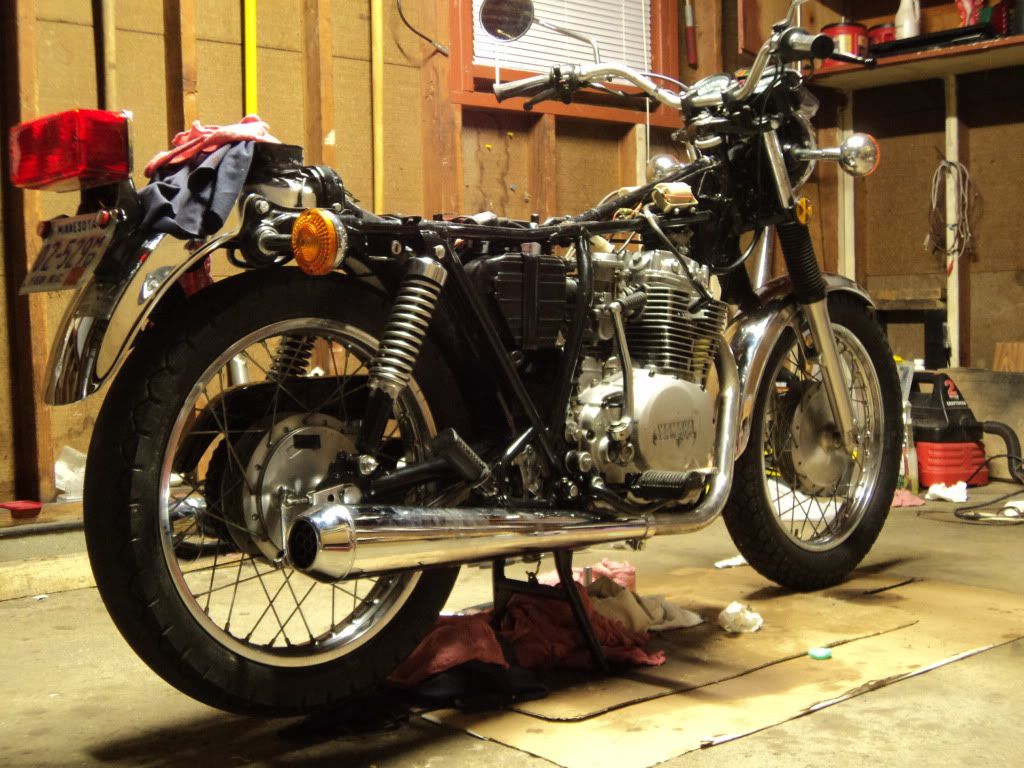
Today (Monday) I insured it, registered it, put plates on, and went for a nice ride! A VERY nice ride!!! This evening was wind advisory and 35 mph winds (talk about air-cooled, Ha) and not THE warmest, but tomorrow supposed to rain. I put 19 miles on it . . .AND. . .GUESS. . .WHAT! Not a single oil leak. It ran flawlessly! Not a hiccup, burp, misfire or stumble. And . .. . . Eila is beginning to see the light And so am I
Pics aren't the best, i don't know how to use a camera. I wanted them clear and focused at least so they were taken on a miniature tripod. Can't wait to post better pics in an album.


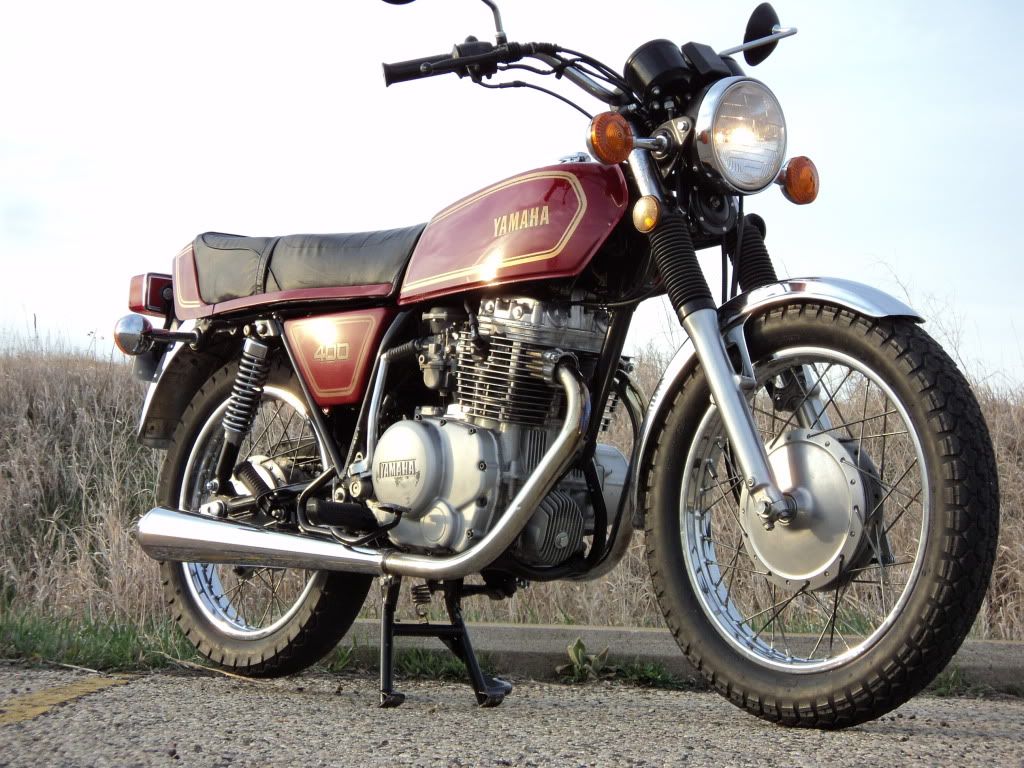
Disclaimer: I don't condone riding on possibly 30 year-old bald tires and using the original rusty chain. Everything was checked for proper torque and chain tension etc. At very last after getting home after dark and after stopping at some out of town friends', I made three 60 mph runs past my house through all the gears then straight in the garage. Don't try this at home. Have a chain (no PBR). Tires, tubes and spoke truing are on the to-do.
Conclusion? EXHILARATING
I made a half-hearted but way too hasty 4-5 hour tear down mainly to check oil passage o-rings and because I re-read in service manual to make sure all timing chain slack towards the tensioner. With left points dead-on LF the right side breakers were fully to the right and still not on the mark.
So I also realized there was something else amiss with the return of burning oil out of exhaust after a servicio de Italiano.
Spent Saturday from 8 am to past midnight and got it started! Sunday got the points and carbs finely tuned and running real good
What went wrong!
Firstly and foremostly I did not have the valve stem seals forcefully press-fit fully down into place
I ended up using another new set of valve stem seals. Taking it apart, time to decarbonize again.
Notice the obvious intake side oil streak from valve guide.
I did check that my valve lapping job and seating still good. After 2 hours with water.

From my half-a**ed attempt I merely lifted the barrels to check the right rear oil passage seal. As a result, oil all over, although it didn't result in any gasket leak from outside of motor. But not good.
Same thing with the head gasket - no pic - but again not leaking from Outside of motor anyway.
I wasn't very happy with the cyl base o-rings i ordered, which were Yamaha parts and the gasket set o rings fit nicely in, whereas these seemed larger and had to TRY to press fit them in (was very uncomfortable with the idea, but worked out. . . so far).
As an upside - i did find an upside to all this - i decided to do a better, if not best, job of cleaning the motor between the fins - that was my Thursday and Friday evenings.
Before and after. Also above pics show them cleaned. THINK POSITIVE!
Here's a stupidness lesson, if you use shoe string to hold up the timing chain, dont torque down all the head nuts on part of the shoe string! Again
I thought it would be gentler than wire, and not scratch any surfaces.
This time I made darn sure every link of timing slack from front side was taken up and even had the rotor positioned two hairs left of the TDC mark. Once tensioner in, then this picture i had the rotor exactly on the TDC line. All 12 o'clock
The new cam seal I replaced by pressing in when motor still together, was still leaking and i was convinced that I hadn't used gasket seal right up to the edge of where it sits. Turns out it goes farther in than i could press it in and triple checked this when torquing the valve cover on. ( also thought not a bad idea to fill the cam lobe baths with oil, which i didn't do before).
Maybe someone knows this, but this time I also used the liquid gasket where the two middle bolts go (#13 & #14).
This just as a reference for myself and anyone who can use it. The numbers are the loosening sequence and couldn't find tightening sequence and not sure, but i tighten in the reverse, starting with 14.
The tach cable seal leaked from when I got it which was quite obvious and don't know why I thought it would be fine
Also don't ask why i took the circlip off since I ended up diging the old seal out. Don't know how to disassemble the tach gear But nice to know it can be best replaced with motor together. I could not get it pressed all the way in!! and inserted the cable and some carefully placed poundings with screwdriver and hammer (worked nice).
Things are starting to look up, and a bit more shiny even (again, coulda done better).
Carbs on, pipes on. Feelin lucky this time round. Just those cyl base large o-rings on my mind at this point.
(also. . . double checking, i discovered one of the carb slides was not lowering consistently smooth. Diaphragm out, the slide was perfect but i had to smooth the bore of it a bit, and good. Feeling even better about the THIRD-attempt rebuilding process.
This is getting long-winded. All assembled, 12:30 a.m., so HERE WE GO. . and . . . awwwwwww
I lost sleep over this. Oil out of both exhausts, looked very, very close to make sure it wasn't from the head gasket. Nope.
Hummed and hawed and just thought, next day- timing, carbs, ride it. I considered the fact that the cylinders are still freshly cross-hatch scratched up from re-honing. . and that the oil seals dont really expand outward so much like the compression rings and POSSIBLY, just MAYBE a tiny bit of oil getting past. I concluded this after examining the plugs after that first start-up and they were just right! There IS hope.
Next day I rode it and better.
Today (Monday) I insured it, registered it, put plates on, and went for a nice ride! A VERY nice ride!!! This evening was wind advisory and 35 mph winds (talk about air-cooled, Ha) and not THE warmest, but tomorrow supposed to rain. I put 19 miles on it . . .AND. . .GUESS. . .WHAT! Not a single oil leak. It ran flawlessly! Not a hiccup, burp, misfire or stumble. And . .. . . Eila is beginning to see the light
And so am I Pics aren't the best, i don't know how to use a camera. I wanted them clear and focused at least so they were taken on a miniature tripod. Can't wait to post better pics in an album.
Disclaimer: I don't condone riding on possibly 30 year-old bald tires and using the original rusty chain. Everything was checked for proper torque and chain tension etc. At very last after getting home after dark and after stopping at some out of town friends', I made three 60 mph runs past my house through all the gears then straight in the garage. Don't try this at home. Have a chain (no PBR). Tires, tubes and spoke truing are on the to-do.
Conclusion? EXHILARATING
Last edited:
 I think this is the part number for the 360/400 tach gear seal: 93102-06254-00, its listed on ebay but doesnt say its for a 250 as well. But I dont think the 250 was brought out in the states so they never seem to mention the 250 compatability.