not so new build restor job

dobbie750

XS400 Enthusiast
Messages
35
Reaction score
0
Points
6
Location
bournemouth
ok so here goes,
been following a few of your resto/ tracker jobs and thought id get involved.
not going to such extremes as many just need to get it to my tastes.
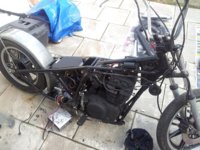
this is what im starting with:shrug: (sorry for bad pics got the bike haome at night)
2011-10-16 19.13.32.jpg

2011-10-16 19.13.48.jpg

2011-10-16 19.14.02.jpg

not a bad starting point but not the best,
am going for the lowrider rat look as shes already only 3.5 inches off the deck.
 
Welcome to the forum dobbie :thumbsup:

Unfortunately mate I've already given someone my spare caliper :shrug:

Look forward to seeing how you progress this with the start you have. Fixing someone else's attempt can sometimes be more hassle than just starting with a stock bike :banghead: but from what I can see on the pictures it looks in decent nick.
If there are any other parts you are after post it here, there are a few UK members now and a variety of spares knocking around between us.

Caddy
 
Looks a good starting point Dobbie, just sent you a PM re:caliper :thumbsup:

better pictures though, hard to see in the dark :D
 
thanks for the warm welcome guys,
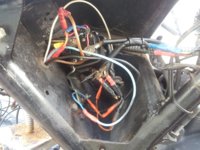
so shitty day yesterday, started to strip the bike down, started with the wiring and oh my god what a fu**ing mess some wires change three time before they reach there destination heres a few pics.


2011-10-20 15.37.13.jpg

2011-10-20 15.37.09.jpg

2011-10-20 15.37.03.jpg

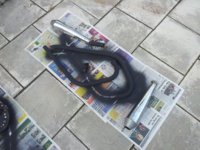
then stripped off the exhaust, used my dads sander to get them butter smooth(sorry dad) and resprayed in vht matt black
2011-10-20 15.36.34.jpg

then took off seat, battery box and exhaust bracketry and gave all that a sand and painted the underside of the seat with gloss black hammerrite, and the rest in matt black bbq paint( very hard wearing and will take heat from exhaust).
2011-10-20 15.36.38.jpg

and then the shit hit the fan:banghead::doh::wtf:
took the front brakes apsrt no problem went to take out the bleed nipple and PING!!!,
the fu**ing thingh goes snap, ok dont panic put a shout out on here, then missus dad comes down and we have a go at drilling it out, going well so far, but realy need a stud extractor, so drive round for 2 hrs on a sunday to find a motor factors, nothing so last resort we decided to go to halfords and spend £20 on a set.
get home and turning by hand its goin well, its starting to ease out then PING!!! the fu**ing extractor breakes off in the hole :wtf::banghead:.

then my savior comes in the form of Drewpy,:D:D:thumbsup::D (big thanks man) as hes got a spare.

will post pics of my fu**ed up one and the good one when it turns up, thats all for now folks.:thumbsup:
 
geez, those 'lectrics are bad, i'd start again from scratch and don't use those preinsulated connectors.

I made a rewire how to on here somewhere.

hope you like your new caliper!
 
sorry not been on posting for a while but work nights and got two small kids so unfortunatly bikes bin stripped and just sitting there in the garden for two weeks doin nuthin:(, ordered all the parts i need, new lights set of ape hangers, load of wiring and solder terminals, new battery, paint, switches, throttle housing, filters, and a few other odds and sods, will post piccie of parts as and when they arrive.
again thanks to drewpy for the front caliper:thumbsup:, when it arrived looking like brand new of the shelf it made the rest of my brake set up look like sh*t:( so the only thing ive done recently is to rubb down the caliper bracket and respray with smoothrite and strip down the master cyclinder,
well thats it for now will post when i have some good news on the parts:wink2:
 
ok so need a bit of help, stripped down the wiring today and started to do new loom, sat scratching my head for about an hour in the pissing rain only to discover it has a starter relay, was told by previous owner that it was kick only and didnt hav a starter motor, now i only want to do kick so can i remove the relay and wiring and also the motor???
any suggestions would be welcome.
 
ok so some bits arrived today and just got round to uploading the piccies
new head and tail lights
20111104_092606.jpg:D

20111104_092617.jpg:D

new bars 13" apes:bike:
20111103_122929.jpg

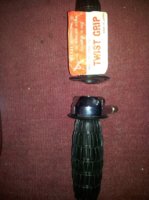
some nice vintage nos dixies balloon grips with internal throttle:D
20111103_123022.jpg

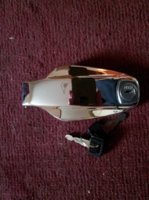
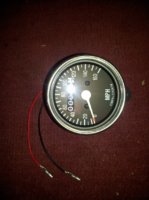
and finaly a new nos gas cap and a new mini speedo:D
20111103_123120.jpg
20111103_123157.jpg

and a piccie for drewpy to show what a mess i made of my old caliper:doh:
20111024_122912.jpg
 
ouch, well seized.

you do realise that new shiney stuff = the rest of thre bike has to be like new and shiney? :D
 
Need a bit of help with wiring, nearly done complete loom all buttoned up and i place but cant seem to find anywhere on the net or in books which wires connect to which tabs on my universal ignition:shrug:, it has for points which are IGN, BATT, ACC, ST, im running kick only and have switches for kill and lights on/off, anyone with any ideas let me know
cheers guys:D
 
cheers but i managed to track down a rough layout plan on ripper1's web page as he's used the same type of ignition,

finaly getting somewhere with the build, mounted all the parts i ordered also fitted hel brake line, and rubbed down and painted the underside of the tank and front fender in satin black ( thankyou poundland ):laugh:, 300ml spray can for £1, got 5 of them to do fenders and tank and to be honest not a bad job really for outside on the patio:D, but then i did used to spray for B.A.E. systems so should know what im doing :shrug:??.
will post pickies when i finish work this week.
 
ok piccies and update time,:D

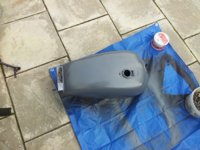
finally:thumbsup:got there have de-rusted and resined inside and filled dents outside and prepped and painted the tank
View attachment 5921

View attachment 5922

View attachment 5923

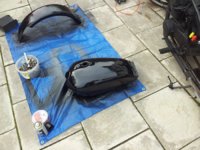
also hammered:eek: back into shape sanded filled sanded primed and painted the rear end
View attachment 5924

View attachment 5925

View attachment 5926

and finished the wiring so all electrics work (with a little help from drewpy,:thumbsup:thanks buddy)
and this evening decided i didnt want to go all black and proceeded to sand and buff the engine cases and fins then started on the starter cover and carbs20111117_162356.jpg

20111117_162650.jpg but this will be an on going thing as really need to get her on the road as sick of walking the 3 miles to and from work every fucking night, so just waiting for the fuel line to turn up and get her taxed and tested
oohh almost forgot also wasnt happy with the pathetic 3" spring so made some risers out of some 22mm copper pipe and some bowl washers, raised it anothe 2", so more comfy for my 6' 3" 17 stone beefyness:laugh::laugh:20111116_103202.jpg:bike:
 
Just a thought on the broken bleeder.
In the Advanced Auto here they have a kit for about $8 that fixes broken bleeders. You drill out the old bleeder, tap the hole for 1/4 pipe thread, thread in the new bleeder seat and voila a brand new bleeder in your caliper.
Find it right on the rack in the HELP section.
Leo
 
thanks leo but all sorted now:D

new problem can anyone help, got her all up together taxed and tested etc...
been ridin her for tow weeks without a problem, and then last week she blew the dip beam and within 5 mins she blew high beam, changed the bulb and first ride she blew both again this time rear went aswell, checked fuse and it was fine (15amp as for front and rear together).
checked all wiring and found a frayed earth where it had been rubbing so replacedit and secuered it, replaced all bulbs took out for a ride today and fine going out to shop but on way home dip beam went again:wtf:, high and rear are fine for now but as work nights lights are kind of important.
anyone with any ideas:shrug::confused: please help.
 
I thought the xs's used 10 and 20 amp fuses.

check your not over charging. In this case higher revs when riding is creating too much voltage!

Check the live wires and switches for pinching etc.
 
Back
Top