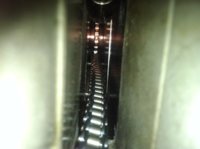
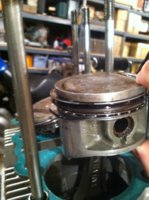
Ok, so the heads must be the problem. You said there is no cam on or cover causing valves to move at this point. The acorn nuts aren't going to make any difference because the difference in height from loose to fully torqued is not significant in terms of clearance unless the head gasket crush rings are totally flattened. The only option is that something is hitting your piston at or near TDC on one side.
Can you read the marks and tell at which point contact is occurring? RF/RT or LF/LT, etc? Can you get a nice clear photo of your head gasket and the valves seated in the heads?
Are your heads on backwards? I have to ask
")