xs400 build - Double Aught Apparel shop bike

TheMainMuel

Cycle Junkie
Messages
113
Reaction score
0
Points
16
Location
Columbus, Ohio
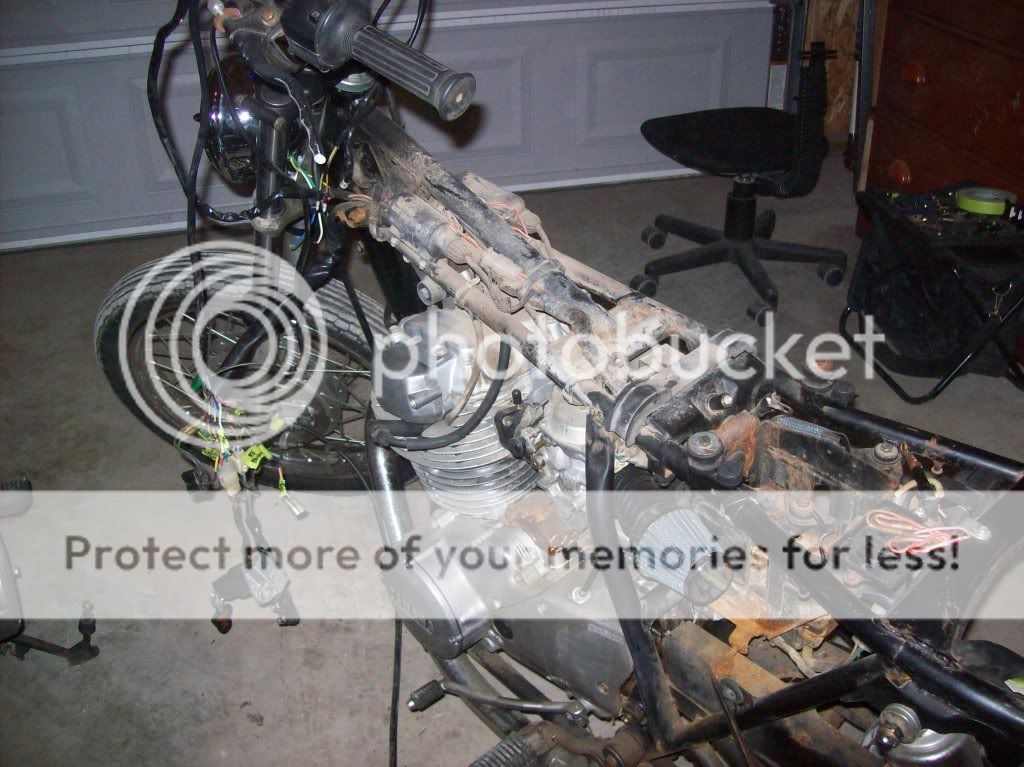
Hey duders. I have been wanting to build a vintage daily rider and have been looking for something with a classic vintage look to it. I also wanted it to have an aircooled vertical twin, chain drive, and spoked wheels. I came across an old Yamaha xs400 with only 7k miles on it. It even has drum brakes front and rear. I went and checked it out and it was in pretty good shape for it's age. It hadn't been ridden in at least 10 years, there was no battery and the tires were dry-rotted. But it had potential, so I worked a deal and brought the bike home.

Here it is in all it's stock glory.

3-11022.jpg


3-11021.jpg


Sweet sissybar!

3-11031.jpg


Those of you who have ever rebuilt a car or bike know that plans change and evolve as the build progresses. I'm sure this will occur somewhat with this build, but as for now, the plan is somewhat of a classic vintage bike. A stripped down, bare-essentials type. Bobbed rear fender, no front fender, no turn signals. Although I plan to keep the swingarm, it won't really be a brat. I'm not hardtailing it or raking it out, so it won't be a bobber or a chopper. I am considering extending the swingarm 3-4” and possibly relacing the rims from 18” front and 16” rear to a 21” front and an 18” rear. Only time and money will tell what exactly happens.
 
Last edited:
yea, gonna be a clean build then if your using it for promo work.

Of course you can show us first the build as it progresses
 
Thanks guys. I'll try to keep it pretty clean. I will be using it for promo, but it's primarily my daily driver. I will definitely keep you guys posted. I was stoked to find a site dedicated to the xs400.
 
Since I'm not a fan of lighthouse size headlights, unless it's on a sweet cafe racer, I decided to replace the stock headlight with a bottom mount I had from another build. I just needed to make a mount for it, so I fabbed one up from the horn mount bracket.

xs400001.jpg


I didn't have the right size of drill bit for the headlight mount bolt. And at 1:30 in the morning and a few beers into a build I didn't feel like driving around to find one. A little ghetto fabulous, but it'll work for now

xs400002.jpg


The placement is good

xs400004.jpg


Still running through ideas for the rear fender

xs400007.jpg


I want something bobbed. I have an FX rear fender I can chop up

xs400009.jpg


The original carb boots were shot. I put some new ones on, cleaned out the carbs and fired it up. She's a runner! I put pod filters on it, so she's running lean. I need to rejet the carbs before she's roadworthy.

xs400008.jpg


Apparently the previous owner made his first attempt at wiring a bike. The wiring on this bike is jacked! Aside from the bike running, absolutely nothing works. No lights, no turn signals, no horn, nothing. He even hardwired where there should have been a fuse box. I'm glad I'm doing a bare-bones bike, it should make this a little easier to rewire. Better break out my free wiring diagram... thanks xs400.com!

xs400011.jpg

 
damn that wiring is a mess lol. but nice job on gettin it runnin! im liking where your headin with this. was the bike dumped on its side at one point? im jsut asking because mine was gouged in the same place it looks like yours is. on the right side cover. its good to have a nice clean slate to start from tho huh. lol
 
The same guy the "rewired" yours must have done mine! Fuse box gone. Just a big wire nut. That got it working so he continued to F more stuff up.
 
damn that wiring is a mess lol. but nice job on gettin it runnin! im liking where your headin with this. was the bike dumped on its side at one point? im jsut asking because mine was gouged in the same place it looks like yours is. on the right side cover. its good to have a nice clean slate to start from tho huh. lol

Thanks!
Yeah, it looks like it was laid down on the right side. The front brake lever was broken and both of the right side foot pegs are bent. And yes, clean slates are great. Once I get it to where I want it, I will strip it down to the frame and shave off everything that isn't a necessity. Then clean it up, paint it and make it purdy.
 
6-19-11

I finished rewiring the bike. No horn or turn signals. Just hi and low on the headlight and my brake/taillights. Eliminated a bunch of…

Picture019.jpg


Got the taillights mounted

Picture016.jpg


I wanted heavier duty shocks than what came stock on the 400. I had a couple different spares laying around and decided to with a set from a Virago. They were better looking, beefier and a little shorter.

Before (stock):

Picture015.jpg


After (Virago):

Picture017.jpg


Got some new handlebars and mounted them up

Picture011.jpg


Picture012.jpg


I had been kicking around ideas for the seat and rear fender. I couldn’t really figure out a way, that I liked, to use any of the rear fenders I have laying around. I originally wanted a drop seat, but have found inspiration in some of the builds I have seen from the WrenchMonkees and also some SR’s from the BubbleVisor blog. I put the SR’s up in my garage.

Inspiration:

Picture006.jpg


I looked at using the stock seat pan, but it was way too bulky.

Picture002.jpg


Picture007.jpg


I love the flat, low profile look of the inspiration seats. I had a little cutting and grinding to do. I know some might not recommend cutting this off because it may affect the structural integrity, but I have been riding it this way for weeks and have had no problems.

Before:

Picture018.jpg


Picture020.jpg


After:

Picture021.jpg


Although I have not yet rejetted the carbs I was able to get the bike to run well enough to ride after a second cleaning. The tires are the originals from 1981 and were, needless to say, in rough shape. I got them to hold air long enough for the maiden voyage though.

I wanted to find a wide white wall for the rear. A friend of mine just happened to have bought a new set of tires for his Harley and was getting rid of his wide white wall Metzlers that were still in great shape. Thanks Jeff!

Picture022.jpg


I have been looking all over for an old school, skinny, ribbed front tire that will fit an 18” rim. I love the Avon Speedmasters, but they only come in 19 and 21”. I could not find the tire I wanted and had held out on buying anything else. Although I should have known better, I decided to ride the bike to work with the original front tire still on. (Kids, do not try this at home) I was surrounded by cars on the interstate heading toward downtown when the front tire blew out. My handlebars were all over the place and I had to cut across three lanes of traffic to make it to the exit. I was going too fast and almost laid it down trying to make the right turn off the interstate. Bad morning.
After work I took a bus to a motorcycle shop just north of downtown. I just needed a tire to get me home. I didn’t have much cash on me, so I asked if they had anything used in an 18”. He looked around in the back and said he only has one. He pulled out an old school, skinny, ribbed Yokohama and said “20 bucks”. It was perfect! I wrestled the new tube and tire back on the rim and rolled out. I great end to a crappy start of the day.

I was hoping to have my bike closer to being done before taking it to the Dice Magazine / Church of Choppers party at Kung Fu Tap and Taco last weekend, but I have been pretty busy with custom orders and have not had as much time as I’d like to apply to the bike. I started making a seat pan out of fiberglass, but only had two layers on. I still went though and had a blast. A lot of cool people and cool bikes. I got to hang out with Jeff Wright (Church of Choppers) and shake hands with Chopper Dave.

I hadn’t ridden two up yet on the bike, so my shocks were adjusted to a low setting. We found out the hard way heading to the party. Every bump we hit, the rear tire hit the seat pan and started to burn through right under my wife. I didn’t have any tools with me either. Fortunately we met a couple of cool guys from Le Mars (home of Blue Bunny ice cream) that were also riding Yamahas. They had some tools and adjusted the shocks for me. One had an xs400, the other an xs650. They built the frames from scratch.

xs400:

Picture026.jpg


xs650:

Picture027.jpg


I’ll post more pics from the party in the events section.

I took a few pics of my bike the way I rode it to the Dice/COC party.

Picture047.jpg


Picture048.jpg


Picture050.jpg

 
Obviously I haven’t had any recent updates on this build. I took a job transfer from Iowa to Ohio at the end of 2011 and left the bike at a friend’s house thinking I’d be back in a few weeks to pick it up. Well, it ended up being a year and a half before I picked it up. I flew back to Des Moines a couple weeks ago and picked up the bike. It’s time to get back to the build.
XS400pickup_zps96418a27.jpg

I tried firing it up, but to no surprise it wouldn’t start. I needed to rejet the carbs anyway so I rebuilt the carbs and rejetted with a 6 Sigma jet kit.
XS400Mikunis_zps676169b4.jpg

I accumulated a few goodies during my year and a half hiatus. One of them being some Firestone Deluxe Champion tires.
00XS400Firestones_zps04a6bc3b.jpg
 
I started working on rebuilding the wheels. Doing a paint and polish, then wrapping them in Firestones.

Front drum before:
FrontDrumBefore_zps56a494de.jpg


Front drum after:
FrontDrumAfter_zpscaeb3ecb.jpg


Front wheel before:
FWBefore_zpsed3c7f07.jpg


Front wheel after:
FWAfter_zps39d37e0a.jpg
 
I'm digging the wheels. I am thinking about mine and I think I'd tape the rim off and paint the rest. You know Just tape off the face of the rim so the inside near the spokes is flat black. Kind of like a trim ring such as on some mid 60's to mid 70's G M's. My 71 Monte Carlo comes to mind.
 
Yeah, that could be cool. Breaking them down the way I did has been very labor intensive. Next time around I might just buy new spokes and nipples and powder coated rims. It would save a ton of time.
 
By the time I relaced the wheels and got the new tires on, I had completely F'ed up the paint. So, I stripped everything back down and did it all over again.

PaintReadyjpg_zps0df78e8a.jpg


After the paint cured I put the front end back together.

FrontEndjpg_zps7278dcc3.jpg


Headlightjpg_zpsdc26f9c1.jpg


Now I have to re-relace the wheels and try to get the tires on without scratching the paint.
 
Back
Top