Carb/Exhaust issues

So it turns out my start button is fine. It's the kill switch that is backwards. From what I can tell, the kill switch is designed for a bike where the circuit is normally open while in operation, then you close it (I assume short the coil) to shut the bike off. The xs400 apparently needs a closed circuit to run. I turned the switch to the off position and pressed the button just to see and Voila! it turned right over.

However, now I have a problem with my headlight. It was working then it just stopped. I went all the way back to the relay. I couldn't find a 12V charge to the relay so my first thought was it must be a fuse but all my fuses are fine. I had to buy a relay for it a few months back as well so I wonder if something is killing the relay as well. Anyone ever had a problem like this? Could anyone tell me what color the wire is that should be providing my 12V constant? The wire running to the headlight is blue/black.

Also, I sill don't have any clue whats wrong with my turn signals, they just won't work. I grounded that yellow/red wire just to see what would happen and something under the seat just started freaking out like it was clicking but so fast it sounded like a buzz, even after I pulled the wire off. Once I shut the key off and turned it back on, it was fine. Any ideas? Did I break something?
 
Did you check the wire going to the fuse box for headlights? If everything before that looks good, that's the last thing to check, then chase that wire to its beginning. Did you check hi beam? My light failed one day (h4) and I was concerned until I saw the high beam works no problem, it was my bulb. That's all I've got at 640 am.
 
That's what I was trying to do but with 3 other wires, I'm not sure which one goes to the fuse. I will rip up more tape and see if I can get a better view. I'm not even sure it has a fuse. The PO made 4 fuses, 30A main, two 15A, and one 10A. I know one 15A is on a light brown wire that goes to my headlight bucket but it's not attached to anything:confused:. the other 15A blew last night when I was messing around with the wiring near the tail light, and I'm not sure what the 10A goes to. The main was just twist tied and taped:yikes: so I soldered that but I haven't delved into the rest of the fuses much.
 
No he didn't. He got the inline blade fuses from the local auto parts so the fuses aren't enclosed or mounted to anything. Would the headlight be on the same fuse as the tail light?
 
It sounds like your PO was over-fusing to either mask problems when selling the bike, or to avoid having to fix them - gambling that he would manage to stay within the added safety margins on each circuit.
The main should be a 20A and the other 3 should be 10A.

If he didn't follow those specs, then you won't be able to count on his having wired anything else up correctly either. I wish I knew how the wiring actually worked so I could actually help but general theory and the basic rules are all I know.
 
I finally got my wiring fixed after removing all the protective tape. The headlight ended up being a fuse after all but the my blinkers went all caddywampus on me. I first had trouble getting them to work with my new switch. Racked my brain on that for a few days until I looked at the wiring diagram (instructions... who needs em'?:banghead:) and figured out that there is a neutral that goes to the canceler. I tried to Macgyver the bronze tab back into the new switch but that didn't work. Then I found the forum about bypassing the canceler all together. DO NOT ground the the green/yellow wire on the flasher relay for future viewers. After all that, I still only got one side to work so I changed the relay with a autozone cheapo. both sides worked great...for a minute then one back light stopped blinking. Somehow (and I'm still not sure how) the ground from the light bulb didn't have connection to the stud of the signal mount even though it's one solid piece of metal:confused:. So I took a 3" piece of wire and jumped the ground to the stud. Works fine now. Now it's finally back to getting my bike started again.

Lights - check
Carbs cleaned - check
gas tank painted - check
all put back together - NO GO HOUSTON. I REPEAT NO GO.
 
Sounds like a real rats nest! Glad you got it figure out. These bikes have a relatively easy loom to replicate, and there are some good how to's. I haven't done it, but aspire to it in the future as the cosmetics of my bike undergo some changes. Cheers
 
Yeah, the thought of rewiring my bike did run through my head a few times and I probably will some day but I have a feeling an undertaking like that would take me months. It's hard enough getting out there to work on it 2-3 hours a week. It ranks right up there with redo stator connections and replace engine gaskets. For now, it's all about cleaning the carbs :thumbsup:. Besides I need to get a little return on investment before I start any mire projects.
 
BTW, the $6 blinker relay from autozone was plug and play even though it was only 2 tabs instead of three. I know a lot of people on other forums have that question a lot.
 
Okay, so I finally got the bike running again and I still have the notorious 4000 rpm high idle problem when it warms up. After extensive research on here, I have cleaned the carbs 3 times (by hand, boiling, and yamalube cleaner), changed the floats and set them, new needle valves, butterfly valves, mix set screws (set to 3 turns out, new carb boots, put the H-pipe back on with uni pods, adjusted valve clearance, and changed the oil.

Next up on the list is to check the carbs for more air leaks with some carb cleaner. I'm going to change out the choke plungers just to be safe. Last up, I guess will be to clean them again and rejet. Earlier in the posts, xschris suggested 142.5 mains and 45 pilots jets for my uni pods on the H-pipe and modified mini mufflers. I'm going to order them now along with a few other sizes to be safe I got 142.5 through 147.5 mains and 45 and 47.5 pilots.

I will probably need some pointers as to what kind performance I should be looking for and troubleshooting the new jet sizes. I am also going to put my new plugs in so I can tell how its burning easier. Any pointers anybody can give me before I start?
 
You know I bench synced them when I put them back together but I forgot to sync them after I installed it. Would that really be enough to cause the high idle problem? I suppose I could try tonight and see what happens

It is possible to have a high idle due to undersized jets, right? Because other than that, it runs great in all rpm ranges.
 
Out of sync carbs will cause those issues also. But yes too small of a pilot jet can lean it out for a high idle. Make sure the throttle cable has a bit of slack in it and with the bike warm set the idle down to 1200 rpm then sync. If after the sync if it still hangs at a high idle go up on the pilot jets. Just to be sure, you have checked the diaphragms for holes and made sure the valves in the motor are set correct.
 
Last edited:
Valves were good, and the diaphram passed visual inspection. Is there another way that I should be testing them?

The more I think about it, the more I think it's my pilot because of the exhaust and the pods. I read other posts on here about people with the mini exhausts running much larger jets. I am also in denial that my carbs are dirty :D.
 
To test diaphragms rise the slide with one hand and the with the other place your finger over the venturi hole. If the slide stays or falls very slow it's ok. If it fall fast then it has a hole or bad seal. Both carbs should act about the same.
 

Attachments

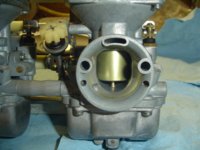
  • DSC02410.jpg
    DSC02410.jpg
    176.4 KB · Views: 251
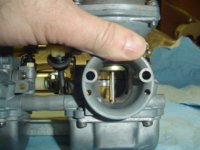
  • DSC02414.jpg
    DSC02414.jpg
    165.5 KB · Views: 274
Okay so I tested them like you said Chris. They both hissed and came back down within 5 seconds. upon taking apart the diaphram, I noticed there is an open hole inside the bronze cylinder. The washer screws in with two screws then there is a hole. Is that hole supposed to be plugged somehow because I'm 95% positive that's where the hissing is coming from and why my diaphram is falling.
 
No, the hole in the slide is supposed to be there. It controls the lifting of the slides. Sounds to me like your diaphragms are either not sealing or have holes. Inspect them carefully with a bright light behind them to find the leaks. They can't be repaired. JBM Industries has replacement diaphragms that will work. Measure yours and order a pair in the correct size from them.
 
That hole should be there. Check the diaphragms for any cracks in the lips or if the metal slide spins in the rubber at all. Hold them up to a bright light to see if any light comes through. This will show if there is any pin holes. The only other thing is your choke plunger or assembly could have a leak. Make sure it's off and fully tightened into place when testing the diaphragms. The slides will fall but it should be slow.
 
Back
Top