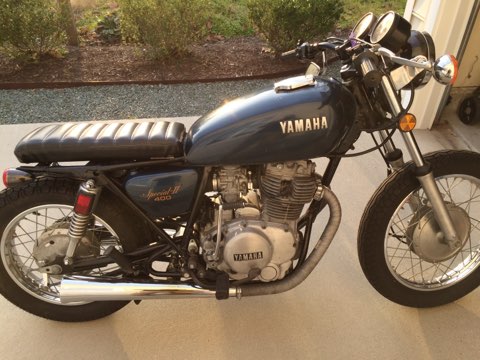
New to XS member, project bike excited to wrench

buztabuzt

XS400 Addict
Messages
249
Reaction score
31
Points
28
Location
Mid Atlantic, US A
Hi all and preemptive thanks for the wealth of info on here. Have been reviewing the tech refs section and trying to decipher manual diagrams :)

This XS400 special is my 3rd bike, sold a GL1500A after a bucket list trip and have a 98 Magna so I'm neither well versed nor totally inept. Apparently the XS "died while running" a few months back, and after replacing stator he’s given up (2 owners back was guy that cafe’d it). I figured it would be a good learning project, albeit more tasks than I wanted.

The Good:
- Price was right. Has all guts, minimal rust. No tank rust. 10k miles.
- Compression at 145 psi, slightest bit low but found threads saying should be sufficient. Haven’t added teaspoon of oil or trans fluid to try to up it

The Bad, WTFs, and my priority list for coming months:
- Showing no recognition of electrical life. PO is surprised by this and thought it was just battery in need of a charge. But with battery on tender or using my spare batt, nothing lights up with key turned on. I’m assuming worst, that I’ll have to retrace everything but weird turn signals, headlight show nothing. Fuses are fine
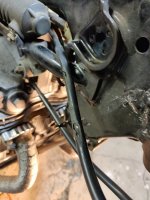
- He tried replacing stator, no telling if it works or if properly hooked up. Has a cockamamie elec wire dangling below oil pain, with frayed sheath, now at 90deg angle
attachment.php

- Has 2 rear red lights. Apparently, they are wired to act as turn signals, unless braking, in which case they light up as brake lights… and over-ride turn signal?!? I’ll go ahead and lose some major cool points by wiring up a dedicated brake light :wink2:

- tank gasket looking shot?
attachment.php

- Tires (around 90% remaining) are manuf 2011 and 2012. No signs of dry rot, stored in garage, but probably worth replacing once running
- Side rearview was attached below bar, so every left turn it was banging into tank to compliment a few other gouges to tank paint
doh.gif

- clutch has so much slack it doesn’t engage, apparently never readjusted after he replaced stator.
- Replace electric starter (allegedly, only kick was working)
- Drilled out OEM mufflers... No idea if rejetted
- Front tire swap for disc break

That’s the starting point, any suggestions certainly welcome! I suspect i'll be looking into fuel delivery as well but starting with elec, since it just might help generate spark :) Thanks again for all the great resources on here and manuals :thumbsup:

full
 
Last edited:
Welcome. You can do some tests with a voltmeter. That wiring doesnt look too good though and Id redo it. Its not an easy job, but it isnt the hardest Or you can just buy used replacements. All those wires need to be clean and dry and have a good jacket. You might be OK and only have to clean everything and get the wires covered up. Could also be a bad connection somewhere that just needs a tight and cleaning.
 
Thanks. I've eyed Drewpy's stellar write up on the rewiring, hoping I don't have to go that far as to redo everything but time will tell. Read that kill switches often corrode so will check that to start to see if it is powered and generally attack all over with a multimeter.

Forgive my ignorance, I've never owned a kick starter bike... but even if starter motor isn't hooked up, headlights and signals should still work when key turned to on, correct?

Is there any harm in cranking it to test it before checking timing and valve clearances, once I get electric sorted?
 
Last edited:
Some lights should turn on. Headlight probably won't until the bike is running. Yours probably has a headlight relay.

The glass fuse holders can get a layer of corrosion too. Fuse can be good and inserted but still not conduct.
Test across the fuse holders rather than the fuse if you have a multimeter.

You can rotate the crank to set timing and valve clearances. Use a 17mm socket on the crankshaft under the timing cover.
 
Study the wire diagrams and make notes. Wiring on these bikes is very simple and color coded.

It might be easier to just start with wiring up a new fuse box of your choice. A lot of members update to mini blade fuses. You wont need to modify the factory harnessto do this either. You will only have to take the harness plug on the fusebox side and retrofit the new fusebox with the plug.

My bike is a bit older, so it doesnt have daytime running lights or anything special like that. I have an on/off switch for lights.

My bike has an E-start. Ive used it maybe 5 times over 3 years. Its always a last resort for me since I have a downsized battery. Its only a harder to start when its below 50 degrees Fahrenheit. Thats WITH a points ignition. I had more difficulty when I had an electronic advanced ignition installed.
 
A bit of a side note, but I don't find the manual to be very well organized by MammaYamma circa 1980. It has supplements for different models, but each supplement contains slightly different info?
The 400S/SH at start discuss carb fuel level; the 360C section discusses carb synching, mixture, and screw adjusts. Neither discusses points timing, valve check procedures in any real detail I saw.
The 400G discusses neither - I presume it is implied to base it off the 400s/sh info but that's my interpretation. Ultimately will be trial/error/testing to determine best tune... but still found it a bit ambiguous. Luckily there is boobtube. On the other hand, the manual does document well the individual model wiring diagrams, valve specs, and stopping/accel info (for what that's worth).
 
Thanks - that manual is better. I just got excited when I saw the official Yamma one has easier to decipher pictures and in one file. I haven't dedicated the time to wrench yet, just trying to read whenever i have a moment. Back to haynes it is!
 
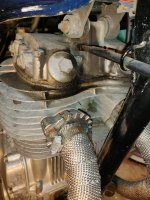
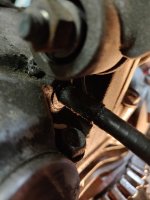
Just starting to get into electric today and don't know how I never noticed this oil on front right before. Just above exhaust head... Seems to be coming from Tachometer cable point (black cable towards top of photo). Is there any way to tighten or secure the connection? It seems to have a few mm free play... I'm assuming small JIS screw to side is the one in need of attention .
 

Attachments

  • IMG_20190217_133137.jpg
    IMG_20190217_133137.jpg
    247.6 KB · Views: 433
  • IMG_20190217_142250.jpg
    IMG_20190217_142250.jpg
    129.5 KB · Views: 395
Last edited:
Thanks! Found Tachometer parts diagram to confirm suspicion. There's supposed to be a 'circlip', housing, washer, and oil seal, in theory. Will pull apart and see what's missing (something is or else just loose), thanks for the pointer!
 
You will need to replace the seal to fix the leak. I would clean everything and ride the bike for a while. Then you can see where all the leaks are. Then you can order all the stuff you will need before you take it all apart. For what you will need to take apart to get to the tach seal it's a good time to replace the cam seal also.
 
Made some progress... quickly learning not to trust POs mechanical work (not that I'm a wizard). Realized what I thought were my JIS are Posidrive, so called a timeout. Main 20A main fuse was the reason for no elec life. Looked FINE in glass window but the end piece burned out a hole! Eventually will replace with blade box (after it's running). New glass fuses I got are longer length than the old fuses but still make enough contact to recognize key.

Not imminent priority:
  • Tach, Cam, Air Filter seals/gaskets after seeing some life in her. Air filter gasket is cracked moderately
  • Install rear turn signals separate from brake signals, replace broken license plate light
Priorities
  • Topped out at a resting 12.6V after a thorough trickle charge. Thought I might get by without replacing it. After fuse replacement, the brakes, horn, right sig worked. Assuming turn button needs cleaning/grease. Fixed rear brake light connection (unhooked bullet connectors :shrug:). Key on and Voltage drops to 12/ below 12 just with running lights on... Headlight stays off - thinking it's new batt time.
  • Investigate hanging, partially stripped wire below stator
  • Rear Shocks are set to the 2 Extreme Opposite settings. Maybe PO had a heavier right half of his body? :shootme:
Questions:
  • Can someone advise on WHICH 2 contacts to cross w/ screwdrive to start the Hitachi solenoid? As I see it, there are 3 connection points on it. 1 Goes to battery POS, 1 goes towards starter/stator bottom left of engine, 1 seems to be switched power disappearing up the main harness. Any easy way to test solenoid? The stator destination wire has ground continuity, battery connect is 12V, the switched appears to be sub1V when key on.
  • Presumably wise to replace clutch cable if stripped sheathing? If anyone else wants to emulate, just wire throttle and clutch on top of chassis so the tank tears it to pieces every time you turn and cables slide :doh:
  • Is it idiotic to try to start after cleaning connections on bars? I plan to check pt gaps, timing, valves, and clean carbs. But tempted to try turning over first if it wouldn't do any real harm. Tank has no rust and gas doesn't smell off. Could easily replace gas but no idea how carbs are lookin yet.
  • IMG_20190217_142854.jpg
  • IMG_20190217_141654.jpg
 
Last edited:
Can someone advise which 2 points on solenoid need to connect to get the starter to trigger?

I cleaned all control contacts today and the expletive starter switch wire popped off . Had to re solder it.

Then when you try to screw start switch back down it refused to stay squished against the tail end, there's a TINY ridge it seems is supposed to keep it from pushing freely back into housing which the switch is all too happy to push past... :eek: Picture worth 1,000, ridge around yellow arrow:
IMG_20190219_164850__01.jpg
 
Last edited:
If you have painted bars you need to remove the paint where the left and right switch controls touch them. The right one grounds through the bars to the left one which is where the ground wire is. Without this your e-start will not work.
 
thanks Chris. It is strange to have a 1 wire "switch". I read you had posted they needed to be grounded in another thread and figured it to be the case although I couldn't make sense looking at it how depressing it actually grounded it. It doesn't seem to go close to physically touching the bar. I guess the screw grounds the control. That damn gold looking bar circled in my last post LOVES to jump out of the ridge though - then it doesn't properly resist being depressed to close the circuit

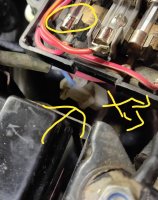
I may try to temporarily rig it with test wires to run ground continuity through the switches to try and trigger it. I also traced the blue/white wire to under the fusebox, where there is a 2 into 2 connection and it swaps the connection with a red/white wire. This looks like stock wiring and is consistent with the wiring diagram... but damned if it isn't perplexing to look at. Picture shows this connection point (unplugged when i tested for continuity) as well as how the new glass fuses are oversized for 1980 standards :laugh2:
IMG_20190219_181400__01__01.jpg
 
I suppose the exterior circular grooves are the best place to ground the controls by filing and sanding off paint? Will certainly leave those areas prone to rust but such is the sacrifice for e start on a 40 year old bike with aftermarket bars?
IMG_20190219_173727__01.jpg
 
Some progress, some setbacks. Valves adjusted, only .001 tight on left and right all good. Air filter H boot kept sliding off on sought movement, finally firmly attached. Starter button on order since plastic flange has broken off. Adjusted clutch but very taught even for 80s bike. Will probably just replace.

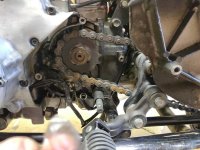
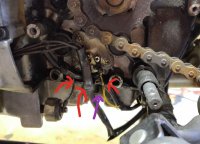
Realized the sprocket cover was pinching wires. Probably not ideal. I'll likely have to replace all of stator wire harness but not sure what the blue wire to left is that is pinched and doesn't have enough slack to run through the opening.
IMG_20190302_174033.jpgIMG_20190302_174027__01__01.jpg

Trying to get it to start still, knowing I'll probably need carb work tho. Is it normal for neutral light to go off after giving her a kick over? Headlight comes on and neutral goes off.

I get spark but not sure it's getting fuel. I tried checking gas flow with tank on the bench. Flows freely on prime as it should but nothing seems to come on reserve or on setting. Anything special about routing hose? Hoping the petcock isn't shot...
IMG_20190302_190256.jpg
 
Last edited:
That petcock has to go, unless you plan on doing a factory restoration. It should work fine when its on the PRI position though.

To check for fuel, you can open the drain port in the 2nd cylinder fuel bowl and see if both carbs are filling up.

Adjusting the valves by .010” seems like thats a lot... a normal adjustment would be .001” or .003”

Try pouring some gas in the spark plug holes.

The carbs have to be super clean and you cant have any chance of a vacuum leak at all..

I always buy extra gaskets for the intake tract as well as spare intake boots.

If you get spark, you should almost always get some sort of kick even with the timing off. From there, it comes down to your ignition/points and fuel.

Getting the carbs cleaned as much as you should is often overlooked as well. It should be #1 on everyones list. Its also something that is not easy and not for your average tinkerer.
 
That petcock has to go, unless you plan on doing a factory restoration. It should work fine when its on the PRI position though.

To check for fuel, you can open the drain port in the 2nd cylinder fuel bowl and see if both carbs are filling up.

Adjusting the valves by .010” seems like thats a lot... a normal adjustment would be .001” or .003”

The carbs have to be super clean and you cant have any chance of a vacuum leak at all..
I always buy extra gaskets for the intake tract as well as spare intake boots.

Getting the carbs cleaned as much as you should is often overlooked as well. It should be #1 on everyones list. Its also something that is not easy and not for your average tinkerer.

Thanks Mike.
edited post. .001"! .01 would've been a problem :) Had already ordered new carb boots because the ones on it look like they've been epoxied over with black tar to try and patch up what must have once been a leak.

I'll search the forums for any discussions on fitting a new petcock into the existing opening, appreciate any advice on fitment and replacement model. I'll look for a diagram, but assume the cyl 2 drain port you are referring to is the screw at the bottom, opposite side from the petcock infeed.

Does the neutral light normally go off after trying to kick-start? I wouldn't imagine it should...
 
Back
Top