jmd_forest
Bldg 1980 XS400 Cafe Bike
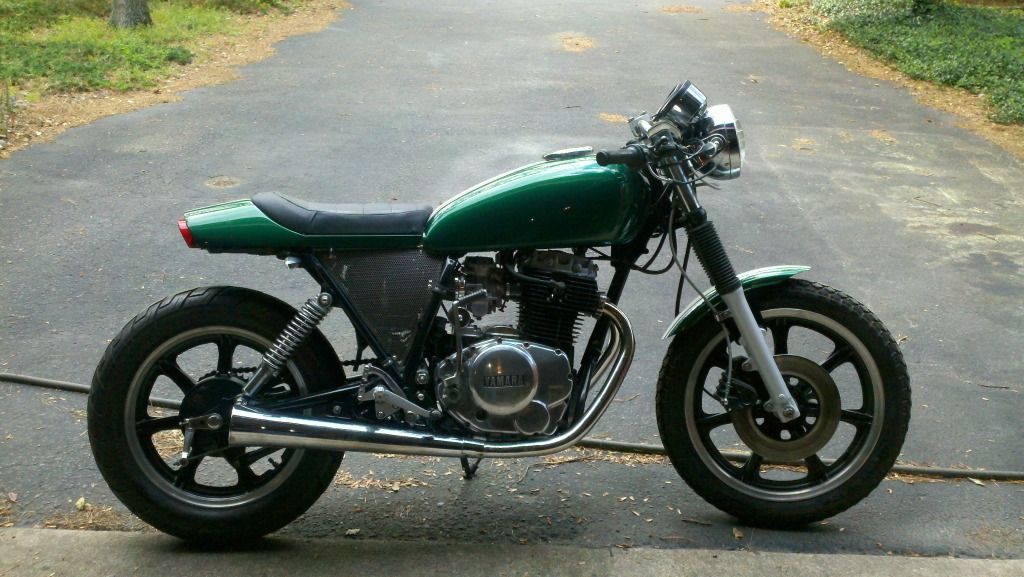
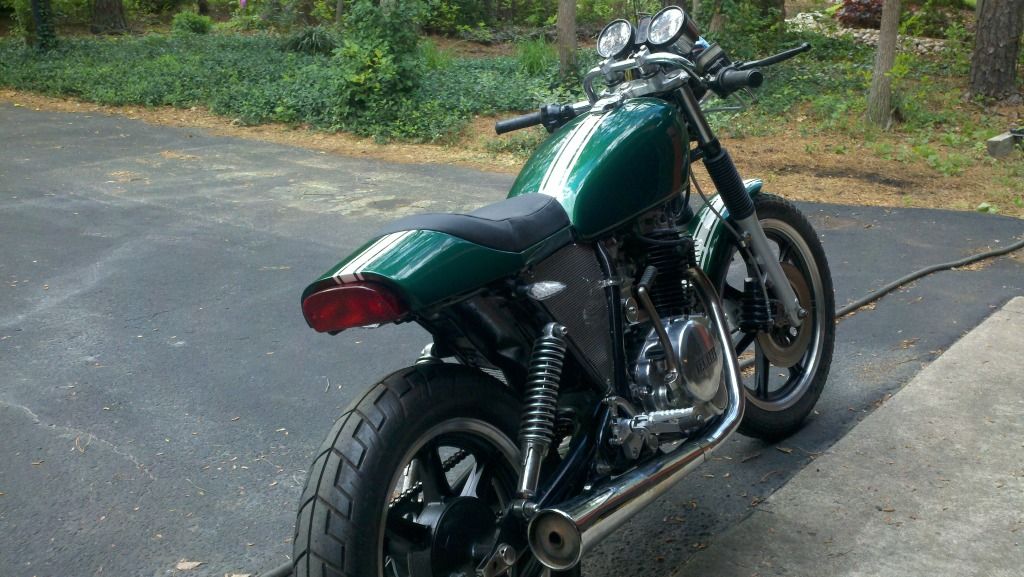
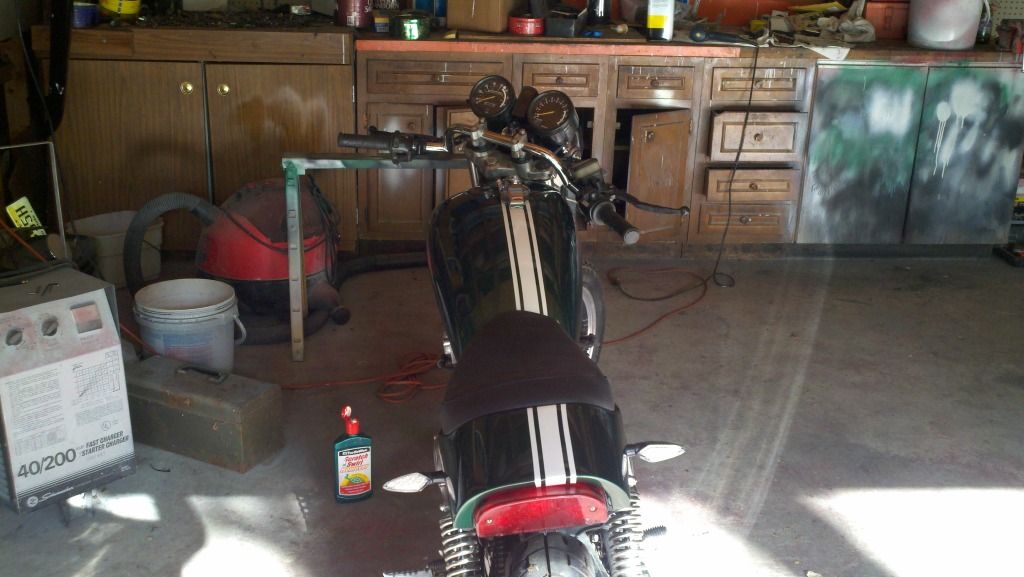
Last sumer my son caught the bike bug. Since he was attracted to the vintage cafe style rather than the modern streetfighter look, for Christmas he got a 1980 XS400 Heritage Special I picked up on ebay for $440. Needless to say it was pretty rough and barely ran. Although luckily, his Dad (me) has pretty decent auto body and mechanical skills, his design skills are lacking so we searched the web looking for a build we liked and settled on emulating the 1981 xs400 built by Bare Bone Rides. Many thanks to the guys at Bare Bone Rides for taking time from their business to answer questions and provide guidance. Also thanks to the many members who helped me through answers to my many posts.
The following is a quick run down of the build:
1) clean and rebuild carbs to get engine running well (float valves and seats, idle mixture screws, seals, washers, throttle shaft seals)
2) polish carb hats
3) set timing
4) chop frame aft of shock mounts
5) fabricate tail light mount for Suzuki VX800 tail light
6) design new seat pan (metal cutting done by local sheet metal shop)
7) weld together seat pan
8) fabricate new shock mounts and weld to frame
9) trim covers from stock rear shocks
10) fabricate rear set mounts and weld to frame
11) modify FRZ600 rear set to mount upside down
12) completely disassemble bike to bare frame
13) detab frame and grind smooth/remove center stand
14) drill out original foot mounts to allow switch back to original footpegs if desired
15) rebuild front caliper
16) rebuild Master Cylinder
17) replace front brake
18) replace rear brake pads
19) replace front and rear wheel bearings
20) wet sand and paint frame
21) paint front forks with 3 stage platinum
22) wet sand and paint controls, battery box, caliper, horn, bottom triple tree, instrument mount
23) strip and polish top triple tree
24) replace missing steering ball bearings
25) paint wheels
26) install gaiters/dust covers
27) polish chrome and paint with clear
28) install clubman bars
29) degrease and paint engine cylinder and block
30) polish aluminum engine casings
31) lower batter box 3/4 inch to clear new seat pan
32) repair butchered sections of wiring harness
33) install new rectifier and regulator
34) smooth and fill tank eliminating emblem indentations
35) cut down stock front fender to "shorty" and fill as necessary
36) primer seat tank and fender with DTM epoxy followed by high fill 2K
37) install led signals, modify instrument indicator circuit using diodes to eliminate need for ballast resistors (much fun to finally get working right)
38) fabricate side panels from perforated stainless panels
39) modify vx800 tail light to accept triple LED bulbs for extra brightness
40) fabricate seat cushion "pan"
41) cut down factory seat foam for new seat cushion
42) paint seat tank and fender with metallic green base/clear
43) fabricate seat cover
44) install seat cover over foam onto cushion "pan"
What I had originally expected to be a "bargain basement" build actually wound up costing right around $1600 and about 500 hours of labor.
This was our first bike build ever and absolutely ALL of the work except for cutting the metal for the seat pan (local sheet metal shop) and creating the seat cover (family member who can sew) was done by my son and I, although I wound up doing the bulk of the work when he went back to college after Christmas break. He'll be home in just a few days with a practically brand new cafe racer to enjoy over the summer.
Just a few odds and ends to tie up: the baffles in the right side muffler rattle so it needs to be replaced and the Yamaha "tuning fork" emblems just came in today and need to be applied to the tank.
An entire pictorial of the build can be found in our Photobucket album at: http://s256.photobucket.com/albums/hh196/jmd_forest/1980 XS400 Cafe Racer Build/
Heres a few pictures of our build:
Last edited:
