cool frame build, that neck looks like it might warp on you. any issues there?
-
Enjoy XS400.com? Consider making a donation to help support the site.
XS400.com receives a small share of sales from some links on this page, but direct donations have a much greater impact on keeping this site going.
You are using an out of date browser. It may not display this or other websites correctly.
You should upgrade or use an alternative browser.
You should upgrade or use an alternative browser.
A new build of (somewhat) EPIC proportions! My '78 XS
- Thread starter Lone Vagabond
- Start date
-
- Tags
- bobber fabricating
Lone Vagabond
XS400 Enthusiast
Forgot that I'll need a few things from you travis. Look for a Christmas-time email from me.
Lone Vagabond
XS400 Enthusiast
drewpy, what do you mean?
drewpy, what do you mean?
when you weld the neck, it has a tendency to warp due to the heat needed. the frame jigs I've seen in the uk have a beefier mount to absorb heat and help prevent distortion.
Lone Vagabond
XS400 Enthusiast
oh... I didn't know if you knew of a type of warping or a direction of warping that is typical. I now realize that it would be hard to predict in what direction it would warp.
Do you happen to have pictures of a neck mount from a jig you are thinking of?
Thanks drewpy.
Do you happen to have pictures of a neck mount from a jig you are thinking of?
Thanks drewpy.
Last edited:
oh... I didn't know if you knew of a type of warping or a direction of warping that is typical. I now realize that it would be hard to predict in what direction it would warp.
Do you happen to have pictures of a neck mount from a jig you are thinking of?
Thanks drewpy.
its not an exact science, depends on heat applied etc.
All i can say is, the more its supported and less heat applied reduces the risk of any warpage. some folks just weld it and take it to a frame aligner and adjust it that way
That frame is looking good! Are you going to do the whole thing over in DOM or just go with what you have?
Regarding the neck and neck fixture... it looks like you could move the upright for the neck fixture to the rear, then move the neck fixture up. You should be able to reduce the amount of threaded rod exposed between the lower neck cone and the pivot point to almost nothing. That should stiffen things up a bit. Most jigs are more for squaring everything up and holding things in place rather than to prevent warping. As long as you weld evenly on both sides you shouldn't have to worry about it twisting side to side too much. I would worry more about the neck coming out of round. You could use a thicker neck and turn the inside of the ends where the races will seat. Even though you need to be concerned with too much heat for warping, you'll definitely want to make sure you have enough heat. The neck is the most critical part of the frame. If the neck is thicker, you might want to pre-heat it before welding. That will help with the weld between the neck and the thinner backbone and down-tubes. From what I understand, it will also help with warping. I may be preaching to the choir with my welding tips, but it might help others.
Yeah I run XS650.com, this site, and CB750.com. The Honda CB750 site is the newest of the bunch. They all take quite a while to get going. Once they get somewhat established then they really seem to take off, but you are right in that it could really use a boost! Anything you can do to help would be great including Facebook promoting. Even just posting links to your build around the web helps a lot. I definitely need to spend some more time with the site and with my CB750. Be sure you don't miss out on the CB750 Supply gift certificated giveaways that they post every month in the shops section on CB750.com.
What did you figure out about those dowel pins? It seems a lot of these engines have those locating pins. Did you figure out if they are somewhat universal?
I look forward to it!
Regarding the neck and neck fixture... it looks like you could move the upright for the neck fixture to the rear, then move the neck fixture up. You should be able to reduce the amount of threaded rod exposed between the lower neck cone and the pivot point to almost nothing. That should stiffen things up a bit. Most jigs are more for squaring everything up and holding things in place rather than to prevent warping. As long as you weld evenly on both sides you shouldn't have to worry about it twisting side to side too much. I would worry more about the neck coming out of round. You could use a thicker neck and turn the inside of the ends where the races will seat. Even though you need to be concerned with too much heat for warping, you'll definitely want to make sure you have enough heat. The neck is the most critical part of the frame. If the neck is thicker, you might want to pre-heat it before welding. That will help with the weld between the neck and the thinner backbone and down-tubes. From what I understand, it will also help with warping. I may be preaching to the choir with my welding tips, but it might help others.
...
So I'll be starting a new thread over at cb750.com. Man we need some more traffic over there.
Any way I could help do some marketing for the cb board? Get some graphics around or do some FB promoting? Travis, I see you at each board and I'm guessing your the main guy so those questions are in your direction
...
Yeah I run XS650.com, this site, and CB750.com. The Honda CB750 site is the newest of the bunch. They all take quite a while to get going. Once they get somewhat established then they really seem to take off, but you are right in that it could really use a boost! Anything you can do to help would be great including Facebook promoting. Even just posting links to your build around the web helps a lot. I definitely need to spend some more time with the site and with my CB750. Be sure you don't miss out on the CB750 Supply gift certificated giveaways that they post every month in the shops section on CB750.com.
Gonna start putting this little sh!t back together soon. While tearing down the engine I bent some of the dowel pins that help guide the main motor components. In the main motor portion of the Hanyes manual the part is on page 25 and is item 6 in the diagram.
Are these a Yamaha standard? If I order some would they have to be XS400 spec?
Thanks for the help!
What did you figure out about those dowel pins? It seems a lot of these engines have those locating pins. Did you figure out if they are somewhat universal?
Forgot that I'll need a few things from you travis. Look for a Christmas-time email from me.
I look forward to it!
Lone Vagabond
XS400 Enthusiast
Travis,
I'll take all of the welding tips that your have! I am an aspiring welder! Sent you an email back about the Jig BTW. Also, what would be the best machine to go with?
MIG or TIG?
I'm proficient at MIG and have yet to learn TIG but this kind of thing I pick up fast. Would I be able to do frame building well enough with MIG? I know it is much more gentle on the pocketbook.
Should I invest in a Miller/Hobart or Lincoln or do you guys think could I get away with a Campbell MIG from menards for the time? I also have to weigh my desire to do it right the first time with what I can afford without taking a loan out. And the only reason why I consider a loan is because I want to make a small business out of this. Just what word of mouth will support. More of a self sustaining hobby really...
I haven't found anything out about the dowels as of yet. I'll be going into the local repair shop and will be asking. I don't know if you know about this Drewpy?
Last edited:
TIG is more adaptable, welding steel, aluminium, etc., but it is difficult to master. Can you tap-dance while chewing gum, patting your head and rubbing your belly? All to the beat of the music?  Holding the electrode at the correct height, adjusting the pedal and feeding the rod all at the correct amounts is challenging to say the least.
MIG is much easier to get learn, especially if you have a good ear for the sound the arc is making. Once you have learned the right sound - a steady hiss/sizzle, you can make nice welds.
Dave
MIG is much easier to get learn, especially if you have a good ear for the sound the arc is making. Once you have learned the right sound - a steady hiss/sizzle, you can make nice welds.
Dave
Lone Vagabond
XS400 Enthusiast
Haha, thanks Dave. I actually tried all of that and I can do it!
I guess I'm asking for financial advice more than anything.
I guess I'm asking for financial advice more than anything.
Lone Vagabond
XS400 Enthusiast
Its been a while since I've posted an update on the bike.
I just picked up about everything I need to rewire the bike. I'm going to keep it simple and run 12, 14, and 20 gage dependent on the load. I'll probably do a short write up once I get around to it.
So I cut up the frame. Like the pictures show before. I'm having chopper's remorse. haha. Now that I'm past a point that I cannot turn back from I'm thinking I should have done a tracker and just cleaned up the frame. How many just though "I told you so" ? I'm thinking it myself.
Guess at this point some other view points would be helpful.
Where would you take the bike if it was at this stage?
Bobber? Chopper? Weld the frame back together and go tracker?
Also check out my cb build over a cb750.com. Same name over there. Beautiful BC
Now it's time to update that thread. See you over there.
I just picked up about everything I need to rewire the bike. I'm going to keep it simple and run 12, 14, and 20 gage dependent on the load. I'll probably do a short write up once I get around to it.
So I cut up the frame. Like the pictures show before. I'm having chopper's remorse.
 haha. Now that I'm past a point that I cannot turn back from I'm thinking I should have done a tracker and just cleaned up the frame. How many just though "I told you so" ? I'm thinking it myself.
Guess at this point some other view points would be helpful.
Where would you take the bike if it was at this stage?
Bobber? Chopper? Weld the frame back together and go tracker?
Also check out my cb build over a cb750.com. Same name over there. Beautiful BC
Now it's time to update that thread. See you over there.
Lone Vagabond
XS400 Enthusiast
Things I'm thankful for beyond family, health, blah blah blah... are:
I was laying around last night thinking it was super late because how dark it was outside. I was getting stir crazy and realized it was only 9:30! Yippy! I could work on the bike. So I did.
Did some research on DIY soda blasting and found This.I found it on this forum someplace but I can't remember. Sorry I can't give the op credit.
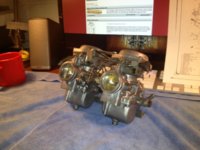
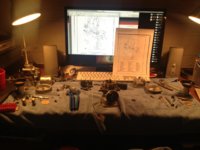
So I got my carbs, kits, a few tools and set out cleaning.
The setup was exactly like that on the website and it worked great. Instead of taping a rod to the box end of the tubing I sliped a short length of steel tubing over it. It would have helped to have some sort of helper that would move the pick up end of the tubing in the box to help with flow of soda. I could see the process working and it worked well!
A few things I want to do/get before I soda blast again:
I used four boxes of soda. I think it was a little much for two carbs. I think is was due to the tubing size I used. It was 1/2 in. O.D. tubing with a I.D. of .37 in. I think if I went to 1/4 O.D. tubing it might take a little more time but would be easier on the piggy. Even with a high volume I only spent 7 dollars on the 8 lbs. of baking soda.
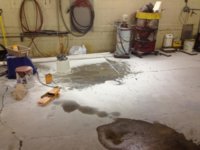
Even without a collecting system, it was easy to clean it all up. A little air and some water did the trick.
I then did some cleaning to remove the leftover baking soda then got some sleep.
This morning I got up and started on rebuilding the carbs. IT TOOK ALL DAY! I went to the hardware store twice and a local cycle shop to try and find some of the special screws and washers. Didn't find anything but I did find out that the spring for the choke slide costs 10.99!
 So DO NOT LOSE THAT LITTLE SH!T!
Somehow I've lost my haynes manual. Not a good way to begin a reassembly but I am thankful that the manual is on here.
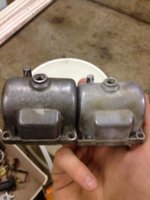
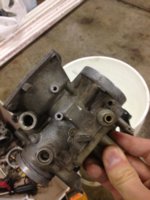
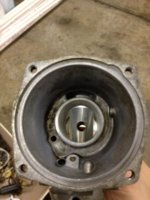
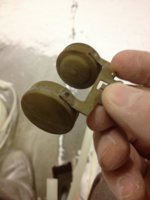
Pictures 1-4 are before.
Pictures 5-8 are during. I looked like a grey hair after the blasting. I had baking soda everywhere.
Picture 9 is done!
- xs400.com
- progress
- internet
- baking soda
- frugality
I was laying around last night thinking it was super late because how dark it was outside. I was getting stir crazy and realized it was only 9:30! Yippy! I could work on the bike. So I did.
Did some research on DIY soda blasting and found This.I found it on this forum someplace but I can't remember. Sorry I can't give the op credit.
So I got my carbs, kits, a few tools and set out cleaning.
The setup was exactly like that on the website and it worked great. Instead of taping a rod to the box end of the tubing I sliped a short length of steel tubing over it. It would have helped to have some sort of helper that would move the pick up end of the tubing in the box to help with flow of soda. I could see the process working and it worked well!
A few things I want to do/get before I soda blast again:
- devise a system to collect the soda. I'm thinking something like a large rubbermaid tote with a hole cut in a side. To that hole I would connect an adapter for a shop-vac with a good filter to catch the media.
- remember a good mask
- remember a good pair of goggles
- remember to wear a hat
I used four boxes of soda. I think it was a little much for two carbs. I think is was due to the tubing size I used. It was 1/2 in. O.D. tubing with a I.D. of .37 in. I think if I went to 1/4 O.D. tubing it might take a little more time but would be easier on the piggy. Even with a high volume I only spent 7 dollars on the 8 lbs. of baking soda.
Even without a collecting system, it was easy to clean it all up. A little air and some water did the trick.
I then did some cleaning to remove the leftover baking soda then got some sleep.
This morning I got up and started on rebuilding the carbs. IT TOOK ALL DAY! I went to the hardware store twice and a local cycle shop to try and find some of the special screws and washers. Didn't find anything but I did find out that the spring for the choke slide costs 10.99!

 So DO NOT LOSE THAT LITTLE SH!T!
Somehow I've lost my haynes manual.
 Not a good way to begin a reassembly but I am thankful that the manual is on here.
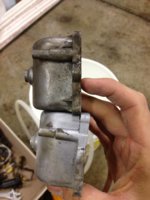
Pictures 1-4 are before.
Pictures 5-8 are during. I looked like a grey hair after the blasting. I had baking soda everywhere.
Picture 9 is done!

Attachments
-
 IMG_6776.jpg181.3 KB · Views: 337
 -
 IMG_6779.jpg186.2 KB · Views: 343
 -
 IMG_6780.jpg189.7 KB · Views: 323
 -
 IMG_6784.jpg138.5 KB · Views: 307
 -
 IMG_6792.jpg161.8 KB · Views: 309
 -
 IMG_6789.jpg166.9 KB · Views: 323
 -
 IMG_6787.jpg134.3 KB · Views: 298
 -
 IMG_6785.jpg181.6 KB · Views: 321
 -
 IMG_6778.jpg205.6 KB · Views: 332
Lone Vagabond
XS400 Enthusiast
Wow.. fell back to page three. Shame on me...
Got some more parts in. Now just waiting on the seal kit.
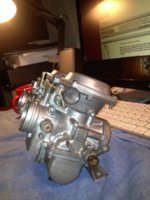
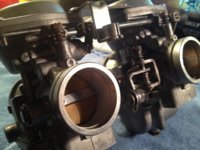
More photos on the new clean carbs. I'll get some inside shots in a few days. The brass parts cleaned up really well.
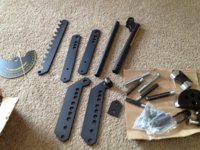
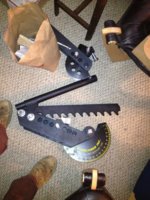
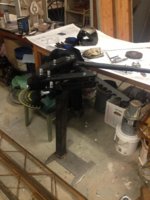
Biggest news is about a new toy for my custom frame.....
Got some more parts in. Now just waiting on the seal kit.
More photos on the new clean carbs. I'll get some inside shots in a few days. The brass parts cleaned up really well.
Biggest news is about a new toy for my custom frame.....

 Need to buy a blasting cabinet over the winter so I done have to go outside next time