tbakic
1st cafe project underway
A friend of mine recently taught me how to make my own seat pad for my xs400, i thought i would share what i learned
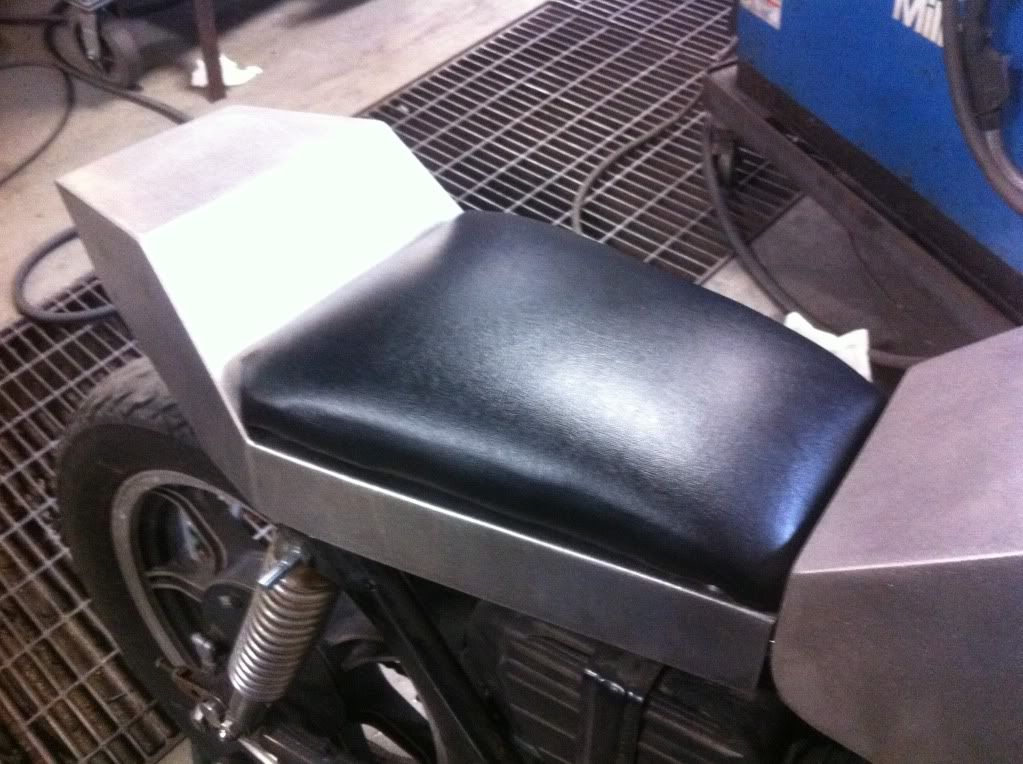
First i would like to say, if you are even thinking about attempting this, let me assure you, it is much easier than you think! With the right tools(not hard to get or expensive) and maybe an extra set of hands, you too can make your own seat pad!
the part of this process i cannot teach you is the mounting of it, every bike is different and is gonna need different ways of mounting it.
PARTS LIST
OSB board or plywood(1/2' or thicker, they sell it in sections at menards/home depot for under $10)
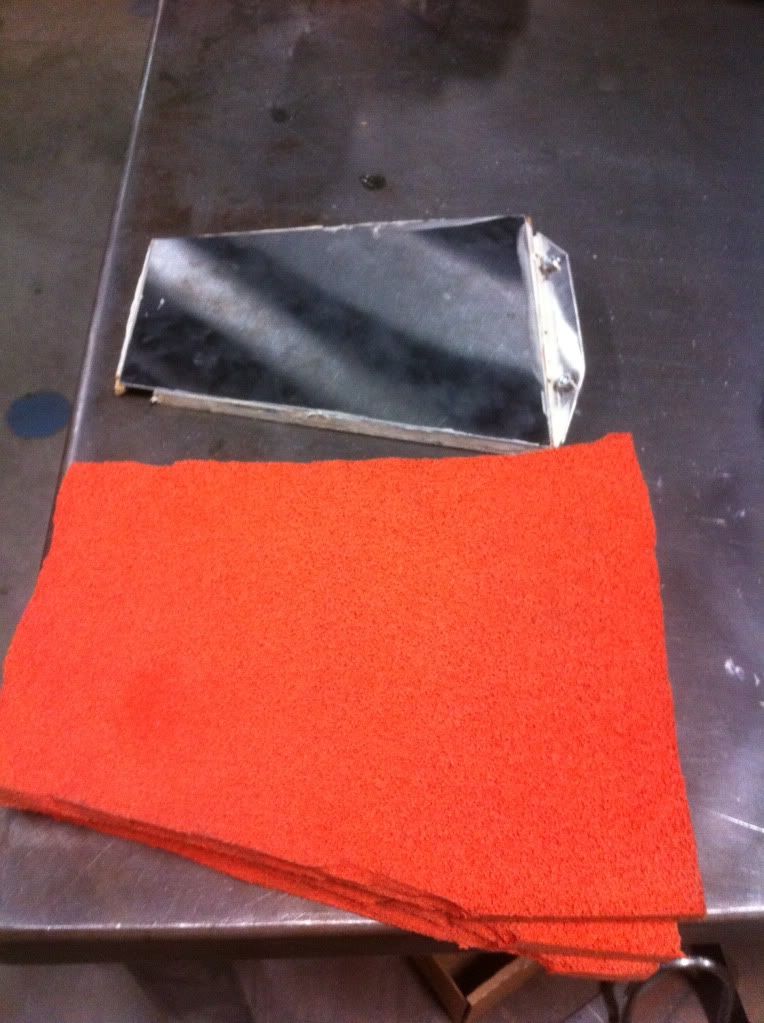
foam(joann fabrics has some, or you can buy from an online foam store, or hack foam from an old seat, bottom line is you want your foam to be supportive under your weight. YOU CAN LAYER YOUR FOAM IT DOESNT NEED TO BE 1 SOLID PIECE)
marine vinyl(joann fabrics, where i got mine, you want it to be waterproof, hence marine vinyl, i got 1/2yrd of fabric for mine)
staple gun
staples(1/4 minimum-whatever thickness your wood is)
1 big "C clamp"
1 friend
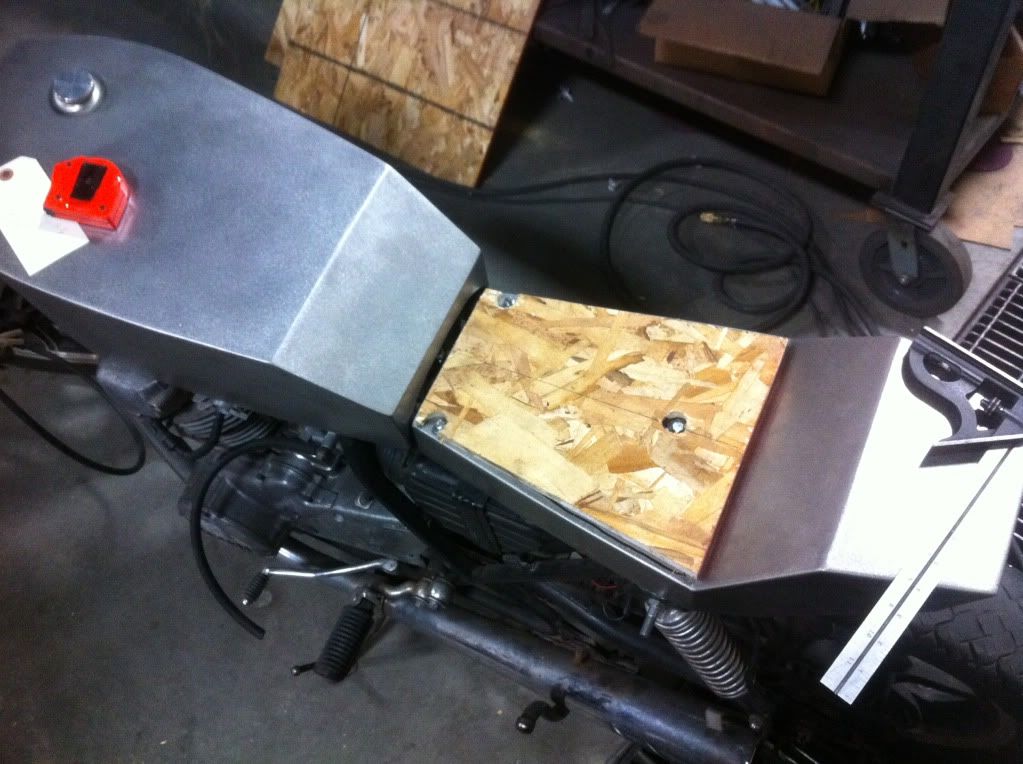
1) first cut your wood the shape your want your seat pad to be
2) Cut your foam to be bigger than your wood panel, about 1/16- 1/8 inch over on all 4 sides, this way when you wrap your seat tight with your vinyl the foam rolls OVER the corner of the wood, you dont want the corner of the wood to be jamming you") Cut 4 pieces of foam or so(depending on the foam you got) and place them on the bike and try 2,3,4 layers of foam to see what density you like. Once you wrap it it will get slightly more stiff/supportive because the foam will be compressed.
Cut 4 pieces of foam or so(depending on the foam you got) and place them on the bike and try 2,3,4 layers of foam to see what density you like. Once you wrap it it will get slightly more stiff/supportive because the foam will be compressed.
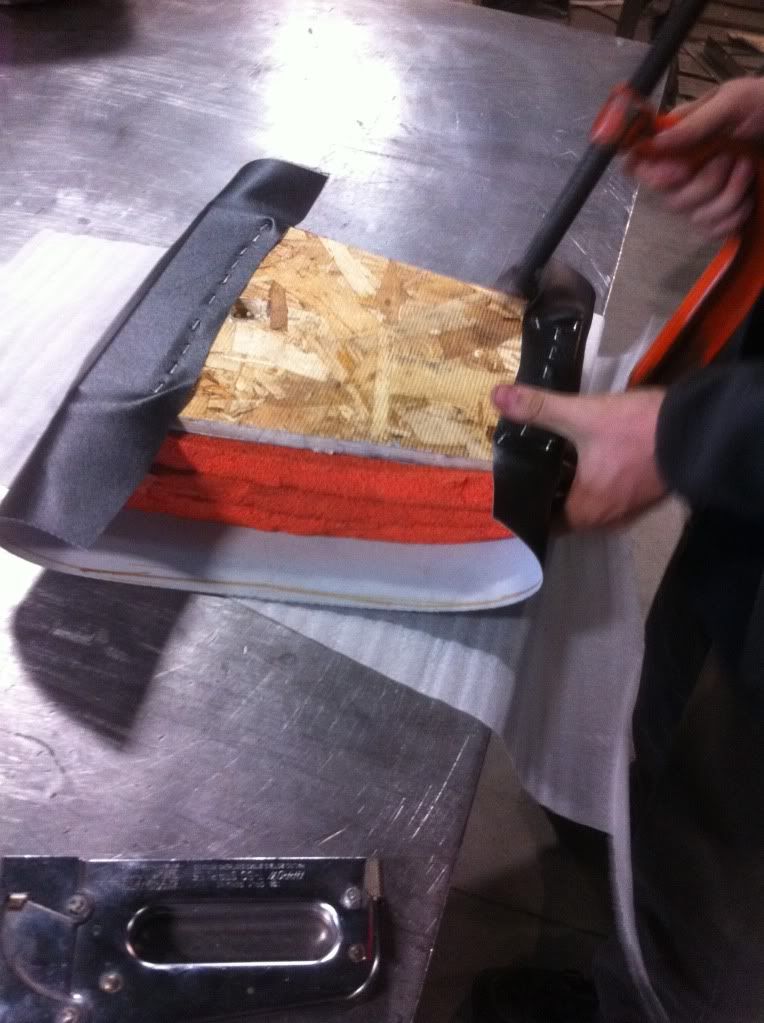
here is my wooden panel and my 3 layers of foam(dont worry about the metal on top of my wood panel, my mounting design needed that)
3)Place your wooden plate on the vinyl with the vinyl upside down, then take the foam you are going to use, if you are using multiple layers grab ALL OF THEM, and lay the foam next to your wood panel and trace the outline
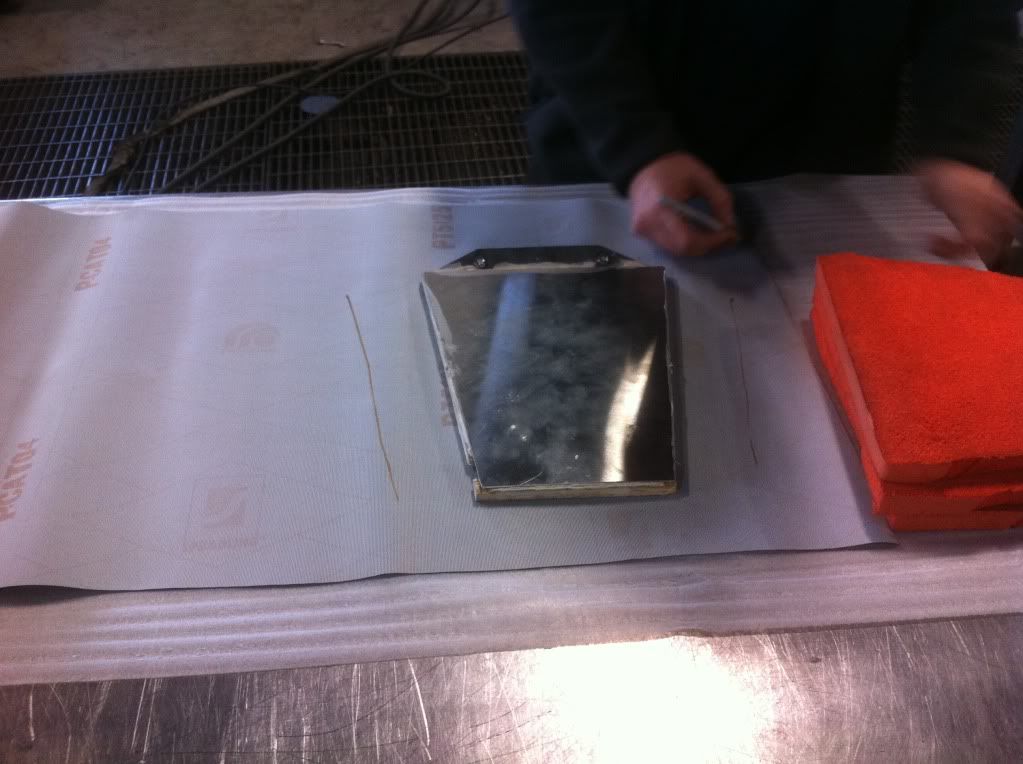
4)Cut out your vinyl, leave the trace lines showing(dont cut on your lines)
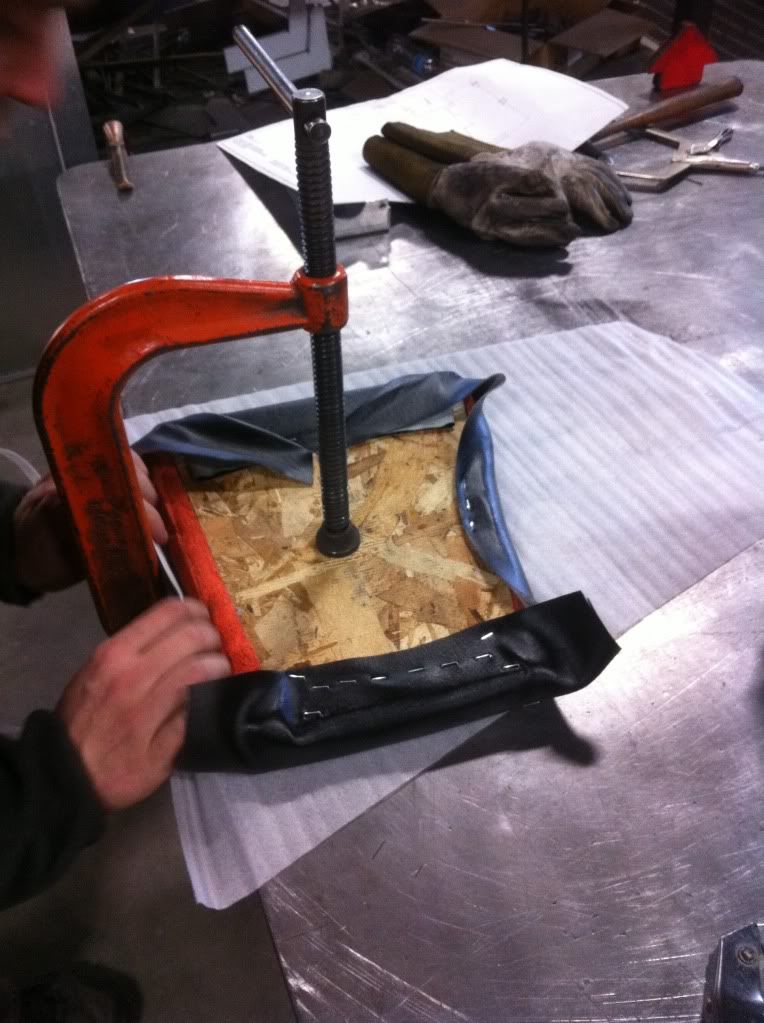
5)the only time you are stapling should be when your seat is clamped and the foam is compressedPlace your vinyl down upside down, then your foam, then your wooden panel, make sure your foam and wood are centered on your vinyl. Then using a c clamp start to clamp the whole thing so your foam gets compressed. Have a friend stretch the vinyl up over the wood for you as you staple it into place, start on one side placing at least 3-4 staples in the center, then do the opposite side
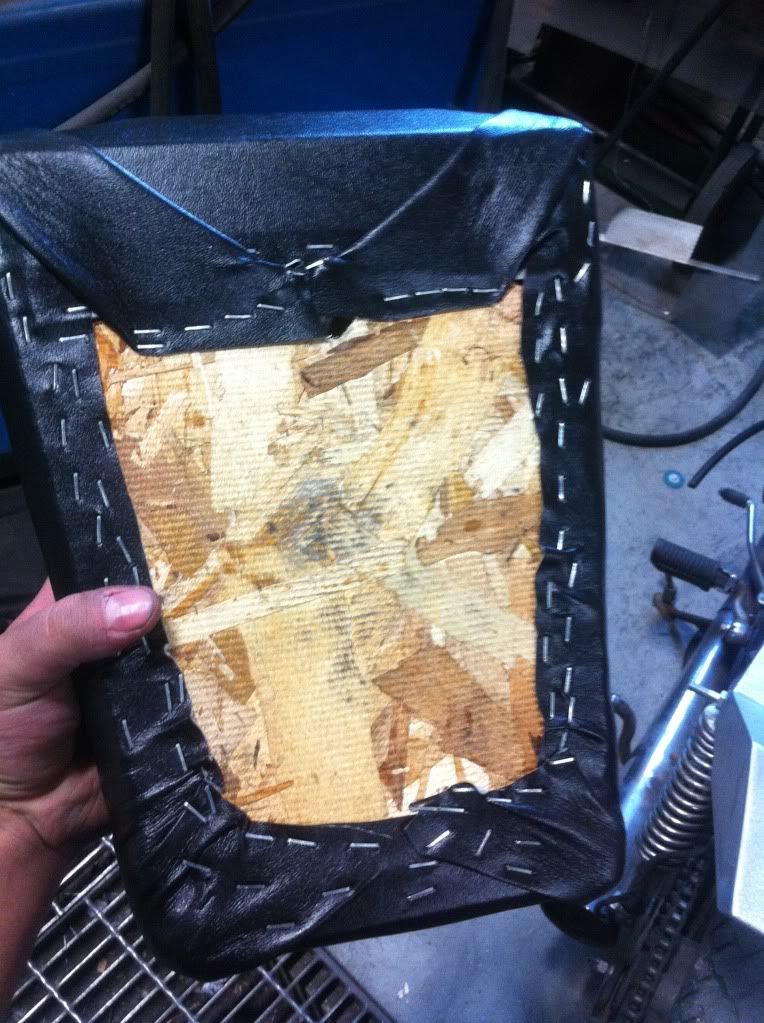
6) Then do the same to other 2 sides, once that is done the corners are next, this can be slightly more difficult, just be patient and keep folding your corners different ways untill it looks like how you want, then staple it in place.
7) Keep moving all around your seat having your buddy pull the vinyl tight then stapling it in place, feel free to be liberal with your staples
8)When you unclamp it, the compressed foam tries to expand back out but the vinyl is tighter and and the foam expands out pulling the vinyl nice and tight giving you a smooth, stretched look to your vinyl


Again i assure you, it really is not that complicated and once you get started with your own seat you will see that
Any questions FEEL FREE to pm me, and i will be glad to help!!
Happy seat pad making!!!
First i would like to say, if you are even thinking about attempting this, let me assure you, it is much easier than you think! With the right tools(not hard to get or expensive) and maybe an extra set of hands, you too can make your own seat pad!
the part of this process i cannot teach you is the mounting of it, every bike is different and is gonna need different ways of mounting it.
PARTS LIST
OSB board or plywood(1/2' or thicker, they sell it in sections at menards/home depot for under $10)
foam(joann fabrics has some, or you can buy from an online foam store, or hack foam from an old seat, bottom line is you want your foam to be supportive under your weight. YOU CAN LAYER YOUR FOAM IT DOESNT NEED TO BE 1 SOLID PIECE)
marine vinyl(joann fabrics, where i got mine, you want it to be waterproof, hence marine vinyl, i got 1/2yrd of fabric for mine)
staple gun
staples(1/4 minimum-whatever thickness your wood is)
1 big "C clamp"
1 friend
1) first cut your wood the shape your want your seat pad to be
2) Cut your foam to be bigger than your wood panel, about 1/16- 1/8 inch over on all 4 sides, this way when you wrap your seat tight with your vinyl the foam rolls OVER the corner of the wood, you dont want the corner of the wood to be jamming you
Cut 4 pieces of foam or so(depending on the foam you got) and place them on the bike and try 2,3,4 layers of foam to see what density you like. Once you wrap it it will get slightly more stiff/supportive because the foam will be compressed.here is my wooden panel and my 3 layers of foam(dont worry about the metal on top of my wood panel, my mounting design needed that)
3)Place your wooden plate on the vinyl with the vinyl upside down, then take the foam you are going to use, if you are using multiple layers grab ALL OF THEM, and lay the foam next to your wood panel and trace the outline
4)Cut out your vinyl, leave the trace lines showing(dont cut on your lines)
5)the only time you are stapling should be when your seat is clamped and the foam is compressedPlace your vinyl down upside down, then your foam, then your wooden panel, make sure your foam and wood are centered on your vinyl. Then using a c clamp start to clamp the whole thing so your foam gets compressed. Have a friend stretch the vinyl up over the wood for you as you staple it into place, start on one side placing at least 3-4 staples in the center, then do the opposite side
6) Then do the same to other 2 sides, once that is done the corners are next, this can be slightly more difficult, just be patient and keep folding your corners different ways untill it looks like how you want, then staple it in place.
7) Keep moving all around your seat having your buddy pull the vinyl tight then stapling it in place, feel free to be liberal with your staples
8)When you unclamp it, the compressed foam tries to expand back out but the vinyl is tighter and and the foam expands out pulling the vinyl nice and tight giving you a smooth, stretched look to your vinyl
Again i assure you, it really is not that complicated and once you get started with your own seat you will see that
Any questions FEEL FREE to pm me, and i will be glad to help!!
Happy seat pad making!!!
